There’s something truly magical about creating kimchi—it’s not just another recipe; it’s a journey through flavor, tradition, and a little bit of science. When you embark on making this vibrant Korean dish, you’re not merely preparing food; you’re engaging in an age-old practice that transforms humble vegetables into a tangy, spicy symphony of flavors. Imagine the crunch of napa cabbage, the fiery warmth of Korean red pepper, and the aromatic kiss of garlic and ginger all mingling together in your kitchen. This Kimchi Recipe promises to awaken your senses and bring an utterly intoxicating experience to your table.
As we dive into this culinary adventure, let me share a little secret: making kimchi isn’t just about following steps; it’s about feeling the rhythm of the ingredients as they come together. You’ll be amazed at how simple vegetables can transform into something so profoundly satisfying. Whether you’re enjoying it on its own, serving it alongside rice, or using it to elevate your favorite dishes, homemade kimchi adds a delicious kick that’s hard to replicate. So grab your apron and let’s get started; I promise you’ll find joy in every bite!
The Irresistible Allure of Fermentation
Kimchi is more than just food; it’s a vibrant part of Korean culture and heritage. Its origins date back centuries, evolving from necessity into an art form cherished by families around the world. Traditionally made to preserve vegetables for winter months, this fermented delight offers a delightful contrast between sweet and savory notes—a balance that keeps everyone coming back for more. The beauty of kimchi lies in its versatility; each batch can be uniquely yours depending on the ingredients you choose or even the time you allow it to ferment. It’s perfect for family gatherings, cozy dinners, or simply as a zesty condiment that can liven up any meal! With each spoonful, you’re not just tasting history; you’re partaking in a ritual that connects generations.
Now that we’ve set the stage for our kimchi-making adventure, let’s jump right into this Kimchi Recipe that will guide you step-by-step through crafting your own jar of deliciousness!
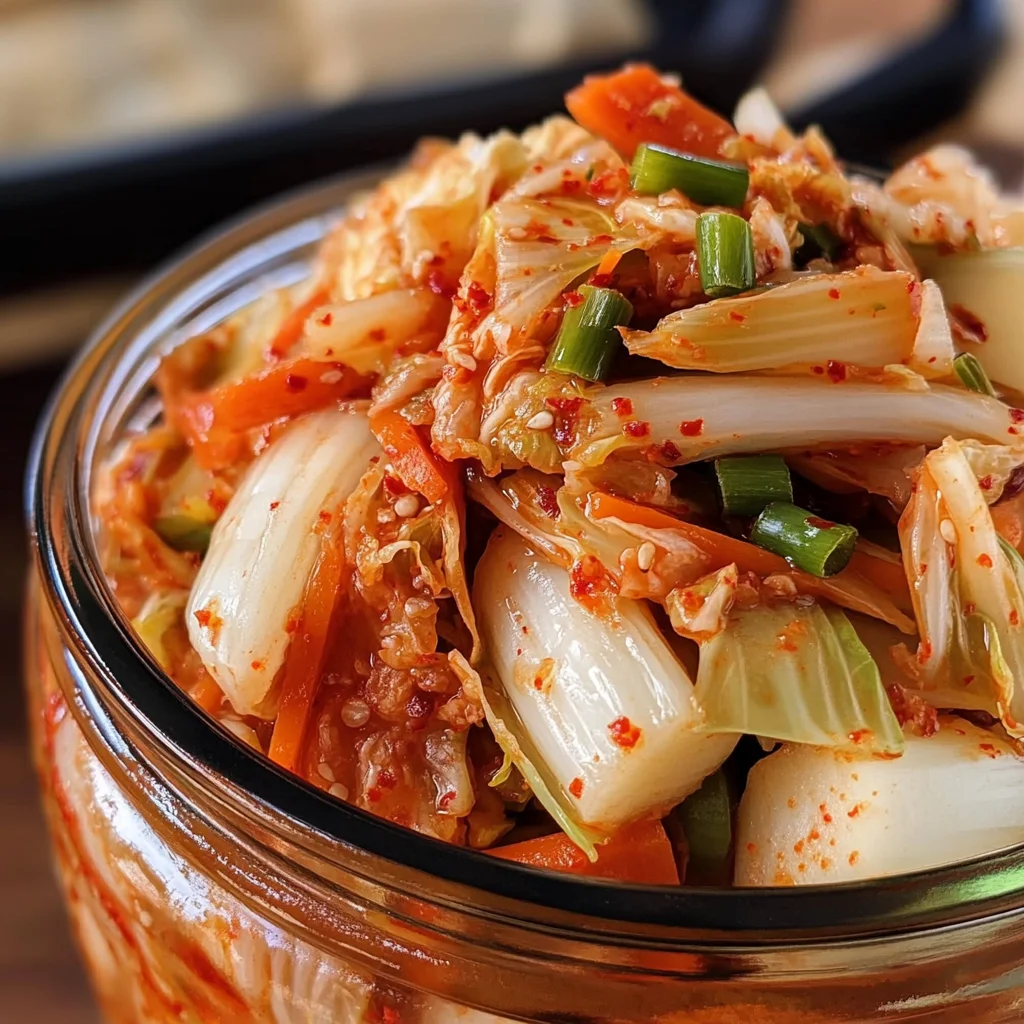
Ingredients:
Embarking on this culinary journey begins with gathering our vibrant ingredients. Each component plays a vital role in creating that perfect balance of taste and texture.
- 1 large napa cabbage (Chinese cabbage): This is the star of our show! Napa cabbage is sweet and crunchy with a tender texture that’s ideal for fermentation. When selecting one at the store, look for firm heads with crisp leaves—anything wilted or brown won’t yield great results. The natural sugars in napa cabbage also help kickstart fermentation, leading to those tangy flavors we all cherish.
- 3 carrots: Carrots add not only color but also sweetness and crunch to our kimchi. When sliced thinly into strips (a process called julienning), they become wonderfully tender yet still retain some bite during fermentation. Choose firm carrots with smooth skin—this ensures they’ll infuse their natural sweetness throughout the dish without overpowering other flavors.
- 1 small daikon radish: Daikon introduces an interesting depth with its mild peppery flavor and crispness that beautifully complements the other ingredients. Look for one that’s smooth and heavy for its size—it should feel dense when held in your hand. Daikon will soften slightly during fermentation while still retaining a satisfying crunch.
- 1 bunch of green onions: These aromatic beauties add freshness and sharpness to our mix! Slice them diagonally into long strips for maximum visual appeal and flavor distribution throughout the kimchi. Select green onions that are vibrant green with firm white bases—the fresher they are, the better they’ll enhance our dish.
- 4 tablespoons of salt: Salt is absolutely paramount here—not only does it draw out moisture from our vegetables (which creates brine), but it also preserves them during fermentation while enhancing their natural flavors. For this recipe, I recommend using sea salt or kosher salt as they are less processed compared to table salt.
- 1 small chunk of ginger: Ginger brings warmth and complexity to our kimchi while also contributing beneficial properties during fermentation. Fresh ginger is key here—its zesty aroma will infuse everything beautifully! Always opt for pieces that are firm with smooth skin; anything shriveled may have lost its essential oils.
- 3 cloves of garlic: Garlic offers an incredible punch of flavor—a necessary component if you’re looking for depth in your kimchi! Fresh garlic will yield a more potent taste than pre-minced varieties; plus, it brings along health benefits like boosting immunity! Aim for plump cloves that are firm to touch.
- 1 apple peeled: This might seem unusual at first but trust me—a dash of sweetness from apple balances out the spice perfectly! It helps fermenting bacteria thrive while adding subtle fruity notes that brighten up our final product. Use any variety you love—Granny Smith or Fuji work particularly well due to their crisp texture.
- 2 tablespoons of Korean coarse red pepper (gochugaru): This ingredient is where things get exciting! Gochugaru provides heat along with gorgeous color—it’s essential for achieving authentic flavor in our kimchi recipe! Look for bright red flakes rather than powder which indicates freshness; if you’re sensitive to spice levels feel free to adjust according to taste!
- 1 tablespoon of fish sauce: Though traditionally made with seafood elements like anchovies or shrimp paste which provide umami richness (a non-negotiable aspect!), we’ll focus here on using a plant-based fish sauce alternative available at many grocery stores nowadays—it still delivers that salty depth without compromising on flavor!
Now that we have gathered all these wonderful ingredients together let’s prepare ourselves for some fun!
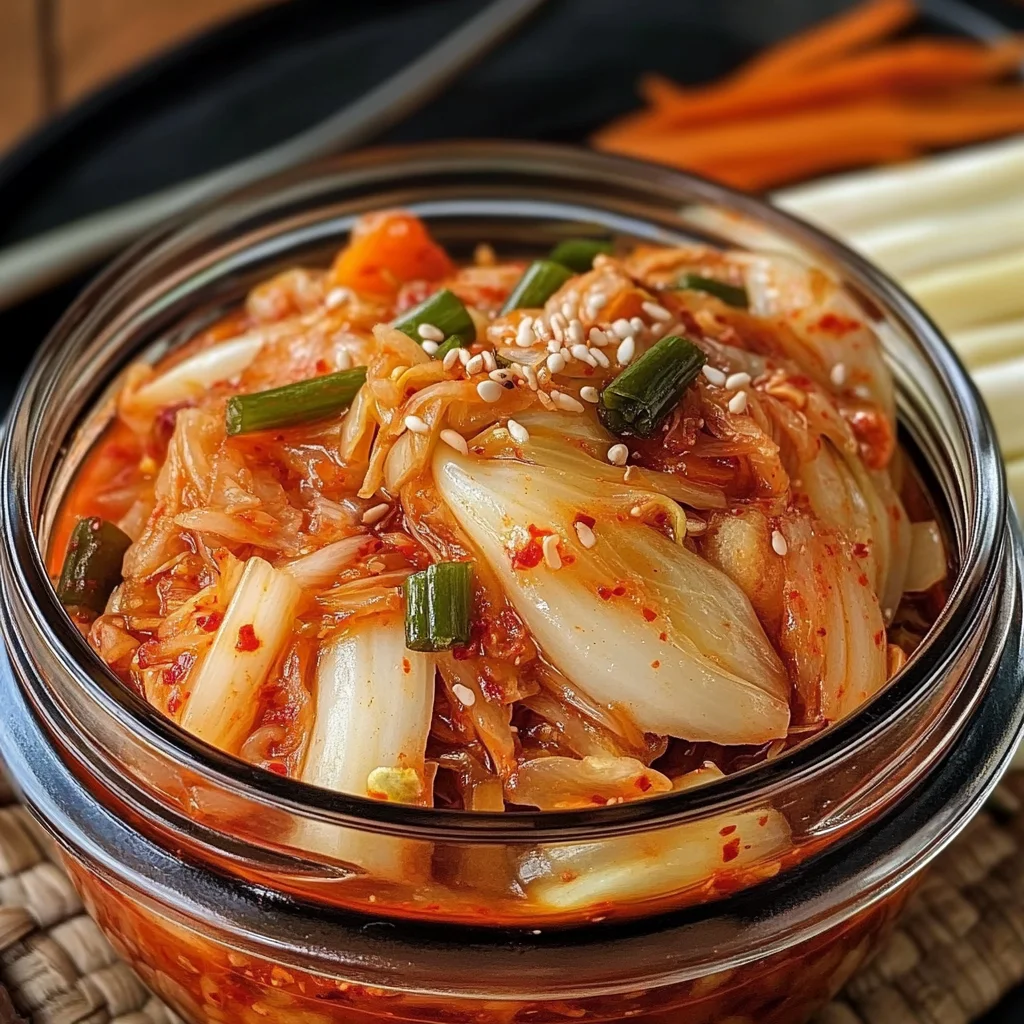
Equipment You’ll Need:
To make this delightful Kimchi Recipe come alive, having the right tools makes all the difference! Think of these items as partners guiding you through each step toward deliciousness.
- Glass mixing bowl – A sturdy glass bowl is essential because it allows you to see what’s happening inside as we combine our veggies together while being easy to clean afterward! Glass won’t react with acidic ingredients either—keeping everything safe as we ferment!
- Cutting board – A good cutting board is indispensable when chopping up all those fresh vegetables! Opting for one made from wood or bamboo can be gentle on knives while providing stability during prep time.
- Sharp knife – A sharp knife will make all your cutting tasks effortless—you want precision when julienning those veggies so everything cooks evenly later down line!
- Food processor or blender – This gadget will help us puree ginger, garlic, apple & other components seamlessly together until smooth—a crucial technique ensuring balanced flavors throughout!
- Glass jars (quart-sized) – These containers will house our finished kimchi during both fermentation stages & storage thereafter! Using glass ensures no chemical reactions occur & allows easy monitoring over time without affecting taste quality!
Now we’ve gathered everything needed let’s prepare ourselves to create something truly special together!
Preparing the Kimchi Recipe
Step 1: Massage Your Cabbage
The first step involves giving those beautiful napa cabbage leaves some love—they need affection too! Start by washing them thoroughly under cold water before slicing them lengthwise into quarters then again into thin strips (julienne style). Once you’ve done this, place these lovely shreds into your glass mixing bowl before adding four generous tablespoons of salt over top—this is absolutely paramount as it draws out excess moisture from the leaves which creates brine during fermentation! Take a moment here to massage each piece gently but firmly—it should feel almost therapeutic as you knead away any stubborn bits until they begin softening slightly after just a few minutes’ effort—it really helps break down cell walls allowing brine formation later on!
Step 2: Prepare Your Crunchy Veggies
Next up are those colorful companions—the carrots, daikon radish & green onions—all ready now for their transformation alongside our salted cabbage friends! Simply julienne them similarly by slicing into long thin strips then toss them directly into same mixing bowl where salt has worked its magic already—mix everything thoroughly until coated evenly—which creates harmony amongst diverse textures within bowl itself! Continue massaging gently until veggies start wilting down noticeably—that’s exactly what we want here—they should look vibrant yet slightly softer—a sign they’re happily absorbing salt’s goodness while preparing themselves for flavorful infusion ahead !
Step 3: Create Your Flavor-Packed Paste
With veggies waiting patiently aside now comes fun part where pureeing takes center stage! Grab your trusty food processor or blender then add peeled ginger chunk along with garlic cloves followed by diced apple pieces plus both gochugaru & fish sauce alternatives—we’re building layers upon layers here creating rich depth throughout dish later on so trust me don’t skimp out anything here ! Blend until mixture achieves smooth consistency resembling velvety sauce—the sound alone should excite ears promising tantalizing results soon enough when added back into veggie mix shortly afterward!
Step 4: Combine Everything Together
Finally we’re nearing finish line here folks!! Once blended paste looks perfect pour over top prepared vegetable medley allowing all those glorious flavors meld together beautifully—as tempting aromas fill kitchen air stirring gently helps distribute paste evenly throughout ensuring no bite goes untouched by seasoning magic happening within jar later down road . Be sure not rush through this step since patience pays off big time ensuring balanced flavor profiles emerge post-fermentation period which could take anywhere between 1–2 weeks based on personal preference regarding strength level desired ultimately achieved via contact time spent submerged under brine during resting phase ahead too!!
I hope you’re feeling inspired already because we’re just getting started on crafting this delightful Kimchi Recipe together—and trust me there’s much more joy awaiting once those jars finally hit fridge shelves awaiting indulgence anytime hunger strikes next time around!!
The Joy of Fermentation: Creating Your Own Kimchi Recipe
Ah, the beautiful art of fermentation! It’s not just a cooking technique; it’s a testament to patience, tradition, and a love for incredible flavors. As we delve deeper into this Kimchi Recipe, we’re not merely preparing food; we’re embracing a ritual that has been cherished for generations in Korean households. The process transforms ordinary vegetables into something truly extraordinary, bursting with complex flavors and beneficial probiotics that are simply good for your soul. So, let’s continue with the next steps of this delightful journey!
Step 5: Crafting the Flavorful Paste
Now that you’ve lovingly massaged those vibrant vegetables together, it’s time to create an utterly intoxicating paste that will elevate your kimchi to new heights. Grab your food processor or blender—this is where the magic begins! You’ll want to add the chunk of ginger, three cloves of garlic, one peeled apple (for a touch of sweetness that beautifully balances the spice), two tablespoons of Korean coarse red pepper (this is what gives kimchi its iconic heat and color!), and one tablespoon of fish sauce—don’t worry; it adds depth without overwhelming the dish. Blend these ingredients until you achieve a smooth and fragrant mixture. This paste is crucial because it infuses each vegetable piece with robust flavors as they ferment.
As you blend, take a moment to breathe in those aromatic scents—the pungent garlic combined with the fresh zing of ginger creates an irresistible aroma that will have everyone flocking to your kitchen! Trust me on this: the right balance of spice and sweetness makes all the difference in achieving that authentic taste. Once blended, you should have a thick paste that feels velvety yet slightly gritty from the pepper flakes. Don’t rush through this step; savor the transformation as you prepare to marry these bold flavors with your salted veggies.
Step 6: Marrying Flavors
With your paste ready, it’s time to bring everything together in a glorious symphony of flavors! In your large mixing bowl filled with cabbage and those lovely julienned vegetables, pour in your smooth paste. Using your clean hands (this is where you get to feel like a true culinary artist!), gently fold everything together. Make sure every piece is coated evenly—it’s absolutely paramount for developing that signature kimchi flavor during fermentation.
As you mix, observe how the colors come alive; the bright orange carrots and vivid green onions meld beautifully with the rich reddish hue of the pepper paste. Massage and toss for about five minutes—this not only distributes flavors but also allows some moisture from the vegetables to mingle with the paste, creating a luscious brine for fermentation. Remember, patience is key here; don’t rush this step! The more thoroughly mixed everything is, the more harmonious your final product will taste.
Step 7: Packing Your Kimchi
Now comes one of my favorite parts—bottling up all that deliciousness! Grab your sterilized glass jars; I usually use quart-sized jars since they make perfect portions for storing in my refrigerator later on. Begin by spooning in handfuls of your vibrant vegetable mixture into each jar. Press down firmly as you go; this helps pack everything tightly and ensures that all those glorious flavors will meld beautifully as they ferment.
Aim to fill each jar about three-quarters full, leaving some space at the top because you’ll need room for expansion. It’s absolutely crucial to keep those veggies submerged below their brine as they ferment; this helps prevent any unwanted mold from forming while keeping everything deliciously crisp and tangy. If needed, you can weigh down the veggies using clean stones or even small jars filled with water—just another great tip I’ve learned over time! You’ll know you’re doing it right when you see bubbles forming as fermentation begins—a sign of life!
Step 8: The Fermentation Phase
Now it’s time for some serious patience—trust me; it’s worth every second! Find a cool spot away from direct sunlight where your jars can sit undisturbed for about 1 to 2 weeks. During this period, nature works its magic: beneficial bacteria thrive while creating lactic acid, resulting in that utterly satisfying tang we adore in kimchi. But be vigilant! Each day brings changes; give them a gentle press down once in a while to ensure they remain submerged under their liquid gold brine.
After about five days or so, start tasting your kimchi—it’s important to check on it regularly! You might find that some batches develop quicker than others based on factors like temperature and humidity in your kitchen. If you prefer a milder flavor, refrigerate earlier; if you enjoy bolder notes typical of traditional kimchi, let it go longer at room temperature before transferring them into cold storage. Don’t be alarmed if you see bubbles—that’s just fermentation doing its thing! Embrace this transformative process because it’s what makes homemade kimchi so profoundly satisfying.
Final Touches: Delightful Storage
Once you’ve achieved that perfect balance between tangy and spicy—which I promise you’ll know when you taste it—it’s time to store your creation! Carefully transfer each jar into the refrigerator to slow down fermentation significantly while preserving those scrumptious flavors you’ve worked so hard to cultivate. The cool environment allows your kimchi to maintain its crunch while enhancing its complexity over time.
And here comes my absolute favorite part: serving it up! Enjoy it straight from the jar or toss it into stir-fries, soups, or even atop rice bowls for an explosive burst of flavor that’s guaranteed to make any meal memorable. Each bite transports me back home and reminds me why I’ve always been captivated by this unique dish—a delightful blend of cultures reflecting my own culinary journey.
So there you have it—a heartfelt Kimchi Recipe designed not just for nourishment but also as an expression of love within every layer of flavor created through patience and care. Embrace every moment spent making this beloved dish—you might find yourself sharing stories around dinner tables just like I do! Happy fermenting!
Storage and Enjoyment Tips for Your Kimchi Recipe
Ah, the moment we’ve all been waiting for—your homemade kimchi is ready to be enjoyed! The vibrant colors and tantalizing aromas are a feast for the senses, promising an unforgettable culinary experience. But before you dive in, let’s talk about how to store this liquid gold so that every bite remains as fresh and flavorful as the day you made it. Proper storage is not just about keeping your kimchi safe; it’s about ensuring that the symphony of flavors continues to develop beautifully over time.
Storing Leftover Kimchi Recipe
To keep your kimchi at its best, I recommend using airtight glass containers. Glass not only preserves the taste but also prevents any unwanted odors from mingling with your delicious creation. Find a cool spot in your refrigerator where it can rest undisturbed—ideally on a shelf rather than in the door, as constant opening can alter the temperature. If stored correctly, your kimchi will last for several weeks, even up to a couple of months! Here’s a little pro tip: if you notice your kimchi starting to lose its crunch or flavor intensity, toss a slice of bread into the jar. This non-negotiable trick helps absorb excess moisture and keeps your kimchi crisp and delightful! As it mingles with time, it transforms into something uniquely special—the flavors deepen, offering that wonderfully tangy profile that makes each bite profoundly satisfying. You can enjoy it straight from the jar or incorporate it into dishes like fried rice or savory pancakes for an explosion of flavor!
Freezing Kimchi for Later
If you find yourself in the joyous position of having extra kimchi—or if you’re simply looking to prepare ahead—freezing is a fantastic option! To freeze properly, spoon your kimchi into freezer-safe bags or containers, ensuring there’s minimal air left inside before sealing them tightly. I recommend dividing it into smaller portions for convenience so you can defrost just what you need later on. When frozen correctly, your kimchi will retain its quality for up to three months without sacrificing too much flavor. When you’re ready to use it, simply transfer it to the fridge overnight to thaw slowly; believe me when I say that this makes for an easy weeknight meal! The convenience factor here is extraordinary; imagine reaching into your freezer on a busy evening and pulling out this vibrant burst of flavor ready to elevate any dish you whip up!
In conclusion, whether you savor your freshly made kimchi right away or store some away for later indulgence, I promise you that each encounter will bring warmth and joy to your table.

Homemade Kimchi
- Total Time: 0 hours
- Yield: Approximately eight servings 1x
Description
Embark on a flavorful journey with this vibrant Kimchi Recipe that brings the essence of Korean cuisine right to your kitchen. This fermented vegetable dish combines the crunchy sweetness of napa cabbage, the crispness of daikon, and the aromatic kick of garlic and ginger, resulting in a tangy and spicy taste sensation. The fermentation process not only enhances the flavors but also introduces beneficial probiotics, making it a healthful addition to any meal. Enjoy it as a side dish, in rice bowls, or even as a unique topping for tacos. With each bite, you’ll savor the magic of homemade kimchi—a culinary tradition that connects generations.
Ingredients
- 1 large napa cabbage
- 3 carrots
- 1 small daikon radish
- 1 bunch of green onions
- 4 tablespoons sea salt
- 1 small chunk of ginger
- 3 cloves of garlic
- 1 peeled apple
- 2 tablespoons Korean coarse red pepper (gochugaru)
- 1 tablespoon plant-based fish sauce
Instructions
- Slice napa cabbage lengthwise into quarters and then into thin strips. Place in a glass bowl and sprinkle salt over the top. Massage gently for a few minutes until softened.
- Julienne carrots and daikon radish; add to the bowl with cabbage. Mix well until all vegetables are coated with salt.
- In a food processor, blend ginger, garlic, apple, gochugaru, and plant-based fish sauce until smooth.
- Pour the paste over the vegetable mix and combine thoroughly to ensure even coating.
- Pack the mixture tightly into sterilized glass jars, leaving some space at the top for fermentation.
- Seal jars and let them ferment at room temperature for 1 to 2 weeks, tasting daily until desired flavor is achieved.
- Refrigerate to slow fermentation once satisfied.
- Prep Time: 30 minutes
- Cook Time: N/A
- Category: Side Dish
- Method: Fermentation
- Cuisine: Korean
Nutrition
- Serving Size: 100g
- Calories: 30
- Sugar: 4g
- Sodium: 670mg
- Fat: 0g
- Saturated Fat: 0g
- Unsaturated Fat: 0g
- Trans Fat: 0g
- Carbohydrates: 7g
- Fiber: 2g
- Protein: 1g
- Cholesterol: 0mg



Leave a Comment