There’s something utterly intoxicating about food that takes you on a journey, isn’t there? It’s not just about the flavors that dance on your tongue; it’s about the memories they evoke, the laughter they share, and the joy they bring. Imagine yourself at a bustling street corner in Mexico, the air filled with the smoky aroma of grilled corn, vibrant with laughter and chatter. The vendors expertly slathering sweet corn on the cob with creamy mayo, zesty lime juice, and a sprinkle of chili powder. That experience is what inspired me to create this Mexican Street Corn Salad—an homage to that delightful street food, but in a way that’s perfect for sharing around a dining table. This dish captures all those vibrant flavors and textures in a bowl, making it not just a recipe but an experience—a celebration of summer in every bite.
What makes this Mexican Street Corn Salad truly special is its blend of contrasting flavors and textures that come alive with each ingredient. The sweetness of the corn harmonizes beautifully with the tangy lime and creamy mayonnaise while the cotija cheese adds that salty richness we all crave. And let’s not forget the kick from jalapeño and chili powder! This salad is like a fiesta for your taste buds, making it perfect for summer barbecues or cozy family dinners. Trust me when I say: once you serve this to your friends and family, you’ll be met with delighted smiles and requests for seconds—if not thirds! So grab your apron and let’s dive into making this uplifting dish together.
Mexican Street Corn Salad: A Flavorful Celebration in a Bowl
Making this Mexican Street Corn Salad is one of the easiest yet most gratifying culinary adventures you can embark upon. The vibrant colors alone will have you smiling as you prepare this dish! With just a handful of ingredients, you’re set to create something that’s not only visually stunning but also packed with flavor. Each bite tells a story—a story that’s rich with tradition but open to creativity. Let’s gather our ingredients and get started on this delicious journey!
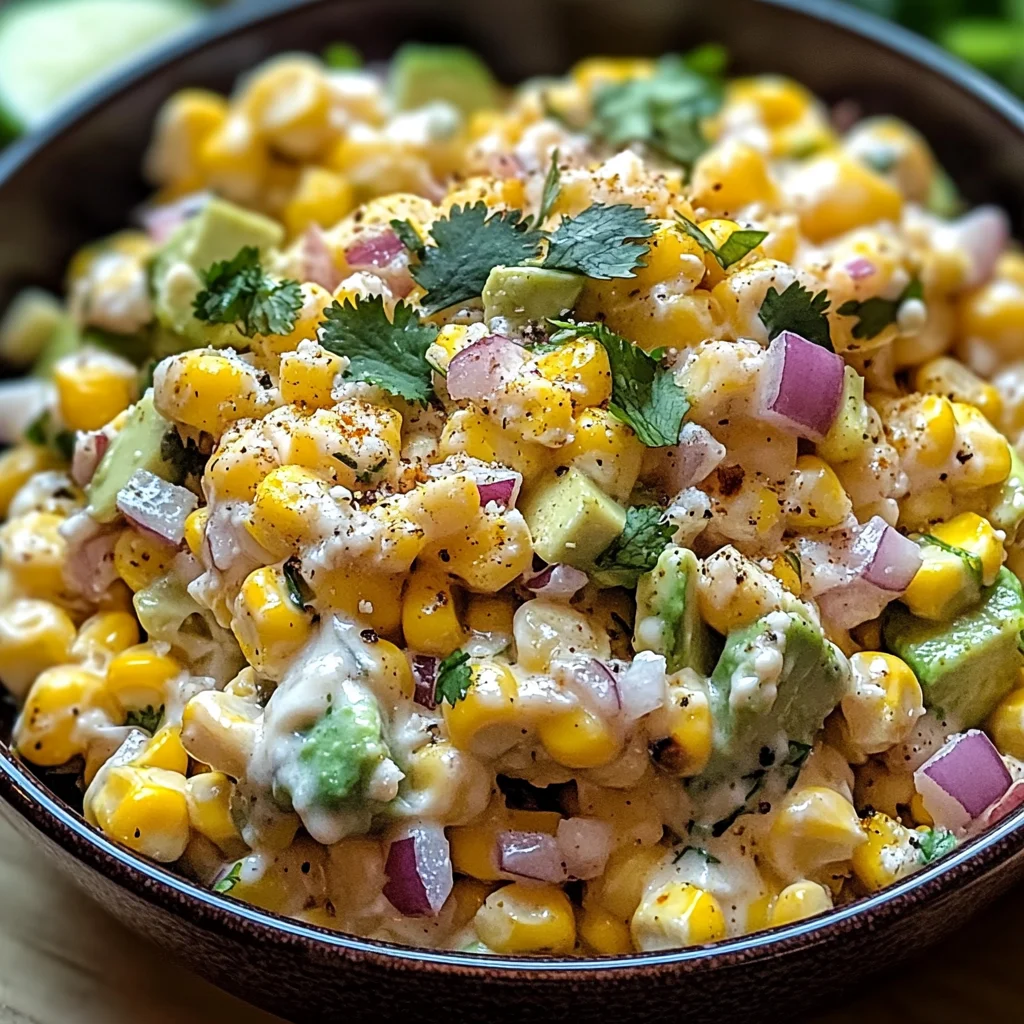
Ingredients:
As we embark on this culinary journey to create our Mexican Street Corn Salad, let’s take a moment to appreciate each ingredient’s role in bringing this dish to life. Each component contributes something special, creating a symphony of flavors that will leave everyone craving more.
- 6 ears fresh corn (or about 4-5 cups frozen corn kernels if you’re lazy or it’s winter). Fresh corn is truly where it’s at; nothing compares to the sweetness and crunch of freshly harvested kernels! When selecting ears of corn, look for plump kernels tightly wrapped in bright green husks; they should feel heavy for their size. If you’re using frozen corn due to seasonal limitations or convenience (I don’t blame you!), make sure they’re high-quality frozen kernels without added sugars or preservatives. Both options will give you that delightful sweetness that is absolutely crucial for our salad.
- 2 Tbsp vegetable oil (for charring the corn – butter works too but burns easier). This oil serves two essential purposes: first, it helps achieve that beautiful char on our corn which intensifies its natural sweetness; second, it prevents sticking! While butter adds incredible flavor, it has a lower smoke point than vegetable oil—so if you’re feeling adventurous enough to use butter, keep an eye on it! This step might seem minor, but trust me when I say it’s crucial for elevating those flavors.
- 1/3 cup mayonnaise (the real stuff, not that diet nonsense). Now here’s where things get creamy! Mayonnaise adds richness and helps bind all our ingredients together seamlessly. Look for high-quality mayonnaise made from simple ingredients—this will make all the difference in flavor. If you’re feeling crafty, homemade mayo can elevate your salad even further! This creamy goodness balances out the acidity from lime juice perfectly.
- 2 Tbsp Mexican crema or sour cream (adds tangy richness). This ingredient introduces an extra layer of creaminess and tanginess that complements our other components beautifully. If Mexican crema isn’t available in your store (it can be tricky sometimes), regular sour cream works wonders too! Just make sure to use full-fat varieties for optimal texture. This element is non-negotiable if you want that authentic flavor profile!
- 1/2 cup crumbled cotija cheese (feta works in a pinch if your grocery store is lame). Cotija cheese brings a salty bite that contrasts wonderfully with the sweet corn; plus its crumbly texture adds great visual appeal too! If by chance you can’t find cotija at your local market—or maybe it’s too pricey—feta cheese makes an excellent substitute; just note that feta tends to be saltier than cotija so adjust accordingly!
- 1/4 cup finely chopped cilantro (double it if you’re a cilantro freak like me). Ahh cilantro—the herb that sparks debates among friends! Personally, I adore its fresh flavor which brightens up this dish like nothing else can. When choosing cilantro at the store, look for vibrant green leaves without wilting or browning; fresher herbs equate to brighter flavors!
- 1 jalapeño, seeds removed and finely diced (leave some seeds if you want actual heat). Jalapeños add just enough kick without overwhelming your palate! Removing seeds allows you to control how spicy your salad becomes—so feel free to adjust according to your own spice tolerance! When chopping jalapeños wear gloves if you’re sensitive; those oils get everywhere!
- 2 cloves garlic, minced (or more—I don’t judge). Garlic infuses everything with warmth and depth; its pungency mellows out as it combines with other ingredients creating an utterly intoxicating aroma as it cooks! I often find myself adding an extra clove because who doesn’t love garlic? Just ensure it’s minced well so its flavor distributes evenly throughout.
- Juice from 2 limes (plus extra wedges for serving). Lime juice is where we really capture that zestiness characteristic of Mexican cuisine—it cuts through all richness balancing out flavors perfectly. Always choose fresh limes over bottled juice—it makes such a significant difference in taste! You’ll want both zest AND juice here so don’t skimp!
- 1 tsp chili powder (preferably Mexican but regular works). Chili powder brings warmth without being overwhelmingly spicy—it rounds out our flavor profile beautifully while evoking those traditional street-style tastes I adore so much! Try finding authentic Mexican chili powders if possible; otherwise regular will do just fine too!
- 1/2 tsp smoked paprika (the secret ingredient that makes people go “whoa”). Here comes my secret weapon—the smoked paprika adds depth while imparting subtle smokiness akin to grilled vegetables giving us those outdoor summer vibes even when inside cooking during colder months!
- Salt and pepper to taste. These two humble seasonings are absolutely paramount—they elevate every single ingredient by enhancing natural flavors present within them allowing everything else shine through beautifully without overpowering anything else present here.
- 1/4 red onion, finely diced. Red onion offers both color contrast along with crispness—plus its slightly sweet flavor complements everything else perfectly providing balance throughout each bite offering varied texture against softer elements present within our salad!
- 1 avocado diced. Avocado provides luscious creaminess while introducing healthy fats into this dish—it also helps round out potential sharpness from onions while offering additional nutrients making each serving richer than before!
- 1/4 cup chopped fresh Mexican oregano or epazote (if you can find it). Fresh herbs introduce aromatic freshness amplifying overall taste significantly more than dried versions could hope for—seek out either oregano or epazote whichever one resonates best with your palate preferences!
- A few dashes of your favorite hot sauce. Finally let’s add some heat at end—that extra kick elevates everything else beautifully drawing attention back towards main event each time someone digs into bowlful goodness laid before them inviting exploration along every layer within dish itself!
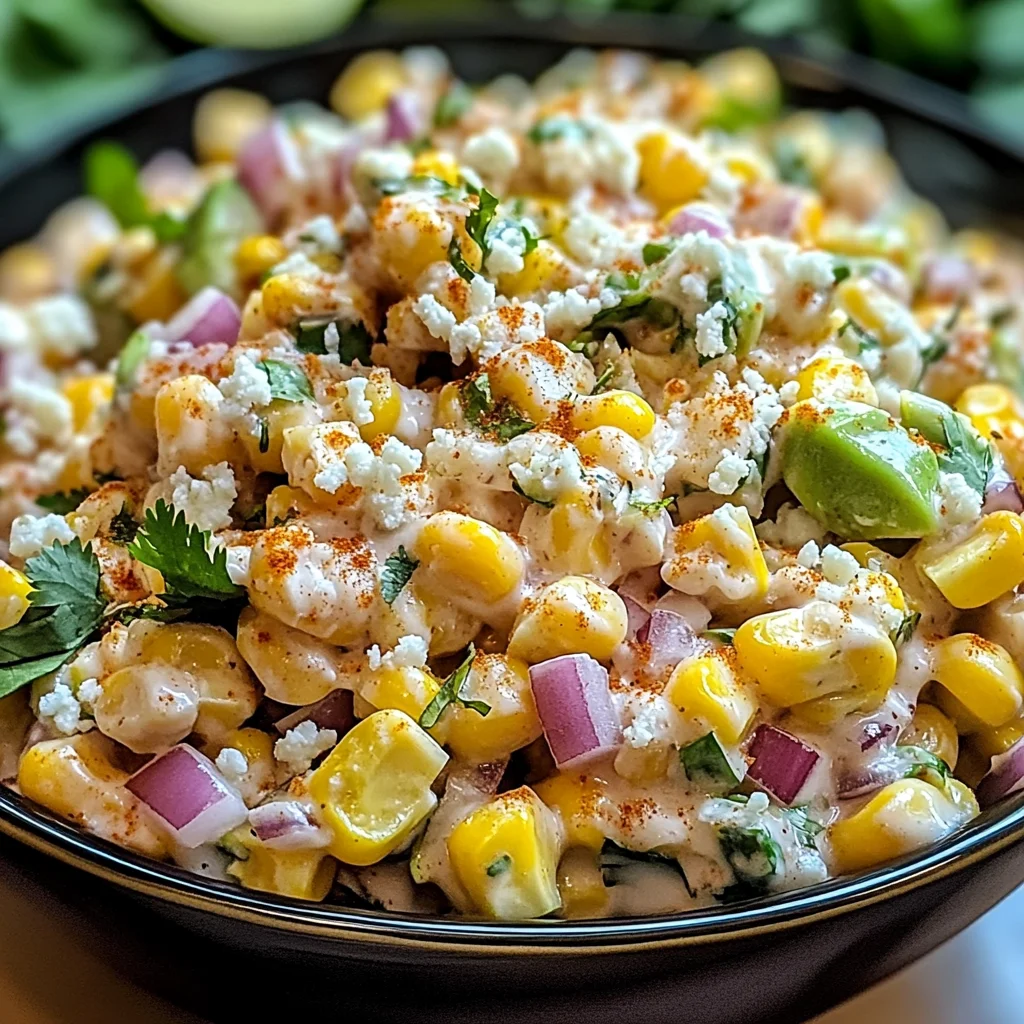
Equipment You’ll Need:
Now that we’ve gathered all our ingredients together let’s talk about what tools we’ll need on our culinary adventure! Having the right equipment makes all the difference in ensuring success while preparing delicious meals—it streamlines processes allowing us more time enjoying company around table instead fussing over things going awry during preparation phases!
- Grill Pan or Outdoor Grill: This is crucial if you want those beautiful char marks on your corn which add depth not only visually but also flavor-wise as well—you’ll achieve such smoky notes reminiscent of traditional street vendors’ grilling techniques producing mouthwatering results every time!
- Sharp Chef’s Knife: A good quality knife will make chopping veggies easy-peasy while ensuring uniform pieces leading towards better cooking results overall yielding consistent textures throughout whole salad experience rather than uneven bites causing distractions during enjoyment phase later down line.
- Cutting Board: Opt for sturdy boards capable handling various tasks since we’ll be chopping multiple different items here—the stability provided contributes greatly aiding efficiency keeping everything organized preventing mess along way streamlining whole process too!
- Mixing Bowl: Large enough to accommodate all ingredients comfortably allowing ample room when stirring ensuring proper blending takes place resulting harmonious amalgamation enticing everyone nearby wanting dig into freshly prepared creation awaiting them shortly thereafter once finished assembling components together beautifully melding flavors seamlessly into one another creating something unforgettable overall experience wise!
Now we’re ready to dive headfirst into bringing our Mexican Street Corn Salad together—a beautiful medley of colors textures aromas inviting everyone gathered around kitchen looking forward eagerly anticipating bursting culinary moments awaiting them ahead filled pure joy satisfaction fulfilled hearts bellies alike celebrating life love good food shared among cherished loved ones dear friends alike…
Step 1: Charring Your Corn
Let’s start by prepping our star ingredient: corn! If you’re using fresh ears of corn like I do during peak season—incredible sweet juicy goodness—you’ll want to shuck them first removing both husks silk completely before moving onto next steps involved here getting ready grill pan heated medium-high temperature until hot enough produce glorious char marks surface area kernels themselves creating depth flavor profile desired outcome ultimately leading towards perfect finished product awaiting us momentarily later down road after initial preparations complete prior diving deeper into assembly stages now approaching ahead soon thereafter joining forces together synergistically creating masterpiece worth savoring every last bite taken once ready served alongside loving company dear friends family alike gathered around sharing stories laughter moments shared forever remembered fondly afterwards long after plates cleared away leaving behind beautiful memories created through shared meals enjoyed thoroughly enjoyed throughout evening spent together heartwarming atmosphere permeating space surrounding us filling air joy excitement anticipation awaiting what deliciousness lies ahead next…
Step 2: Preparing Your Dressing
While waiting patiently for grill pan reach desired temperature take advantage downtime by mixing dressing components needed jacket coating everything later ensuring harmonious union occurs smoothly between diverse elements present within final assembled dish itself showcasing bounty nature provides us effortlessly combining magical essence life creativity artistry culinary endeavors unfolding right before eyes witnessing transformation occurring gradually step-by-step detail-oriented approach taken throughout entire process culminating breathtaking results seen shortly thereafter displayed proudly table setting inviting curiosity eager diners yearning explore unique offerings placed before them designed tantalizing appetites awaken senses spark intrigue hearts minds alike enthralled experience engaged fully immersed surroundings vibrant colorful inviting ambiance created lovingly crafted hand-in-hand contributions made collectively shared burdens joyous occasions bonding friendships strengthened through delicious food made lovingly prepared thoughtfully cherished moments experienced collectively enjoyed endlessly…
Step 3: Mixing It All Together
Once we’ve successfully charred those glorious kernels golden brown perfection embrace aromas wafting tantalizing noses awakening palates beckoning everyone closer inspecting closely curious gazes directed focused intentions keenly observing details unfolding right before eyes watch attentively eager anticipation growing heightened excitement builds as we proceed onward assembling final masterpiece culmination efforts combined pouring heart soul dedication passion artistry into creation celebrating tastes cultures traditions shared lovingly passed down generations enriching lives families communities across borders reaching beyond confines kitchens extending far wide horizons remind ourselves importance nourishment comfort food brings uniting people together fostering connections forging relationships strengthening bonds through shared experiences lasting impact felt long after plates cleared away leaving behind echoes laughter memories created treasured forever etched hearts minds souls…
Step 4: Letting It Chill
After everything has been mixed thoroughly allowing flavors meld together properly resting period becomes imperative at this junction letting sit briefly refrigerator ensures even greater infusion tastes enriching overall quality ensuring maximum enjoyment potential reached heightened levels transforming ordinary simple salad unforgettable culinary delight awaits discovery exploration indulging senses evoking profound satisfaction fulfillment nourished individuals gathered around table sharing stories laughter creating bonds cherished throughout countless gatherings future occasions reminding importance connection community beauty simplicity goodness found within humble ingredients brought alive vibrantly colors aromas sensations waiting eagerly embraced wholeheartedly discovering magic lying hidden depths hidden treasures awaiting discovery uncover collectively treasure trove delights unlocking doors inspiring creativity imagination igniting passions exploring new horizons exciting opportunities unfold unveiling possibilities endless journeys await beyond horizon stretching forth limitless landscapes ripe exploration adventures waiting begin anew…
I can’t wait for you try making this dish yourself; I’m confident you’ll love how easy yet rewarding it is—and how quickly it’ll become part of your cherished collection recipes meant share loved ones near dear heart gathering celebrating life’s little joys together around dining tables filled laughter happiness nourishing souls bodies alike…
Step 5: Charring the Corn to Perfection
Now, let’s get to the heart of what makes this Mexican Street Corn Salad truly unforgettable: the corn! Whether you’re using fresh ears or frozen kernels, charring them is absolutely paramount. If you’re working with fresh corn, start by shucking those beautiful ears and removing all the silky threads. Then, heat up your grill or a large cast-iron skillet over medium-high heat until it’s sizzling hot—this is crucial to achieving that delectable char that adds a smoky depth to the salad. If you’re using frozen corn, simply toss it in a pan with a splash of vegetable oil and allow it to cook until the edges begin to caramelize and develop that beautiful golden color. You want to hear that sizzle when the corn hits the pan; it’s music to your ears!
The reason we char the corn is straightforward yet profound: this process enhances the natural sweetness of the kernels while creating a rich layer of flavor. It’s like unlocking a secret door to deliciousness! Depending on whether you’re using fresh or frozen corn, this should take about 8-10 minutes for fresh corn on the grill (turning occasionally) or around 5-7 minutes for frozen corn in a skillet. Keep an eye out for those lovely brown spots; they are your indicators that you’re on the right track. Once done, remove the corn from heat and let it cool slightly before cutting off the kernels if you used fresh corn. Trust me on this step—resist any urge to rush; allowing those kernels to cool will make them easier to handle and ensure they stay vibrant in your salad.
Step 6: The Creamy Mixture Comes Together
Now comes one of my favorite parts: creating that luscious creamy base that will envelop our charred corn in pure bliss! In a large mixing bowl, combine 1/3 cup of mayonnaise and 2 tablespoons of Mexican crema (or sour cream). This combination lends an utterly intoxicating richness that’ll have everyone begging for seconds. I promise you, using real mayonnaise makes all the difference here—go ahead and skip any diet alternatives because this salad deserves every bit of flavor! Whisk these two together until they’re beautifully combined and smooth like liquid gold.
Next up, we’re going to add in some zing! Squeeze in the juice from two fresh limes; not only does this add brightness, but it also balances out the richness of our creamy mixture beautifully. Lime juice introduces acidity which cuts through fat, giving your taste buds an exciting dance party they won’t soon forget. At this point, sprinkle in your minced garlic cloves—oh, how I adore garlic! It brings warmth and depth, making every bite feel like a hug from inside. Finally, season with salt and pepper to taste; remember, seasoning is key here! Each element works together harmoniously to create a symphony of flavors that will elevate even the simplest ingredients into something truly extraordinary.
Step 7: Adding Flavorful Ingredients
Here’s where we really start building layers upon layers of flavor! With our creamy mixture ready, let’s fold in those gorgeous charred corn kernels we prepared earlier. Gently stir them into the creamy goodness while ensuring each kernel gets coated evenly; we want every bite to be as flavorful as possible! Next up is adding about 1/2 cup of crumbled cotija cheese—this cheese has such a unique salty tang that complements the sweetness of our corn perfectly. If cotija isn’t available at your store (I know how grocery shopping can be), feel free to use feta cheese as an alternative—it’s not quite the same but still delivers delightful results!
But wait—there’s more! Toss in 1/4 cup finely chopped cilantro because I believe cilantro truly brings everything together with its refreshing herbaceous notes. If cilantro is your jam like mine (and trust me, it should be!), feel free to double that amount for an extra burst of flavor! Now let’s turn up the heat just a notch by incorporating our finely diced jalapeño—remember, you can leave some seeds if you desire more spice; otherwise, go ahead and remove them for just a gentle kick. Stir everything together gently yet thoroughly; watch as colors blend into one another creating an inviting masterpiece!
Step 8: The Transformative Chill
Now comes one of those moments where patience pays off handsomely—the chilling phase! Cover your bowl with plastic wrap or transfer your Mexican Street Corn Salad into an airtight container before placing it in the refrigerator for at least 30 minutes, but if you can wait longer (say about an hour), do yourself a favor and embrace that time! Chilling allows all those incredible flavors we’ve layered together to meld beautifully—the lime juice penetrates deeper into each kernel while balancing out all those rich ingredients. Trust me on this: after resting in the fridge, every bite becomes profoundly satisfying!
During this time in chill mode, don’t forget about your avocado—it’s best enjoyed fresh so hold off until just before serving. When you’re ready for presentation, dice it up just right so it’s perfectly creamy without turning brown too quickly—a splash of lime juice can help keep it vibrant if you’re prepping early! As you wait patiently (I know it’s hard!), envision how spectacularly delicious this dish will be once served chilled; imagine hearing compliments echoing around your dinner table as everyone digs into their plates filled with summer love.
Final Touches That Make All The Difference
Step 9: Garnishing Your Masterpiece
Finally—the moment we’ve all been waiting for has arrived! After letting everything chill and come together in perfect harmony during its fridge getaway, it’s time for those final touches that will elevate our Mexican Street Corn Salad from delightful to downright show-stopping! Start by gently folding in your freshly diced avocado just before serving; its creamy texture gives an extra layer of indulgence while adding richness without overpowering any other flavors.
Now grab those wedges of lime we saved earlier—squeezing a bit more lime juice over top right before serving adds freshness and brightness that wakes everything up again after chilling away quietly. To finish off this beautiful creation (and let me tell you, presentation really matters here!), sprinkle some additional crumbled cotija cheese atop along with dashes of chili powder for visual pop plus extra flavor kick—who doesn’t love a little pizazz? And if you’re feeling adventurous—or simply like things spicy—a few shakes from your favorite hot sauce can bring explosion levels higher than ever!
As you serve up these bowls filled with joyfully vibrant colors and aromas wafting through your kitchen air like confetti at a celebration—know deep down that each spoonful is packed full not only with deliciousness but also memories waiting to happen around shared meals among loved ones who gather close together around tables filled generously with good food made from heartfelt recipes passed down through generations. Enjoy every single bite—you deserve nothing less than extraordinary!
Storage and Enjoyment Tips for Your Mexican Street Corn Salad
Now that your Mexican Street Corn Salad is mixed to perfection, it’s time to revel in its vibrant flavors and textures! But before you dive in, let’s talk about how to keep this delightful dish at its peak freshness for later enjoyment. This salad is not only best enjoyed straight from the bowl but also has some fantastic storage options that ensure you can savor it again. I promise you, the next day it’s still bursting with flavor, making it a marvelous option for meal prep or leftovers.
Storing Leftover Mexican Street Corn Salad
When it comes to storing your Mexican Street Corn Salad, the key is to use an airtight container, as this will help preserve the crispness of the corn and the creaminess of the dressing. Place it in the refrigerator, where it will stay fresh for about 3-4 days. Now, if you’re like me and want to avoid sogginess, consider placing a paper towel on top of the salad before sealing it; this little trick absorbs excess moisture and keeps things delightful. Trust me on this one—it makes all the difference! The flavors might deepen after a day in the fridge, leading to an even more complex taste experience that you’ll absolutely adore. When you’re ready to serve again, simply scoop out what you need and give it a gentle stir—no reheating necessary! The cold salad is wonderfully refreshing on a warm day or as a side dish during your weekend barbecues.
Freezing Corn for Later
If you find yourself with extra corn or if you’re preparing ahead of time for a gathering, freezing is an excellent option! To freeze your corn before making the salad, simply cut it off the cob (or use frozen corn kernels) and place them in a freezer-safe bag or container. Be sure to remove as much air as possible to prevent freezer burn—this will keep your corn tasting fresh and sweet for up to six months! When you’re ready to whip up your Mexican Street Corn Salad from frozen ingredients, just let the corn thaw overnight in the refrigerator or run it under cool water until softened. Using frozen corn retains that delightful sweetness while eliminating any hassle during prep time. Imagine having a burst of summer flavors from your freezer on a chilly evening—what could be better?
Mexican Street Corn Salad
- Total Time: 25 minutes
- Yield: Serves approximately 6
Description
Mexican Street Corn Salad is a vibrant, flavor-packed dish that captures the essence of summer in every bite. Inspired by the bustling streets of Mexico, this salad combines sweet charred corn with zesty lime juice, creamy mayonnaise, and a hint of spice from jalapeños. It’s not just a side dish; it’s a celebration of flavors and textures that brings people together around the table. Perfect for summer barbecues or cozy family dinners, this refreshing salad will have your guests coming back for seconds!
Ingredients
- 6 ears fresh corn (or about 4–5 cups frozen corn kernels)
- 2 Tbsp vegetable oil
- 1/3 cup mayonnaise
- 2 Tbsp Mexican crema or sour cream
- 1/2 cup crumbled cotija cheese (or feta as a substitute)
- 1/4 cup finely chopped cilantro
- 1 jalapeño, seeds removed and finely diced
- 2 cloves garlic, minced
- Juice from 2 limes
- 1 tsp chili powder
- 1/2 tsp smoked paprika
- Salt and pepper to taste
- 1/4 red onion, finely diced
- 1 avocado, diced
- 1/4 cup chopped fresh Mexican oregano or epazote (optional)
- A few dashes of your favorite hot sauce
Instructions
- Heat a grill pan or outdoor grill to medium-high. Shuck fresh corn and remove silk.
- Brush corn with vegetable oil, then grill until charred on all sides (about 8–10 minutes). If using frozen corn, sauté in a skillet until golden.
- In a large mixing bowl, combine mayonnaise, Mexican crema/sour cream, lime juice, garlic, chili powder, smoked paprika, salt, and pepper.
- Fold in the grilled corn kernels, cotija cheese, cilantro, jalapeño, red onion, and diced avocado.
- Chill in the refrigerator for at least 30 minutes before serving to let flavors meld.
- Prep Time: 15 minutes
- Cook Time: 10 minutes
- Category: Salad
- Method: Grilling
- Cuisine: Mexican
Nutrition
- Serving Size: 1 cup (about 150g)
- Calories: 290
- Sugar: 6g
- Sodium: 410mg
- Fat: 20g
- Saturated Fat: 3g
- Unsaturated Fat: 16g
- Trans Fat: 0g
- Carbohydrates: 27g
- Fiber: 4g
- Protein: 6g
- Cholesterol: 10mg
Leave a Comment