There’s something profoundly satisfying about the smell of a bubbling lasagna wafting through the house, isn’t there? It’s like a warm hug that wraps around you, whispering tales of family gatherings and cozy evenings spent with loved ones. Today, I want to share with you one of my absolute favorite recipes: Ravioli Lasagna! This dish isn’t just a meal; it’s an experience that dances between tradition and innovation. The beauty lies in its simplicity—using frozen cheese ravioli instead of the traditional noodles transforms this classic dish into something utterly divine, while still delivering that rich, comforting flavor we all crave. Picture this: layers of cheesy goodness, savory marinara sauce, and tender meat melding together in perfect harmony. Oh, trust me when I say your taste buds are in for a treat!
This recipe is not just another way to enjoy lasagna; it’s a testament to how cooking can evolve while still paying homage to cherished family recipes. The combination of ground beef, luscious ricotta, and shredded mozzarella creates a symphony of flavors that beckon everyone to gather around the table. And let’s not forget about the time-saving magic of frozen ravioli—no need for lengthy boiling or layering traditional noodles here! This dish is perfect for busy weeknights or when entertaining friends. You can prepare it ahead of time, letting the flavors meld beautifully while you focus on what truly matters: creating memories with those you love.
Ravioli Lasagna: A Heartwarming Twist on Tradition
Welcome to your new favorite dinner idea! This Ravioli Lasagna is not only incredibly easy to make but also delivers on every level of comfort food satisfaction. With layers upon layers of delightful flavor and texture, it’s bound to become a staple in your kitchen repertoire. Plus, it’s as pleasing to the eyes as it is to the palate—each slice reveals beautiful layers that will make you feel like an accomplished chef every time you serve it!
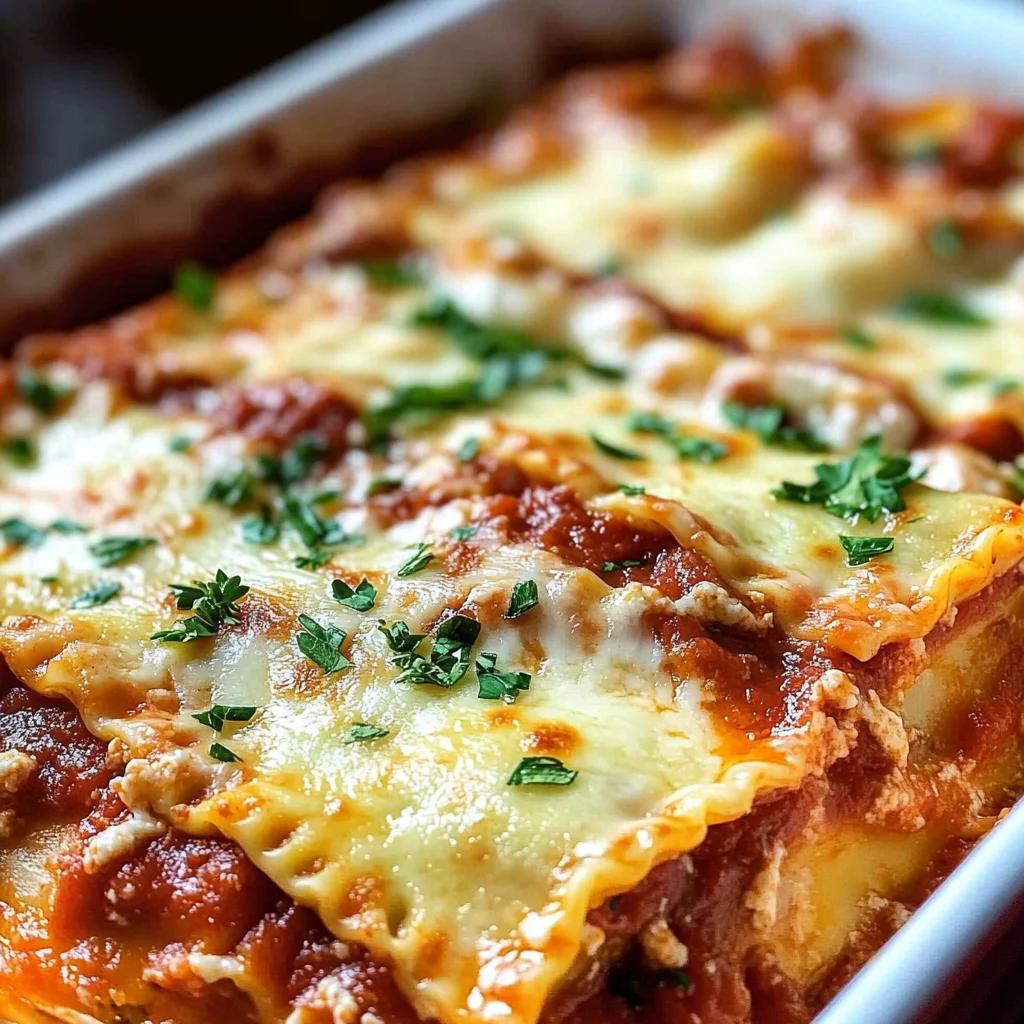
Ingredients:
As we embark on this culinary journey together, I want you to take a moment and appreciate each ingredient we’re about to use. Each one plays a crucial role in crafting our delicious lasagna masterpiece!
- 1 pound ground beef. The heart and soul of our Ravioli Lasagna comes from this hearty protein. Ground beef brings both flavor and richness to this dish; I always opt for lean ground beef (around 85% lean) because it gives me that indulgent mouthfeel without being overly greasy. When browning it in the skillet, you’ll develop those beautiful caramelized bits that add depth to our sauce—don’t rush this step! It’s absolutely paramount for building flavor.
- 1 small onion (diced). Onions are nature’s way of adding sweetness and complexity. As they sauté with the ground beef, they become tender and translucent, infusing everything with their aromatic essence. When selecting your onion, look for firm bulbs with papery skins—this ensures maximum freshness! If you’re feeling adventurous, try using shallots for a slightly milder flavor; they’re delightful too!
- 24 ounces marinara. This luscious liquid gold ties our dish together beautifully! A good marinara sauce should be rich and flavorful—it should taste like someone lovingly simmered tomatoes with garlic and herbs for hours (even if you didn’t!). When picking out your jarred sauce at the store, look for one without added sugars or preservatives; quality is key here! If you’re up for it, homemade marinara is an absolute game changer!
- 3 cloves garlic (minced). Garlic adds an intoxicating aroma and robust flavor profile that elevates our entire dish. Freshly minced garlic releases oils full of flavor that meld beautifully with our other ingredients as they cook together—trust me on this one; it’s essential! If you have trouble peeling garlic quickly, try smashing it gently with the flat side of your knife; it’ll come right off!
- 2 cups ricotta cheese. Oh ricotta—creamy, dreamy ricotta! This ingredient lends such a lovely creaminess and lightness to our lasagna layers while providing a subtle tangy flavor that balances out the richness from the meat and cheese. When choosing ricotta, look for one that’s made from whole milk for optimal creaminess—you want every bite to be utterly indulgent!
- 1 large egg. This humble egg acts as a binding agent in our ricotta mixture—it helps all those creamy components stay together during baking while also adding richness to each layer! Always remember: fresh eggs are non-negotiable when baking or cooking; they enhance both flavor and texture.
- ¼ cup shredded parmesan cheese. Parmesan cheese adds an unmistakably nutty depth while enhancing overall umami flavors within our Ravioli Lasagna. Look for high-quality Parmigiano-Reggiano if possible—it’s worth every penny! Remember: fresh-shredded cheese melts more smoothly than pre-grated varieties because they often contain anti-caking agents.
- ¼ cup chopped parsley. Fresh parsley not only brightens up our dish visually but also adds vibrancy in taste! Its herbaceous notes contrast beautifully with the richness surrounding it—don’t skip this step because garnishing with parsley before serving will make your lasagna pop!
- 1 teaspoon garlic powder & ½ teaspoon onion powder. These spices are my secret weapons—they amplify those savory notes without needing extra chopping or cooking time! They blend seamlessly into our layers while providing consistent flavors throughout every bite.
- 25 ounces frozen cheese ravioli. Here’s where we cut down on prep time significantly without sacrificing quality! Frozen cheese ravioli are pre-cooked so they save us hours in preparation while still offering delightful texture when baked under all those fantastic layers.
- 2 cups shredded mozzarella. Mozzarella—the classic melty topping we all dream about! It creates an ooey-gooey layer on top that pulls apart wonderfully when you serve it hot from the oven—a true crowd pleaser indeed! Opt for whole milk mozzarella for maximum stretchability—it makes all the difference!
- Minced parsley (for garnish). Finally, we’ll adorn our finished masterpiece with some additional chopped parsley before serving—it elevates presentation while providing that final touch of freshness everyone loves!
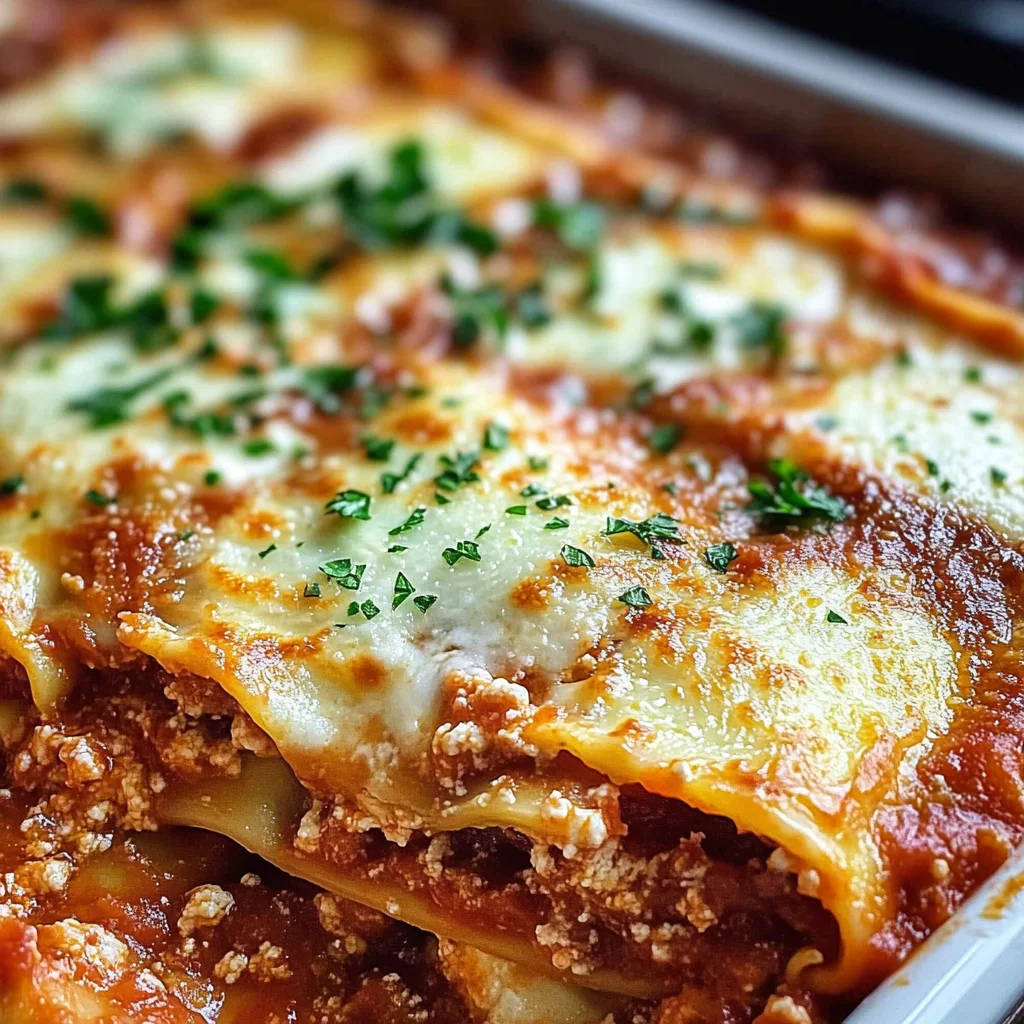
Equipment You’ll Need:
Having the right tools can truly transform your cooking experience from mundane into magical! Every piece of equipment we’re using today serves as an essential partner in creating something wonderful together.
- Large skillet – A heavy-bottomed skillet allows even heat distribution which is crucial when browning meat properly; choose one that’s large enough so everything fits comfortably without overcrowding.
- 13×9 baking dish – This versatile pan provides ample space for layering your Ravioli Lasagna while ensuring even cooking throughout; trust me when I say it’s worth investing in high-quality bakeware!
- Mixing bowls – Having separate bowls helps keep everything organized during preparation; plus they’re great containers for combining ingredients like our ricotta mixture.
- Measuring cups & spoons – Accurate measurements ensure consistency between batches so don’t skimp here—investing in good measuring tools will pay off tenfold down the line!
With all these ingredients and equipment ready at hand let’s dive into preparing this incredible Ravioli Lasagna!
Step 1: Prepping Your Oven & Dish
First things first—we need to preheat our oven to 350 degrees Fahrenheit so it’s nice and hot when we’re ready to bake later on! While it’s heating up, grab your trusty 13×9 baking dish and give it a generous spray with non-stick spray; this is crucial because nobody wants their beautiful lasagna sticking stubbornly to the bottom after all that hard work putting it together!
Step 2: Browning Your Meat
Next up is where all those glorious flavors begin their journey together: heat up your large skillet over medium heat until it’s nice and warm before adding in the pound of ground beef along with diced onion directly into the pan (you’ll know it’s ready when you hear that satisfying sizzle!). Use a spatula or wooden spoon to break apart any clumps as it cooks—you want evenly browned bits coating every surface area—which adds depth beyond compare once combined into our sauce later on.
Step 3: Simmering Our Sauce
Once browned perfectly (about 6–8 minutes), drain any excess grease from the pan because we want rich flavors without greasiness weighing us down unnecessarily during baking later on! Then add in those lovely jars of marinara sauce along with freshly minced garlic straight into your skillet—a mesmerizing aroma will soon envelop your kitchen as these ingredients marry beautifully over low heat during a gentle simmer (5 minutes should do). Keep stirring occasionally until everything blends seamlessly into something utterly intoxicating!
Step 4: Whipping Up That Ricotta Mixture
Meanwhile—as that simmering sauce works its magic—we’ll turn attention toward whipping up our creamy ricotta filling by combining ricotta cheese along with one large egg beaten lightly beforehand inside another mixing bowl alongside grated parmesan cheese plus chopped parsley too—all those additions create an irresistible creamy layer bursting forth deliciousness once baked together later on too! Sprinkle garlic powder & onion powder generously into this mixture before giving everything another thorough mix until smooth yet thick enough not runny—we don’t want any unwanted liquid seeping through later either after layering begins!
Now you’ve got all the foundational steps covered—next up we’ll assemble this delectable masterpiece layer by layer until perfection awaits us shortly thereafter…
Step 5: Layering the Magic
Now that we have the rich, savory meat sauce bubbling away and that heavenly ricotta mixture prepared, it’s time to assemble our masterpiece. First, grab your prepared 13×9 baking dish—this is where the magic happens! Take about one-third of your luscious meat sauce and spread it evenly across the bottom of the dish. This initial layer serves two crucial purposes: it prevents the ravioli from sticking to the bottom and sets a flavorful foundation for what’s to come. Trust me; you want every single bite to be packed with flavor, so don’t skimp on this step!
Next, gently lay down a single layer of the frozen cheese ravioli over the sauce. Imagine those little pillows of cheesy goodness nestled in their sauce bed like they’re ready for a cozy evening! Then, take half of that creamy ricotta mixture and spread it lovingly over the ravioli. You want this layer to be generous—think of it as giving your ravioli a warm hug! Follow that with another third of your meat sauce, swirling it just enough to combine with the ricotta but not completely blending them together. This layering technique is what makes every forkful a symphony of flavors; each bite will have its own unique character while still aligning perfectly with the others.
Step 6: The Art of Repetition
Now comes the fun part—let’s repeat those layers! Just like building a beautiful cake, this step is all about creating balance and depth in flavor. Add another layer of ravioli on top of that scrumptious meat-sauce-ricotta concoction. Don’t rush through this; take your time to ensure each ravioli is placed snugly next to its neighbor without overlapping too much. After all, we want them to cook evenly and soak up all those delicious flavors!
Once you’ve added another layer of ravioli, go ahead and spread the remaining ricotta mixture over them. It’s like frosting a cake but even better because it’s cheese! Top this off with one last glorious layer of marinara sauce—yes, you want to end with sauce because it helps keep everything moist during baking and adds that beautiful glossy finish when it’s done cooking.
This final touch is absolutely paramount; it creates an inviting appearance and ensures that moisture penetrates throughout every layer as it bakes. Finally, sprinkle whatever remains of your marvelous meat sauce on top for good measure before moving on to our final cheesy crown—the mozzarella!
Step 7: Crown Your Creation
Let’s talk about cheese because, honestly, what would life be without it? Grab that shredded mozzarella and sprinkle it generously over your lasagna masterpiece—it should look like a cozy snow blanket covering everything beneath! This step not only contributes an irresistible gooey texture but also forms a golden crust as it bakes—it’s utterly intoxicating when you pull it from the oven. I can already imagine how amazing your kitchen will smell as this beauty cooks away!
Before we pop this into the oven at 350 degrees Fahrenheit, remember to cover it tightly with aluminum foil. This step is crucial because it traps steam inside while ensuring even cooking throughout. Think of it as creating a mini-oven within an oven; you want all those lovely ingredients to meld together perfectly without drying out too quickly. Bake covered for about 40 minutes—during this time, resist any temptation to peek! We want everything inside to develop those rich flavors without losing precious heat.
Step 8: Unveiling Your Culinary Masterpiece
After patiently waiting through those long 40 minutes (and believe me, I know how hard that can be), it’s time for the grand reveal! Carefully remove your lasagna from the oven and take off that foil—you’ll be greeted by a wave of warmth and aromas so inviting they’ll make everyone in the house come running faster than you can say Ravioli Lasagna! But wait—don’t rush right in for a slice just yet; allow your creation some time to set up for about 10 minutes.
Why let it rest? Well, during this quiet moment, all those layers get a chance to firm up slightly while redistributing moisture throughout—a crucial step for achieving perfect slices rather than an oozy mess! When you do finally cut into it after this transformative wait, you’ll find clean edges revealing each beautifully layered section instead of chaos spilling out everywhere.
Final Touches: Garnishing with Love
As you prepare to serve up those glorious slices of Ravioli Lasagna, consider giving it a sprinkle of minced parsley on top for a pop of color and freshness—it elevates both taste and presentation significantly! Fresh herbs are like jewelry for food—they make everything sparkle just a little more brightly.
Take pride in each serving you dish out; not only have you created something deeply satisfying but also shared love through food—a tradition that’s been cherished across generations. So gather around your table with family or friends (or both!), dig into this extraordinary meal you’ve crafted from start to finish, and revel in how utterly delightful simplicity can taste when made with care.
And remember: each bite tells a story—the story filled with warmth, laughter, and love shared over meals that comfort us during our best days and worst ones alike. Enjoy every moment because you’ve truly earned this delicious reward!
Storage and Enjoyment Tips for Your Ravioli Lasagna
Now that your kitchen is filled with the mouthwatering aroma of baked goodness, it’s time to revel in the deliciousness of your Ravioli Lasagna! But let’s not forget that this delightful dish can be enjoyed beyond just the initial meal. Proper storage is key to preserving its rich flavors and satisfying textures for another day. Trust me, you won’t want any leftovers to go to waste; they simply beg to be savored again. So, let’s dive into how to keep this masterpiece fresh and flavorful!
Storing Leftover Ravioli Lasagna
To ensure your leftover Ravioli Lasagna remains as delectable as it was fresh out of the oven, carefully transfer it into an airtight container. This will shield it from unwanted moisture and odors in the fridge while helping maintain its creamy texture. Stored correctly, you can enjoy your lasagna for up to three to five days! Now, here’s a little pro tip: placing a slice of bread inside the container can work wonders in keeping the lasagna moist while absorbing any excess moisture that might otherwise make it soggy. Imagine taking a bite days later and still experiencing that divine blend of flavors! When you’re ready to indulge again, simply reheat individual portions in the microwave or pop them back into the oven until warmed through. You’ll find that the flavors meld even more beautifully after resting, making each bite profoundly satisfying.
Freezing Ravioli Lasagna for Later
If you’re like me and love preparing meals ahead of time, freezing your Ravioli Lasagna is an absolute game-changer! To freeze it properly, cut your lasagna into portions and wrap each piece tightly in plastic wrap before placing them in a freezer-safe bag or container. This way, you’ll lock in all that cheesy goodness! If stored correctly, your lasagna can stay frozen for up to three months without losing its charm. The beauty of this method lies in its convenience; on those busy nights when cooking feels daunting, all you need to do is grab a portion from the freezer and let it thaw overnight in the refrigerator before reheating. Just think about how easy it is to have an indulgent homemade meal ready at a moment’s notice—it’s truly liberating!
Dinner
Ravioli Lasagna
- Total Time: 1 hour 10 minutes
- Yield: Serves approximately 8
Description
Ravioli Lasagna is a delightful twist on the classic lasagna, combining layers of frozen cheese ravioli, savory ground beef, and creamy ricotta into a comforting dish that’s sure to please everyone at your table. This recipe is perfect for busy weeknights or when entertaining guests, as it cuts down prep time without sacrificing flavor. Each bite offers a delicious medley of textures and tastes—think melty mozzarella, rich marinara, and luscious cheese—all harmonizing beautifully. Plus, it’s easy to prepare in advance, allowing the flavors to meld perfectly before serving. Get ready to enjoy a hearty meal that feels like a warm hug!
Ingredients
- 1 pound ground beef
- 1 small onion (diced)
- 24 ounces marinara sauce
- 3 cloves garlic (minced)
- 2 cups ricotta cheese
- 1 large egg
- 25 ounces frozen cheese ravioli
- 2 cups shredded mozzarella
- ¼ cup grated Parmesan cheese
- ¼ cup chopped parsley
Instructions
- Preheat oven to 350°F (175°C) and spray a 13×9 baking dish with non-stick spray.
- In a large skillet over medium heat, brown ground beef with diced onion for about 6–8 minutes. Drain excess grease.
- Add marinara sauce and minced garlic; simmer for about 5 minutes.
- In a mixing bowl, combine ricotta cheese, beaten egg, grated Parmesan cheese, chopped parsley, garlic powder, and onion powder until smooth.
- Layer one-third of the meat sauce in the prepared baking dish; place half of the ravioli on top, followed by half of the ricotta mixture. Repeat layers, finishing with marinara sauce on top.
- Sprinkle shredded mozzarella over the final layer.
- Cover with aluminum foil and bake for 40 minutes; then uncover and bake for an additional 10 minutes until cheese is bubbly.
- Prep Time: 20 minutes
- Cook Time: 50 minutes
- Category: Dinner
- Method: Baking
- Cuisine: Italian
Nutrition
- Serving Size: 1 slice (approx. 200g)
- Calories: 480
- Sugar: 8g
- Sodium: 900mg
- Fat: 25g
- Saturated Fat: 12g
- Unsaturated Fat: 10g
- Trans Fat: 0g
- Carbohydrates: 40g
- Fiber: 3g
- Protein: 30g
- Cholesterol: 90mg


Leave a Comment