The aroma of sizzling chicken fills the air as memories come rushing back—a bustling kitchen, laughter echoing off the walls, and the joyous anticipation of sharing a meal together. Cooking is more than just a task; it’s an experience that brings us closer to our roots and to one another. With this Easy Sesame Chicken Recipe, you’ll find yourself transported back to those cherished moments, all while creating a dish that rivals your favorite Chinese takeout in under 30 minutes! Imagine crispy bites of chicken bathed in a sweet and savory sauce, each piece glistening like liquid gold, beckoning you to take that first delectable bite. Trust me when I say, once you try this recipe, you’ll be firmly on team homemade for life!
And oh, how wonderful it is to take control of what’s on our plates! This Easy Sesame Chicken Recipe is not just a quick dinner solution; it’s a testament to the beauty of cooking at home. Why settle for takeout when you can whip this up in less time than it takes for the delivery driver to arrive? The balance of flavors—the deep umami from soy sauce, the tangy brightness from rice vinegar, and the warm aroma of sesame oil—creates an utterly intoxicating experience. So gather your ingredients, roll up your sleeves, and let’s embark on this culinary adventure together.
Easy Sesame Chicken Recipe: A Crispy Delight You Can Make at Home
This Easy Sesame Chicken Recipe is all about simplicity and flavor coming together beautifully. You might think it sounds too good to be true, but I promise you, with just a handful of ingredients and minimal prep time, you will create something truly extraordinary that everyone at your table will love.
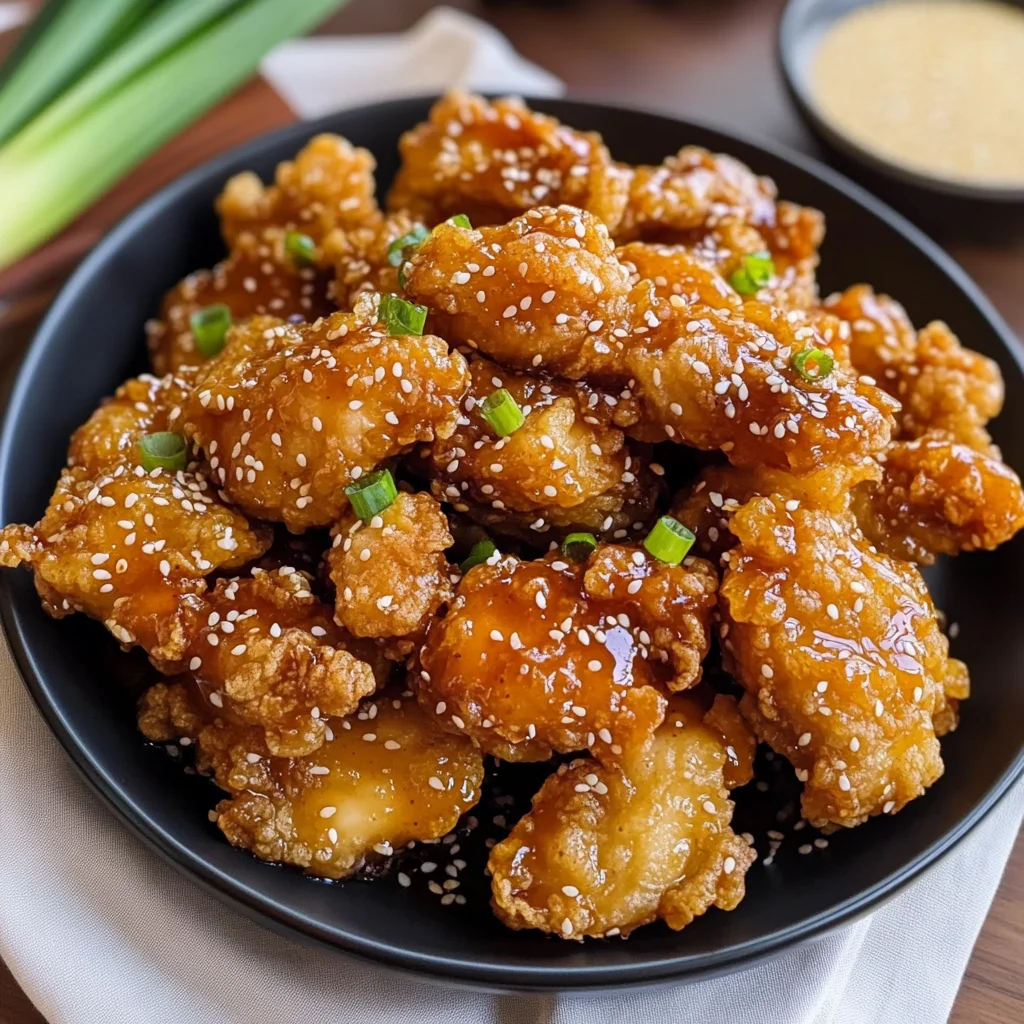
Ingredients:
As we dive into preparing this delightful dish, let’s take a moment to appreciate each ingredient that makes this recipe sing. Each component has its own role in crafting not just a meal but an experience.
-
1/4 cup soy sauce: This rich liquid serves as the backbone of our sauce. Its salty depth enhances the flavors of the chicken while also providing that characteristic umami taste that we all crave. When selecting soy sauce, look for one that’s brewed naturally rather than chemically produced—it makes all the difference! If you’re looking for a gluten-free option, tamari is an excellent substitute.
-
1/4 cup rice vinegar: This ingredient adds a bright acidity that beautifully balances out the sweetness from other components. Rice vinegar is milder than regular vinegar and has a subtle sweetness of its own. It’s essential for cutting through richness and enhancing overall flavor complexity. If you’re in a pinch and don’t have rice vinegar on hand, apple cider vinegar can work as an acceptable alternative.
-
1/2 cup brown sugar: Ahh, brown sugar—this sweetener lends not only sweetness but also a hint of caramel-like richness thanks to its molasses content. It perfectly marries with the saltiness of soy sauce and adds depth to our sauce. Always make sure it’s packed well when measuring; we want every bit of that delicious sweetness!
-
1 tablespoon corn starch: This is crucial for thickening our sauce so it clings beautifully to each piece of chicken without being overly runny. Corn starch works by absorbing moisture when heated; thus, it’s important to ensure it’s well incorporated into your mixture before heating.
-
1/3 cup water: Simple yet effective! Water helps dissolve and balance out our sauce ingredients without overwhelming them. It creates just the right consistency for perfect coating around our chicken pieces.
-
2 teaspoons sesame oil: Ahh, sesame oil—the magic elixir that brings our dish to life! Its nutty flavor adds complexity and warmth that perfectly complements both the chicken and the sauce. When purchasing sesame oil, opt for toasted sesame oil if available; it’s richer in taste and adds deeper flavor.
-
1/2 tablespoon sesame seeds: These tiny seeds are not only visually appealing but add delightful crunchiness and nutty flavor as well. Toasted or raw will work here; just make sure they are fresh for optimal taste!
-
1/2 cup cornstarch: This ingredient plays double duty here—not only does it help create an airy batter for frying but also ensures we achieve that coveted crispy texture on our chicken pieces when they hit the hot oil.
-
1/2 cup flour: We combine this with cornstarch to create a light batter that coats our chicken perfectly while frying. Using all-purpose flour works wonderfully here; however, feel free to experiment with gluten-free flour blends if necessary!
-
2 egg whites: Egg whites serve as an excellent binder in our batter while also contributing crispness during frying due to their protein content hardening upon cooking. Separate them carefully—no yolk should sneak in!
-
1/2 cup cold seltzer water: This might seem like an odd addition at first glance but trust me on this one—it creates bubbles in our batter which leads to extra lightness when fried! The cold temperature also helps maintain crispness throughout cooking.
-
1 lb chicken thighs (boneless and skinless cut into 1-inch chunks): Thighs are juicy and flavorful; they hold up beautifully during frying without drying out like breasts might do if overcooked. Cut them into uniform pieces for even cooking—trust me; no one likes biting into unevenly cooked chicken!
-
Vegetable oil (for deep frying): You’ll need plenty of hot oil for frying—make sure it’s neutral-tasting so it doesn’t overpower other flavors in your dish! Monitor temperature closely; too hot can burn while too cool can lead to greasy chicken instead of crispy perfection.
-
2 teaspoons sesame oil (additional): We’ll use more sesame oil later on after frying—the aromatic essence will enhance our finished dish dramatically!
-
1/4 teaspoon crushed red pepper: A little heat goes a long way here—the crushed red pepper flakes add just enough spice without overwhelming flavors already present in your Easy Sesame Chicken Recipe.
-
1 tablespoon minced garlic: Garlic adds depth and aroma—this fragrant herb will elevate everything else by imparting savory notes throughout every bite!
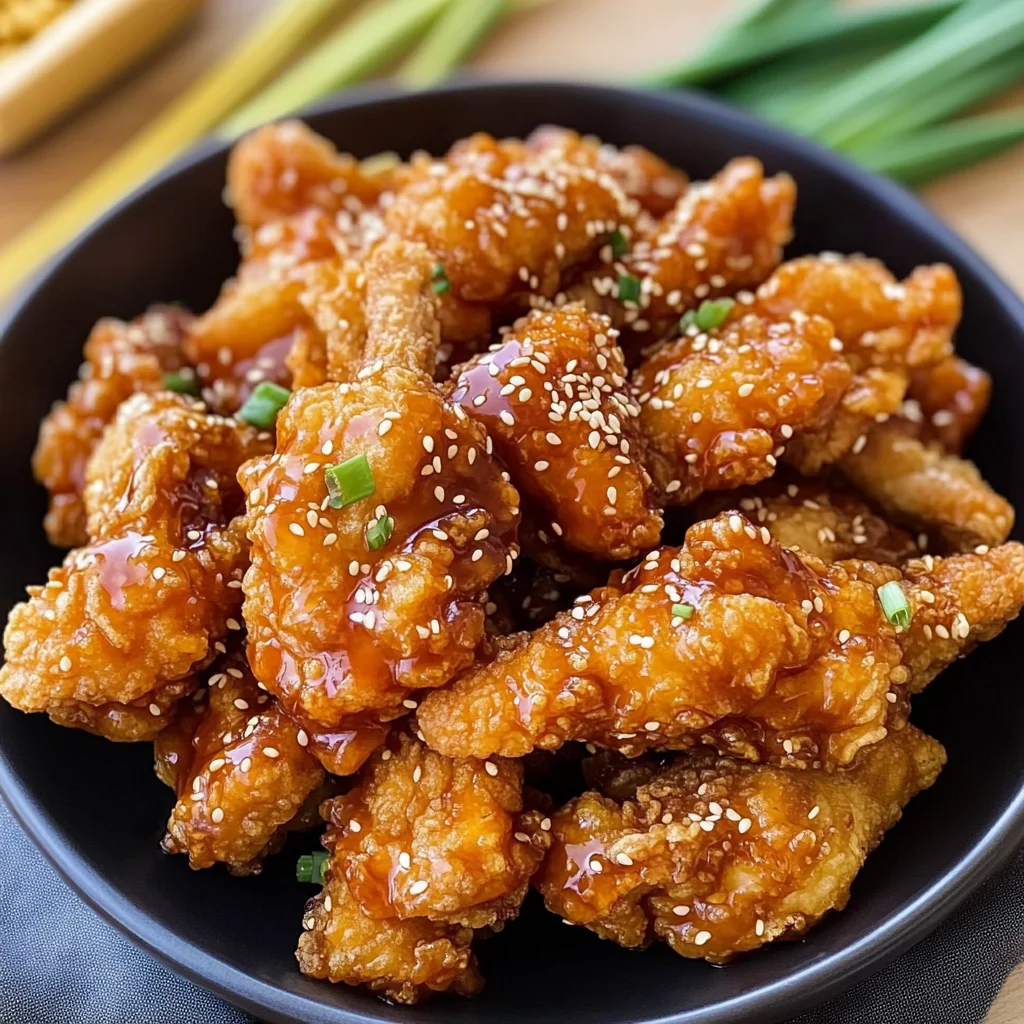
Equipment You’ll Need:
Before diving into our cooking adventure, let’s gather some essential tools that will make your experience smoother and more enjoyable! Having these right tools ready sets you up for success as we prepare this delightful dish together.
-
Large mixing bowl – Having a spacious bowl allows ample room for mixing your batter without making a mess everywhere else! It’s crucial since we’ll be combining various ingredients seamlessly while ensuring nothing splatters out—keeping things tidy is key!
-
Whisk or fork – For whisking together both sauces and batter effectively—this simple tool is indispensable! A sturdy whisk helps incorporate air into mixtures efficiently while breaking down any lumps present (we want smooth sauces!)
-
Deep pot or fryer – You’ll need something deep enough to hold 3 inches of oil comfortably for frying without risk of spills or splatters getting everywhere! Use something heavy-bottomed preferably so heat distributes evenly across its surface area leading us toward golden-brown perfection every time!
-
Slotted spoon or spider strainer – These handy tools allow you to lift fried pieces easily out from hot oil without losing any precious juices inside whilst letting excess grease drip off quickly afterward too!
-
Tongs – Perfectly flipping over those pieces mid-fry ensures even browning occurs across all sides uniformly which means delicious results await!
Preparing the Easy Sesame Chicken Recipe
Step 1: Create Your Flavorful Sauce
First things first—we need that mouthwatering sauce which will bring everything together beautifully! In a medium-sized bowl (one big enough so things won’t spill), combine your soy sauce, rice vinegar, brown sugar, corn starch mixed with water along with two teaspoons sesame oil until fully combined. This process creates what I like to call “the liquid gold” because trust me—once poured over fried chicken later…it’s pure magic! Make sure no lumps remain; otherwise those bits won’t dissolve properly during heating later on leading us astray from achieving proper sauciness desired here!
Step 2: Prepare Your Crispy Batter
Next up comes creating our delightful batter—a mixture crucially responsible for achieving crispy goodness once cooked properly! In another large mixing bowl (keep things separate!), whisk together cornstarch along with flour until evenly combined before adding egg whites followed by chilled seltzer water slowly—you want everything blended gently without overmixing since too much air incorporation can lead towards denser outcomes instead (which isn’t what we’re aiming!) Until just combined works best here so don’t rush through—it’s worth taking time ensuring consistency appears light yet cohesive enough around those yummy chunks soon headed toward hot bubbling oil awaiting them eagerly!
Step 3: Fry That Chicken
Now comes my favorite part—it’s time for frying!! Heat up three inches deep vegetable oil within either deep pot or fryer until reaching around 350°F (175°C) using thermometer if available—this ensures proper temperature maintained throughout cooking leading us straight toward golden-brown heaven guaranteed every single bite counts down below waiting eagerly beneath sizzling surface above!! Once heated sufficiently enough begin adding coated pieces slowly ensuring not overcrowding occurs during journey—they need space allowing bubbling action happen freely around entire surface area surrounding them resulting towards magnificent crispiness achieved outside remaining tender juicy within still intact underneath resulting later upon serving plate itself afterward too!!
Step 4: Add Those Aromatics
Once fried perfectly golden brown removed carefully using slotted spoon onto paper towels allowing excess grease absorb away letting rest briefly meanwhile preparing final touches needed before serving moment arrives shortly after—all about timing here folks!! In large wok/skillet drizzle those remaining two teaspoons sesame oils along with minced garlic followed swiftly crushed red pepper flakes stirring constantly letting aromas fill lovely kitchen air surrounding us reminding why moments spent shared cooking always treasured deeply—let cook lightly just thirty seconds until fragrant wafts ignite senses present nearby waiting patiently eager anticipation awaiting completion finally nearing closer now!!
Stay tuned as we finish assembling this beautiful dish in my next steps filled with excitement bringing everything together seamlessly inviting everyone gathered around table soon indulging soon enjoying culinary masterpiece created merely minutes ago…✨
Cooking Your Easy Sesame Chicken Recipe: A Journey of Flavor
Step 5: The Art of Frying – Getting that Golden Crisp
Now, let’s dive into the thrilling world of frying! This step is where your chicken transforms from mere chunks into crispy, golden morsels that will have everyone at the table eagerly anticipating their first bite. Begin by heating about three inches of vegetable oil in a deep pot or a heavy skillet to a precise temperature of 350 degrees Fahrenheit. This temperature is absolutely crucial because it ensures that the batter puffs up and crisps beautifully without absorbing too much oil, which can lead to a soggy finish. Use a kitchen thermometer if you have one; it’s worth every penny for this step!
Once the oil is hot enough, you’ll want to carefully add the chicken pieces in batches—this is key to keeping the temperature consistent and achieving that perfect crunch. Don’t overcrowd the pan; give each piece room to breathe. You might hear that satisfying sizzle as they hit the oil, which is music to any cook’s ears! Fry each batch for about 4-5 minutes, turning them occasionally until they are gloriously golden brown on all sides. This visual cue not only indicates doneness but also brings out an intoxicating aroma that fills your kitchen with anticipation. Trust me on this—the scent alone will make your mouth water. Once fried, remove the chicken with a slotted spoon and let them drain on paper towels while you continue with the next batch.
Step 6: Aromatic Infusion – Building Flavor in Your Wok
With your chicken perfectly fried, it’s time to bring everything together in a beautiful harmony of flavors! Take a large wok or skillet and add two teaspoons of sesame oil over medium heat—this will be your aromatic base, introducing an utterly intoxicating nuttiness to your dish. Let the oil warm up for just a minute before tossing in your minced garlic and crushed red pepper flakes. Pay attention here; you only need about 30 seconds for these ingredients to release their fragrant oils without burning. Garlic can turn from lightly golden to charred in mere moments, so don’t rush this step—patience will reward you with depth and warmth.
As you stir gently through the sizzling garlic and pepper, take a moment to inhale deeply; the aroma should be rich and inviting, creating a welcoming atmosphere in your kitchen. This stage is essential because it sets the tone for your sauce—you’re infusing flavors that will cling lovingly to every piece of chicken later on. Once you’ve allowed those beautiful scents to meld together, it’s time for the grand entrance of your sauce mixture.
Step 7: The Grand Sauce Entrance – Coating with Love
Now comes one of my favorite moments—the moment when all those individual elements come together! Pour your prepared sauce mixture into the wok with confidence; you’ll see it begin to bubble almost immediately as it meets those heated ingredients. Give it a gentle stir and watch as it thickens up beautifully due to that cornstarch we mixed in earlier—this important component helps create a glossy coating that clings perfectly to our crispy chicken pieces. Don’t forget this crucial step: allow the sauce to simmer for about 2-3 minutes until it thickens slightly; this not only enhances its flavor but ensures that each bite is bursting with taste.
Now’s when you’ll add back those glorious golden chicken pieces into the mix! With sheer excitement, toss them gently through the bubbling sauce using tongs or a spatula until every nook and cranny is coated with that liquid gold. This process is all about love and care; you want each piece enveloped in sauce without breaking apart all that hard-earned crispiness we achieved earlier during frying. The combination of textures—the crunchy exterior meeting the luscious sauce—is what makes this Easy Sesame Chicken Recipe truly extraordinary.
Step 8: The Final Flourish – Garnishing Your Masterpiece
Your Easy Sesame Chicken is almost ready for its moment of glory! Right before serving, sprinkle half a tablespoon of sesame seeds over your coated chicken as a finishing touch—a small yet significant detail that adds both flavor and visual appeal. These little seeds not only provide a delightful crunch but also contribute an additional layer of nutty flavor that ties everything together beautifully.
Now, here’s where I urge you not to overlook presentation; after all, we eat first with our eyes! Serve immediately while still hot, perhaps over a bed of fluffy rice or alongside some vibrant steamed vegetables for balance. As you plate this dish, take a moment to appreciate everything you’ve created—from those humble chicken thighs at the start to this vibrant dish now ready for devouring. I promise you, this Easy Sesame Chicken Recipe will become one of those cherished meals you’ll return to again and again, evoking memories of laughter-filled dinners shared with loved ones.
As I wrap up this delicious journey through cooking today, I hope you’re feeling inspired—and maybe even hungry—to try making this yourself! Each step has been crafted with care and thoughtfulness because cooking should always be an adventure filled with joy and satisfaction. So go ahead—gather your ingredients and create something magical tonight!
Storage and Enjoyment Tips for Your Easy Sesame Chicken Recipe
Now that your kitchen is filled with the intoxicating aroma of your freshly made Easy Sesame Chicken, it’s time to dig in and enjoy this culinary masterpiece! But what happens if you have leftovers? Well, I promise you; this dish tastes just as delightful the next day, making it a perfect candidate for meal prep or a quick lunch. So let’s chat about how to store those leftovers so you can savor every last bite!
Storing Leftover Easy Sesame Chicken Recipe
When it comes to storing your Easy Sesame Chicken, you’ll want to choose an airtight container—this is crucial for keeping that crispy texture intact. Once cooled to room temperature, transfer the chicken into the container and pop it in the fridge where it will stay fresh for up to three days. If you’re worried about maintaining that satisfying crunch from frying, consider placing a paper towel inside the container; it helps absorb moisture and keeps things crispy—trust me on this one! The flavors actually deepen over time, creating an even more profound symphony of taste when you reheat it. To serve, simply warm it up in a skillet over medium heat until heated through, adding a splash of sesame oil for an extra boost of flavor.
Freezing Easy Sesame Chicken for Later
If you find yourself with more Easy Sesame Chicken than you can eat in one sitting—which is often the case because it’s just that delicious—you can freeze it! To do this properly, allow your chicken to cool completely before placing it in a freezer-safe bag or container, squeezing out as much air as possible before sealing. This will keep your dish tasting fresh for up to three months! When you’re ready to indulge again, simply transfer the frozen chicken to the fridge overnight to thaw before reheating gently on the stove. This convenience factor is absolutely paramount for busy weeknights or last-minute dinner gatherings. Imagine pulling out a homemade meal from your freezer that tastes like you just made it—that’s what I call winning!
Dinner
Easy Sesame Chicken Recipe
- Total Time: 30 minutes
- Yield: Serves four
Description
Skip takeout and savor the delightful flavors of homemade Easy Sesame Chicken! This dish combines tender chicken pieces with a crispy coating, all enveloped in a luscious sweet and savory sesame sauce. In under 30 minutes, you can create a meal that rivals your favorite Asian restaurant, bringing warmth and joy to your dining table. Perfect for weeknight dinners or special occasions, this recipe is a guaranteed crowd-pleaser. With every bite, you’ll experience the perfect balance of textures and tastes that will transport you back to cherished family meals.
Ingredients
- 1/4 cup soy sauce
- 1/4 cup rice vinegar
- 1/2 cup brown sugar
- 1 tablespoon corn starch
- 1/3 cup water
- 2 teaspoons sesame oil (plus more for finishing)
- 1/2 tablespoon sesame seeds
- 1 lb boneless, skinless chicken thighs (cut into chunks)
- 1/2 cup cornstarch
- 1/2 cup flour
- 2 egg whites
- 1/2 cup cold seltzer water
- Vegetable oil (for frying)
- 1 tablespoon minced garlic
- 1/4 teaspoon crushed red pepper
Instructions
- In a medium bowl, whisk together soy sauce, rice vinegar, brown sugar, corn starch mixed with water, and two teaspoons of sesame oil until smooth.
- In another large bowl, mix cornstarch and flour. Gradually add egg whites and seltzer water, stirring gently until just combined.
- Heat vegetable oil in a deep pot to 350°F. Coat chicken pieces in the batter and fry in batches for about 4-5 minutes until golden brown. Drain on paper towels.
- In a large skillet, heat remaining sesame oil over medium heat. Sauté garlic and crushed red pepper for about 30 seconds until fragrant.
- Pour the prepared sauce into the skillet; simmer for 2-3 minutes until thickened. Add fried chicken pieces and toss to coat evenly.
- Garnish with sesame seeds before serving hot over rice or steamed vegetables.
- Prep Time: 15 minutes
- Cook Time: 15 minutes
- Category: Dinner
- Method: Frying
- Cuisine: Asian
Nutrition
- Serving Size: Approximately 200g
- Calories: 330
- Sugar: 16g
- Sodium: 700mg
- Fat: 12g
- Saturated Fat: 2g
- Unsaturated Fat: 8g
- Trans Fat: 0g
- Carbohydrates: 37g
- Fiber: 0g
- Protein: 18g
- Cholesterol: 50mg
Leave a Comment