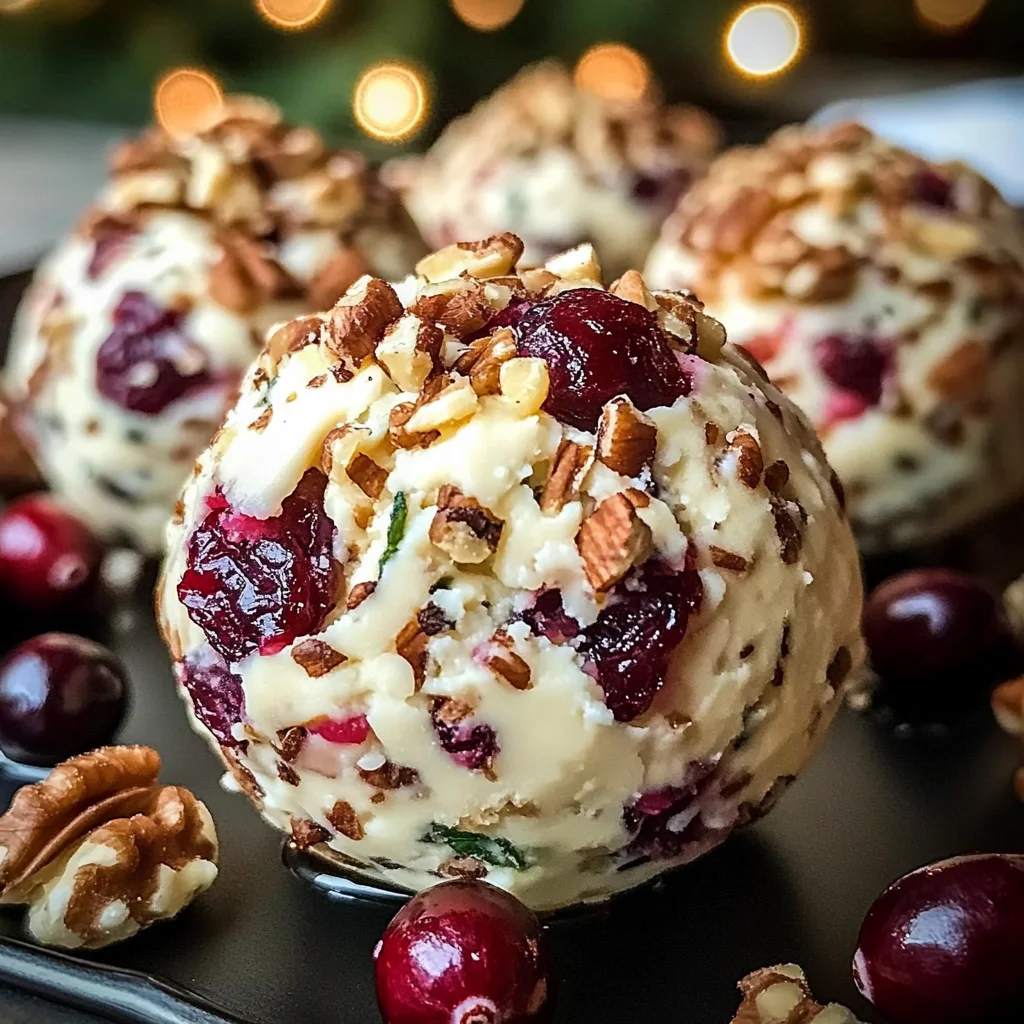
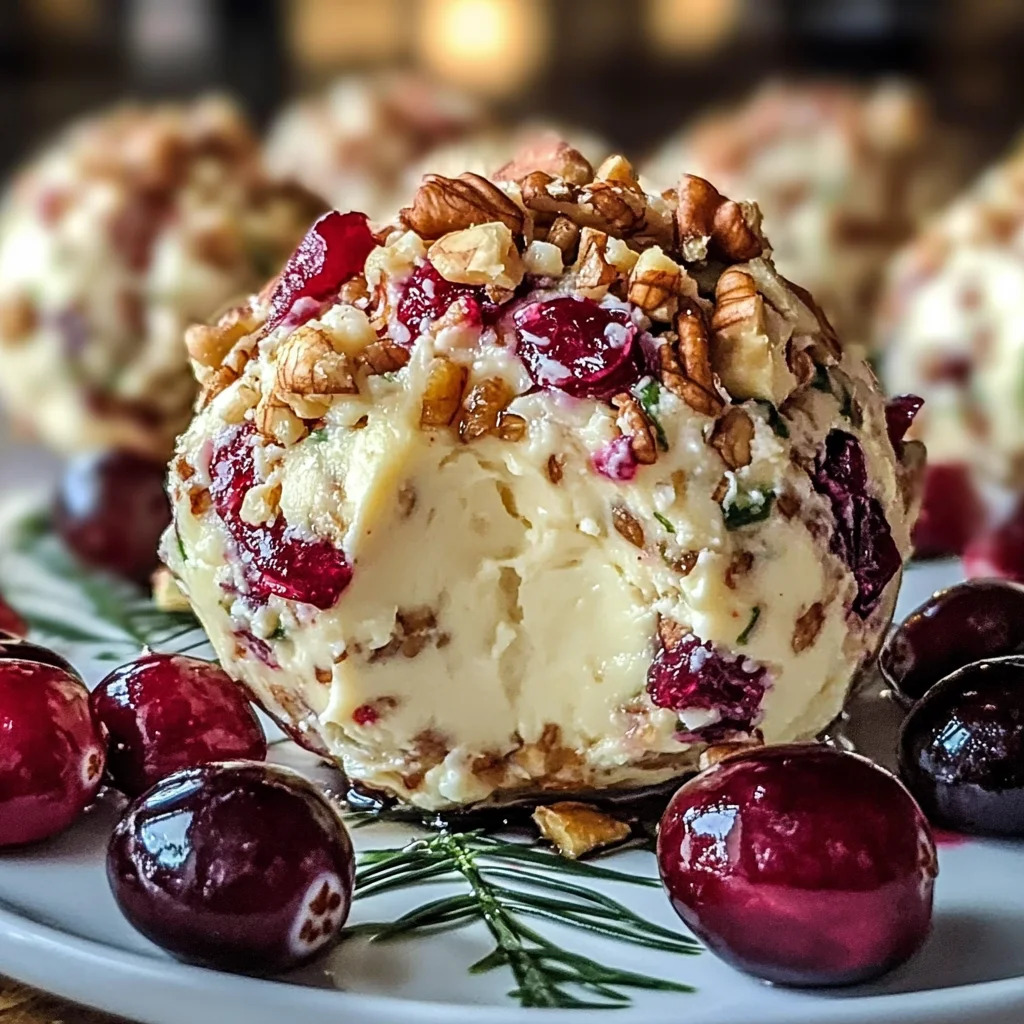
There’s something deeply enchanting about food that transcends mere sustenance; it’s an experience, a celebration, a moment of connection with those we love. The very act of cooking can evoke memories, stir emotions, and create new traditions. When I think about my beloved Cranberry Walnut Cheese Balls, it strikes me how this delightful little dish brings together the vibrant tartness of cranberries with the earthy crunch of walnuts—all enveloped in a rich, creamy cheese blend that is simply irresistible. Each bite is like tasting a sweet hug on a chilly day, warming the heart and igniting joy. It’s not just about what you eat; it’s about sharing these moments with friends and family, creating bonds over flavors that linger long after the last crumb has disappeared.
I’ve always been captivated by recipes that go beyond the ordinary, bridging the gap between cherished family traditions and modern culinary flair. These Cranberry Walnut Cheese Balls are perfect for any occasion—be it a festive gathering or a cozy evening at home. They shine on holiday tables yet are simple enough to whip up for an impromptu get-together. The contrast of sweet and savory in these cheese balls is absolutely paramount; the sharp white cheddar adds depth while the honey brings a whisper of sweetness that dances gracefully with the tart cranberries. Trust me on this: once you serve these delightful bites, they will become a staple in your recipe repertoire.
Cranberry Walnut Cheese Balls: A Delightful Symphony of Flavors
Let’s dive into this delightful recipe together! Preparing these Cranberry Walnut Cheese Balls is not only easy but also an immensely satisfying process that fills your kitchen with an intoxicating aroma—a promise of deliciousness to come.
Ingredients:
As we embark on this culinary journey, it’s essential to gather our ingredients with love and care. Every component plays a vital role in crafting these exquisite cheese balls, so let’s explore!
- 8 oz cream cheese, softened: This ingredient serves as the luscious foundation for our cheese balls. Its creamy texture allows for easy mixing and gives each bite a velvety mouthfeel that is utterly divine. When selecting cream cheese, look for high-quality brands without additives; trust me, you’ll taste the difference! Make sure to let it soften at room temperature—this step is crucial because cold cream cheese can lead to lumpy cheese balls instead of the smooth blend we desire.
- 1 cup shredded sharp white cheddar: This cheese elevates our dish from ordinary to extraordinary! Its robust flavor provides a perfect contrast to the sweetness of cranberries and honey. I always recommend using freshly shredded cheddar rather than pre-packaged options because they often contain anti-caking agents that can alter texture and taste. The sharpness of this cheddar creates a beautiful harmony with the other flavors, making each bite profoundly satisfying.
- 1 tsp honey: Honey adds just the right touch of sweet goodness to balance out the tangy notes from the cranberries and rich creaminess from the cheeses. Opt for raw or local honey if possible; its complex flavors will enhance your cheese balls significantly! This isn’t just an afterthought—it’s essential for achieving that perfect sweet-salty balance that makes these bites so special.
- 1/4 tsp salt: Ah, salt—the unsung hero in many recipes! Even though it seems like such a small amount, it plays an absolutely vital role in enhancing all other flavors present in our Cranberry Walnut Cheese Balls. It helps draw out sweetness from the honey and intensifies the sharpness of our cheddar while providing overall depth to our dish. Don’t skip this step; every pinch counts in creating a symphony of flavors!
Equipment You’ll Need:
Now that we have our ingredients ready, let’s talk tools! Having the right equipment makes this cooking experience smoother and more enjoyable—think of them as your trusty partners in creating something wonderful.
- Mixing bowl: A sturdy mixing bowl is essential for combining our ingredients thoroughly without fear of spillage. Look for one that’s large enough to allow space for mixing without making too much mess—trust me; you’ll appreciate having some elbow room here!
- Hand mixer or stand mixer: While it might be tempting to mix everything by hand, using an electric mixer will give you that perfectly creamy texture faster—no lumps allowed! If you don’t have one on hand, whisking vigorously with all your might will work too; just know it may take some extra time.
- Rubber spatula: This versatile tool is key when it comes to folding ingredients together gently or scraping down the sides of your mixing bowl to ensure everything gets well incorporated. A good spatula ensures no bit goes unturned—literally!
- Plastic wrap or parchment paper: We’ll need this for chilling our formed cheese balls later on. Properly wrapping them helps maintain their shape while cooling down—and believe me when I say chilled cheese balls are simply divine!
Preparing the Cranberry Walnut Cheese Balls
Step 1: Uniting Creamy Goodness
First things first! Begin by placing your softened cream cheese into your mixing bowl. Using either your hand mixer or stand mixer fitted with beaters (or even good old-fashioned elbow grease), mix until it’s luxuriously smooth—this process should take about 2 minutes at medium speed. You want it to be airy yet still dense enough to hold its shape once combined with other ingredients. Why spend time getting this right? Because achieving that silky texture now means every bite later will melt beautifully in your mouth.
Step 2: Adding Sharp Cheddar
Once your cream cheese has reached its desired consistency, it’s time to introduce our star player—sharp white cheddar! Gradually add it into your fluffy cream mixture while continuing to mix on low speed until well-blended (about another minute). The moment those two flavors embrace one another is where magic happens; you’ll notice how they create an utterly intoxicating aroma wafting through your kitchen! This step ensures even distribution throughout each ball so every bite bursts with flavor.
Step 3: Sweetening Things Up
Next up is adding honey along with salt into our concoction! Pour them both into your mixing bowl and continue blending gently until combined (another minute should do). You’ll find yourself falling deeper under its spell as those sweet notes meld seamlessly into creamy goodness—a true revelation awaits you here! Remember not to rush this step; allowing those flavors time together sets up layers upon layers of deliciousness waiting beneath each morsel.
Step 4: The Grand Finale—Cranberries & Walnuts!
Finally comes one of my favorite parts—folding in those heavenly dried cranberries and crunchy walnuts! Use your rubber spatula now as we want minimal air incorporation during this stage—just enough gentle folding action will do wonders here without compromising texture integrity! As you add them in slowly (about half at a time), envision how they’ll contribute delightful bursts when biting down into these little jewels later on… oh my goodness! Once everything looks evenly dispersed throughout our lovely mixture (takes about 2 minutes), simply cover tightly before refrigerating for at least an hour—a crucial step as chilling helps solidify those flavors while making shaping easier!
Stay tuned for more steps where I’ll guide you through forming these delicious balls and presenting them beautifully. Trust me—it’ll be worth every moment spent together on this flavorful adventure!
Step 5: Mixing the Ingredients for Harmony
Now that we have our star players ready, it’s time to unite them into a delightful blend. In a large mixing bowl, combine the softened cream cheese, shredded sharp white cheddar, honey, and salt. I want you to feel the excitement building as you gather these ingredients; each one plays a crucial role in creating those Cranberry Walnut Cheese Balls that will leave your guests craving more. Start by using a spatula or a sturdy wooden spoon to mix everything together until it looks like a creamy canvas waiting to be transformed. You’ll want to combine them thoroughly so that every bite bursts with flavor—this is where the magic happens.
As you stir, take your time; don’t rush this step! Mixing isn’t just about blending ingredients; it’s about allowing flavors to meld and develop a cohesive taste profile. The cream cheese acts as the rich base, while the sharp white cheddar introduces an utterly intoxicating depth of flavor. Honey contributes a touch of sweetness that perfectly balances the saltiness of the cheese and enhances the tartness of the cranberries we’ll add later. This creamy mixture should be smooth and slightly fluffy; if it feels too stiff, it might need just a smidgen more honey or even a splash of water to achieve that ideal texture. Trust me on this—getting the consistency right will ensure each cheese ball is rich and satisfying.
Step 6: Incorporating Cranberries and Walnuts
Now comes my favorite part! It’s time to fold in those delicious cranberries and walnuts, which will add both texture and bursts of flavor to our cheese balls. Measure out about half a cup of dried cranberries and roughly chop them into smaller pieces if they seem too large; this allows for easier incorporation into the creamy mixture without overwhelming any single bite. As you sprinkle them into your bowl, take a moment to inhale their sweet aroma—there’s something so nostalgic about dried cranberries that brings back memories of holiday gatherings and cozy evenings spent with loved ones.
Next up are the walnuts! About half a cup of these beauties will do just fine, but before adding them directly into our mixture, let’s give them a quick toast in a dry skillet over medium heat for about 3-4 minutes until they’re fragrant and golden brown. This step is absolutely paramount because toasted nuts not only enhance their natural oils but also amplify their flavor tenfold! Keep an eye on them as they can go from perfectly toasted to burnt in mere seconds. Once they’ve cooled slightly, chop them coarsely before folding them into your creamy cheese mixture with gentle care. You want these delightful morsels distributed evenly throughout so every bite has that perfect crunch alongside the creaminess.
Step 7: Shaping Your Cheese Balls
With your creamy mixture ready and flavor-packed with cranberries and walnuts, it’s time for an exciting transformation: shaping those delightful bites! Using clean hands or a small cookie scoop (about one tablespoon in size), grab portions of your mixture and roll them gently between your palms until they form smooth balls. This is such an enjoyable step; imagine how satisfying it feels to create these little treasures! As you work through the mixture, you might find some sticky spots—don’t worry! A light dusting of water on your palms can help prevent sticking while ensuring each ball maintains its beautiful shape.
As you shape each cheese ball, take this moment to think about how these will be received by friends or family during gatherings or celebrations. Each ball should be roughly uniform in size—not only does this make for an aesthetically pleasing presentation when served on a platter, but it also ensures even distribution of flavor across all bites. Once shaped, lay each ball on a parchment-lined baking sheet or plate—it keeps things tidy while allowing for easy transfer later on.
Step 8: Chilling Time – The Key to Perfection
Now comes perhaps one of the most critical steps—the chilling process! Cover your tray or plate with plastic wrap or simply pop it in the fridge uncovered if you’re feeling adventurous—either way works—but I highly recommend at least 2 hours of chill time for optimal results. Why chill? Well, when you refrigerate your cheese balls, it allows all those incredible flavors to meld together more harmoniously while firming up the mixture so they hold their shape beautifully when served.
Think about this step as letting your creation rest after all that hard work—you wouldn’t rush through enjoying something extraordinary like this! If you’re short on time, aim for at least 30 minutes in the fridge; however, if you can manage longer (upwards of several hours), you’ll truly unlock an unparalleled depth of flavor that’s profoundly satisfying. The cooling process not only firms up our cheese balls but also enhances their overall texture—the cold temperature helps bring out every nuance in taste while providing that signature creaminess we’re all after.
Next Major Phase – Coating Your Cheese Balls
Step 9: The Finishing Touch – A Flavorful Coat
Once those delightful cheese balls have chilled sufficiently (and trust me when I say this can feel like an eternity!), it’s time for their grand finale—coating them with crushed nuts for added texture and visual appeal! In another shallow dish, spread out some finely chopped walnuts or even crushed crackers if you’re looking for something different; these will provide an extra layer of crunch that contrasts beautifully against the soft interior of our cheese balls.
Take each chilled ball from the fridge and roll it gently in your chosen coating until fully covered—this final touch is essential not just for aesthetics but also adds another dimension of flavor that pairs wonderfully with the creamy center inside. As you work through each one, think about how inviting they’ll look when served at parties or gatherings; people won’t be able to resist trying just one more! Once coated well (and let’s face it—you might need another taste test along the way), return them briefly back to their cooling spot while preparing for serving.
And there you have it—your very own Cranberry Walnut Cheese Balls finished off with love and care! These little gems are perfect as appetizers at any festive gathering or simply enjoyed during cozy nights at home paired with crackers or sliced baguettes drizzled lightly with honey. Serve chilled alongside fresh fruit or veggies for color contrast—it’s sure to be an unforgettable experience filled with laughter over shared bites and stories exchanged around tables laden with good food!
Storage and Enjoyment Tips for Your Cranberry Walnut Cheese Balls
Now that your Cranberry Walnut Cheese Balls are ready to dazzle your taste buds, let’s talk about how to savor them at their best! These delightful bites are perfect for parties, casual gatherings, or simply indulging during a cozy night in. But if you find yourself with leftovers (though I doubt it!), don’t worry—I have some excellent tips on how to keep them fresh and flavorful.
Storing Leftover Cranberry Walnut Cheese Balls
To ensure your Cranberry Walnut Cheese Balls remain as scrumptious as the day they were made, store them in an airtight container, preferably one with a tight-fitting lid to lock in all that creamy goodness. You can keep them in the refrigerator for up to five days, but trust me—once you’ve tasted them, you’ll want to share these little gems with everyone! If you notice that they start to dry out a bit, simply place a slice of bread in the container with them; this clever trick helps maintain moisture and keeps those cheese balls tasting freshly made. After a few days in the fridge, they still pack a wonderful flavor punch with just a hint of tanginess from the cranberries and the crunch of walnuts—it’s like a flavor party waiting to happen! When you’re ready to enjoy them again, serve them chilled straight from the fridge or let them sit at room temperature for about 30 minutes before serving for an extra creamy experience.
Freezing Cranberry Walnut Cheese Balls for Later
If you want to extend the life of your delicious creation even further, freezing is absolutely an option worth exploring! To do this properly, wrap each cheese ball tightly in plastic wrap before placing them in a freezer-safe bag or container. They’ll keep beautifully frozen for up to three months—just think about how convenient it will be to pull one out for unexpected guests or a last-minute snack craving! When you’re ready to use them from frozen, simply transfer the cheese balls to the refrigerator overnight or let them thaw on your countertop for a couple of hours before serving. The flavors meld together even more beautifully during freezing, intensifying that sweet-tart cranberry vibe paired with the nutty crunch of walnuts. I promise you; having these handy will make you feel like a culinary superhero!
CATEGORY_NAME

Cranberry Walnut Cheese Balls
- Total Time: 20 minutes
- Yield: Approximately 12 servings 1x
Description
Cranberry Walnut Cheese Balls are a delightful treat that perfectly balances creamy, tangy, and nutty flavors. These easy-to-make bites are ideal for festive gatherings or cozy evenings at home. The vibrant tartness of dried cranberries meets the earthy crunch of walnuts, all enveloped in a rich blend of cream cheese and sharp white cheddar. Each bite is like a warm hug on a chilly day, making them the perfect addition to your appetizer table. With just a handful of ingredients and straightforward preparation steps, you can create these irresistible cheese balls that will leave your guests asking for more.
Ingredients
- 8 oz cream cheese, softened
- 1 cup shredded sharp white cheddar
- 1 tsp honey
- 1/4 tsp salt
- 1/2 cup dried cranberries, chopped
- 1/2 cup walnuts, toasted and chopped
Instructions
- In a mixing bowl, combine softened cream cheese, shredded cheddar, honey, and salt. Mix until smooth.
- Gently fold in chopped cranberries and toasted walnuts until evenly distributed.
- Shape the mixture into small balls using clean hands or a cookie scoop.
- Chill the cheese balls in the refrigerator for at least 2 hours to allow flavors to meld and firm up.
- Optional: Roll chilled cheese balls in additional crushed walnuts for extra texture before serving.
- Prep Time: 20 minutes
- Cook Time: 0 minutes
- Category: Appetizer
- Method: Chilling
- Cuisine: American
Nutrition
- Serving Size: 1 cheese ball (30g)
- Calories: 100
- Sugar: 1g
- Sodium: 120mg
- Fat: 9g
- Saturated Fat: 3g
- Unsaturated Fat: 6g
- Trans Fat: 0g
- Carbohydrates: 5g
- Fiber: 0g
- Protein: 3g
- Cholesterol: 15mg


Leave a Comment