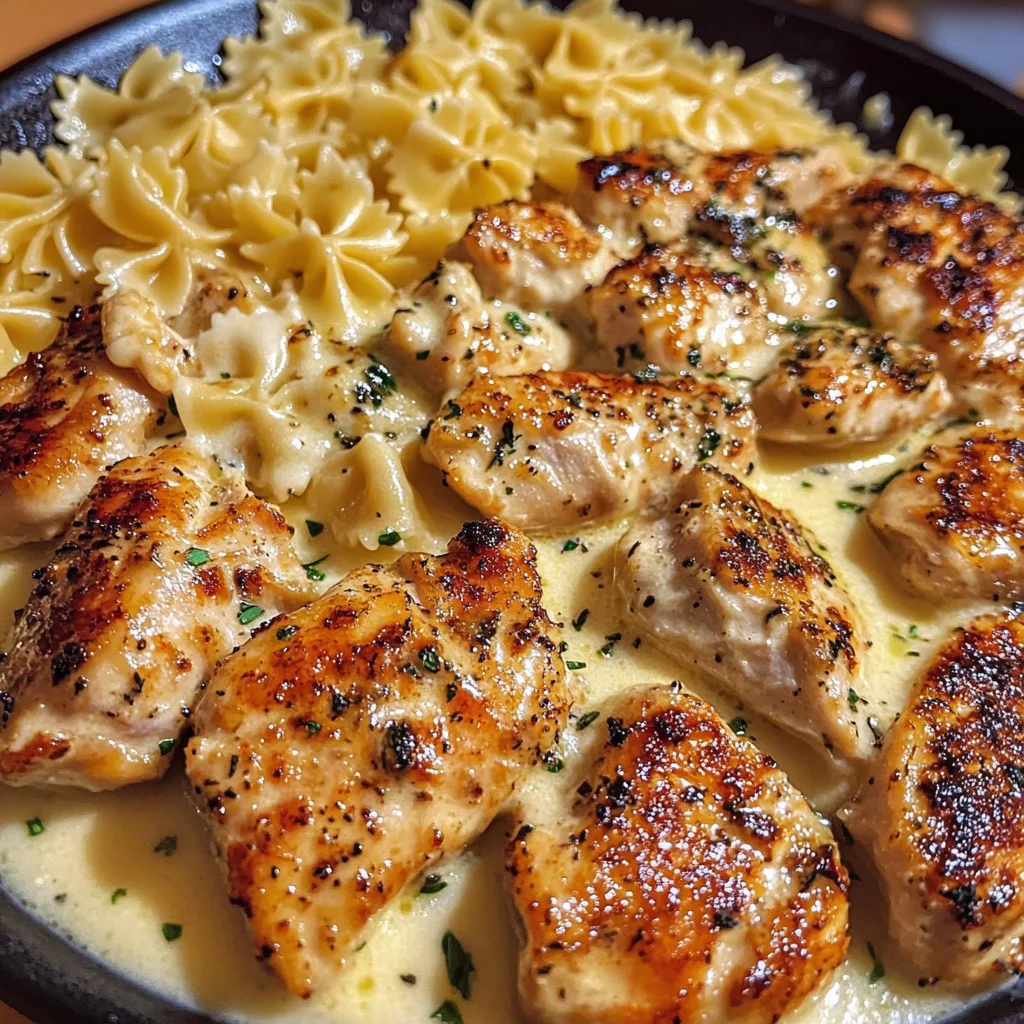
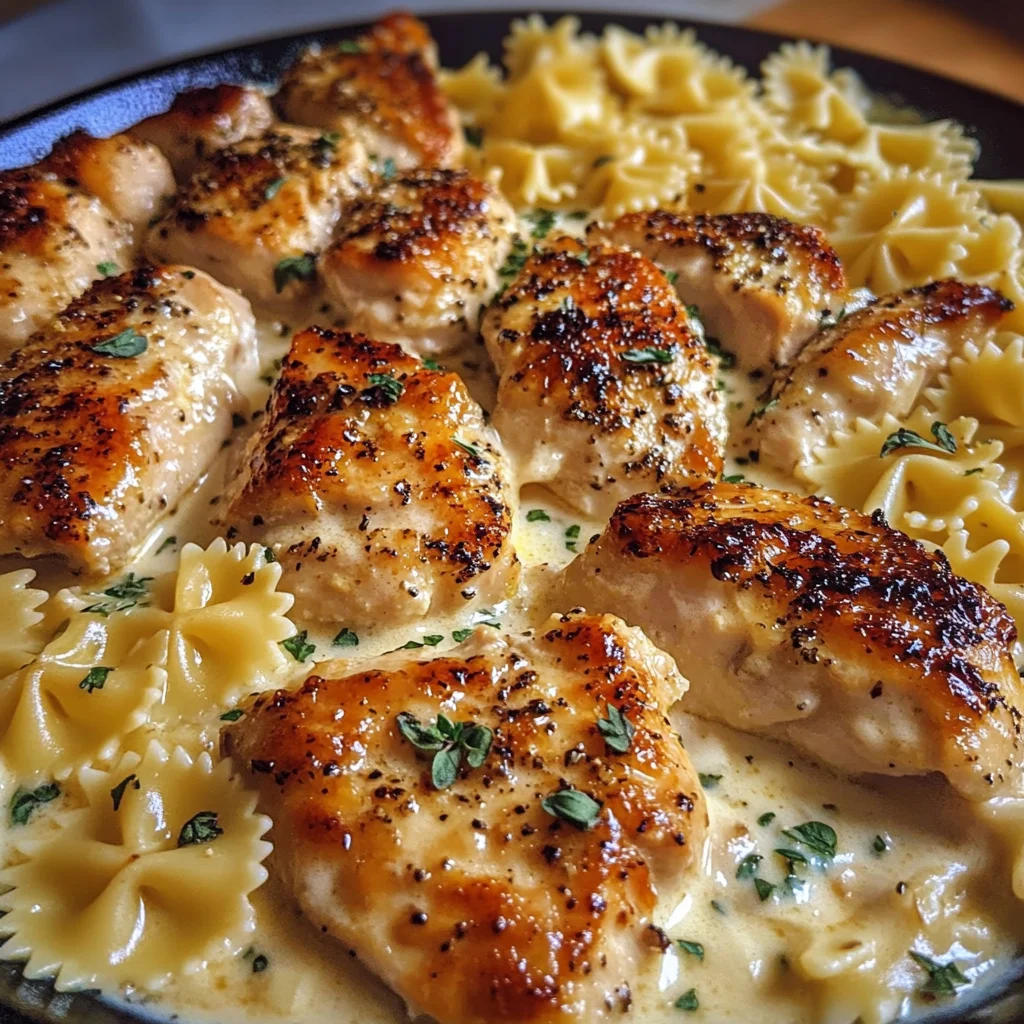
There’s something undeniably magical about the aroma of garlic and butter wafting through your kitchen, isn’t there? It’s like a warm embrace, an invitation to gather around the table, and a promise of comfort and satisfaction. Today, I want to share with you my beloved recipe for Garlic Butter Chicken with Bowtie Pasta, a dish that transcends mere sustenance. It’s an experience that brings together tender chicken pieces coated in a luscious garlic butter sauce, enveloped by perfectly cooked bowtie pasta. Each bite is a symphony of flavors that dances on your palate, creating memories that linger long after the last morsel is gone. Trust me when I say that this recipe is not just about feeding your body; it’s about nourishing your spirit.
I’ve always been captivated by meals that bring people together, and this dish is no exception. It’s perfect for cozy weeknight dinners or special gatherings with friends and family. The creamy texture of the sauce pairs beautifully with the al dente pasta, while the chicken adds heartiness to the mix. And let’s face it—who can resist the allure of melted cheese cascading over everything? This Garlic Butter Chicken with Bowtie Pasta invites you to slow down, savor each bite, and enjoy the company around you. So grab your apron and let’s embark on this culinary journey together—I promise you’re in for something truly extraordinary!
Garlic Butter Chicken with Bowtie Pasta: A Creamy Delight That Warms Your Heart
This delectable dish is as comforting as it sounds, combining succulent chicken with rich garlic butter sauce and pasta that’s just waiting to soak up all those flavors. The beauty of this recipe lies in its balance of simplicity and indulgence; it requires minimal effort while promising maximum satisfaction. Plus, it’s adaptable enough to cater to your preferences—whether you’re looking to add some veggies or spice things up with different seasonings, this dish welcomes creativity.
Ingredients:
As we embark on this delicious adventure, let’s take a moment to appreciate our ingredients—the building blocks of our culinary masterpiece. Each one plays a vital role in crafting the harmony of flavors we’re aiming for.
-
1 pound boneless, skinless chicken breasts, cut into 1-inch pieces. This is absolutely paramount for ensuring even cooking and tenderness throughout your dish. Choosing high-quality chicken breasts will make a noticeable difference; look for organic options if possible, as they tend to be juicier and more flavorful. The cut size is important too—smaller pieces cook more quickly and allow for better absorption of that delicious garlic butter sauce.
-
1/2 teaspoon Italian seasoning. This blend adds depth and complexity to our dish without overpowering it. A good Italian seasoning typically includes herbs like oregano, basil, and thyme—all of which complement garlic beautifully! If you don’t have any on hand or want to customize your flavor profile further, consider using fresh herbs like rosemary or parsley instead.
-
8 ounces Velveeta cheese, cubed. Now here’s where things get really exciting! Velveeta brings an utterly intoxicating creaminess that elevates our sauce into something almost dreamy—it melts beautifully without separating or becoming greasy. When selecting Velveeta, make sure it’s fresh; avoid any cubed varieties that look dull or past their prime.
-
4 ounces cream cheese, softened. This ingredient adds richness and smoothness to our sauce while balancing out the bold flavors of garlic and butter perfectly. Soften it at room temperature before mixing; if you forget this step (we all do sometimes!), a quick zap in the microwave will help—just 10 seconds should do! Cream cheese also helps stabilize our sauce so it doesn’t become too runny.
-
1/2 cup chicken broth. The essence of any great dish often lies within its base—this broth enriches our sauce by adding layers of savory goodness without overwhelming other flavors at play here. Opt for low-sodium broth so you can control salt levels better; homemade is fantastic if you happen to have some lying around!
-
1 cup shredded mozzarella cheese. This melty marvel creates strings of gooey goodness throughout every bite! Freshly shredded mozzarella works wonders here since pre-shredded versions often contain anti-caking agents that can affect melting quality—you want pure cheesy perfection!
-
1/2 cup grated Parmesan cheese. Ahh… Parmesan! Its nutty flavor adds depth while enhancing overall creaminess in combination with mozzarella! Look for high-quality Parmigiano-Reggiano if possible—its robust taste will shine through even amidst all those other delightful components we’ve gathered!
Now that we’ve assembled our ingredients full of promise and potential let’s dive into how we’ll transform them into something truly unforgettable.
Equipment You’ll Need:
Having the right tools makes all the difference when preparing a meal; think of them as supportive partners in our culinary dance together! Here are some essential items that will help ensure success:
-
Large skillet: A spacious cooking surface allows us ample room for browning chicken evenly while also providing enough space for stirring in those luscious sauces without risk of splatter.
-
Wooden spoon: This trusty utensil is perfect for stirring as it won’t scratch non-stick surfaces—a vital consideration when working with delicate cheeses!
-
Measuring cups & spoons: Precision matters when cooking; having these handy ensures accurate measurements so flavors come together just right each time.
-
Cutting board & knife: A sturdy cutting board provides stability during food prep while facilitating easy chopping or slicing tasks—a sharp knife always makes life easier too!
As we gather these tools together alongside our beautiful ingredients let’s move forward into preparing this delightful Garlic Butter Chicken with Bowtie Pasta!
Step 1: Searing the Chicken
Start by heating up your large skillet over medium-high heat until sizzling hot—this step sets us off on the right foot toward achieving beautifully browned chicken pieces! Add a splash of olive oil (about a tablespoon) once heated—it should shimmer gently but not smoke aggressively; if it does lower heat slightly as overheating oil can lead to burnt food (yikes!). Carefully place your chicken pieces into the skillet in one layer; avoid overcrowding them which inhibits browning—it’s better to work in batches if necessary! After about 5–7 minutes on each side (depending on thickness), they should develop a nice golden crust which indicates they’re nearly done cooking through but still juicy inside—check with an instant-read thermometer if uncertain; ideally aim for 165°F at center.
Step 2: Infusing Flavor
Once your chicken has reached perfect doneness remove it from the pan onto a plate temporarily; now let’s crank up those flavorful layers! In the same skillet where magic just happened (don’t wash yet!), reduce heat slightly before adding minced garlic—around four cloves worked finely—is key here as we want them fragrant but not burned! Stir constantly until softening occurs (usually just under one minute) releasing intoxicating aromas filling every corner nearby—it feels like home already doesn’t it? Next comes butter—two tablespoons melted directly atop sizzling garlic brings everything together harmoniously creating that divine essence we crave so much! Once combined well continue stirring briefly before returning seared chicken back into pan along with any juices collected earlier—a glorious reunion awaits!
Step 3: Building Our Sauce
With everything back in place let’s elevate this dish further by incorporating cheeses next! Start by lowering heat again gently making sure nothing bubbles too aggressively—we need creamy consistency rather than separation happening here folks! Gently fold cubed Velveeta followed closely behind by softened cream cheese gradually—both melt effortlessly creating luscious texture alongside seasoned chicken already present within pan—this process known as emulsification ensures smoothness throughout ensuring no clumps remain visible later down line either! Continue stirring occasionally until fully melted then pour half cup broth slowly allowing mixture consistency adjust slightly thicker whilst blending evenly throughout entire pot—we’re getting close now friends!
Step 4: Finishing Touches
Finally comes time add shredded mozzarella along grated Parmesan finishing off creamy ensemble perfectly joining forces amongst all elements tightly woven together within skillet now resembling divine creation worthy celebration ahead! As cheeses melt completely stir gently once again ensuring every inch thoroughly coated before introducing pre-cooked bowtie pasta directly into mix allowing absorbent nature permeate rest nicely without losing structure entirely—we’ve arrived sweet friends!! Toss carefully until pasta fully integrated becoming part whole alongside luscious garlicky goodness surrounding them lovingly—the sight alone will make hearts flutter believe me!
And there you have it—the essence captured within Garlic Butter Chicken with Bowtie Pasta awaits exciting adventure ahead where flavor reigns supreme whilst friendships deepen around table shared moments forever cherished…
Step 5: Searing the Chicken to Golden Perfection
Now, let’s turn our attention to the chicken. This is a crucial step in creating a truly flavorful Garlic Butter Chicken with Bowtie Pasta. Start by taking your pound of boneless, skinless chicken breasts, already cut into delightful 1-inch pieces. It’s essential to pat them dry with paper towels before seasoning; this simple act removes excess moisture that can prevent that glorious golden sear we’re after. I personally sprinkle half a teaspoon of Italian seasoning over the chicken, ensuring it is evenly coated. Why Italian seasoning? It brings a beautiful depth of flavor that complements the buttery garlic beautifully.
Now, heat a generous tablespoon of butter in a large skillet over medium-high heat. As soon as the butter begins to shimmer and dance in the pan, it’s time to add your seasoned chicken pieces. Be careful not to overcrowd the pan; each piece should have enough space to breathe and develop that irresistible caramelization. You’ll want to sear them for about 4-5 minutes on one side without moving them—trust me on this! Allowing those pieces to sit undisturbed will create that delightful crust that captures all the juices inside. After the first side is beautifully golden, flip them over and cook for another 3-4 minutes until they’re cooked through and reach an internal temperature of 165°F (75°C). The aroma wafting through your kitchen at this point will be utterly intoxicating!
Step 6: Creating the Rich Garlic Butter Sauce
Once your chicken is perfectly seared and removed from the pan, it’s time to elevate this dish with our rich garlic butter sauce—a true symphony of flavors! In that same skillet, without cleaning it (we want all those flavorful bits left behind), melt another generous tablespoon of butter over medium heat. As it begins to melt, introduce minced garlic—around four cloves should do wonderfully here. Allowing it to sizzle gently for about 30 seconds is key; you want it fragrant but not burned because burnt garlic can take your sauce from heavenly to bitter in an instant.
Next, pour in half a cup of chicken broth and stir while scraping up those delicious brown bits stuck to the skillet—the fond, as we chefs call it! This process adds layers of flavor that are absolutely non-negotiable for achieving depth in your sauce. Let this mixture simmer for about 2-3 minutes until it reduces slightly, intensifying its flavors and creating a smooth base for when we introduce our cheeses. Trust me when I say this step transforms your dish into something truly extraordinary!
Step 7: Incorporating Velveeta and Cream Cheese
Now comes perhaps my favorite part—the cheesy goodness! Lower your heat and add in the cubed Velveeta cheese along with four ounces of softened cream cheese directly into that luscious garlic butter sauce you’ve just created. Stir gently but persistently as these cheeses begin to melt into one another, creating what I like to call “liquid gold.” This slow melting process takes about 3-5 minutes; keep stirring until everything is fully incorporated and silky smooth.
This step is absolutely paramount because both types of cheese contribute their unique textures and flavors; Velveeta provides creaminess while cream cheese adds a tangy richness that balances beautifully with our garlic base. You’ll notice how thick and decadently rich the sauce becomes—it’s simply intoxicating! If at any point you find it’s getting too thick for your liking, feel free to add a splash more of chicken broth until you reach that perfect saucy consistency that clings lovingly to your pasta.
Step 8: Combining Pasta & Finishing Touches
While all those cheesy components are melding together beautifully, let’s not forget about our bowtie pasta! At this point, ensure you have already cooked eight ounces of bowtie pasta according to package instructions until al dente—this means just firm enough that it has a slight bite when you taste it. Once drained (but don’t rinse—those starches help the sauce cling!), add it directly into our creamy garlic butter sauce right there in the skillet.
Gently fold everything together using tongs or a spatula; make sure every single piece of pasta is enveloped in that glorious sauce! The colors blend beautifully here—golden cheese against light brown pasta creates such visual appeal! Don’t rush this step; take your time allowing each piece to soak up all those intoxicating flavors while also getting warm again—about 2-3 minutes should do nicely. You may find yourself enchanted by how rich and vibrant everything looks!
Next Major Phase: Serving Up Your Garlic Butter Chicken with Bowtie Pasta
As we come closer to savoring this magnificent dish, let’s focus on how best to serve it so everyone can appreciate its beauty—and trust me, they’ll be impressed!
Step 9: Garnishing for That Extra Wow Factor
Before you dive into serving, allow me this indulgent moment: sprinkle freshly shredded mozzarella cheese generously over each plate just before serving! The magic happens as you place each portion under a broiler set on high for just about 2-3 minutes—watch closely here! The goal is bubbly perfection; once you see beautiful golden spots appear on top like tiny suns shining down on our dish, remove it immediately.
This final touch elevates everything significantly; melted mozzarella adds not only an enticing layer but an irresistible stretch when served that makes every bite feel special—like being wrapped up in a warm embrace from an old friend at dinner time. Finish off with a light dusting of grated Parmesan cheese combined with freshly chopped parsley or basil if you’re feeling adventurous! These herbs bring freshness while providing a lovely contrast against all those creamy textures—a touch so essential for balancing out richness!
So there you have it—your very own Garlic Butter Chicken with Bowtie Pasta awaits! Serve family-style or plated individually—it doesn’t matter because everyone will be gathering around as soon as they catch wind of those delectable aromas wafting through your home! Enjoy every moment as you dig into this profoundly satisfying dish together—you’ve earned it!
Storage and Enjoyment Tips for Your Garlic Butter Chicken with Bowtie Pasta
Now that your kitchen is filled with the intoxicating aromas of garlic and butter, it’s time to sit back and enjoy your culinary masterpiece! I can already hear the delighted oohs and aahs as you serve up this dish, but let’s talk about how to store this delightful creation for later enjoyment. Trust me, you’ll want to savor every last bite, whether it’s during a hectic weeknight or a cozy weekend gathering.
Storing Leftover Garlic Butter Chicken with Bowtie Pasta
To ensure your Garlic Butter Chicken with Bowtie Pasta remains as delicious as the moment it left the stovetop, transfer any leftovers into an airtight container—this is absolutely paramount to retain its rich flavors. You can keep it in the refrigerator for about three to four days, which makes it ideal for meal prep or post-dinner indulgence. If you’re like me and want to maintain that creamy texture, consider placing a slice of bread inside the container; it works wonders by absorbing moisture and keeping your pasta from getting too mushy. When you reheat it—whether in the microwave or on the stovetop—add a splash of chicken broth or water to help revive those luscious garlic butter flavors. The beauty of this dish is that even after storage, it still presents an utterly satisfying experience with all its comforting notes intact.
Freezing Garlic Butter Chicken with Bowtie Pasta for Later
If you find yourself with an abundance of this delightful dish or simply want to prepare ahead for busy days, freezing is an excellent option! To freeze your Garlic Butter Chicken with Bowtie Pasta properly, allow it to cool completely before transferring it into freezer-safe containers or resealable bags—make sure to remove as much air as possible to prevent freezer burn. It will stay fresh in your freezer for up to three months, which is such a fantastic convenience when you’re in need of a quick meal without compromising on flavor. When you’re ready to enjoy it again, just thaw overnight in the fridge and reheat gently on the stove; perhaps add a touch more cheese or fresh herbs to brighten it up! I promise you, having this dish stashed away is like holding onto a little treasure that can be pulled out whenever you desire comfort food goodness.
Garlic Butter Chicken with Bowtie Pasta
- Total Time: 40 minutes
- Yield: Serves approximately 4 people 1x
Description
Discover how easy and delightful Garlic Butter Chicken with Bowtie Pasta can be! Perfect comfort food for any occasion—try it today!
Ingredients
- 1 pound boneless, skinless chicken breasts, cut into 1-inch pieces
- 1/2 teaspoon Italian seasoning
- 8 ounces Velveeta cheese, cubed
- 4 ounces cream cheese, softened
- 1/2 cup chicken broth
- 1 cup shredded mozzarella cheese
- 1/2 cup grated Parmesan cheese
- 4 cloves garlic, minced
- 8 ounces bowtie pasta
Instructions
- Heat a large skillet over medium-high heat and add a tablespoon of butter. Once melted, add the chicken seasoned with Italian seasoning. Sear until golden brown on both sides and cooked through (about 4-5 minutes per side). Remove from the skillet.
- In the same skillet, reduce heat and add another tablespoon of butter and minced garlic. Sauté until fragrant (about 30 seconds).
- Pour in the chicken broth and stir while scraping up any browned bits from the pan. Let simmer for about 2-3 minutes.
- Lower the heat and add Velveeta and cream cheese to create a creamy sauce, stirring until fully melted.
- Add shredded mozzarella and grated Parmesan to the sauce; mix well.
- Toss in cooked bowtie pasta and combine until evenly coated in sauce.
- Prep Time: 15 minutes
- Cook Time: 25 minutes
- Category: Dinner
- Method: Searing
- Cuisine: Italian
Nutrition
- Serving Size: 1 cup (approximately 250g)
- Calories: 550
- Sugar: 3g
- Sodium: 700mg
- Fat: 30g
- Saturated Fat: 17g
- Unsaturated Fat: 10g
- Trans Fat: 0g
- Carbohydrates: 46g
- Fiber: 3g
- Protein: 28g
- Cholesterol: 90mg
Leave a Comment