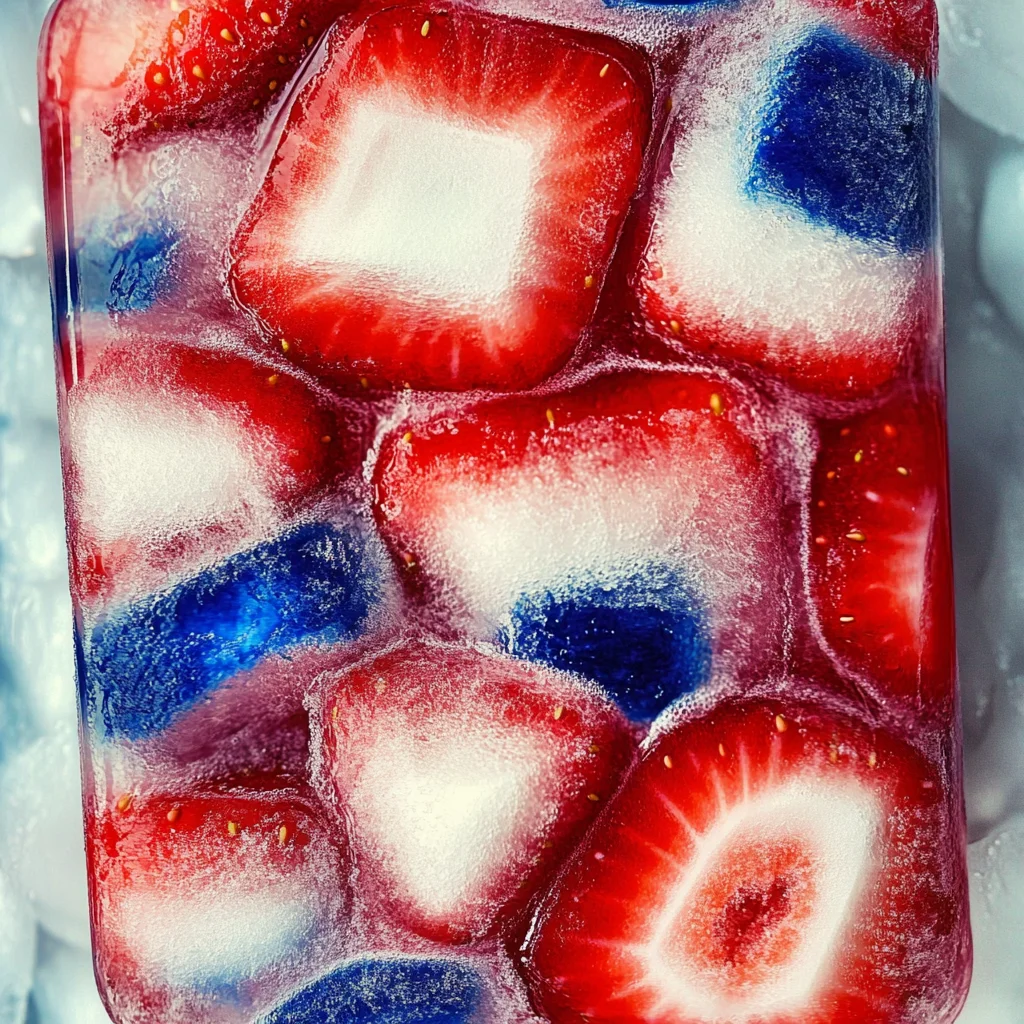
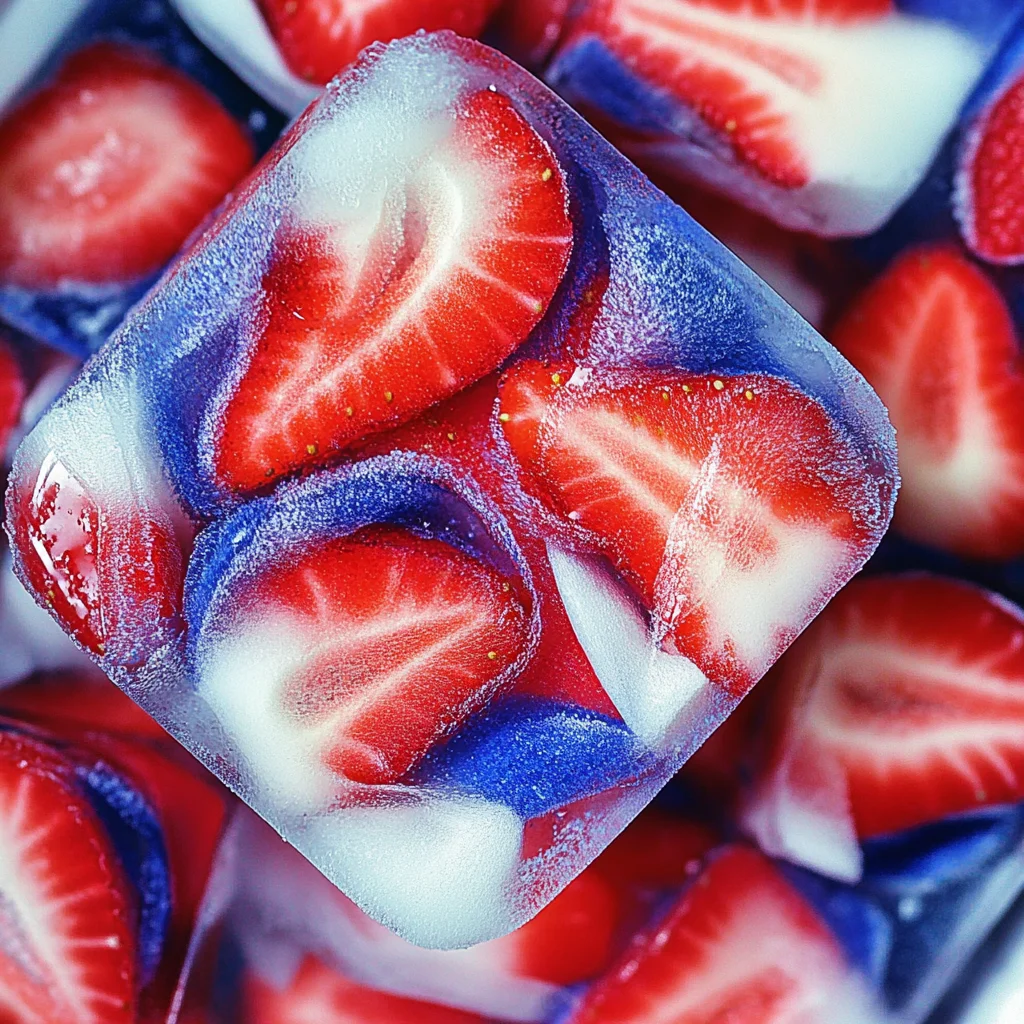
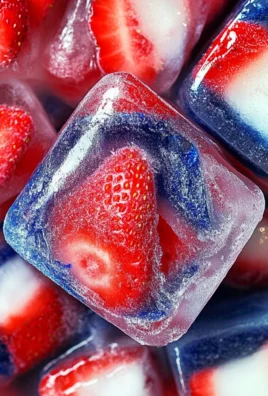
There’s something truly magical about the summer months, isn’t there? As the days stretch longer and the sun casts its golden glow, we find ourselves not just craving cool drinks but also creating beautiful moments to cherish with family and friends. And let me tell you, these Red, White, and Blue Ice Cubes are more than just a fun addition to your beverages; they embody everything that makes summer special. Imagine serving up a glass of lemonade or iced tea on a hot day, only to discover vibrant ice cubes floating like little jewels in your drink. Each cube bursts with flavor and adds a delightful chill that transforms an ordinary sip into an experience—a celebration of color and creativity that will leave everyone mesmerized.
I’ve always been captivated by how food can evoke emotions and memories. The 4th of July, for instance, is not just a day of fireworks and barbecues; it’s a chance to gather around with loved ones, enjoying each other’s company while sharing delicious treats. When I stumbled upon this idea of layering flavors and colors into ice cubes, I felt inspired! These Red, White, and Blue Ice Cubes are made with all-natural ingredients—no artificial colors or flavors here—making them not only beautiful but also wholesome. They’re perfect for patriotic celebrations or even for cheering on your favorite sports teams whose colors resonate with that red, white, and blue palette. Trust me when I say this: once you make these stunning ice cubes, you’ll want to share them with everyone!
Red, White, and Blue Ice Cubes: A Festive Splash for Your Summer Sips
Let’s dive into creating these vibrant ice cubes together! You’ll be amazed at how simple it is to combine fresh fruits and creamy coconut milk into delightful frozen treats that will wow your guests—and yourself! Each ice cube is a small work of art that not only cools down your drinks but also adds a layer of fun and festivity. Plus, they’re super easy to make—all it takes is some fresh strawberries, coconut milk, water, and blue butterfly pea flower powder. So grab your ingredients and let’s get started on this colorful culinary adventure!
Ingredients:
As we embark on this delightful journey to create our Red, White, and Blue Ice Cubes, let’s take a moment to appreciate each ingredient that plays its part in making this recipe extraordinary.
-
3 large strawberries (stems removed). Strawberries are not just visually stunning; they bring a sweet-tart flavor profile that perfectly balances the creaminess of the coconut milk. When selecting strawberries, aim for those that are plump and fragrant—this guarantees maximum flavor in your cubes! Plus, their vibrant red hue adds an enticing pop that’s sure to please the eye as much as the palate.
-
1/3 cup water. Water is often overlooked but serves as the canvas upon which our flavors will bloom. It helps meld the strawberry flavor evenly throughout the ice cube while ensuring proper freezing consistency. Using filtered water can elevate your finished product by removing any impurities that might affect taste.
-
1/3 cup + 2 Tbsp coconut milk (I use light). Coconut milk is what gives these ice cubes their luxurious creaminess without being overly heavy—perfect for those sweltering summer days! Look for brands that use minimal additives; pure coconut milk will provide the most authentic flavor. If you’re looking for lower fat content while still keeping things creamy, light coconut milk does wonders here.
-
1/3 cup + 2 Tbsp water (again). Yes! We’re using water twice here because achieving the right balance in texture is crucial for our icy creations. This second round of water ensures our blue layer comes out smooth without being too watery or too thick—so keep measuring carefully!
-
1/2 tsp blue butterfly pea flower powder. Now here’s where things get exciting! This natural powder infuses the ice cubes with a stunning deep blue color without any artificial dyes or additives—how amazing is that? Not only does it look striking against the red strawberries but it also brings subtle earthy notes reminiscent of green tea. When buying this powder, ensure it’s sourced from reputable suppliers to guarantee quality.
Equipment You’ll Need:
Now that we have our ingredients lined up like enthusiastic participants waiting for their turn in our culinary performance, it’s time to gather our trusty kitchen tools! Having the right equipment makes all the difference in creating something wonderful.
-
Ice cube tray – This essential tool will hold everything together as our colorful mixture freezes into lovely little cubes! Opt for silicone trays if you can; they make popping out those frozen jewels so much easier than traditional plastic trays.
-
Blender – A powerful blender is vital for achieving smooth blends of strawberries and coconut milk without any pesky lumps. Whether you’re using a high-speed blender or a regular one, make sure it has enough capacity to blend everything evenly.
-
Measuring cups – Precision matters when crafting recipes like this one; measuring cups help ensure every layer is just right! Having both liquid measuring cups (for liquids) and dry measuring cups (for powders) handy will streamline your process.
-
Small mixing bowl – This will come in handy when preparing your blue butterfly pea flower mixture before layering it into your ice cube tray—a separate bowl keeps things organized as you experiment with colors!
Now you’ve got all your tools ready; let’s transform these simple ingredients into something spectacular!
Step 1: Prepare Your Ingredients
First things first—let’s prep those strawberries! Begin by washing them thoroughly under cold running water then gently patting them dry with a clean towel. Removing stems may seem trivial but trust me—it allows all that luscious berry goodness to shine through in every bite! Once you’ve prepped them nicely by cutting off the tops (the leaves), chop them into quarters so they blend effortlessly when it’s time to create our beautiful strawberry layer.
Step 2: Blend Up That Strawberry Layer
Next up is blending those vibrant strawberries into liquid gold! Pop those quartered beauties into your blender along with 1/3 cup of water (remember what we said about balancing flavors?). Blend until smooth—you should aim for a consistency similar to thick juice without any chunks left behind since we want uniformity in each gorgeous cube we’ll be crafting later on! The aroma wafting from the blender will transport you immediately—it’s intoxicatingly sweet yet refreshing at once!
Step 3: Create Your Coconut Layer
Now let’s whisk together our coconut milk mixture while waiting on those fruity delights! In another mixing bowl (or even back in the blender if you’re feeling lazy), combine 1/3 cup + 2 tablespoons of light coconut milk with an additional 1/3 cup + 2 tablespoons of plain water—we need both layers to freeze evenly after all! Whisk gently until well combined; you want everything fully incorporated without introducing too much air here since too many bubbles could lead to uneven freezing later.
Step 4: Time for Color!
The moment has finally arrived—time to add some magic via our blue butterfly pea flower powder! Sprinkle half a teaspoon directly into your coconut mixture then stir gently until you see mesmerizing swirls start forming through its creamy body—it’ll look like ocean waves dancing inside each dollop! Take care not to overmix though; those delicate blues deserve undisturbed attention so they’ll maintain their vibrancy when frozen!
And there we have it—the first stages complete towards crafting these stunning Red, White, and Blue Ice Cubes! With patience being key here (trust me!), allow yourself ample time between steps as we prepare for luscious layering ahead…
Step 5: Blending the Strawberries into a Vibrant Red
Let’s start with the star of our first layer: those luscious strawberries! Take your three large strawberries, ensuring that you’ve lovingly removed the stems, and slice them in half to expose their juicy interiors. In a blender, combine these vibrant red gems with 1/3 cup of water. Now, here’s where the magic begins. Blend this mixture until it transforms into a smooth, velvety puree—think liquid ruby! This is crucial because we want every drop to be bursting with flavor and color. When you’re done blending, take a moment to marvel at that rich hue; it’s not just beautiful but also incredibly inviting.
Once blended, pour this strawberry mixture into your ice cube tray until each compartment is about one-third full. This step requires a gentle hand—don’t rush as you fill each section. You want to avoid overfilling because we need room for our next layers of white coconut milk and blue butterfly pea flower infusion. Trust me on this; if you overfill, those stunning layers will mix together, and we definitely want that gorgeous red layer to stand out against the white and blue. Once filled, place the tray in your freezer for about 30 minutes or until the strawberry puree is firm enough to handle without compromising its shape.
Step 6: Crafting the Creamy White Layer
Now that our red layer has set beautifully in the freezer, let’s move on to creating that luscious white layer which will be made from coconut milk—a non-negotiable ingredient for achieving that creamy texture without any dairy! Measure out 1/3 cup plus an additional 2 tablespoons of coconut milk and gently whisk it in a bowl until it’s smooth and silky. The reason we whisk is simple: it incorporates air and ensures an even consistency so that when frozen, each cube will have that delightful creaminess throughout.
Once you achieve that lovely creamy texture, carefully remove your ice cube tray from the freezer. Here comes another delicate part: slowly pour the coconut milk mixture over the solidified strawberry layer until each compartment is nearly full but still allows a little space at the top for our blue layer. I can’t stress enough how important it is to pour gently; this way, your red layer remains intact while you add this dreamy white layer. After filling all compartments, return the tray to the freezer for another 30 minutes or until firm again. You’ll know it’s ready when you can tap on it lightly without disturbing any of the layers beneath—so satisfying!
Step 7: Introducing a Splash of Blue
It’s time for our final flourish—the magnificent blue butterfly pea flower infusion! To make this enchanting blue hue, combine 1/2 teaspoon of butterfly pea flower powder with 1/3 cup plus 2 tablespoons of water in a small bowl or cup. Stir this mixture thoroughly until all the powder is dissolved; you’re looking for a vibrant azure color that’s simply mesmerizing! The beauty of butterfly pea flower lies not only in its striking color but also in its incredible health benefits and natural origin—it’s a wonderful way to infuse your ice cubes with some extra pizzazz.
With your blue concoction ready, retrieve your ice cube tray once more from that frosty paradise we call a freezer. Carefully pour your beautifully colored liquid over the set coconut milk layer until each compartment is filled to the brim. Don’t worry if there are tiny bubbles forming; it’s completely normal! Allowing those bubbles means you’re incorporating air into your mix, which can actually help create unique textures as they freeze—how fun is that? Once completed, slide your tray back into the freezer for at least two hours or until completely solidified—this patience pays off big time as it ensures each ice cube boasts distinct layers when released!
Step 8: The Grand Reveal
The moment you’ve been waiting for has finally arrived! After allowing those stunning Red, White, and Blue Ice Cubes to freeze solidly for at least two hours (or longer if you can resist!), it’s time for the grand reveal. As you pull them out of the freezer, take a deep breath and admire your handiwork; these cubes are not just visually striking—they’re loaded with flavor and creativity! To release them from their icy mold, gently twist or flex your ice cube tray; this will loosen them up without breaking apart those delicate layers.
Watch as they pop free like little jewels ready to brighten up any drink! If you’re having difficulty removing them (and trust me—you’re not alone; I’ve had my fair share of stubborn ice cubes), run warm water over the bottom of the tray for just a few seconds to help release those beauties without sacrificing their integrity. As they tumble out onto your serving platter or directly into drinks like lemonade or sparkling water (imagine how stunning they look!), you’ll see how these Red, White, and Blue Ice Cubes bring life and excitement to any gathering.
Next Major Phase – Serving Your Refreshing Masterpiece
Now that you’ve created these fabulous Red, White, and Blue Ice Cubes, let’s talk about how best to showcase them! Imagine serving them up at a summer barbecue or perhaps during a festive celebration like Independence Day—you’ll leave everyone utterly captivated by their beauty as well as their deliciousness! Drop these cubes into clear glasses filled with lemonade or sparkling water where they’ll float gracefully like tiny works of art while infusing every sip with refreshing strawberry sweetness and creamy coconut notes.
These delightful little gems are not just festive accents but also functional flavor enhancers that keep drinks cool while adding flair—absolutely perfect for impressing guests at any gathering! They can even be enjoyed independently as treats on hot summer days when you’re looking for something refreshing yet healthy. So go ahead—get creative with how you use them because these Red, White, and Blue Ice Cubes are sure to become an exciting staple in your repertoire all summer long!
I promise you this recipe will become one of those cherished creations you’ll want to share again and again with friends and family—it embodies everything wonderful about summer celebrations: joy, color, flavor—and who doesn’t love an edible piece of art? Enjoy every mesmerizing sip!
Storage and Enjoyment Tips for Your Red, White, and Blue Ice Cubes
Now that you’ve poured your heart into creating these delightful Red, White, and Blue Ice Cubes, I can already see the smiles they’ll bring to your gatherings. These vibrant ice cubes aren’t just a treat for the eyes; they are a playful addition to any drink, instantly elevating your summer refreshments. As we wrap up this culinary adventure, let’s talk about how to store them properly so that you can enjoy their beauty and flavor long after the last sip is taken.
Storing Leftover Red, White, and Blue Ice Cubes
If you find yourself with any leftover ice cubes (though I doubt they will last long!), it’s crucial to store them in an airtight container. A silicone ice cube tray can also work wonders here, allowing you to keep them fresh while still being easy to remove for future use. Just make sure to place them in the freezer as soon as possible; if stored correctly, they can last for about two weeks without losing their vibrant color or flavor. To maintain their quality during storage, consider placing a slice of bread in the container—this little trick helps absorb any excess moisture that could lead to freezer burn. When you’re ready to add a splash of fun to your next drink, simply pull out a cube or two; they will still maintain that refreshing taste and eye-catching appearance even after some time in the freezer!
Freezing Components for Later
If you’re like me and love to be prepared for those spontaneous moments of joy—like hosting an impromptu BBQ or celebrating a friend’s birthday—freezing individual components is an excellent strategy! For instance, you can freeze each layer separately if you’re making these ice cubes ahead of time. Pour in each component carefully into your ice cube trays and let them freeze completely before stacking them in a larger freezer-safe bag. They will remain fresh for up to two months when frozen properly! When you’re ready to use them, there’s no need to thaw; just pop them straight into your favorite beverage for an instant transformation! The convenience factor is fantastic; it allows you to elevate any drink on a whim without extra prep time. Trust me on this—it’s all about making life easier while keeping things fabulously fun!
CATEGORY_NAME
Red, White, and Blue Ice Cubes
- Total Time: 2 hours 15 minutes
- Yield: Approximately 12 ice cubes 1x
Description
Brighten your summer gatherings with these captivating Red, White, and Blue Ice Cubes! Perfect for adding a splash of color to any drink, these delightful ice cubes blend fresh strawberries, creamy coconut milk, and vibrant blue butterfly pea flower powder. Not only do they look stunning in lemonade or iced tea, but they also impart a refreshing flavor that will wow your guests. Made with all-natural ingredients, these ice cubes are an ideal way to celebrate summer festivities without any artificial colors or flavors. Whether you’re hosting a barbecue or simply enjoying a sunny day, these ice cubes are sure to elevate your drinks and create memorable moments.
Ingredients
- 3 large strawberries (stems removed)
- 1/3 cup water (plus more for coconut layer)
- 1/3 cup + 2 Tbsp light coconut milk
- 1/2 tsp blue butterfly pea flower powder
Instructions
- Wash and chop the strawberries into quarters. Blend them with 1/3 cup water until smooth.
- Pour the strawberry mixture into an ice cube tray until each compartment is one-third full. Freeze for about 30 minutes.
- Combine 1/3 cup + 2 Tbsp coconut milk with an additional 1/3 cup + 2 Tbsp water in a bowl; whisk until smooth. Pour over the frozen strawberry layer and freeze again for another 30 minutes.
- Mix blue butterfly pea flower powder with water; gently pour over the coconut layer until full. Freeze for at least two hours until solid.
- To serve, gently twist the tray to release the ice cubes and add them to your favorite drinks.
- Prep Time: 15 minutes
- Cook Time: 2 hours
- Category: Dessert
- Method: Freezing
- Cuisine: American
Nutrition
- Serving Size: 1 ice cube
- Calories: 15
- Sugar: 2g
- Sodium: 0mg
- Fat: 0.5g
- Saturated Fat: 0.5g
- Unsaturated Fat: 0g
- Trans Fat: 0g
- Carbohydrates: 3g
- Fiber: 0g
- Protein: <1g
- Cholesterol: 0mg
Leave a Comment