There’s something truly magical about a simple sandwich that transcends mere sustenance to become a cherished experience. The Smashed Chickpea Avocado Dill Pickle Sandwiches are more than just a meal; they are an embrace of flavor and texture that invites you to slow down and savor every bite. Imagine biting into a crusty slice of whole grain bread, where the creamy, lush avocado melds with the nutty chickpeas, punctuated by the zesty crunch of dill pickles. It’s a delightful symphony of flavors and aromas that dances across your palate—a celebration of health, taste, and creativity! This dish embodies the spirit of innovation while respecting the traditions of wholesome eating.
In a world where quick meals often sacrifice quality for convenience, I promise you that this recipe will stand out as a beacon of balance. It’s not just about filling your stomach; it’s about nourishing your soul. The combination of creamy avocado and hearty chickpeas creates a satisfying texture that leaves you feeling content without the heaviness often associated with traditional spreads. Plus, the vibrant notes of lemon and fresh herbs awaken your senses, making each sandwich feel like a little gift to yourself. Whether you’re preparing for a cozy lunch at home or packing for a picnic under the sun, these sandwiches are not just food; they’re an invitation to connect—with yourself and those around you.
Smashed Chickpea Avocado Dill Pickle Sandwiches: A Wholesome Delight
Let’s dive into this delectable recipe together! The Smashed Chickpea Avocado Dill Pickle Sandwiches are not only quick to prepare but also bursting with flavors that come together in perfect harmony. You’ll find yourself reaching for these sandwiches again and again because they are not only delicious but also incredibly healthy! With rich avocados providing healthy fats and protein-packed chickpeas, this is truly a guilt-free indulgence.
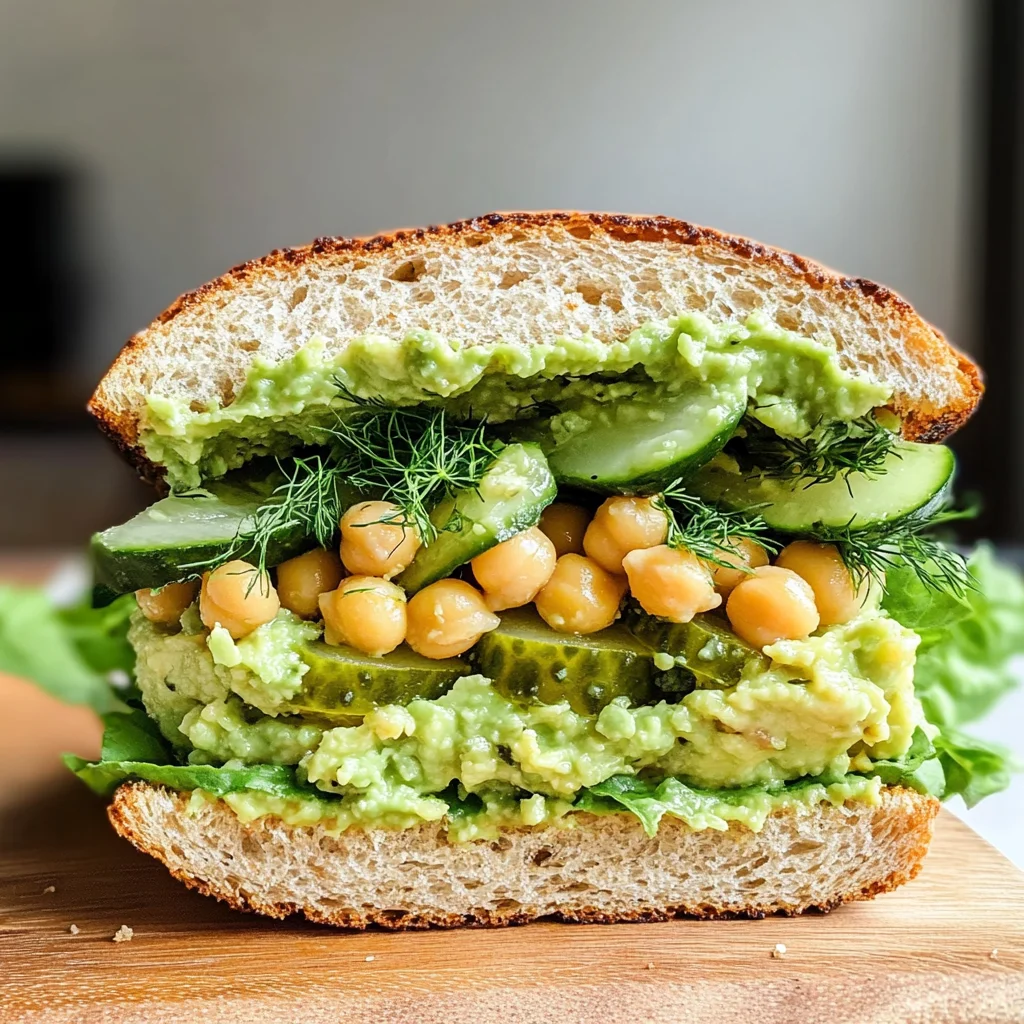
Ingredients:
As we embark on this culinary journey together, let’s take a moment to appreciate each ingredient that contributes to the magic of these smashed chickpea avocado sandwiches. Each element plays its role beautifully, creating layers upon layers of flavor and texture that will leave you craving more.
-
1 1/2 cups cooked chickpeas (or 1 14-oz can, drained and rinsed): Chickpeas are the star of our show here! They provide not only substance but also a lovely nuttiness that forms the backbone of our sandwich filling. If you’re using canned chickpeas for convenience—no judgment here!—just make sure to rinse them well to wash away any excess sodium or preservatives. If you’re cooking them from scratch, allow them to simmer until tender; this enhances their creaminess when mashed!
-
1 ripe avocado, pitted: Ahh, avocado—the creamy liquid gold we all adore! It enriches our sandwich with healthy fats while providing an incredibly smooth texture that binds everything together beautifully. When choosing an avocado, look for one that’s slightly soft to the touch, indicating ripeness; it should yield gently when pressed but not feel mushy. This luscious fruit not only adds richness but also elevates the overall flavor profile.
-
3 tablespoons freshly squeezed lemon juice: The bright acidity from fresh lemon juice is absolutely paramount in balancing flavors. It cuts through the richness of the avocado while keeping everything light and vibrant—trust me on this! Always opt for fresh lemons over bottled juice; there’s simply no comparison in flavor or aroma!
-
1 large garlic clove, minced: Garlic brings an aromatic depth that’s undeniably enticing. When minced finely, it releases its essential oils and infuses our sandwich filling with warmth and character. Don’t skip this step! If you’re sensitive to raw garlic’s intensity, consider roasting it first for a sweeter undertone.
-
1 celery rib, diced: Celery adds crunch—a non-negotiable element in achieving that textural contrast we crave! Its mild flavor allows other ingredients to shine while providing delightful bites throughout each mouthful. Look for crisp celery stalks without blemishes or soft spots for the best results.
-
1/4 cup finely chopped pickles: Here comes another layer of texture along with tangy goodness! Pickles inject a punchy acidity that plays off the creamy elements beautifully. Feel free to choose your favorite variety—dill pickles add freshness while sweet pickles offer contrast—but make sure they’re finely chopped so their flavor disperses evenly throughout.
-
1/4 cup finely chopped dill (or to taste): Fresh dill is like sunshine in herb form! It introduces an aromatic brightness that complements both the chickpeas and pickles wonderfully. Don’t be shy with it—if you’re a fan of dill’s unique flavor profile (as I am), go ahead and add more!
-
2 green onions, finely chopped: Green onions lend both color and mild oniony sweetness without overwhelming other flavors—a perfect addition to keep things light yet flavorful. Chop them thinly so they blend seamlessly into our filling mix.
-
Pinch each fine sea salt and freshly ground black pepper: Seasoning is crucial in bringing out all those beautiful flavors we’ve assembled! A touch of salt enhances sweetness while balancing acidity; black pepper adds warmth without overpowering our delicate ingredients.
-
Whole grain bread, pitas, bagels, or tortillas: Choose your canvas wisely! Whole grain bread brings fiber-rich goodness alongside delightful nutty notes; pitas offer portability; bagels provide heartiness; tortillas create versatility—all perfect vessels for holding our scrumptious filling!
-
Lettuce or arugula: Adding greens brings freshness—not just in taste but visually too—with vibrant colors elevating your sandwich game. I love using peppery arugula as its boldness pairs wonderfully with creamy fillings!
-
Mustard: A smear of mustard adds zest—it’s like adding personality to your creation! Whether you prefer Dijon or yellow depends entirely on what flavor notes excite you most—don’t shy away from experimenting!
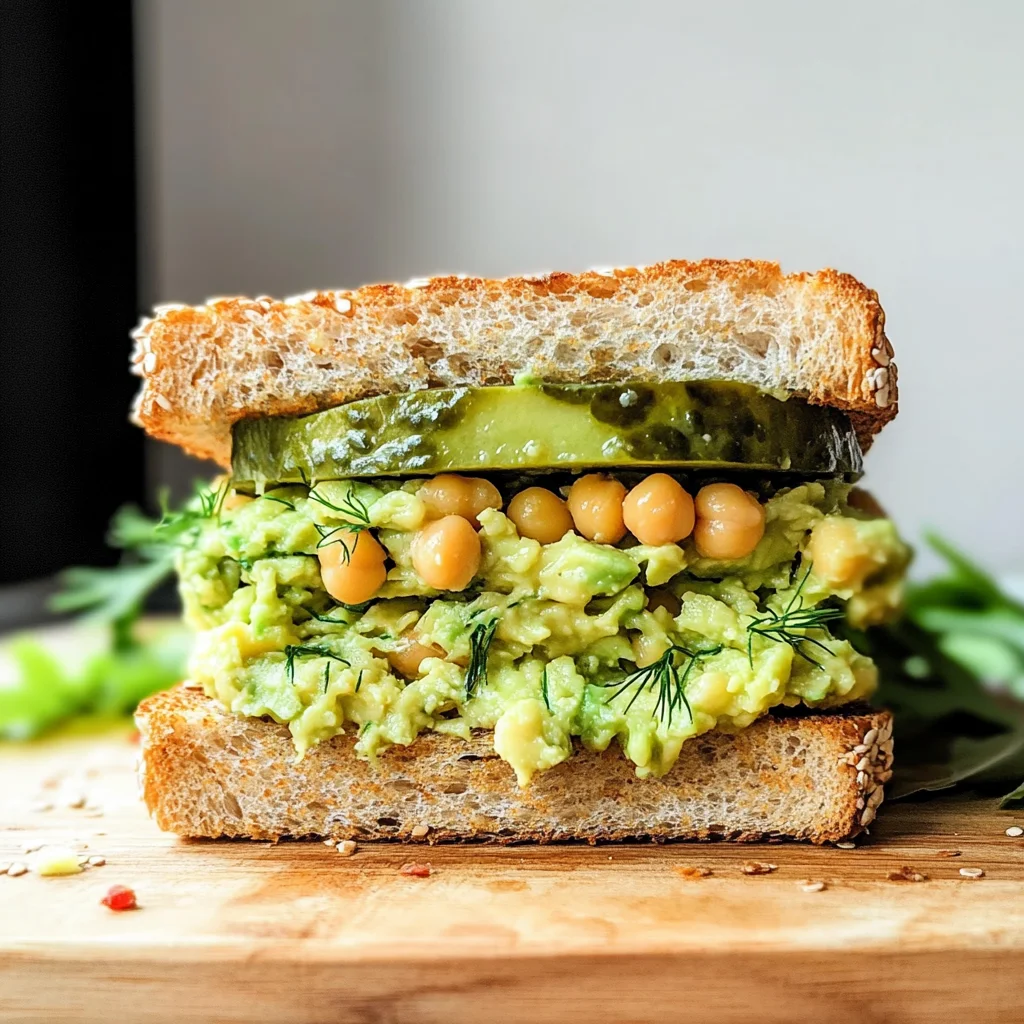
Equipment You’ll Need:
Now let’s talk tools because having the right equipment makes cooking smoother and more enjoyable—like having trusty friends by your side in this culinary adventure!
-
Potato masher or fork – Essential for mashing those chickpeas into submission! Whether you choose a classic potato masher or opt for good ol’ fork power depends on what feels comfortable in your hands; both will do wonders here.
-
Mixing bowl – A spacious mixing bowl helps combine all our ingredients effortlessly without making too much mess—look for one deep enough so nothing escapes during mixing!
-
Knife & cutting board – Sharp knives are vital companions when prepping vegetables like celery or herbs—ensure yours is well-honed so slicing feels effortless rather than laborious.
-
Measuring cups & spoons – Accurate measurements guarantee consistent results every time—you want repeatable success when it comes to crafting these delicious sandwiches!
Preparing the Smashed Chickpea Avocado Dill Pickle Sandwiches
Step 1: The Artful Mash
To begin crafting your masterpiece sandwich filling, start by mashing those chickpeas with either a trusty potato masher or simply use the back of a fork—it’s surprisingly therapeutic! Aim for mostly broken up pieces while allowing some whole ones to remain intact for texture’s sake; this contrast keeps every bite interesting as you experience different textures with each mouthful. Once you’ve achieved satisfaction in your mashing endeavors (and trust me—you’ll know!), it’s time to introduce our creamy partner-in-crime—the ripe avocado! Adding it at this stage allows its lusciousness to envelop those nutty chickpeas completely before we move forward.
Step 2: Brightening Up
Now comes one of my favorite parts—adding freshly squeezed lemon juice which acts like sunshine pouring into our bowl full of goodness! Not only does it elevate flavors dramatically but also ensures everything remains fresh-tasting rather than heavy—a crucial detail worth celebrating here! Toss in minced garlic next because who doesn’t love that aromatic allure wafting through their kitchen? Give everything another thorough stir until well-combined before tasting—a gentle pinch more salt? A splash more lemon? Adjust according to your preferences until it sings blissfully on your palate!
Step 3: Crunch Time!
Once satisfied with seasoning perfection achieved after adjusting flavors just right—as I know you will be—we’re ready for some crunch factor courtesy of diced celery! This step introduces delightful contrast among softer elements already present within our mixture while adding necessary hydration too—keeping things balanced overall helps prevent dryness later when constructing sandwiches themselves…so don’t rush this step!
Step 4: The Final Touch
With all ingredients harmoniously united at last—including those vivid green onions bringing extra vibrancy into play—we’re ready now finally add chopped pickles along with fragrant dill stirring gently yet thoroughly until every last bit joins forces creating symphonic harmony between tangy bites alongside earthy depths layered within each spoonful enjoyed thereafter—a moment worth savoring entirely before moving onward towards assembling these glorious creations awaiting us next…
Stay tuned as we continue exploring how best bring together all these components into irresistible sandwiches everyone will rave about long after last crumb disappears…
Step 5: Mashing the Chickpeas to Perfection
Now that you have your chickpeas ready, it’s time for the fun part—mashing! I’ve always been captivated by the simple joy of turning whole ingredients into something creamy and delicious. Grab a sturdy potato masher or the back of a fork; both will serve you beautifully in this step. Begin by placing your cooked chickpeas in a large mixing bowl, and start mashing away. The goal here is to break them down until they’re mostly smashed but still retain some texture—think of it as creating a delightful balance between creamy and chunky. This is crucial because while we want the mixture to be spreadable, those little bits of chickpea add heartiness and substance to every bite.
As you mash, don’t be too aggressive! You want to embrace some of that rustic charm in your filling, so leave a few whole chickpeas for added crunch—this will bring an exciting contrast against the smooth avocado that comes next. Once you feel satisfied with the consistency, it’s time to introduce the avocado. Halve your ripe avocado, remove the pit (carefully!), and scoop out its luscious green flesh with a spoon. The creamy texture of avocado is utterly intoxicating and will bind everything together beautifully while adding rich flavor and healthy fats that are simply unparalleled. Mix it all gently so that the chickpeas and avocado meld into a beautiful harmony. Trust me on this; feeling those ingredients come together is deeply satisfying!
Step 6: Infusing Flavor with Fresh Ingredients
Once your chickpeas and avocado are mashed together into this velvety mixture, it’s time to infuse some vibrant flavors! Add in your freshly squeezed lemon juice—it not only brightens up the entire dish but also acts as a natural preservative that helps keep the avocado from browning too quickly. The acidity from the lemon juice creates a refreshing backdrop for all those rich flavors—it’s like giving your sandwich a little sunshine! Then, toss in one large garlic clove minced finely; garlic adds warmth and depth, which is absolutely paramount for layering flavors in any dish.
Next comes the green onions—finely chopped to unleash their mild kick—and celery for that lovely crunch factor! A little diced celery adds an unexpected crispness that plays beautifully against our creamy filling. Don’t forget about those pickles—this is where we bring in an element of tanginess that cuts through richness like a breath of fresh air. I often find myself sneaking extra pickles into my mix because who can resist that zing? Finally, sprinkle in some finely chopped dill; its aromatic qualities elevate this filling from good to truly extraordinary! Give everything a good stir until well-combined, tasting along the way; adjusting salt, pepper, or even lemon juice if necessary ensures you’re creating something uniquely yours.
Step 7: The Art of Assembly
With your flavorful filling complete, we now embark on assembling these delightful Smashed Chickpea Avocado Dill Pickle Sandwiches! It’s important to choose your bread wisely; whole grain bread brings fiber and nutrients while complementing the hearty filling seamlessly. Lay out two slices on a clean cutting board or plate—the canvas on which our masterpiece will unfold! Generously scoop out portions of your smashed chickpea mixture onto one slice of bread. The visual cue here is quite inviting; you should see lovely green-green specks intermingled with flecks of yellow-gold from chickpeas—a true feast for the eyes!
Now here’s where you can get creative: top your filling with fresh lettuce or arugula for an added layer of freshness and crunch—the perfect counterbalance to our robust mixture below! When layering toppings, remember that each ingredient builds upon one another; every bite should provide an explosion of flavors and textures that dance across your palate. Carefully place another slice of bread on top to complete each sandwich. Take a moment to press down gently—you want everything to marry together without squishing all those beautiful flavors out!
Step 8: Serving Your Masterpiece
As we near completion, it’s essential to consider how best to serve these Smashed Chickpea Avocado Dill Pickle Sandwiches. If you’re enjoying them immediately, cut each sandwich diagonally for an elegant presentation—it transforms simple sandwiches into something special! Alternatively, if you’re preparing them for later or packing them up for a picnic adventure (which I highly recommend!), wrap them snugly in parchment paper or foil; this keeps them fresh while allowing all those gorgeous flavors to meld further during their short rest period.
If you have extra filling left over (and believe me, it happens because it’s so delicious!), store it in an airtight container in the fridge—it’ll keep beautifully for about 2-3 days. This means you can enjoy leftovers on crackers or as part of a veggie platter later in the week—what’s better than having meals prepped ahead? And here’s another tip: if you let them chill in the fridge before serving for at least 30 minutes, you’ll enhance those flavors even more—the rest allows all components to harmonize fully into what feels like pure culinary magic!
Final Touches
Now that you’ve prepared these delightful Smashed Chickpea Avocado Dill Pickle Sandwiches with love and care, it’s time to savor every bite! These sandwiches are not only easy to make but also satisfyingly wholesome—perfect for lunch at home or packed away for days spent outdoors under sunlit skies with friends. Each mouthful offers an uplifting experience filled with vibrant tastes that are as nourishing as they are delicious.
I promise you—once you take a bite into that crunchy exterior revealing all those wonderful flavors inside, you’ll be hooked! So gather around your loved ones or pack them up for an outing; either way, these sandwiches are bound to create warm memories shared over good food—a testament to how simple ingredients can transform into something spectacular when made with heart. Enjoy every moment of making and sharing this recipe—it truly embodies what food is all about!
Storage and Enjoyment Tips for Your Smashed Chickpea Avocado Dill Pickle Sandwiches
Oh, the moment has finally arrived! You’ve crafted these delightful Smashed Chickpea Avocado Dill Pickle Sandwiches, and now they’re ready to delight your taste buds and nourish your body. Whether you’re enjoying them right now or preparing to savor them later, let’s talk about how to keep that fresh, vibrant flavor intact. With just a few simple tips, you can ensure every bite remains as scrumptious as the first!
Storing Leftover Smashed Chickpea Avocado Dill Pickle Sandwiches
To store any leftover Smashed Chickpea Avocado Dill Pickle Sandwiches (which I’m sure will be minimal!), opt for an airtight container. This step is crucial for maintaining freshness; it keeps out unwanted air and moisture that can turn your masterpiece into a soggy mess. Ideally, place them in the refrigerator where they will stay fresh for up to two days. However, I recommend consuming them within the first day if possible since the avocado might start to brown after a while. If you’re worried about soggy bread—trust me, we’ve all been there—try placing a piece of parchment paper between the sandwich and the lid of your container. This little trick creates a barrier that helps absorb any excess moisture while keeping your sandwich intact. When you take them out for lunch or a snack, they’ll still have that satisfying crunch from the bread and freshness from the fillings!
Freezing Components for Later
Now, if you want to prepare ahead of time or save some for a rainy day—which is honestly such a great idea—you can freeze the chickpea avocado filling separately! Just scoop it into a freezer-safe container or plastic bag, making sure to squeeze out as much air as possible before sealing it up tight. It’ll keep well in the freezer for about one month. When you’re ready to enjoy again, simply pull it out and let it thaw in the fridge overnight or on your countertop for about an hour before serving. Then, just spread it onto fresh bread or wraps with some crunchy lettuce; it’s like having a taste of summer anytime you crave it! The convenience factor here is extraordinary; you can whip up an easy lunch in no time without compromising on taste or nutrition.
Salad
Smashed Chickpea Avocado Dill Pickle Sandwiches
- Total Time: 0 hours
- Yield: Makes 4 sandwiches 1x
Description
Smashed Chickpea Avocado Dill Pickle Sandwiches are a delightful fusion of creamy avocado and hearty chickpeas, perfect for a nutritious meal or snack. This vibrant sandwich combines the rich textures of mashed chickpeas and avocado, complemented by the zesty crunch of dill pickles and fresh herbs. It’s not just a quick meal; it’s a wholesome experience that nourishes both body and soul. Whether enjoyed at home or packed for a picnic under the sun, these sandwiches invite you to indulge in flavors that celebrate creativity and health.
Ingredients
- 1 1/2 cups cooked chickpeas
- 1 ripe avocado
- 3 tablespoons freshly squeezed lemon juice
- 1 large garlic clove, minced
- 1 celery rib, diced
- 1/4 cup finely chopped pickles
- 1/4 cup finely chopped dill
- 2 green onions, finely chopped
- Salt and pepper to taste
- Whole grain bread, pitas, bagels, or tortillas
- Lettuce or arugula
- Mustard (optional)
Instructions
- In a mixing bowl, mash the cooked chickpeas using a potato masher or fork until mostly broken down with some whole pieces remaining.
- Add the ripe avocado to the bowl and mix until creamy.
- Stir in the lemon juice, minced garlic, diced celery, chopped pickles, dill, green onions, salt, and pepper until well combined.
- Spread the filling onto slices of whole grain bread (or your choice of carriers).
- Top with lettuce or arugula and add mustard if desired before placing another slice on top.
- Prep Time: 15 minutes
- Cook Time: None
- Category: Sandwich
- Method: No cooking required
- Cuisine: American
Nutrition
- Serving Size: 1 sandwich (approx. 160g)
- Calories: 320
- Sugar: 2g
- Sodium: 350mg
- Fat: 13g
- Saturated Fat: 2g
- Unsaturated Fat: 10g
- Trans Fat: 0g
- Carbohydrates: 43g
- Fiber: 12g
- Protein: 10g
- Cholesterol: 0mg
Leave a Comment