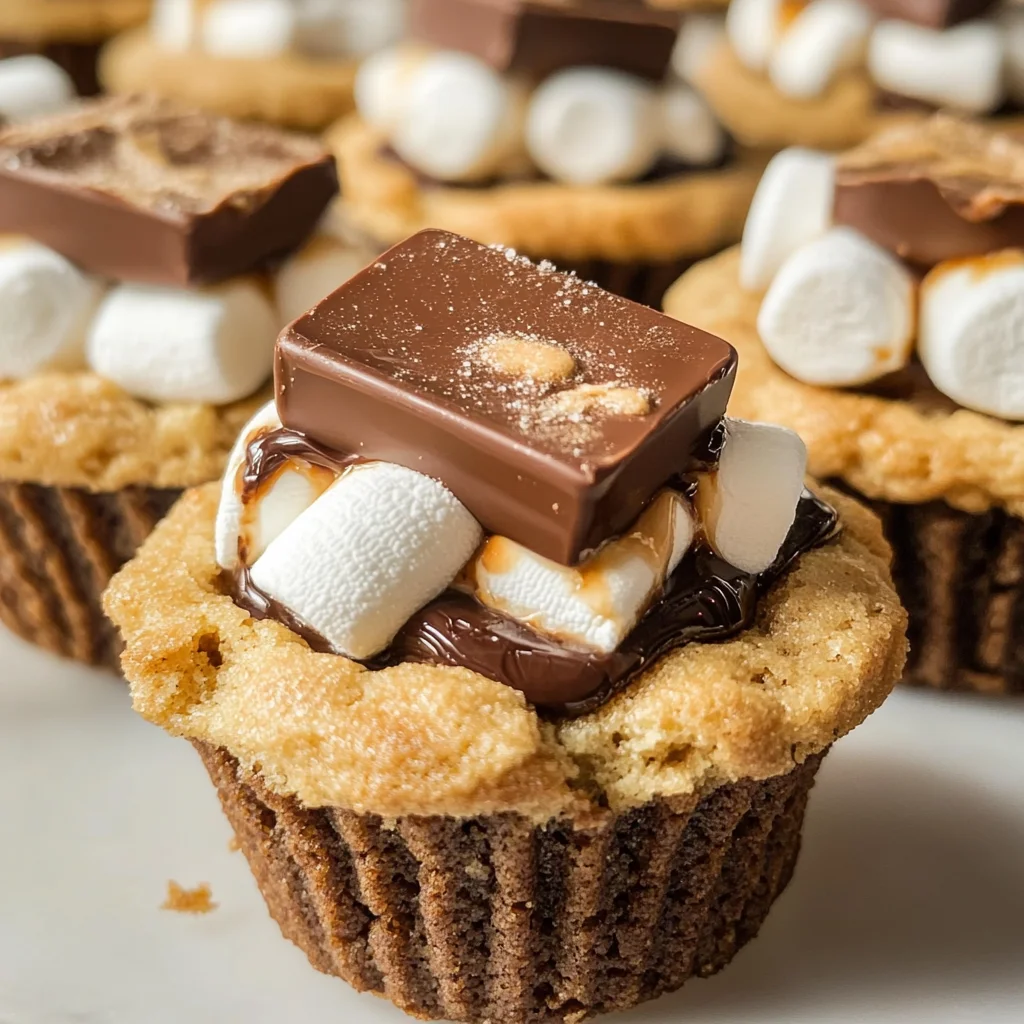
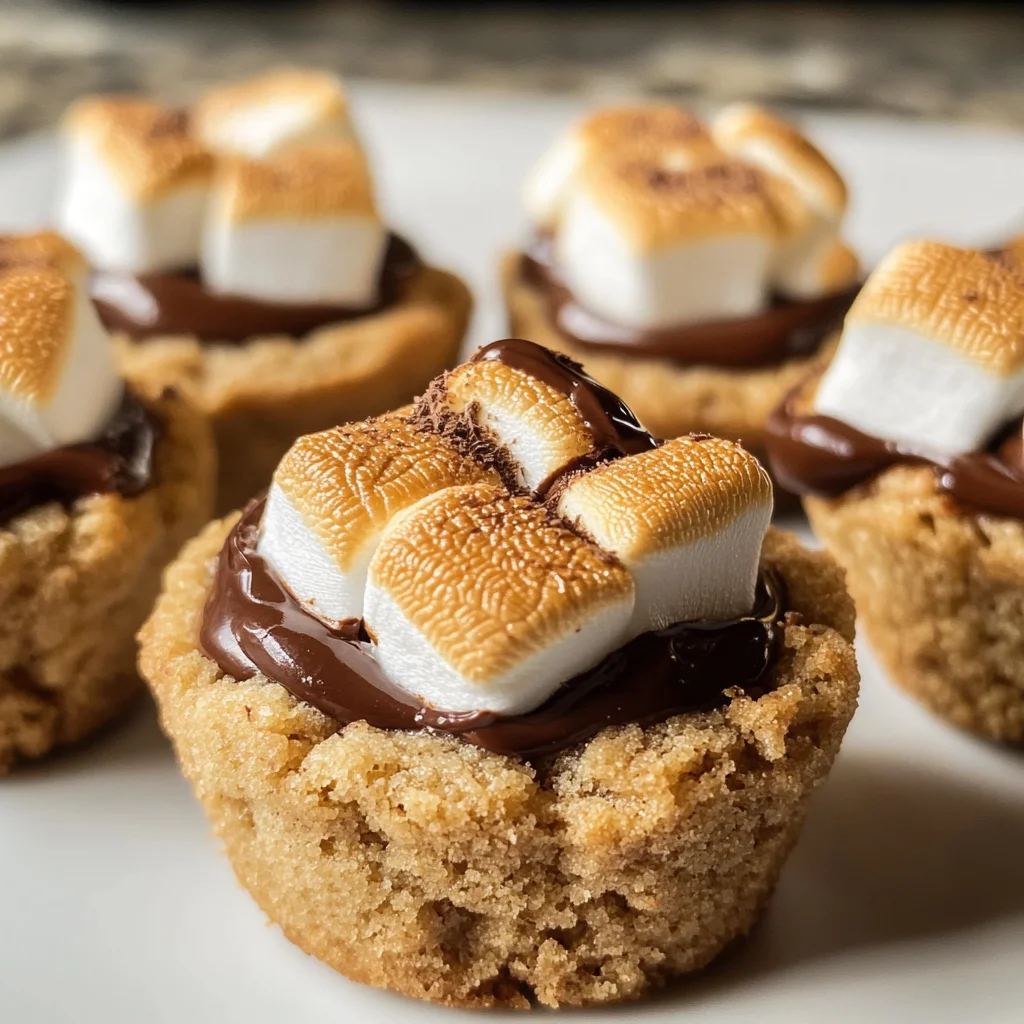
There’s something undeniably magical about the combination of flavors that come together in S’mores Cookie Cups. Each bite transports you to a cozy campfire evening, where laughter floats through the air and the sweetness of melted chocolate mingles with the warm, gooey decadence of marshmallows. These delightful little cups are not just a treat; they evoke nostalgia and create new memories all at once. The buttery cookie crust is perfectly crisp on the outside yet soft in the center, cradling pockets of melted chocolate and fluffy marshmallow that make your heart sing. I promise you, these S’mores Cookie Cups are an experience worth savoring, a bridge between traditional campfire s’mores and innovative dessert artistry.
As we embark on this culinary journey together, I hope you’ll feel the excitement I do every time I whip up these treats. This recipe is infused with love and a dash of creativity – it’s perfect for gatherings or simply when you need a little extra sweetness in your day. Whether it’s a rainy afternoon or a festive celebration, these cookie cups bring joy and warmth to any occasion. Trust me when I say that there’s nothing quite like watching friends and family take their first bite, eyes lighting up as the flavors meld together in perfect harmony. Let’s dive into this delicious adventure!
Ingredients:
Before we get started on baking these S’mores Cookie Cups, let’s gather our ingredients! Each one plays a vital role in creating that beloved flavor profile we all adore.
- 1¼ cup all-purpose flour. Flour is the backbone of our cookies, providing structure and stability to each cup. When choosing flour, look for high-quality all-purpose varieties that are finely milled to ensure a smooth texture without lumps. This flour will work hand-in-hand with other ingredients to create that perfect balance between chewy and crumbly textures in your cookie cups. Remember that measuring accurately is crucial; too much flour can lead to dry cookies while too little can result in overly soft ones.
- 1 cup graham cracker crumbs. Ah, graham crackers – the quintessential ingredient that gives our S’mores Cookie Cups that unmistakable flavor reminiscent of summer nights spent by the fire. The crumbs add not only taste but also texture, contributing a delightful crunch to each bite. When selecting graham crackers, opt for brands that use simple ingredients for the best flavor profile; homemade crumbs are even better if you’re feeling adventurous! Just remember to crush them finely so they integrate beautifully into our dough.
- ½ teaspoon baking soda. This is our leavening agent that helps give our cookie cups a lightness that’s absolutely necessary for achieving that perfect cookie texture. Baking soda reacts with acidic components in other ingredients (like brown sugar) to create tiny bubbles of carbon dioxide during baking, allowing our cups to rise slightly while remaining tender inside. Make sure your baking soda is fresh – it should be active enough to provide the lift we desire.
- ¼ teaspoon salt. Don’t underestimate salt; it’s an important flavor enhancer in desserts! A touch of salt balances the sweetness from sugars and helps highlight the rich flavors of chocolate and marshmallows within each cup. It’s essential for creating depth and complexity in flavors – think of it as an amplifier for all those lovely tastes.
- ½ cup (1 stick) butter (softened). Butter is where the magic begins! This ingredient contributes rich flavor and creates a tender crumb when creamed properly with sugars. Make sure your butter is softened – this means it should be cool but not melting; about room temperature works best. If it’s too cold, it won’t incorporate well; too warm, and your cookie cups will spread excessively during baking. For an extra indulgent taste, consider using high-fat European-style butter for richness.
- ½ cup light brown sugar (packed). Brown sugar brings moisture and depth due to its molasses content, which adds an irresistible caramel undertone to our cookie cups. Packing it tightly into your measuring cup ensures you’re using just the right amount for sweetness without making them overly sugary – balance is key! Plus, brown sugar helps keep your cookies moist longer than white sugar would.
- ⅓ cup granulated sugar. While brown sugar provides moisture, granulated sugar aids in achieving that lovely crisp texture on the outside of our cookie cups. The combination of both sugars allows us to enjoy contrasting textures: soft interiors paired with slightly crunchy exteriors—pure bliss! Always use granulated sugar that’s fresh; old sugar can clump due to moisture absorption.
- 1 large egg. Eggs act as binding agents within our dough while adding richness and structure—crucial elements when creating any baked good! They help incorporate air into your batter during mixing which contributes to rising during baking as well as providing additional moisture for softness throughout each cup’s life cycle.
- 1 teaspoon vanilla extract. Vanilla extract elevates our sweet treats with its warm notes—it’s like music playing softly behind all those other flavors harmonizing together perfectly! For this recipe, opt for pure vanilla extract over imitation; its complex aroma makes all the difference in quality.
- 12 large vegan marshmallows (cut in half). Marshmallows bring that signature s’mores element right into our cookie cups—the gooey goodness we crave! Look for high-quality vegan marshmallows as they melt beautifully without compromising on flavor or texture; their sticky sweetness enhances every bite while providing wonderful contrast against rich chocolate layers above them.
- 2 bars (1.55 oz each) Hershey’s milk chocolate. Using classic milk chocolate not only satisfies cravings but also provides creaminess alongside sweetness—we want every bite bursting with delightful decadence! You can substitute different brands or types if desired—but trust me: Hershey’s evokes those nostalgic summer memories better than anything else!
Equipment You’ll Need:
Now that we’ve gathered our ingredients let’s prepare ourselves with essential tools that’ll make this baking adventure enjoyable! While these might not technically be ingredients, having the right equipment is paramount when it comes down to getting everything just right.
- Mini muffin pan: This specialized pan features shallow wells designed specifically for creating individual-sized treats like our S’mores Cookie Cups! Its nonstick surface means easy removal once baked—no one wants their precious creations stuck behind after all this hard work!
- Mixing bowls: A set of mixing bowls will serve multiple purposes throughout this process—from combining dry ingredients before blending them into wet ones—to holding finished dough while we prep everything else ahead! Opting for glass or stainless-steel options allows you greater visibility during mixing while ensuring durability over time!
- Electric mixer (hand or stand): Whether using handheld or standing models depends on personal preference—but having one handy significantly speeds up creaming processes compared with manual whisking methods alone! Creaming butter/sugar requires aeration which electric mixers excel at producing quickly—allowing us more time spent enjoying finished products rather than laboriously mixing by hand!
- Measuring spoons & cups: Accurate measurements are vital when baking so invest in reliable measuring tools—this ensures consistency across batches every single time! Dry measures should be used exclusively across dry substances such as flour/crumbs/baking soda while liquid measures provide reliable results across wet ingredients like butter/vanilla/eggs!
Preparing the S’mores Cookie Cups
Step 1: Preheat Your Oven
To kick off this delightful baking experience effectively—and ensure optimal results—we’ll start by preheating our oven at 350℉ (or 175℃). This step is crucial because starting with an already hot environment allows those lovely cookies’ edges crisp up nicely while keeping centers soft inside—the ultimate textural delight we’re aiming for here! Meanwhile, spray down your mini muffin pan generously with nonstick cooking spray before setting aside—we don’t want any sticky situations later on!
Step 2: Whisk Together Dry Ingredients
Next up comes some whisking fun! Grab yourself a medium bowl where we’ll combine all those dry ingredients: all-purpose flour, graham cracker crumbs, baking soda, and salt—and go ahead give them a good mix together until everything appears uniform throughout—that beautiful blend sets us up nicely later during mixing processes ahead! Whisking ensures even distribution which affects how well cookies rise versus becoming dense due solely from uneven ingredient ratios present beforehand.
Step 3: Cream Butter & Sugars
Time now for some serious magic—let’s cream together softened butter along with light brown sugar plus granulated sugar inside another larger bowl using either electric hand mixer or stand mixer fitted paddle attachment if preferred! Begin beating slowly then gradually increase speed until mixture turns fluffy after about 1–2 minutes—it’ll transform into something resembling liquid gold as air bubbles form within emulsifying fats/sugars beautifully together—a key component responsible for creating tender centers later!
Step 4: Add Egg & Vanilla Extract
At this point let’s add one large egg alongside one teaspoon pure vanilla extract into buttery-sugar mixture before continuing beaters running until fully incorporated again—it shouldn’t take long since both additions integrate smoothly amidst existing creamy base already present here too! Eggs provide structural integrity needed throughout baked goods while enhancing overall flavor profiles alongside aromatic qualities brought forth via fragrant extracts introduced earlier—it truly does make quite an impact!
These initial steps set us firmly onto path towards crafting scrumptious S’mores Cookie Cups—stay tuned as we’ll soon delve deeper into constructing these delectable bites ready-to-enjoy shortly thereafter…
The Sweet Symphony of S’mores Cookie Cups
Step 5: The Beautiful Blend of Wet and Dry Ingredients
Now that we’ve got our dry ingredients waiting patiently, it’s time for the magic to happen! In a larger bowl, take your softened butter—this is crucial, as room temperature butter blends beautifully and creates that fluffy texture we’re after. Using an electric hand mixer or the paddle attachment on a stand mixer, beat the butter together with the packed light brown sugar and granulated sugar. I can’t stress enough how much this step contributes to the overall flavor and texture! You want to mix it for about 1-2 minutes until it’s creamy and looks like liquid gold. This process incorporates air into the mixture, which is absolutely paramount for achieving those soft, tender cookie cups.
Once your butters and sugars are perfectly combined, it’s time to add in one large egg and a teaspoon of vanilla extract—oh, that heavenly aroma! Beat these into the mixture until fully combined; you’ll know it’s ready when everything looks smooth and harmonious. Don’t be tempted to rush this step; trust me, taking your time ensures that every bite will be rich and flavorful. After all, we’re creating something truly extraordinary here!
Step 6: Merging the Doughs with Gentle Care
Now comes the part where we combine our dry ingredients with the wet ingredients. Carefully dump the bowl of dry ingredients into your butter-sugar-egg concoction. At this point, you’ll want to mix on low speed just until everything is incorporated. This is where patience really matters—overmixing can lead to tough cookie cups instead of the soft, crumbly delights we’re aiming for. It’s normal for the dough to look slightly crumbly at this stage; don’t worry! When you press it between your fingers, it should come together beautifully.
This technique of combining wet and dry ingredients gently allows gluten development to occur at a controlled pace, giving you that perfect texture. If you find that your dough isn’t forming well enough, a light touch of warmth from your hands can help bring everything together without overworking it. Remember: this dough isn’t meant to be smooth like cake batter; rather, it should have character!
Step 7: Filling Your Mini Muffin Tins with Love
With your dough ready, it’s time for one of my favorite parts—scooping! Using a cookie scoop or two spoons (whatever works best for you), fill each mini muffin tin cup generously with your cookie dough mixture. Don’t be shy! You want each cup filled right up to the top and then some because they will bake down beautifully into those ideal little cookie cups. As you pack down the dough slightly to even out the top, think about how satisfying each bite will be when they’re done.
Baking these beauties at 350℉ for about 8 minutes is where they start transforming into those glorious treats we crave. Keep an eye on them as they bake; they may look slightly underdone when you pull them out—that’s exactly how they should look! The key here is understanding that we will give them another dose of heat later on when we broil those marshmallows on top. So bring them out of the oven just in time; a golden edge with a soft center means you’re right on track!
Step 8: Creating Perfect Indents for Marshmallow Magic
As soon as your cookie cups come out from their brief encounter with heat, it’s time for some quick action! Using a teaspoon-sized measuring spoon (or any small rounded tool), gently press down into the center of each mini muffin cup while they’re still warm. This step is non-negotiable because it’s what creates that perfect little nest for our vegan marshmallows—a place where all that gooey goodness can settle in beautifully.
The warmth from the cookies will soften them just enough so when you press down lightly but firmly, you’ll create a lovely indent without breaking apart your delicate cookie structure. If you’d rather not risk damage to these magnificent treats (and I wouldn’t blame you!), consider using silicone molds instead of metal tins next time—you’ll find them more forgiving if you’re worried about sticking or breaking during this step. Make sure each indent is deep enough but not going all the way through—that way, all that marshmallow bliss stays nestled in its cozy spot.
Conclusion:
As we wrap up our journey through the creation of these S’mores Cookie Cups, I can hardly contain my excitement for you to dive into this recipe! Each step has led us closer to a treat that perfectly captures childhood memories around the campfire—marshmallows melting into chocolatey goodness nestled in a crumbly graham cracker shell. What truly sets this recipe apart is how effortlessly it combines nostalgia with modern-day convenience; there’s just something profoundly satisfying about biting into one of these cups and feeling that rush of flavors and textures dance across your palate.
Why should you try making these delightful cookie cups? Well, beyond their mouthwatering taste and exquisite presentation lies the joy of creating something extraordinary from simple ingredients found in your pantry. They shine on every occasion—from cozy family nights to festive gatherings with friends—serving as both dessert and conversation starter alike! Imagine pulling these beauties from the oven, their tops glistening with melted marshmallows inviting everyone closer as their sweet aroma fills the room; it’s an experience worth cherishing.
Serving suggestions? Oh my goodness—imagine savoring one alongside a steaming cup of hot cocoa on a chilly evening or perhaps with a scoop of vanilla bean ice cream as an indulgent treat after dinner! For an afternoon pick-me-up, pair one with your favorite coffee blend—it’s truly blissful! And if you’re feeling adventurous, consider drizzling some melted vegan chocolate over the top before serving; it adds another layer of decadence that elevates each bite.
Feeling adventurous? This recipe is wonderfully adaptable! You could switch out the chocolate bars for your favorite nut butter-filled varieties or sprinkle in some crushed nuts for added crunch—it opens up so many creative doors! Don’t hesitate to experiment with different flavors; perhaps add a hint of cinnamon or try incorporating peanut butter chips instead—each variation brings its own magic! I invite you to give this recipe a go, share your experiences with friends and family, and make lasting memories together around these charming little cups of joy!

S’mores Cookie Cups
- Total Time: 23 minutes
- Yield: Approximately 12 servings 1x
Description
S’mores Cookie Cups are a delightful fusion of classic campfire flavors and modern dessert innovation. Each mini treat features a buttery graham cracker crust that cradles rich chocolate and fluffy vegan marshmallows, making them an irresistible indulgence for any occasion. Perfect for gatherings or as a sweet pick-me-up, these cookie cups evoke nostalgia while creating new memories with every bite. Whether enjoyed warm or at room temperature, they deliver a satisfying crunch and gooey goodness that will have everyone coming back for more. Dive into this easy recipe, and elevate your dessert game with these charming S’mores Cookie Cups!
Ingredients
- 1¼ cup all-purpose flour
- 1 cup graham cracker crumbs
- ½ teaspoon baking soda
- ¼ teaspoon salt
- ½ cup (1 stick) softened butter
- ½ cup light brown sugar (packed)
- ⅓ cup granulated sugar
- 1 large egg
- 1 teaspoon vanilla extract
- 12 large vegan marshmallows (cut in half)
- 2 bars (1.55 oz each) Hershey's milk chocolate
Instructions
- Preheat the oven to 350°F (175°C) and prepare a mini muffin pan with nonstick spray.
- In a medium bowl, whisk together the flour, graham cracker crumbs, baking soda, and salt.
- In a larger bowl, cream the softened butter, brown sugar, and granulated sugar until fluffy (about 1-2 minutes). Add the egg and vanilla extract; mix until combined.
- Gradually add the dry ingredients to the wet mixture on low speed until just combined.
- Fill each muffin tin cup generously with dough, slightly packing it down.
- Bake for about 8 minutes until edges are golden but centers look soft.
- Immediately press down in the center of each cookie cup to create an indent.
- Place half a vegan marshmallow in each indent and top with a piece of chocolate.
- Broil for 1-2 minutes until marshmallows are golden brown; watch carefully!
- Let cool slightly before enjoying.
- Prep Time: 15 minutes
- Cook Time: 8 minutes
- Category: Dessert
- Method: Baking
- Cuisine: American
Nutrition
- Serving Size: 1 cookie cup (35g)
- Calories: 150
- Sugar: 12g
- Sodium: 70mg
- Fat: 7g
- Saturated Fat: 4g
- Unsaturated Fat: 3g
- Trans Fat: 0g
- Carbohydrates: 20g
- Fiber: <1g
- Protein: <1g
- Cholesterol: 20mg
Leave a Comment