There’s something undeniably magical about the combination of crispy fried chicken and fluffy biscuits, especially when you add a drizzle of sweet and spicy hot honey. It’s not just food; it’s a story, an experience that invites you to gather around the table with friends and family, sharing laughter and creating memories. As I think back on those cozy brunches filled with warmth and joy, I can’t help but feel that Hot Honey Chicken Biscuits are the perfect embodiment of comfort food. Imagine biting into that tender chicken, perfectly seasoned and enveloped in a crunchy exterior, all while your taste buds dance with the delightful contrast of sweet honey tinged with a gentle kick of heat. This dish isn’t merely a meal; it’s a celebration of flavors that sings in harmony—a true revelation for anyone lucky enough to take part.
Cooking is always about bridging tradition with innovation. These Hot Honey Chicken Biscuits reflect Southern roots while allowing for personal twists—like using your favorite herbs or adjusting the heat level of the honey drizzle to suit your palate. Why do we adore this recipe so much? Perhaps it’s because it effortlessly straddles breakfast and lunch, making it ideal for any occasion—from lazy Sunday mornings to lively brunch parties with friends. Each bite tells a story rooted in Southern hospitality, where sharing good food is synonymous with love. Trust me when I say that once you try these biscuits, you’ll find yourself revisiting this recipe time and time again, eager to pass it down through generations.
Hot Honey Chicken Biscuits: A Sweet and Spicy Adventure
Let’s embark on this culinary journey together! The process of creating Hot Honey Chicken Biscuits is as rewarding as the final result itself. From marinating the chicken to crafting those flaky biscuits from scratch (or using store-bought if you’re short on time), each step is infused with love and care. And don’t worry—I’ll be right here guiding you through every detail to ensure your success!
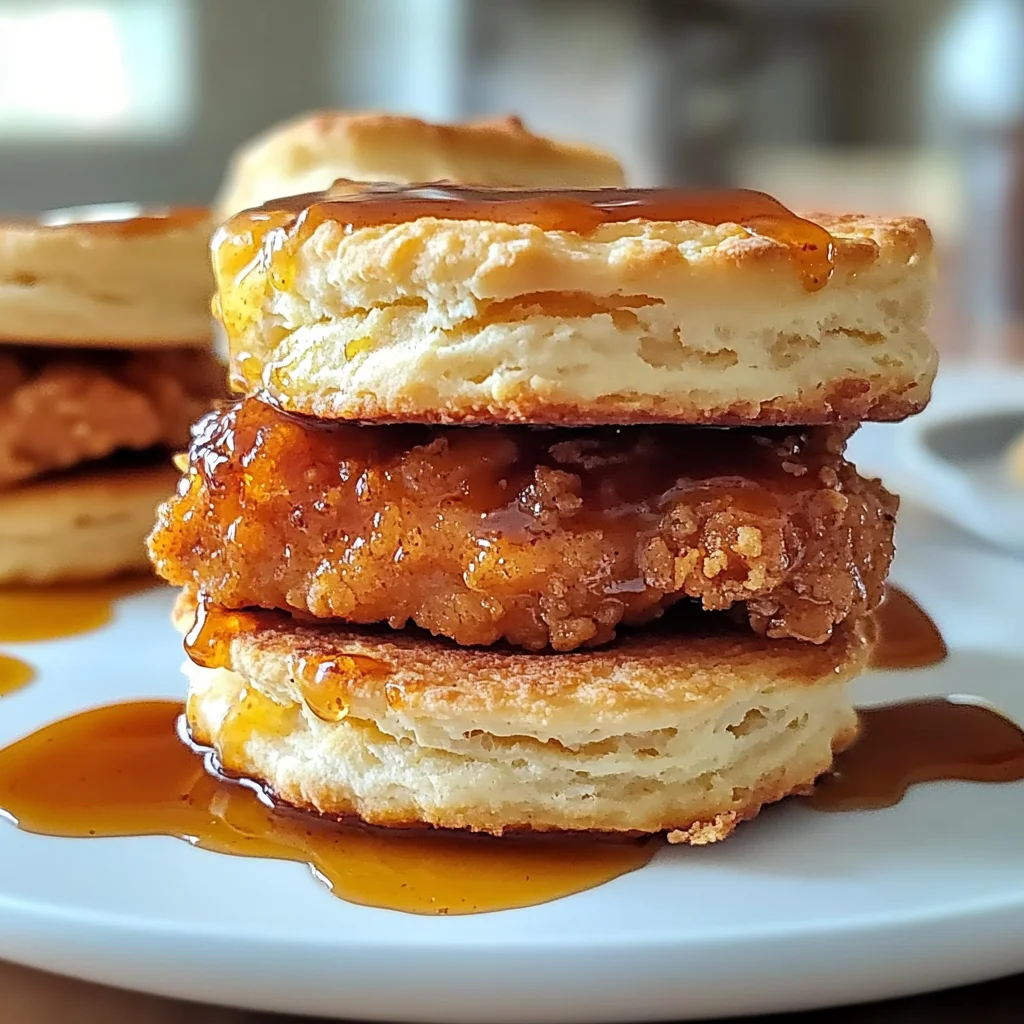
Ingredients:
As we dive into this adventure, let’s take a moment to appreciate each ingredient that plays its part in crafting these delightful Hot Honey Chicken Biscuits. Every single one brings something special to the table—literally!
- 4 boneless skinless chicken thighs (or breasts, if preferred). Chicken thighs are my go-to choice for this recipe because they are so wonderfully juicy and flavorful, thanks to their higher fat content compared to breasts. However, if you prefer leaner meat or have some chicken breasts on hand, feel free to use those instead! Just know that they may require slightly less cooking time since they’re thinner.
- 1 cup buttermilk (for tenderizing). Buttermilk is magic—it tenderizes chicken beautifully while adding a subtle tanginess that elevates the dish’s flavor profile. When marinating your chicken in buttermilk, give it at least an hour (or overnight if you can!) so it can work its wonders—trust me, this step is crucial for achieving that melt-in-your-mouth texture.
- 1 cup all-purpose flour. This flour serves as the base for our chicken’s crispy coating—it’s essential for creating that crunch we all crave when biting into fried chicken. Always choose high-quality flour; it will make a difference in texture. And don’t forget: it’s best to sift your flour before measuring for accuracy!
- 1 tsp paprika. Paprika adds not only color but also depth of flavor to our coating mix. I love using smoked paprika here; it lends a subtle smokiness that complements the heat from our hot honey drizzle perfectly.
- 1 tsp garlic powder. Garlic powder infuses our fried chicken with fragrant warmth—a non-negotiable component if you ask me! Fresh garlic could also work wonders here; however, garlic powder integrates seamlessly into our dry coating mix without clumping.
- 1 tsp salt. Salt is absolutely paramount in bringing out all those lovely flavors in our dish! It enhances every component—from the marinated chicken to the biscuits themselves—so don’t skimp on this step or underestimate its importance.
- 1/2 tsp black pepper. A dash of freshly cracked black pepper adds just enough heat and contrast against the other flavors without overwhelming them—think of it as enhancing rather than dominating.
- Vegetable oil for frying. Choosing the right oil can make or break your frying game! Vegetable oil has a high smoke point which makes it perfect for frying at higher temperatures without burning—this ensures that golden color we’re aiming for while keeping everything crispy.
- 2 cups all-purpose flour (for biscuits). Yes, we need more flour! This second batch creates our flaky biscuit dough which forms an essential foundation for holding our delicious fried chicken—the heart of our dish.
- 1 tbsp baking powder. Baking powder is what gives our biscuits their rise—think fluffy clouds rather than dense hockey pucks! Make sure yours is fresh for optimal results; old baking powder won’t pack a punch.
- 1/2 tsp baking soda. Alongside baking powder, this ingredient helps create those beautiful layers within each biscuit by promoting leavening action—trust me when I say these little guys will puff up perfectly!
- 1/2 tsp salt (for biscuits). Just like before, salt amplifies flavor here too—instead of being bland or flat-tasting, our biscuits will sing!
- 6 tbsp cold unsalted butter (cubed). Butter brings richness and flakiness into play—the colder it is when mixed into the dough, the better! This process known as “cutting in” creates those delicate layers we’re striving for in flaky biscuits.
- 3/4 cup buttermilk (for biscuits). Yep—more buttermilk! Its tangy flavor again shines through here while providing moisture needed during mixing—and just like before: colder is better!
- Store-bought biscuits can also be used for convenience if you’re pressed for time or simply want an easy route without sacrificing too much quality.
- 1/2 cup honey. Here comes our star performer—the sweet liquid gold that ties everything together beautifully! Use high-quality honey (preferably raw) which boasts rich flavors compared to processed versions—you’ll really taste the difference!
- 1–2 tsp red pepper flakes (adjust to taste). This provides that coveted spicy kick! Feel free to adjust according to your preference; some might even enjoy more heat while others savor just a hint—it’s all about finding what works best for you!
- 1 tsp apple cider vinegar (optional). Adding vinegar gives an extra layer of complexity by balancing sweetness with acidity—but only add it if you want some tang; otherwise skip this step altogether!
- Pinch of salt finishes off our hot honey sauce nicely—don’t forget even sweetness needs balance!
With these ingredients close at hand, we’re ready to move forward on this exciting cooking escapade together!
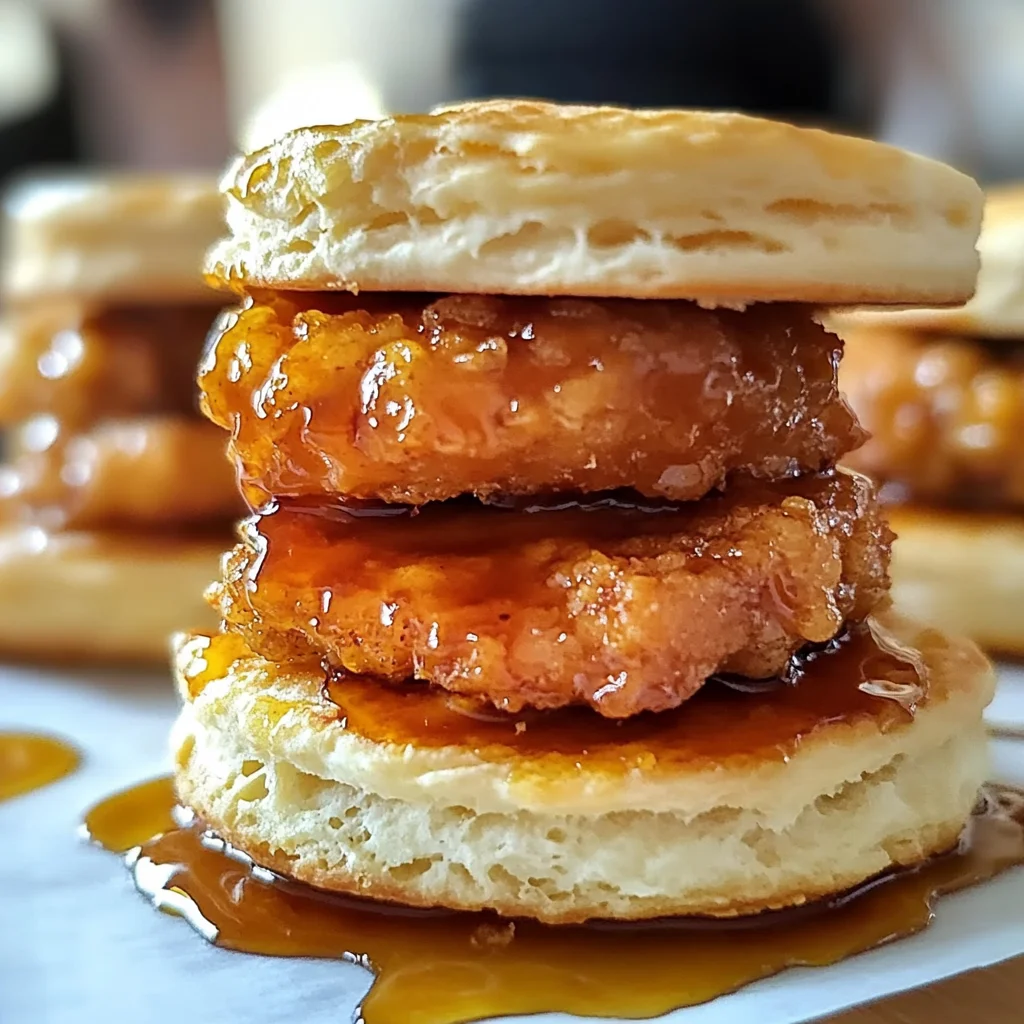
Equipment You’ll Need:
Before we get cooking, let’s talk about some essential tools that’ll help us create these heavenly Hot Honey Chicken Biscuits. Having these handy will streamline your process and set you up for success!
- Large mixing bowl – This bowl serves as your primary workspace where you’ll combine ingredients without worrying about spills or messes—it should be large enough so everything has room to blend harmoniously together!
- Whisk – A good whisk helps incorporate dry ingredients smoothly while ensuring no lumps remain—a vital tool when dealing with flour-based mixtures like batter or doughs!
- Measuring cups & spoons – Accurate measurements are key here; using proper measuring tools guarantees consistency throughout every stage—from seasoning marinades down through baking times.
- Cutting board & knife – You’ll need these two companions when handling raw poultry—they allow safe preparation while ensuring cleanliness by keeping surfaces separate from other foods.
- Cast iron skillet or deep fryer – For frying up that luscious chicken perfectly crispy on all sides—you can use either option depending on what you have available at home! Cast iron skillets retain heat exceptionally well which produces even cooking results too!
With all these pieces assembled before us now let’s dive deeper into preparing those mouthwatering Hot Honey Chicken Biscuits!
Step 1: Marinating Magic
First things first—let’s prepare our chicken by marinating it in buttermilk mixed with spices! Combine one cup of buttermilk along with paprika, garlic powder, salt & black pepper in your large mixing bowl until smooth—this simple mixture works wonders by breaking down proteins within each piece resulting in tender juiciness once cooked through later on! Place four boneless skinless thighs directly into marinade ensuring they’re completely submerged within creamy goodness before covering tightly with plastic wrap or foil then refrigerating anywhere between thirty minutes up until overnight depending on how deep you’d like flavors penetrate their essence! Trust me—I promise you won’t regret letting them soak longer overnight yields richer flavors throughout every bite later down road.
Step 2: Crafting Biscuit Dough
While waiting patiently upon marination magic happening inside fridge—we can commence crafting flaky biscuit dough next—which requires two cups plus additional half-cup all-purpose flour combined alongside tablespoonful baking powder alongside half teaspoon each respective baking soda & salt whisked together thoroughly until evenly distributed throughout mixture formed therein basin below awaiting arrival cold cubed butter freshly cut ahead hand-sized pieces brought forth next step upon countertop surface nearby—that way they’re easy accessible during subsequent incorporating process required shortly thereafter involving hands-on labor intensity applied cutting said butter gently working into combined dry elements until crumbly texture achieved resembling coarse sand-like consistency remaining visible within sight whilst maintaining small bits recognizable still intact present within view displaying promise future flaky outcomes anticipated upcoming moments served soon thereafter post oven escapade completed altogether soon thereafter…
Step 3: Bringing It All Together
Now comes my favorite part—the actual assembly leading us closer toward delicious end goal achieved through patience exercised thus far displayed proudly upon tabletop nearby awaiting attention soon thereafter expected given aromatic scents wafting though kitchen air tantalizing senses surrounding space inviting mouths watering eagerly anticipating glorious moments ahead shared joyously amongst loved ones gathered round feasting merrily celebrating triumphs achieved collectively this day brought forth smiling faces brightening ambiance accordingly meanwhile let’s add three-fourths cup fresh chilled buttermilk poured directly atop crumbly blended goodness stirring gently enough ensure absorption occurs fully yet avoiding overworking dough risking toughened outcome tempting fate resulting disaster instead remaining mindful taking care during kneading process afterward folding edges inward repeatedly forming cohesive ball shape topping lightly floured surface previously prepped earlier awaiting arrival doughy creation beginning transformation unfolding beautifully right before eyes witnessed firsthand throughout entirety journey embarked upon today…
Step 4: Rolling Out Perfection
Next step involves rolling out prepared biscuit dough evenly spread across surface area allowing thickness reach approximately one-inch height ideally desired outcome achieved means cutting circles utilizing round cutter size deemed appropriate preferred personal choice evident showcased prominently beneath glowing pride emanating radiantly above heads surely boasting accomplishments completed thus far ultimate rewards anticipated fantastically celebrated moments unleashed once served stacked high alongside crispy fried chicken pieces topped generously drizzled enticingly prepared hot sauce made previously reserved sitting quietly nearby patiently waiting introduction grand finale presented forth forthwith unleashing symphony flavors harmonizing brilliantly elevating dining experience altogether capturing hearts minds souls alike forever etched memory lane cherished eternally treasured long after last bites enjoyed savoring…
Step 5: Marinating the Chicken to Perfection
Ah, marinating! This crucial step is where the magic truly begins. By soaking your boneless chicken thighs in that rich buttermilk for a minimum of 30 minutes—though I often let mine sit for a couple of hours if I have the time—you’re allowing the chicken to tenderize beautifully. The acidity in the buttermilk works wonders, breaking down those tough muscle fibers and transforming them into juicy bites of delight. Imagine biting into that chicken, and experiencing that succulent texture contrasted with a crispy exterior—absolutely divine! As you prepare this mixture, don’t rush! Make sure each piece of chicken is fully submerged. If it’s not swimming blissfully in that creamy bath, it won’t absorb all those flavors as well as it should.
While your chicken is luxuriating in its buttermilk bath, take a moment to breathe in the anticipation of what’s to come. You’ll want to make sure your workspace is tidy and organized for the next steps—this little bit of preparation will make everything feel so much smoother when it’s time to fry. And trust me on this: if you can let that chicken marinate longer, do it! Even just an hour can elevate your dish from good to utterly extraordinary.
Step 6: Coating with Seasoned Flour
Now comes the fun part: creating that glorious crust! In a large mixing bowl, combine 1 cup of all-purpose flour with paprika, garlic powder, salt, and black pepper. This blend is not just there for flavor; it’s your secret weapon in achieving that crispiness we all crave when we think about fried chicken. Each ingredient plays its role—the paprika adds a beautiful color and smoky undertone while the garlic powder infuses warmth into every bite. Mix these together until they form a lovely sandy consistency; this ensures an even coat on your chicken later.
Once your chicken has soaked long enough, let’s get it ready for frying! Remove each piece from the buttermilk and allow any excess liquid to drip off. It’s important not to skip this step because too much buttermilk will prevent the flour from sticking properly. Dredge each piece generously in your seasoned flour mix, making sure all sides are covered—don’t be shy about pressing down gently to really pack that coating onto the meat. If you’re feeling adventurous (and I encourage you to be), double-dipping back into buttermilk and then again into flour creates an even thicker crust that’s simply irresistible. Just imagine that first bite—the crunch followed by tender chicken—oh my goodness!
Step 7: Mastering the Frying Technique
Now that your chicken is coated beautifully with seasoned flour, it’s time to heat up that vegetable oil in your trusty cast-iron skillet or deep frying pan. You’ll want to fill it up about halfway with oil—this ensures even cooking and helps achieve that perfect golden-brown color we all desire so much. Heat it over medium-high heat until it reaches around 350°F (175°C). A quick tip here: if you don’t have a thermometer handy (though I highly recommend getting one!), you can test if it’s ready by dropping a small pinch of flour into the oil; if it sizzles immediately, you’re good to go!
Carefully lower each piece of coated chicken into the hot oil one at a time—this part requires patience! Avoid overcrowding your pan because too many pieces at once can lower the temperature of the oil and lead to greasy instead of crispy results; we want light and airy fried perfection! Cook each piece for about 6-8 minutes on one side without fussing with them too much; flipping them prematurely can cause them to lose their glorious crust. You’ll know they’re ready when they turn beautifully golden brown and reach an internal temperature of 165°F (75°C). Once done, transfer them onto a plate lined with paper towels; this allows any excess oil to drain off and keeps them crisp.
Step 8: Baking Those Flaky Biscuits
While your chicken rests after frying—a vital step allowing juices to redistribute—let’s focus on baking those gorgeous homemade biscuits! Preheat your oven to 450°F (230°C). In another bowl, whisk together 2 cups of all-purpose flour with baking powder, baking soda, and salt until well combined. This mixture sets up the essential leavening process needed for those biscuits to rise beautifully while maintaining a delicate texture.
Next comes my favorite part: incorporating cold butter into our dry ingredients! Using either your fingertips or a pastry cutter (or even two forks), work those cubed butter pieces into the flour mixture until you achieve a crumbly consistency resembling coarse sand or small peas—this step is non-negotiable because it’s what gives biscuits their flaky layers as they bake. Don’t rush this process; take your time ensuring no large chunks remain because those will prevent proper flakiness later on.
Finally, pour in three-quarters of a cup of buttermilk gradually while stirring gently with a spatula or wooden spoon until just combined. It’s vital not to overmix here; we want just enough moisture for everything to come together without losing those lovely air pockets formed by our butter pieces. Once you have formed a shaggy dough, turn it out onto a lightly floured surface and pat it down gently until it’s about one inch thick before cutting out biscuits using either a biscuit cutter or even just a glass! Place these beauties on a parchment-lined baking sheet before popping them into your preheated oven for about 12-15 minutes.
With these steps complete—from marinated chicken perfection through flaky biscuits straight from heaven—you’re left holding onto something profoundly satisfying: Hot Honey Chicken Biscuits that are begging for their moment on the table where family gathers around eager anticipation lighting up their faces as they dive right into comfort food bliss like no other! So gather everyone around, savor every bite together sharing memories along with deliciousness—you’ve created something special today!
Storage and Enjoyment Tips for Your Hot Honey Chicken Biscuits
Now that you’ve created this delightful dish of Hot Honey Chicken Biscuits, it’s time to revel in the joy of enjoying them! Whether you’re gathering around the table with loved ones or savoring a quiet moment alone, these biscuits promise to elevate your experience. But what if you find yourself with leftovers? Don’t worry, I’ve got you covered! Let’s dive into the best ways to store and savor these scrumptious morsels beyond their initial glory.
Storing Leftover Hot Honey Chicken Biscuits
To keep your Hot Honey Chicken Biscuits tasting as fresh as the moment they were pulled from the oven, you’ll want to store them in an airtight container. This is crucial because it helps lock in moisture while keeping out unwanted air that can make them tough. Ideally, you’ll want to stash them in the fridge where they’ll stay good for about 3 to 4 days. If you’re concerned about maintaining that delightful flaky texture of your biscuits, here’s a pro tip: place a slice of bread in the container with them! The bread acts like a sponge, absorbing excess moisture and helping keep your biscuits soft and tender. When reheated, they might not have the same crispiness as when first made, but trust me, they’ll still taste utterly delicious! For reheating, simply pop them in a preheated oven at 350°F (175°C) for about 10-15 minutes; this will revive their warmth while giving you that comforting aroma all over again.
Freezing Hot Honey Chicken Biscuits for Later
If you’re looking to save some time for future meals – or if you just can’t resist making a double batch – freezing is an excellent option! To do so properly, let your biscuits cool completely before wrapping each one tightly in plastic wrap or aluminum foil. Then, place them in a freezer-safe bag or container to prevent freezer burn. They’ll stay fresh for up to three months frozen, which makes whipping up a quick meal so easy. When you’re ready to enjoy them again, simply thaw overnight in the refrigerator, and then reheat as mentioned above. The convenience factor here is absolutely paramount; imagine having these heavenly bites right at your fingertips whenever those cravings hit! It’s like having your own little treasure trove of comfort food waiting for you!
Breakfast
Hot Honey Chicken Biscuits
- Total Time: 50 minutes
- Yield: Serves 4
Description
Experience irresistible Hot Honey Chicken Biscuits – crispy fried chicken meets flaky biscuits topped with sweet-spicy honey drizzle. Try it today!
Ingredients
- 4 boneless skinless chicken thighs
- 1 cup buttermilk (for marinating)
- 3 cups all-purpose flour (2 cups for biscuits; 1 cup for coating)
- 1 tbsp baking powder
- 1/2 cup honey
- 1–2 tsp red pepper flakes
- Vegetable oil (for frying)
Instructions
- Marinate chicken thighs in buttermilk for at least 30 minutes or up to overnight.
- For the coating, mix 1 cup flour with paprika, garlic powder, salt, and black pepper in a bowl.
- Remove chicken from buttermilk, dredge in seasoned flour, and set aside.
- Heat vegetable oil in a skillet to 350°F (175°C). Fry chicken for about 6-8 minutes per side until golden brown and cooked through.
- While chicken rests, prepare biscuits by mixing remaining flour with baking powder and salt. Cut in cold butter until crumbly. Stir in buttermilk until just combined.
- Roll out dough and cut into rounds. Bake at 450°F (230°C) for about 12-15 minutes.
- For the hot honey glaze, warm honey with red pepper flakes on low heat until infused.
- Assemble by placing fried chicken between biscuits and drizzling with hot honey.
- Prep Time: 20 minutes
- Cook Time: 30 minutes
- Category: Main
- Method: Frying/Baking
- Cuisine: Southern
Nutrition
- Serving Size: 1 serving
- Calories: 420
- Sugar: 10g
- Sodium: 600mg
- Fat: 18g
- Saturated Fat: 6g
- Unsaturated Fat: 10g
- Trans Fat: 0g
- Carbohydrates: 46g
- Fiber: 2g
- Protein: 24g
- Cholesterol: 80mg
Leave a Comment