Ah, there’s something utterly enchanting about creating a treat that doesn’t require an oven to deliver pure bliss. These No Bake Chocolate Oatmeal Bars are not just a recipe; they’re a heartfelt hug in food form. Imagine the moment you take a bite: the rich chocolate melding with the nutty undertones of oats and peanut butter, offering you a symphony of flavors that dances on your palate. The warm aroma of melted chocolate and creamy peanut butter wafting through your kitchen feels like nostalgia wrapped in comfort. This is not merely food; it’s an experience that brings people together and ignites joy. Every time I make these bars, it’s like I’m revisiting cherished memories filled with laughter and warmth, making them perfect for sharing with friends or indulging solo.
Now, let’s talk about what makes this recipe so special. These No Bake Chocolate Oatmeal Bars strike that perfect balance between sweet and wholesome, allowing you to treat yourself without the guilt that sometimes accompanies desserts. They’re quick to whip up—no need to preheat the oven or watch over a bubbling pot on the stove. Just imagine the thrill of blending simple ingredients into something extraordinarily satisfying! Whether you’re gearing up for a family gathering, looking for a delightful snack to pack in lunches, or craving a sweet pick-me-up after a long day, these bars fit the bill beautifully. They’re versatile enough to adapt to your preferences while maintaining their charm as a classic favorite.
No Bake Chocolate Oatmeal Bars: A Sweet Symphony Without The Oven
These bars are not only easy to make but also incredibly satisfying to eat. Trust me when I say they’ll quickly become a staple in your dessert repertoire, as they bridge the gap between indulgence and healthiness with every chewy bite.
Ingredients:
Embarking on this culinary journey requires just a handful of simple yet impactful ingredients that come together harmoniously to create your No Bake Chocolate Oatmeal Bars. Each component plays an essential role in crafting something truly special.
- 1 cup (2 sticks or 226g) unsalted butter: Butter is our base here, providing richness and depth to these bars. It melts down beautifully with brown sugar, creating that liquid gold we all crave in desserts. Using unsalted butter allows us control over the saltiness of our treat, letting the sweetness shine through without being overshadowed by saltiness. When shopping for butter, look for high-quality brands; European-style butters have higher fat content which can elevate your bars even further.
- 1/2 cup brown sugar (packed): Brown sugar is more than just sweetness; it brings moisture and flavor complexity with its caramel notes thanks to molasses. Packing it tightly helps ensure you get the right amount which results in that desired chewy texture we all love. If you find yourself out of brown sugar, you can easily substitute it with white sugar mixed with a little bit of molasses—just remember that the deeper flavor will be missed!
- 1 teaspoon vanilla extract: This little powerhouse adds warmth and depth, enhancing all other flavors in our bars. The quality of vanilla can transform your dish; pure vanilla extract is always preferred over imitation because it offers genuine flavor that elevates each bite into something memorable.
- 3 cups rolled oats: Rolled oats are the backbone of our recipe, providing structure while also lending their nutty flavor profile. They absorb moisture beautifully during preparation and help bind everything together without feeling heavy or dense. Look for whole grain options whenever possible as they often offer more nutrients and fiber!
- 1 cup semisweet or dark chocolate chips: Chocolate is not just an ingredient—it’s what makes these bars truly irresistible! Whether you opt for semisweet or dark chocolate depends on your preference for sweetness versus intensity; both bring their unique charm into play. Choose brands with higher cocoa content if you desire richer flavor—this choice will give your bars an indulgent touch.
- 1/2 cup peanut butter: Creamy or crunchy—your choice! Peanut butter adds protein while enhancing texture; its earthy flavor complements chocolate spectacularly well, creating an utterly intoxicating combination everyone adores. When selecting peanut butter, go for natural brands without added sugars or hydrogenated oils for healthier indulgence.
Equipment You’ll Need:
Having the right tools makes preparing these No Bake Chocolate Oatmeal Bars not only smoother but also more enjoyable! While they aren’t technically “ingredients,” these essential partners help craft something wonderful from those simple components listed above.
- 8-inch or 9-inch square baking dish: This size is perfect for creating thick bars that hold their shape beautifully once set! If you’d prefer thinner bars, feel free to use a larger 9×13-inch dish—just adjust your cutting accordingly later.
- Parchment paper: Line your baking dish with parchment paper before getting started; this non-stick hero allows you to lift out your completed bars easily without any fuss or mess at all! Plus, it saves on cleanup time—a win-win in my book!
- Large saucepan: The heart of this recipe where our buttery blend comes together! Choose one with ample space so stirring isn’t cumbersome—it’s vital we get everything fully incorporated without splashing everywhere!
- Microwave-safe bowl: For melting those luscious chocolate chips and peanut butter together smoothly—this step ensures we achieve that delightful creamy filling consistency we crave without any lumps interrupting our experience!
- Rubber spatula: An essential tool for scraping down sides and folding mixtures gently—it guarantees no ingredient goes unnoticed while adding texture throughout our creation!
Now that we have gathered our ingredients and equipment, let’s dive into how we prepare these delicious No Bake Chocolate Oatmeal Bars!
Step 1: Preparing Your Baking Dish
Start by lining an 8-inch or 9-inch square baking dish with parchment paper and set it aside where it’s easily accessible during the process. Make sure to leave some overhang on the edges—this little trick will be crucial later when lifting those beautiful bars out intact! If you’re feeling adventurous and want thinner bars instead of thicker ones, go ahead and grab a 9×13-inch pan; just remember you’ll end up with more pieces to share (or keep all to yourself!).
Step 2: Melting Butter & Brown Sugar
In your large saucepan over medium heat, combine your unsalted butter and packed brown sugar until both elements melt away harmoniously into each other—a lovely sight indeed! Stir gently as this happens—the goal here is not only melting but ensuring that sugar dissolves completely without caramelizing too much since we want softness rather than crunchiness later on in our final dish! Once melted down together beautifully (it should take around 4–5 minutes), stir in the comforting hug of vanilla extract before adding rolled oats directly into this mix.
Step 3: Blending Ingredients
Now lower the heat slightly so everything simmers instead of boiling aggressively—this gentle cooking method allows flavors to meld perfectly while preventing potential burning at those critical stages! You’ll want everything mixed well together within about three minutes; this short duration ensures we capture all those lovely taste profiles without losing moisture from overcooking—keep stirring until every oat looks coated evenly throughout!
Step 4: Forming The Base Layer
Once blended nicely as mentioned earlier above (trust me—you’ll know when it’s ready!), pour half of this warm oat mixture into your prepared baking dish carefully then spread out evenly using either another spatula or spoon pressing down firmly enough so it adheres nicely but still retains its airy quality underneath—that crunch factor needs preserving too! Set aside what’s left since we’ll layer again shortly after completing our next steps.
With these initial steps under our belt already showcasing how easy yet rewarding making No Bake Chocolate Oatmeal Bars can be… stay tuned as we melt chocolate goodness next!
No Bake Chocolate Oatmeal Bars: The Ultimate Indulgence
Oh my goodness, my friends, we are about to embark on a delightful journey that culminates in a mouthwatering treat that’s not only incredibly easy to make but also utterly addictive! These No Bake Chocolate Oatmeal Bars are like a warm hug wrapped in chocolatey goodness, and I promise you, once you take that first bite, you’ll understand why they become an instant family favorite. Made with wholesome rolled oats, rich chocolate, and creamy peanut butter, these bars blend textures and flavors in such a way that they create a symphony of satisfaction with every single bite. So grab your ingredients and let’s dive right into the magic of making these luscious bars!
Step 5: Melting Bliss – The Chocolate Peanut Butter Filling
Now it’s time to create the luscious filling that truly elevates these bars to extraordinary heights. In a small microwave-safe bowl, combine 1/2 cup of peanut butter and 1 cup of semisweet or dark chocolate chips. You’ll want to microwave this mixture in 30-second intervals, stirring well after each interval until everything is smooth and beautifully combined. This step is crucial because it allows the heat to gently melt the chocolate without seizing or burning—trust me on this, burnt chocolate is a heart-wrenching affair! Once you reach that creamy consistency, you’ll be greeted by an utterly intoxicating aroma; it’s the kind that makes your heart race with excitement and anticipation.
But why do we melt these two ingredients together? Well, have you ever experienced the joy of biting into something where flavors meld perfectly? That’s exactly what happens here! The creamy richness from the peanut butter complements the decadent chocolate so wonderfully that they form a velvety filling that will make you swoon. Make sure to stir thoroughly until the mixture is completely smooth—this ensures even distribution throughout your bars. If you find yourself with any stubborn lumps of chocolate or peanut butter, don’t hesitate to pop it back into the microwave for just a few more seconds. Perfection is worth the extra minute!
Step 6: Layering Like a Pro – Building the Perfect Structure
Now comes one of my favorite parts: layering! Take half of your oat mixture—the portion you set aside earlier—and pour it into your prepared baking dish. Spread it out evenly with a spatula or your hands (I often use my hands for better control), pressing down firmly but gently. This step helps create a solid base for our bars; it’s absolutely paramount that this layer is compact enough to hold everything together later on. You want to feel confident that when you cut into these bars later, they won’t crumble apart like an unsteady house of cards.
Once you’ve pressed down the first layer evenly across the bottom of the dish, it’s time for that heavenly peanut butter-chocolate filling we just created! Pour it over the crust and spread it out gently but evenly—this layer should be like a silky blanket hugging our oat base. Don’t forget to reserve about 1/4 cup of this divine mixture for drizzling later; trust me on this little touch—it transforms your bars from ordinary to extraordinary visually and flavor-wise! As you’re working with this gooey goodness, take a moment to appreciate how effortlessly everything is coming together; there’s something profoundly satisfying about creating something so delicious from simple ingredients.
Step 7: Topping It Off – The Final Layer
After spreading out our luscious filling, it’s now time for the remaining oat mixture. So grab that other half we set aside earlier and sprinkle it over the chocolate layer evenly. Again, you’ll want to press down gently but firmly—this step ensures all those beautiful layers adhere well together while creating lovely texture as well. It’s essential not to rush this part; taking your time here allows all those flavors to meld beautifully during chilling.
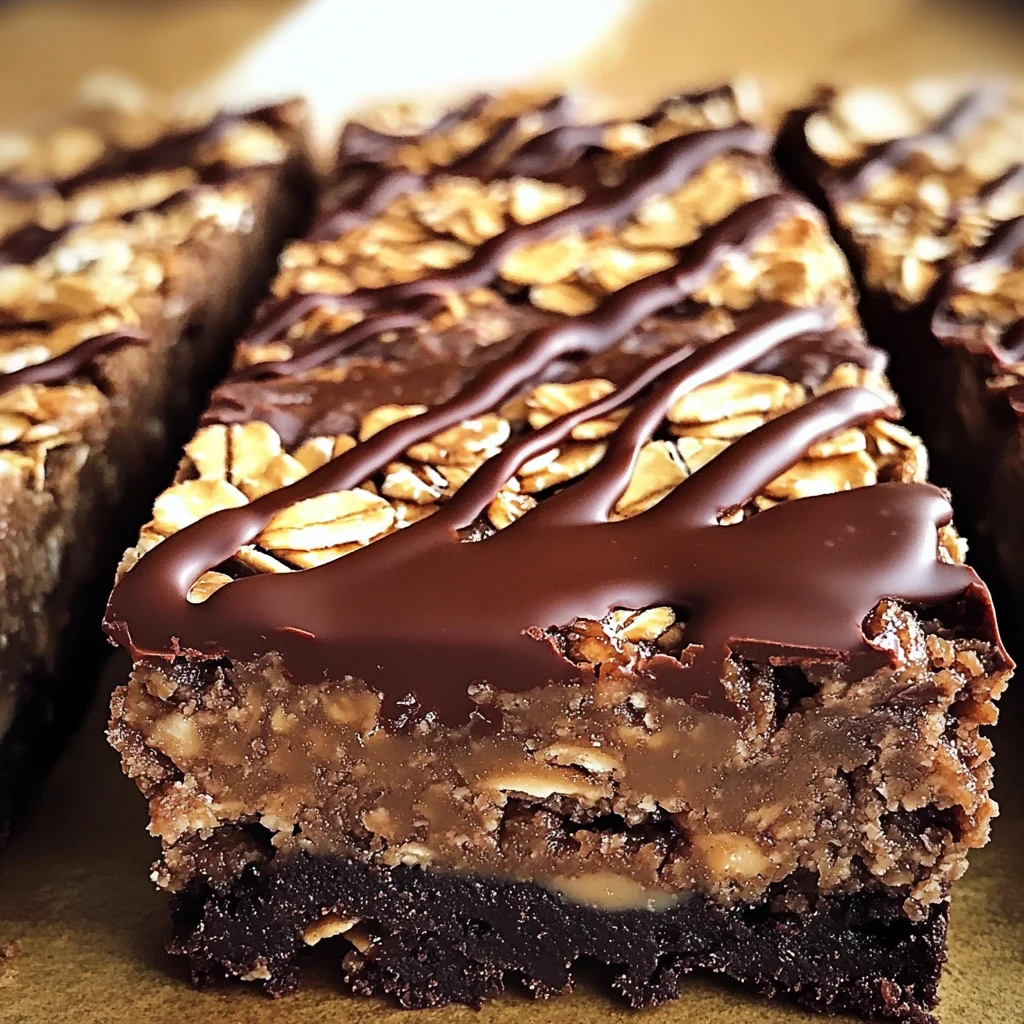
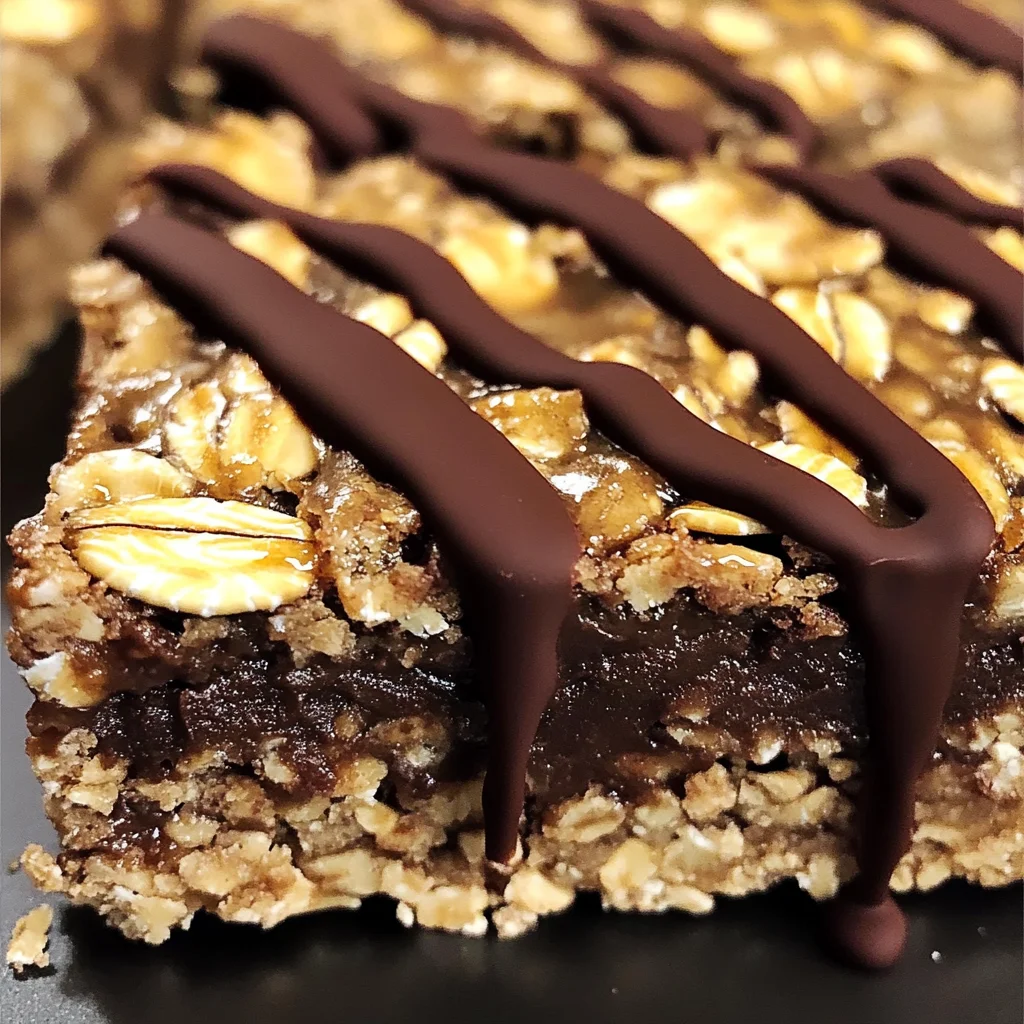
Now comes another delightful touch: drizzle that reserved chocolate-peanut butter mixture over this final oat layer! It adds visual appeal and provides little pockets of indulgent flavor throughout each bar when sliced. Honestly, who could resist an extra burst of chocolatey goodness? As you’re drizzling away, just envision how each slice will look when presented at your next gathering or simply enjoyed at home with loved ones—it’s impossible not to get excited!
Step 8: Chilling Out – The Transformative Waiting Game
This next step requires some patience—but trust me when I say it’s absolutely worth every minute! Cover your baking dish with plastic wrap or aluminum foil (careful not to disturb those precious layers) and pop it into the refrigerator for 2 to 3 hours or even overnight if you can resist temptation! This chilling period allows all those beautiful layers we’ve crafted together time to set properly; without this crucial stage, you risk ending up with soft bars that fall apart instead of cutting into neat pieces.
As they chill, imagine how all those wonderful flavors will deepen and mature—it’s truly magical when food has time to rest and let its personality shine through! When you’re ready to cut into them after their chilling adventure, let them sit at room temperature for about 15-20 minutes before slicing; this helps soften them just enough for easier cutting while still holding their shape beautifully. Use a sharp knife for clean cuts—you’ll want those edges crisp rather than jagged—so don’t skip this detail if perfect presentation matters!
Final Touches – Savoring Your Creation
Step 9: The Grand Reveal – Cutting & Enjoying Your Creation
At long last, it’s time for the moment we’ve all been waiting for—the grand reveal! Carefully lift your no-bake chocolate oatmeal bars out of the baking dish using the parchment paper overhang (this clever trick saves us from messy clean-up!). Once they’re out on your cutting board or plate, grab that sharp knife again and prepare yourself for some serious delight as you slice through those layers.
As you cut through these beauties into squares or rectangles (the size is entirely up to you), breathe in deeply—the smell wafting up will transport you straight into dessert heaven! There’s something truly rewarding about seeing how beautifully your creation has come together; each piece reveals glistening layers of oats hugging that smooth chocolate-peanut butter center—all begging to be devoured.
Don’t forget about presentation either—these bars can be served as-is or garnished with crushed nuts or even sprinkles if you’re feeling festive! Share them generously with friends or keep them all for yourself—no judgment here because I understand how hard it can be not wanting just one more piece!
So there you have it—a no-fuss recipe resulting in delectable No Bake Chocolate Oatmeal Bars that’ll quickly become a staple in your kitchen repertoire. Each bite promises warmth and comfort while bringing smiles around any table—it doesn’t get better than that! Enjoy every scrumptious moment—you’ve earned it!
Storage and Enjoyment Tips for Your No Bake Chocolate Oatmeal Bars
Now that your delicious No Bake Chocolate Oatmeal Bars are chilling in the fridge (and trust me, waiting is the hardest part!), let’s talk about how to preserve this sweet delight for future indulgences. With just a bit of care, you can keep these bars fresh and tasty, ensuring that each bite is as delightful as the first. Imagine reaching into your pantry for a quick snack or dessert and pulling out a perfectly preserved bar, ready to satisfy those chocolate cravings. It’s like having a little piece of happiness at your fingertips!
Storing Leftover No Bake Chocolate Oatmeal Bars
To keep your No Bake Chocolate Oatmeal Bars in tip-top shape, I recommend storing them in an airtight container, preferably one that’s lined with parchment paper to avoid sticking. This keeps moisture out and preserves that delightful texture we all love. If you’ve got some leftovers (though I can’t promise there will be many!), they’ll last in the fridge for up to a week. Pro tip: placing a slice of bread in the container can help maintain moisture, ensuring your bars remain chewy and delicious rather than drying out. And let me tell you, they taste just as mesmerizing after a couple of days — the flavors meld together beautifully! When you’re ready for a treat, simply take them out of the fridge and let them come to room temperature; it’ll make that chocolate drizzle even more inviting.
Freezing No Bake Chocolate Oatmeal Bars for Later
If you’re looking to extend the life of these scrumptious bars even further, freezing is an excellent option! Slice them into individual portions before wrapping each bar tightly in plastic wrap or aluminum foil (this prevents freezer burn). Then pop them into an airtight freezer bag or container. They can stay frozen for up to three months without losing their incredible flavor or texture! When you’re ready to enjoy one (or two), simply remove from the freezer and let them thaw at room temperature for about 30 minutes. This convenience factor makes these bars perfect for meal prepping — just imagine always having a sweet treat on hand whenever those cravings strike!
Dessert
No Bake Chocolate Oatmeal Bars
- Total Time: 0 hours
- Yield: Approximately 12 servings 1x
Description
Indulge in easy no bake chocolate oatmeal bars packed with flavor! Discover this delightful recipe today and enjoy every delicious bite.
Ingredients
- 1 cup unsalted butter
- 1/2 cup brown sugar (packed)
- 1 teaspoon vanilla extract
- 3 cups rolled oats
- 1 cup semisweet or dark chocolate chips
- 1/2 cup peanut butter
Instructions
- Prepare an 8-inch square baking dish by lining it with parchment paper.
- In a large saucepan over medium heat, melt together the butter and brown sugar until smooth. Stir in the vanilla extract.
- Add rolled oats to the mixture and stir until well combined.
- Set aside half of the oat mixture in the baking dish and press firmly to form a base layer.
- In a microwave-safe bowl, melt together the peanut butter and chocolate chips in intervals until smooth.
- Pour the melted chocolate-peanut butter mixture over the oat base and spread evenly.
- Top with the remaining oat mixture, pressing down gently to adhere.
- Drizzle any leftover chocolate-peanut butter mixture on top if desired.
- Cover with plastic wrap and chill in the refrigerator for at least 2 hours before cutting into bars.
- Prep Time: 20 minutes
- Cook Time: None
- Category: Dessert
- Method: No Bake
- Cuisine: American
Nutrition
- Serving Size: 1 bar (50g)
- Calories: 210
- Sugar: 11g
- Sodium: 95mg
- Fat: 10g
- Saturated Fat: 5g
- Unsaturated Fat: 4g
- Trans Fat: 0g
- Carbohydrates: 26g
- Fiber: 3g
- Protein: 4g
- Cholesterol: 15mg
Leave a Comment