Oh, the sheer joy of cooking! There’s something utterly magical about transforming simple ingredients into a dish that warms the heart and nourishes the soul. This Garlic Butter Shrimp (Ready in 15 Minutes!) is not just a meal; it’s an experience that encapsulates the beauty of simplicity while delivering a symphony of flavors that dance on your palate. Picture this: succulent shrimp glistening in a luxurious garlic butter sauce, infused with zesty lemon and fresh parsley, all coming together in under 15 minutes. It’s the perfect dish for those busy nights when you crave something delicious yet effortless—a true revelation that bridges tradition with innovation.
As I stand in my kitchen, watching the shrimp sizzle and the garlic release its intoxicating aroma, I can’t help but feel a sense of connection to countless home cooks who have gone before me. This recipe is steeped in love and warmth, making it ideal for gatherings with friends or a cozy dinner at home. The beauty of Garlic Butter Shrimp lies not only in its flavor but also in its versatility—whether served as an appetizer or paired with pasta or rice for a main course, it brings people together around the table. Trust me when I say, once you try this dish, it’ll find its way into your regular rotation!
Garlic Butter Shrimp (Ready in 15 Minutes!): A Quick Culinary Delight
Let’s dive into this delightful recipe that will quickly become your go-to for any occasion. The wonderful thing about Garlic Butter Shrimp is just how easy it is to prepare without sacrificing flavor. You might even find yourself making it on those evenings when only comfort food will do.
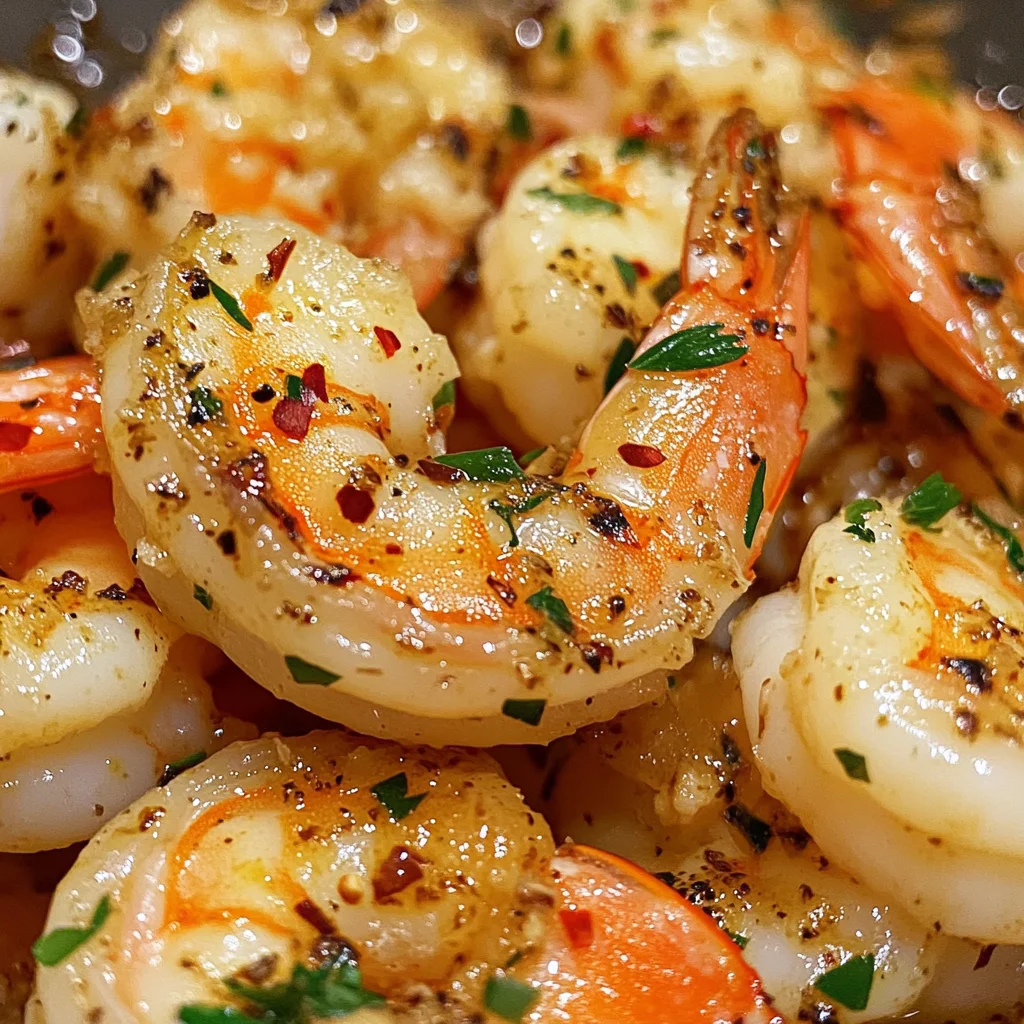
Ingredients:
Gathering quality ingredients is the first step on this culinary adventure, and each component plays a vital role in crafting that unforgettable taste we’re aiming for.
- 1 lb large shrimp (peeled and deveined). When selecting shrimp, opt for large ones as they provide a satisfying bite and are more forgiving during cooking. Freshness is key here; if you can buy them from a reputable seafood market or grocer where they look lively and smell like the ocean, you’ll be golden! If using frozen shrimp, make sure to thaw them thoroughly to avoid excess water in your dish.
- 1/2 cup unsalted butter. Ah, butter—the cornerstone of rich flavors! Unsalted butter allows you to control the saltiness of your dish better. It melts down into liquid gold during cooking, creating a luscious base for our sauce while enhancing every bite of shrimp with its creamy richness. Don’t skimp on quality here; European-style butter has higher fat content, which can elevate your dish even further.
- 4 cloves garlic (minced). Garlic is nothing short of magical in this recipe! Minced garlic releases its oils quickly when sautéed, infusing your butter with an utterly intoxicating aroma that beckons everyone to gather around. Fresh garlic delivers far superior flavor compared to pre-minced varieties; I promise you’ll notice the difference!
- 2 tbsp fresh lemon juice. This bright and zesty addition cuts through the richness of the butter beautifully while marrying all flavors harmoniously. Freshly squeezed lemon juice is non-negotiable here; bottled versions simply lack that vibrant freshness that makes this dish sing.
- 2 tbsp fresh parsley (chopped). Parsley adds not only a beautiful pop of color but also freshness that balances out the richness from the butter. Opt for fresh parsley over dried whenever possible—it has a vibrant flavor profile that truly elevates this dish.
- 1/4 tsp red pepper flakes (optional). If you’re seeking an extra kick, these little flakes are your friend! They offer just enough heat to wake up your taste buds without overwhelming the other flavors.
- 1/2 tsp salt (or to taste). Salt enhances every aspect of flavor; it’s essential for bringing out the natural sweetness of shrimp while balancing richness.
- 1/4 tsp black pepper (or to taste). Like salt, black pepper works wonders by adding depth and complexity to our dish.
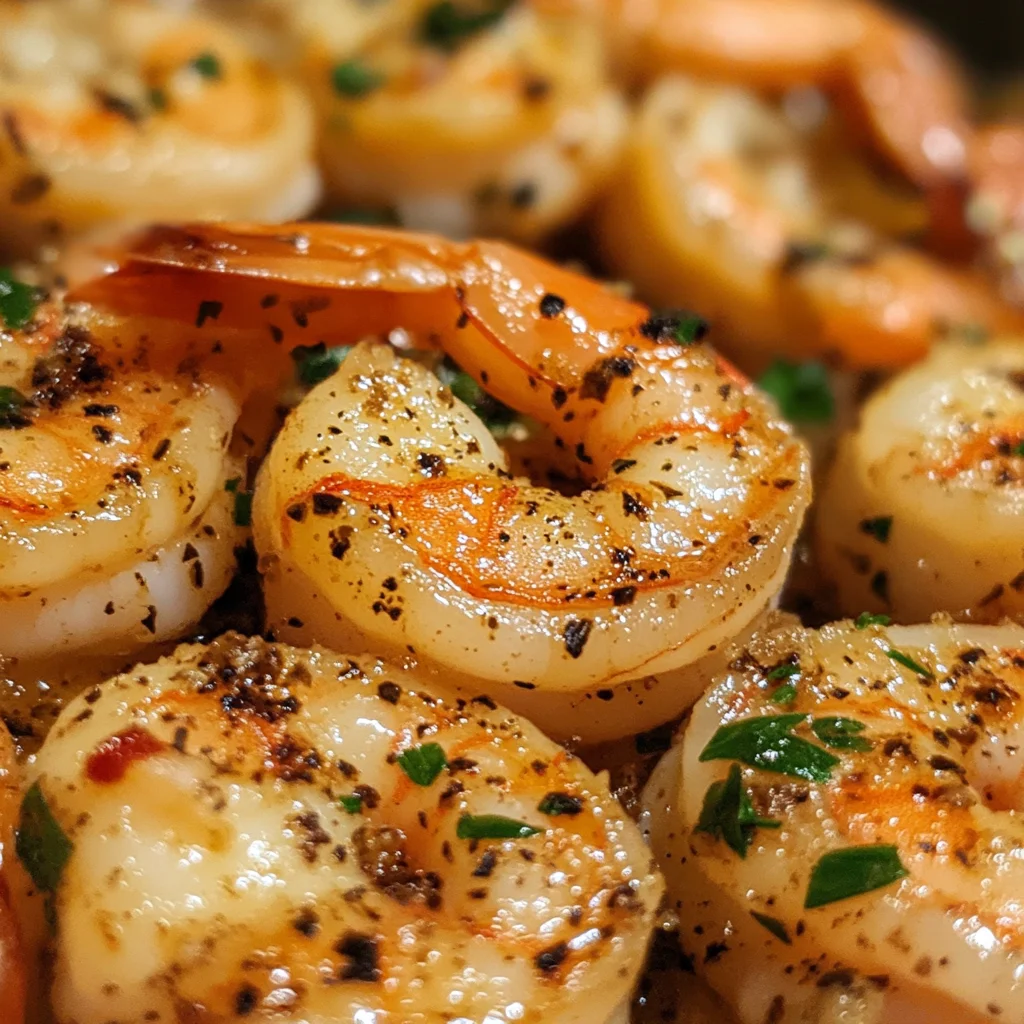
Equipment You’ll Need:
Before we get started on our cooking journey, let’s take a moment to appreciate our trusty kitchen tools—these are essential partners in creating something truly wonderful. Having the right equipment makes all the difference between a smooth cooking experience and one fraught with frustration.
- Large skillet: A good-quality skillet ensures even heating and allows you to sear those lovely shrimp perfectly without overcrowding them. Look for one with a non-stick surface if possible; this will help prevent sticking while also making cleanup easier.
- Spatula: A sturdy spatula is crucial for flipping those delicate shrimp without breaking them apart. Silicone or wooden spatulas work well as they won’t scratch your cookware.
- Measuring spoons: Precision matters! Accurate measurements ensure balanced flavors throughout your dish, so having measuring spoons handy will keep everything consistent.
Now that we’ve gathered our ingredients and tools, let’s embark on preparing our Garlic Butter Shrimp!
Step 1: Thawing and Preparing Your Shrimp
Begin by rinsing your frozen shrimp under cool running water until fully thawed if needed—this process should only take about 10 minutes if they’re small or medium-sized shrimp. Once thawed, pat them completely dry using paper towels—this step may seem trivial but trust me; it’s absolutely paramount! Drying helps achieve that coveted caramelization during sautéing rather than steaming them in their own moisture. Now sprinkle some salt and black pepper directly onto your shrimp; seasoning at this stage allows those flavors to penetrate deeply into each piece.
Step 2: Melting Butter and Infusing Flavors
In your large skillet set over medium heat, add half a cup of unsalted butter—watch as it begins melting into buttery bliss! As it turns golden brown and starts bubbling gently, toss in minced garlic along with optional red pepper flakes if you’re feeling adventurous today. Stir constantly for about 30-60 seconds until fragrant—this technique known as sautéing draws out those essential oils from garlic while ensuring it doesn’t burn (burnt garlic can turn bitter!). You want just enough time for those aromas to envelop you like an embrace before moving on!
Step 3: Cooking Your Shrimp
Now comes one of my favorite moments—the addition of our star ingredient! Gently place your seasoned shrimp into the skillet in a single layer without overcrowding them (you want them to sizzle!). Cook them undisturbed for about 1-2 minutes per side until they transform into a stunning pink hue and curl into that iconic ‘C’ shape—we’re aiming for tender perfection here! Keep an eye out; they’ll go from translucent to opaque fairly quickly—this visual cue tells you exactly when they’re done!
Step 4: Finishing Touches
Once cooked through (and please resist rushing this step!), immediately remove the skillet from heat before adding freshly squeezed lemon juice along with chopped parsley—it’s like adding sunshine after a storm! Stir gently but thoroughly—this action combines all those glorious flavors while allowing every bite to burst with freshness from both herbs and citrus brightness alike.
Now you have created pure magic in less than 15 minutes! Stay tuned because soon we’ll explore how best to enjoy this divine Garlic Butter Shrimp—and I promise you’ll want seconds!
Step 5: Searing the Shrimp to Perfection
Now, it’s time to give our shrimp the star treatment they truly deserve! First, carefully add your beautifully seasoned shrimp to the skillet, ensuring they’re in a single layer. This is not just a suggestion; it’s absolutely paramount! When shrimp are crowded in the pan, they tend to steam rather than sear, which means you’ll miss out on that delightful caramelization that adds layers of flavor. Watch as they sizzle and dance in that luscious garlic butter concoction, which is quickly becoming a symphony of flavors in your kitchen.
Cook the shrimp for about 1-2 minutes on each side. You’ll know they’re ready when they turn a vibrant pink and begin curling into that charming ‘C’ shape—this is your visual cue that they are transforming from raw to perfectly cooked. Trust me on this: overcooked shrimp become rubbery and lose their delicate texture, so keep an eye on them! As you flip them, take a moment to savor the intoxicating aroma wafting from the skillet; it’s like a warm hug for your senses. Once both sides are done, remove them promptly from the heat to prevent any overcooking—a little patience here goes a long way!
Step 6: The Magic of Lemon and Parsley
With the shrimp perfectly cooked and resting off to the side, let’s bring together this dish with two powerhouse ingredients: fresh lemon juice and chopped parsley. This step might seem simple, but I promise you it’s where the magic happens! When you stir in the lemon juice right after removing the skillet from heat, you’re brightening up all those rich flavors. The acidity of the lemon cuts through the buttery richness and balances everything out beautifully.
As you sprinkle in the vibrant green parsley, notice how it adds not only color but also freshness that elevates this dish from ordinary to truly extraordinary. Gently toss everything together until every succulent shrimp is coated in this luxurious sauce—this is where you get that liquid gold effect! I can’t stress enough how essential this step is for flavor balance; without it, your dish could taste flat or overly heavy. So take your time here; don’t rush this step because good things come to those who wait!
Step 7: Plating Your Masterpiece
Now comes one of my favorite parts—plating! The way you present food can amplify its appeal tremendously; we eat with our eyes first after all! Grab your favorite serving platter or individual bowls (if you’re feeling fancy), and gently arrange those gorgeous garlic butter shrimp. Be generous with pouring any remaining sauce over them; this will not only enhance their appearance but also ensure every bite remains juicy and flavorful.
As you plate up, consider adding some extra sprigs of parsley as garnish or even some thin lemon slices for a pop of color and freshness. Each element should complement not just visually but also texturally and flavor-wise. Don’t forget about serving options—these shrimp pair beautifully with a side of crusty bread for dipping into that heavenly garlic butter sauce or perhaps over a bed of fluffy rice that will soak up all those delectable juices. Every detail matters here because it’s not just about eating; it’s about creating an experience that’s profoundly satisfying.
Step 8: Serving Suggestions and Final Touches
Finally, let’s talk about how to serve these delightful Garlic Butter Shrimp (Ready in 15 Minutes!) for maximum enjoyment! I recommend serving them immediately while still warm because that’s when they’re at their absolute best—each bite bursting with flavor and tenderness. If you’re planning a gathering or special occasion, consider setting up a delightful seafood bar with accompaniments like tangy coleslaw or zesty avocado salad to compliment those rich flavors.
And remember, presentation is key! A sprinkle of extra parsley not only enhances appearance but also adds another layer of freshness right before serving. For added flair (and flavor), consider providing additional lemon wedges on the side—after all, who doesn’t love an extra squeeze of bright citrus? Gather your friends around as you serve them these gorgeous shrimp; trust me when I say they’ll be impressed by your culinary skills!
So there you have it—a quick yet utterly intoxicating recipe for Garlic Butter Shrimp that’s sure to become one of your go-to meals when time is tight but deliciousness is non-negotiable. Enjoy every bite knowing you’ve created something truly special in less than 15 minutes!
Storage and Enjoyment Tips for Your Garlic Butter Shrimp (Ready in 15 Minutes!)
Now that you’ve whipped up this stunning dish of Garlic Butter Shrimp, it’s time to dig in and let the flavors dance on your palate! But what if you have leftovers? Fear not! This recipe not only dazzles on the dinner table but also keeps beautifully when stored correctly. Imagine savoring those succulent shrimp again the next day, their garlic-infused richness still tantalizing your taste buds. Let’s dive into how to preserve this delightful meal so you can enjoy it even longer!
Storing Leftover Garlic Butter Shrimp (Ready in 15 Minutes!)
To ensure your leftover Garlic Butter Shrimp remains as delectable as when you first cooked it, store it in an airtight container. Glass containers are my personal favorite because they help maintain freshness and don’t retain odors like plastic might. Make sure to refrigerate your shrimp within two hours of cooking to keep them at their best. When stored properly, you can expect them to last about 2-3 days in the fridge. Now, here’s a little secret: if you want to keep your shrimp from drying out, consider placing a slice of bread in with them before sealing the container—this simple trick helps retain moisture! When you’re ready to enjoy them again, simply reheat gently on the stove over low heat or in the microwave until warmed through. Trust me; they will still taste extraordinary!
Freezing Garlic Butter Shrimp for Later
If you find yourself with more shrimp than you can eat in a few days, freezing is an excellent option! To freeze your Garlic Butter Shrimp properly, allow them to cool completely after cooking, then place them in a freezer-safe bag or airtight container. Be sure to remove as much air as possible before sealing to prevent freezer burn—this step is absolutely crucial for preserving that wonderful flavor! Your shrimp will keep well for up to 2 months in the freezer without losing quality. When you’re ready for a quick meal from frozen, simply transfer them directly into a skillet over medium heat, adding a splash of water or broth to help steam them back to life. It’s such a fantastic convenience—just think about how easy it is to have a gourmet meal at your fingertips whenever cravings hit!
Garlic Butter Shrimp (Ready in 15 Minutes!)
- Total Time: 15 minutes
- Yield: Serves approximately four people 1x
Description
Savor delicious Garlic Butter Shrimp (Ready in 15 Minutes!) that’s quick and easy! Try this flavorful recipe tonight for an unforgettable meal.
Ingredients
- 1 lb large shrimp (peeled and deveined)
- 1/2 cup unsalted butter
- 4 cloves garlic (minced)
- 2 tbsp fresh lemon juice
- 2 tbsp fresh parsley (chopped)
- 1/4 tsp red pepper flakes (optional)
- Salt and black pepper to taste
Instructions
- Thaw shrimp under cool water if frozen, then pat dry and season with salt and black pepper.
- In a large skillet over medium heat, melt the butter until bubbling. Add minced garlic and optional red pepper flakes; sauté for 30-60 seconds until fragrant.
- Add seasoned shrimp in a single layer to the skillet; cook for 1-2 minutes per side until pink and curled.
- Remove from heat and stir in lemon juice and chopped parsley to combine flavors.
- Serve immediately with crusty bread or over rice.
- Prep Time: 10 minutes
- Cook Time: 5 minutes
- Category: Dinner
- Method: Sautéing
- Cuisine: Seafood
Nutrition
- Serving Size: Approximately 1/4 of the recipe (approximately 200g)
- Calories: 320
- Sugar: 0g
- Sodium: 560mg
- Fat: 24g
- Saturated Fat: 15g
- Unsaturated Fat: 8g
- Trans Fat: 0g
- Carbohydrates: 6g
- Fiber: 0g
- Protein: 22g
- Cholesterol: 180mg
Leave a Comment