There’s something utterly intoxicating about the aroma of a burger sizzling on the grill, mingling with the crispness of freshly cut fries that waft through the air. Just imagine it for a moment: golden, crispy fries that are perfectly seasoned, alongside a juicy burger patty nestled atop a colorful bed of fresh greens and vibrant vegetables. This is not just a meal; it’s an experience—a delightful celebration of flavors and textures that brings comfort and joy to every bite. Welcome to my version of The Best Burger Bowls with Fries, where I promise you’ll find a symphony of goodness that transforms the classic burger into something refreshingly new while still keeping all those cherished elements we adore.
What makes these burger bowls so special is not merely their convenience or their health-conscious twist; it’s the way they allow for creativity in every layer. You can customize each bowl to your liking, embracing your favorite toppings and sauces while ditching the bread to savor the vibrant ingredients in their purest forms. When you take a bite, you’re not just tasting beef and veggies; you’re experiencing a harmonious blend of flavors—each element playing its part in this delicious ensemble. Whether it’s a casual weeknight dinner or a gathering with friends, these bowls will surely impress, making everyone feel right at home.
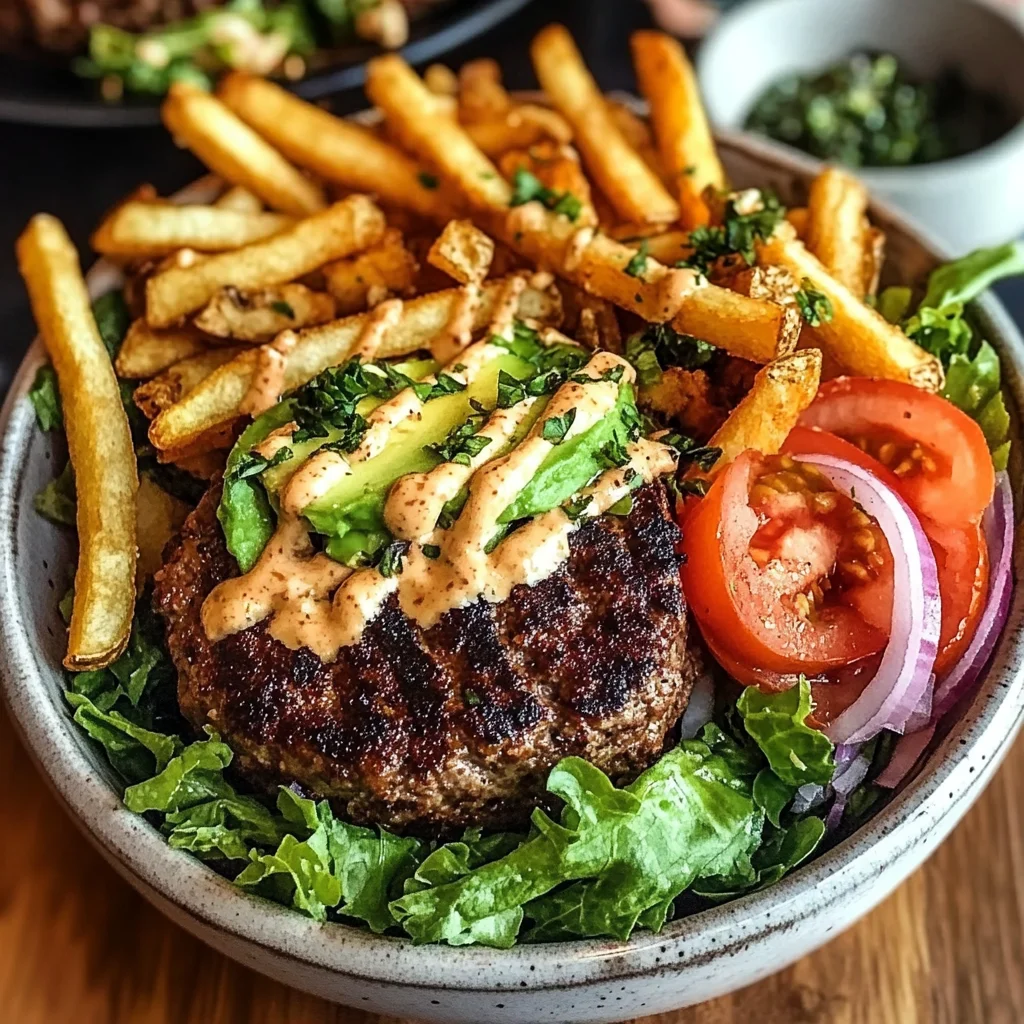
The Best Burger Bowls with Fries: A Comfort Food Reinvented
Let’s dive into this culinary journey together! These burger bowls are designed to be hearty yet wholesome, offering you that satisfying comfort food feeling without the heaviness often associated with traditional burgers. With flavorful beef patties, fresh vegetables, and crispy fries all served in one delightful bowl, this dish is perfect for health-conscious food lovers who still crave indulgence. Are you ready? Let’s gather our ingredients and start cooking!
Ingredients:
As we embark on this delicious culinary adventure, let’s take a moment to appreciate each ingredient that will come together to create our masterpiece. Every component plays an integral role in delivering flavor and texture that will have your taste buds dancing.
-
2 large Russet Potatoes. The star of our fries! Russet potatoes are known for their high starch content, which results in fries that are fluffy on the inside and crispy on the outside—just how we want them! When selecting your potatoes, look for firm ones without any blemishes or sprouts. If you’re feeling adventurous, try sweet potatoes for a twist; they add an earthy sweetness that pairs beautifully with savory elements.
-
1 tablespoon olive oil. Olive oil is our golden elixir here! Not only does it help achieve that desired crunch on our fries, but it also adds depth of flavor and healthy fats. Choose extra virgin olive oil for its robust taste and health benefits; it’s rich in antioxidants and can elevate your dish from good to exceptional.
-
1/2 teaspoon salt. Salt is vital in enhancing the natural flavors of our ingredients. It may seem simple, but this humble seasoning is absolutely paramount—it draws out moisture from potatoes during cooking while also enhancing every bite’s overall flavor profile.
-
1/2 teaspoon paprika or garlic powder. Here’s where we introduce some flair! Paprika provides a subtle smokiness that complements our burger beautifully; it adds warmth without overpowering. Alternatively, garlic powder imparts an aromatic quality that’s simply irresistible; both options boost flavor exponentially.
-
1 pound ground beef. The heart of our burger patties! Opt for ground beef with around 80% lean meat—this balance ensures juiciness while preventing dryness during cooking. Remember to let your beef rest at room temperature before shaping patties; this step guarantees more even cooking and tenderness.
-
1 teaspoon garlic powder. Garlic powder is like magic dust! It infuses our patties with depth and richness without adding any raw garlic texture—perfect for those who prefer smoother bites while still enjoying that classic garlicky essence.
-
1 teaspoon onion powder. Similar to garlic powder, onion powder enhances flavor without introducing chunks or grit into our patties. It rounds out the savory notes beautifully—trust me; you’ll wonder how you ever made burgers without it!
-
1 teaspoon smoked paprika. This ingredient is truly extraordinary because it brings complexity through its smoky undertones—giving our burgers an almost char-grilled flavor even if we’re using a skillet indoors!
-
1 teaspoon salt (for seasoning). Again, remember how crucial salt is? This additional sprinkle ensures we’ve seasoned every layer of flavor adequately—don’t skimp on this step!
-
1/2 teaspoon black pepper. Freshly cracked black pepper elevates our dish by adding warmth and spice; it’s what rounds out all other flavors harmoniously—like music composing an orchestra!
-
4 cups mixed greens or lettuce. Fresh greens form the base of our bowl—their crispness adds contrast against rich flavors and creamy sauces while providing essential nutrients too! Feel free to mix different types or use what you love most—spinach, arugula, or romaine would work wonderfully here!
-
1 large tomato, sliced. A juicy tomato slices bring freshness and acidity that cuts through richer flavors beautifully—a must-have burst of color!
-
1/2 red onion, thinly sliced or pickled. Red onions contribute both crunch and zing; if you’re concerned about their sharpness impacting overall taste too strongly, think about quick-pickling them—they’ll mellow out perfectly while still adding vibrancy!
-
1 cup dill pickles, sliced. Dill pickles provide crunch along with tartness—the perfect counterpart to creamy elements like mayonnaise in our sauce later on! If you’re not fond of pickles (though I encourage trying them!), you could substitute them with olives or jalapeños based on preference.
-
1/2 avocado, sliced. Creamy avocado slices add richness while balancing out everything else—we’re talking about liquid gold here! Use ripe avocados for optimal creaminess; they should yield slightly when gently pressed.
-
1/2 cup mayonnaise (homemade or store-bought). Mayonnaise acts as the silky base for our special sauce—it’s crucial for bringing all flavors together smoothly! If making homemade mayo sounds daunting (it can be!), don’t hesitate to grab your favorite store-bought version instead—just ensure it has clean ingredients.
-
1 tablespoon Dijon mustard. Dijon mustard adds tanginess alongside sharpness—it’s another layer within our sauce that’ll excite your palate without overwhelming it altogether!
-
1 tablespoon ketchup. Ketchup lends sweetness along with acidity—you might think it’s just there for nostalgia’s sake but trust me when I say it’ll brighten up everything else beautifully!
-
1 teaspoon honey or maple syrup (for sweetness). Just enough sweetness goes a long way in balancing out other flavors—the touch from either honey or maple syrup provides nuance rather than overpowering sweetness itself.
-
1/2 teaspoon Worcestershire sauce (vegetarian-friendly if needed) – Worcestershire sauce packs umami punch which deepens all savory notes throughout this dish—it’s non-negotiable if you ask me!
-
1/2 teaspoon garlic powder (for sauce) – We’re using garlic powder again because why not?! It ties back nicely into sauce’s overall profile seamlessly without being overly aggressive throughout!
Equipment You’ll Need:
Cooking becomes so much more enjoyable when you have the right tools at hand! While these items may not be ingredients themselves, think of them as essential partners in creating something wonderful in your kitchen—a well-equipped space can make all the difference between chaos and harmony as you cook.
-
Baking sheet or air fryer basket – Depending on whether you’re baking traditional fries or opting for an air fryer method (which gives fantastic results), having one sturdy baking sheet is crucial—it promotes even cooking by allowing hot air circulation around each fry evenly across its surface area ensuring those crispy edges we crave!
-
Cutting board & knife set – A solid cutting board paired with sharp knives makes prep work smooth sailing—it allows precision slicing through tomatoes & veggies easily whilst minimizing mess along way too!
-
Mixing bowls (various sizes) – Having assorted mixing bowls handy serves many purposes: from tossing fries before baking to mixing sauces—all while keeping countertop organized neatly—is key towards efficient workflow whilst cooking up deliciousness together here today
Now that we’ve gathered our ingredients and tools let’s move onto preparing these delightful burger bowls—a culinary adventure awaits us!
With these foundational steps covered regarding preparation details thus far I hope excitement builds momentum gradually leading closer completing masterpiece envisioned earlier together soon once frying finishes up right away serving warm comforting plates assembled delightfully enjoying company shared among friends family members alike proving time spent kitchen worthwhile always worthwhile pursuing craft passionately ignited within hearts souls alike sharing food experiences mean so much more beyond mere nutrition nourishing bodies minds spirits alike truly remarkable moments captured forever cherished always remembered fondly…
Creating the Perfect Crunch: Frying Your Fries to Golden Glory
Step 5: Mastering the Art of Frying
Now that your fries are prepped and ready, it’s time to turn those humble potato strips into crispy golden delights that will elevate your The Best Burger Bowls with Fries to new heights. Preheat your oven to 425°F (220°C) or set your air fryer to 400°F (200°C). This step is crucial because a hot cooking environment ensures that the fries begin to crisp up immediately, sealing in moisture while allowing for that all-important crunch. If you’re using an oven, opt for a convection setting if available; this will help circulate the heat evenly around the fries, creating a wonderfully consistent texture.
Once your oven is preheated, spread your coated fries in a single layer on a baking sheet. It’s vital not to overcrowd them; otherwise, they’ll steam instead of fry, resulting in sad, soggy sticks. If using an air fryer, arrange them in a single layer as well. As they cook, keep an eye on them and flip halfway through that 15-20 minute timeframe. This flipping is essential for achieving uniform browning—think of it as giving each fry its moment in the spotlight! You want them to have a beautiful golden color and crisp texture; they should be tempting enough that you can’t resist stealing one before serving.
Step 6: The Secret Behind Juicy Burger Patties
While those glorious fries are crisping away, let’s focus on what makes our burger patties so special. In a large mixing bowl, combine your ground beef with garlic powder, onion powder, smoked paprika, salt, and black pepper. Mixing these spices into the meat isn’t just about flavor; it’s about creating a savory profile that infuses every bite with richness. I always say that seasoning is the heart of any dish—don’t shy away from being generous here!
Once combined, divide this mixture into four equal portions. Here’s where you’ll shape them into patties about half an inch thick. Why this thickness? Because it allows for even cooking while maintaining juiciness inside. Trust me—there’s nothing worse than a dry burger! As you shape them, make a small indentation in the center of each patty with your thumb; this helps them cook evenly and prevents puffing up during cooking. Now set these aside while we prepare the cooking surface.
Step 7: Cooking Your Patties to Perfection
Heat a skillet or grill pan over medium-high heat—this step is non-negotiable if you want that delicious sear! Once hot (you can check by splashing a drop of water; if it sizzles away quickly, you’re ready!), add your burger patties gently to avoid splatter. The sound of meat hitting the pan is music to any cook’s ears; it means we’re on our way to deliciousness! Cook these beauties for about 3-4 minutes per side for medium doneness.
But how do you know when they’re done? Well, I always recommend having an instant-read thermometer handy; aim for about 160°F (71°C) for medium doneness—or simply rely on visual cues like clear juices running from the sides or firm pressure when pressed down lightly with a spatula. Don’t rush this step by cutting into them too early; letting them rest for about 2-3 minutes after cooking allows those juices to redistribute throughout the meat—resulting in an incredibly juicy burger experience.
Step 8: The Joyful Assembly Begins
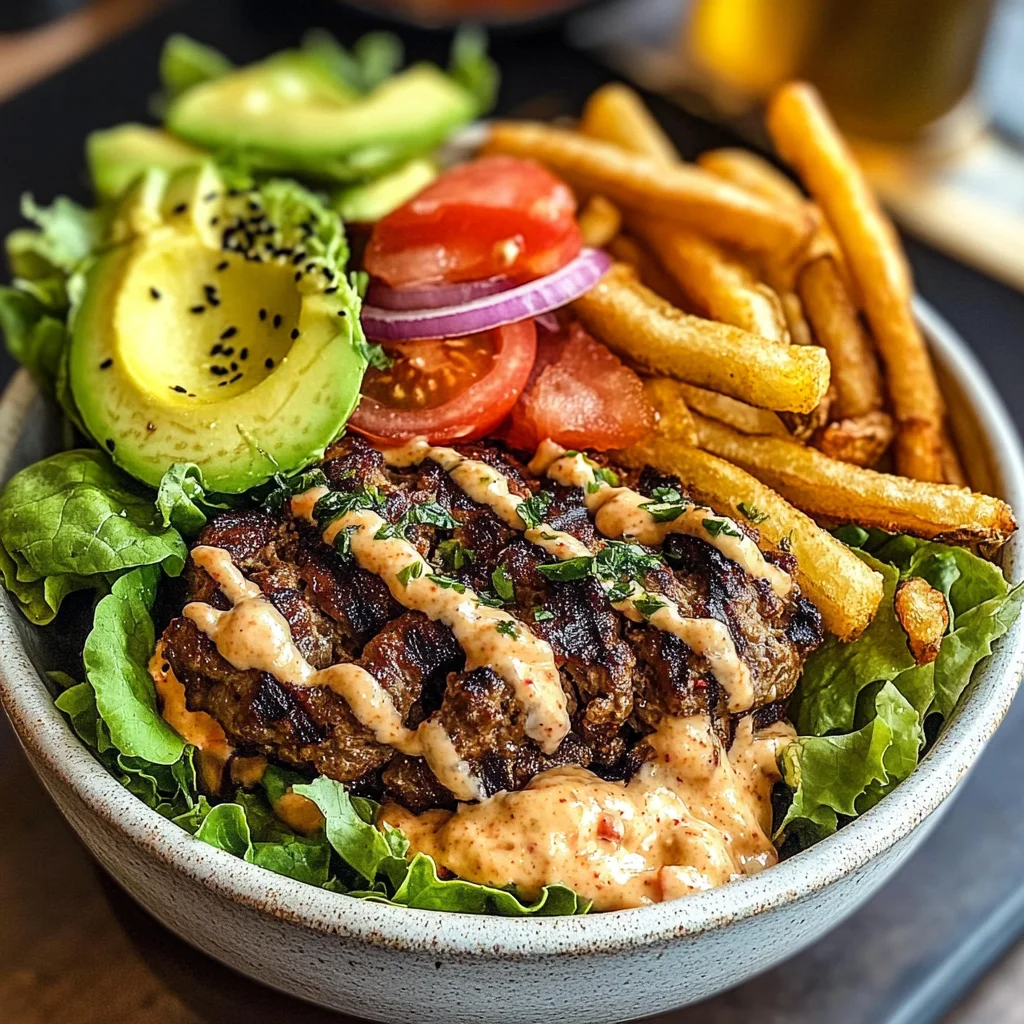
Now comes one of my favorite parts—the assembly! Grab those large bowls and start layering with mixed greens or lettuce as your base. This green bed not only adds nutritional value but also livens up the dish visually—a symphony of colors! Next up are those lovingly cooked burger patties: place them right atop those greens like crowns on heads! Follow this with luscious tomato slices that add freshness and vibrant color along with thinly sliced red onion for some zing.
Dill pickles are next—these little gems bring an addictive crunch and tanginess that elevates everything else in the bowl! And don’t forget about avocado slices; their creamy texture contrasts beautifully against the other ingredients and brings richness that rounds out this wholesome dish perfectly. Finally, let’s not overlook our crispy fries! You can either nestle them beside everything else or mix them right in—whichever way feels right to you!
Final Touches: Crafting Your Ultimate Sauce
Step 9: Whipping Up Your Special Sauce
As we near the finish line of creating The Best Burger Bowls with Fries, it’s time to whip up that fabulous sauce which ties all these flavors together so beautifully! In a small bowl (I love using something colorful here—it makes everything feel more festive), combine mayonnaise with Dijon mustard and ketchup for tangy sweetness. Add honey or maple syrup for natural sweetness—it’s truly amazing how this balances out all those bold flavors.
Now add Worcestershire sauce (make sure it’s vegetarian-friendly if needed) along with garlic powder and mix until smooth—you want it perfectly blended without any lumps because trust me, every bite deserves that creamy goodness! Adjust seasoning as needed; feel free to add more mustard if you’re feeling adventurous or another drizzle of honey if you’d like extra sweetness.
Serve this sauce either drizzled over your assembled bowls or on the side as a dipping option—it’s entirely up to personal preference! But I promise you’ll find yourself reaching back for more once you’ve tasted its magic—it really does bring everything together!
And there you have it—your very own Best Burger Bowls with Fries masterpiece! Each layer tells a story—a narrative woven through flavors and textures that will leave everyone at your table utterly satisfied and wanting more. Enjoy every bite knowing you’ve created something truly extraordinary!
Storage and Enjoyment Tips for Your The Best Burger Bowls with Fries
Now that you’ve crafted these delightful bowls, it’s time to savor every bite of your creation! I can already imagine the rich aromas wafting through your kitchen, and the anticipation of digging into those beautifully layered ingredients is simply irresistible. But what happens if you have leftovers? Fear not! I’ll guide you on how to keep the magic alive so you can enjoy your The Best Burger Bowls with Fries even after the first serving.
Storing Leftover The Best Burger Bowls with Fries
To store your leftover The Best Burger Bowls with Fries, it’s best to use airtight containers that will lock in freshness and flavor. Glass containers are excellent for this purpose, as they don’t absorb odors and are microwave-safe. Place your assembled bowls in the refrigerator, where they will stay fresh for up to three days. Now, here’s a pro tip: if you want to ensure your crispy fries remain somewhat crunchy, consider placing a folded paper towel inside the container with them. This absorbs excess moisture that could make them soggy. When you’re ready to indulge again, just reheat everything in the microwave or oven; trust me, a few minutes in an oven brings back some of that initial crispiness! The flavors will meld even more beautifully after storage, creating a wonderfully satisfying meal that feels like a warm hug.
Freezing Component for Later
If you find yourself with extra components from your The Best Burger Bowls with Fries, freezing is a fantastic option! You can freeze the cooked burger patties and even the fries separately. To freeze properly, wrap each item tightly in plastic wrap or use freezer bags while pushing out as much air as possible—this prevents freezer burn and keeps flavors intact. Each component can hold its quality for about two to three months in the freezer. When you’re ready to enjoy them again, simply thaw them overnight in the fridge before reheating. This method not only saves time during busy weeks but also allows you to relish a homemade meal at a moment’s notice! How convenient is that?
CATEGORY_NAME
The Best Burger Bowls with Fries
- Total Time: 1 hour
- Yield: Serves 4
Description
If you’re looking for a delicious and healthier spin on traditional comfort food, look no further than The Best Burger Bowls with Fries. This vibrant dish transforms classic elements into a fresh, exciting meal without sacrificing flavor. Imagine juicy beef patties nestled atop a bed of crisp greens and colorful vegetables, complemented by golden, crispy fries—all served in a single bowl for ultimate convenience. Whether it’s a casual weeknight dinner or a gathering with friends, this customizable recipe lets you explore your favorite toppings while keeping indulgence in check. Dive into this delightful experience, where every bite is an explosion of flavors and textures that will leave everyone craving more.
Ingredients
- 2 large Russet potatoes
- 1 tablespoon olive oil
- 1 pound ground beef
- 4 cups mixed greens
- 1 large tomato, sliced
- 1/2 avocado, sliced
- 1/2 cup mayonnaise
- 1 tablespoon Dijon mustard
- Salt and pepper to taste
Instructions
- Preheat the oven to 425°F (220°C). If using an air fryer, set to 400°F (200°C).
- Peel and slice Russet potatoes into fry shapes about half an inch thick. Soak in cold water for at least 30 minutes.
- Drain and pat dry the potatoes. Toss them with olive oil, salt, and paprika/garlic powder.
- Spread fries evenly on a baking sheet or air fryer basket and cook for 15-20 minutes, flipping halfway through until golden brown.
- In a bowl, combine ground beef with garlic powder, onion powder, smoked paprika, salt, and black pepper. Form into four patties.
- Cook patties in a skillet over medium-high heat for about 3-4 minutes per side until they reach desired doneness.
- Assemble bowls by layering mixed greens first, then adding burger patties, sliced tomatoes, avocado, dill pickles, and finally top with crispy fries.
- Prep Time: 30 minutes
- Cook Time: 30 minutes
- Category: Main
- Method: Baking/Frying
- Cuisine: American
Nutrition
- Serving Size: 1 bowl (approx. 450g)
- Calories: 650
- Sugar: 4g
- Sodium: 850mg
- Fat: 35g
- Saturated Fat: 8g
- Unsaturated Fat: 25g
- Trans Fat: 0g
- Carbohydrates: 55g
- Fiber: 7g
- Protein: 35g
- Cholesterol: 90mg

Leave a Comment