There’s something incredibly special about gathering around a meal that not only fills the belly but also nourishes the soul. For me, the Savory Cheeseburger Bowl: Comfort Food Made Your Way is more than just a dish; it’s a celebration of flavors and textures that brings warmth to any table. Picture this: succulent ground beef sizzling in a pan, releasing an aroma that dances through the air, while crispy russet potatoes transform into golden nuggets of joy. This bowl isn’t just food; it’s an experience, a bridge connecting cherished memories of backyard cookouts with modern culinary creativity. Each bite is a symphony of flavors, a reminder of the comfort that comes from familiar ingredients crafted into something extraordinary. I promise you, once you dive into this bowl, you’ll find yourself smiling as if wrapped in a warm hug.
What makes this Savory Cheeseburger Bowl truly special is its versatility. You have the power to customize it to your heart’s desire! If you’re looking for a low-carb option, swap out potatoes for some grilled zucchini or cauliflower rice. Want to spice things up? Throw in some jalapeños or a spicy pepper jack cheese for that extra kick. This dish beautifully melds traditional cheeseburger elements with fresh ingredients like crisp romaine lettuce and tangy dill pickles, creating layers of flavor that are profoundly satisfying. Whether you’re serving it at a casual family dinner or prepping for meal prep throughout the week, this recipe adapts effortlessly to meet your needs.
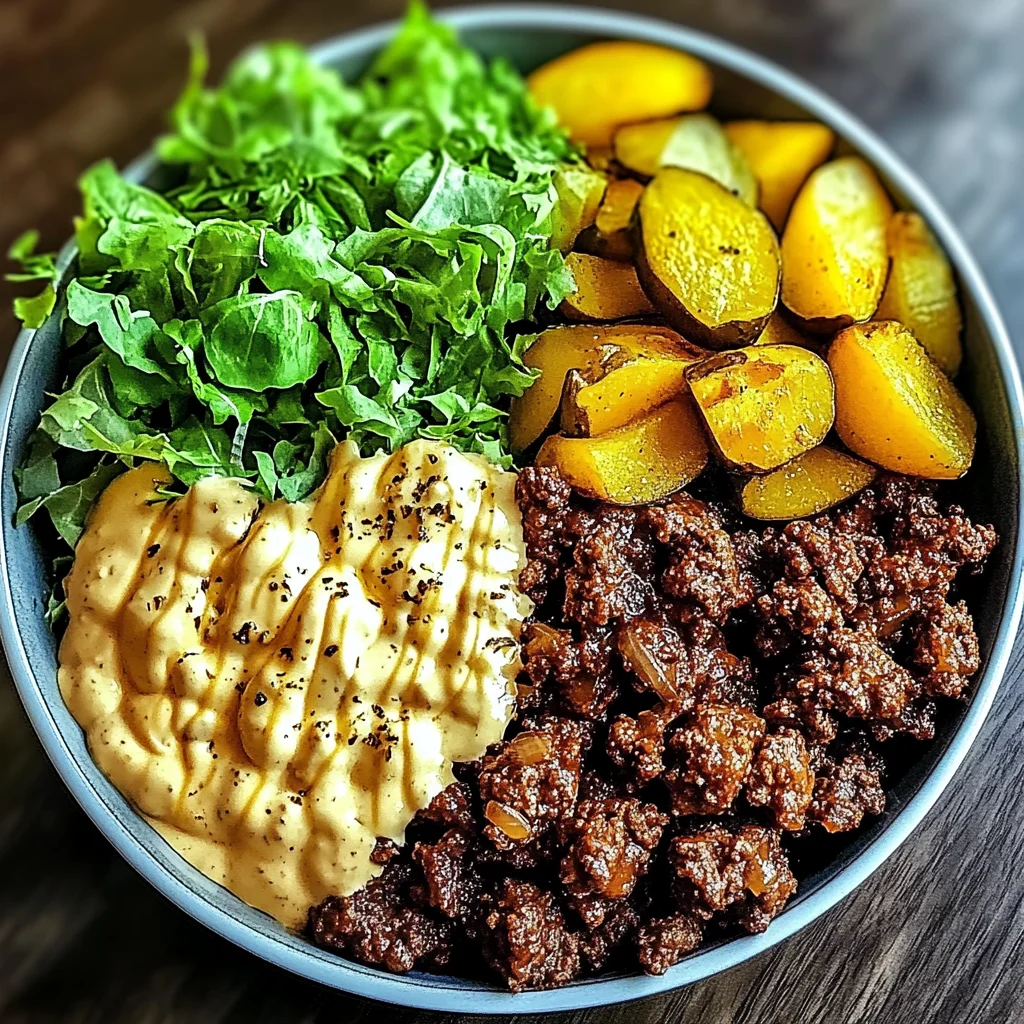
Ingredients:
Before we embark on this delightful culinary journey together, let’s gather our ingredients. Each component plays an essential role in crafting the perfect Savory Cheeseburger Bowl: Comfort Food Made Your Way, and I can’t wait to share what makes every single ingredient shine.
- 1 lb Ground Beef (85/15) – The star of our show! Opting for an 85/15 blend provides the ideal balance of fat for flavor and juiciness without being overly greasy. If you’re watching your fat intake, feel free to substitute with leaner 93/7 beef; just add a splash of olive oil to ensure your beef remains juicy during cooking. This choice is non-negotiable because the richness of well-cooked ground beef is what gives our bowl its hearty foundation.
- 2 medium Russet Potatoes – These starchy gems are perfect for creating crispy potato bites that will elevate your bowl from delicious to divine! Russets are known for their fluffy texture when cooked which pairs beautifully with our savory toppings. If you decide to use other varieties like Yukon Gold or red potatoes, keep an eye on their cooking times as they tend to take less time to soften.
- 2 tbsp Olive Oil – This liquid gold not only helps in cooking but also adds depth and richness to our dish. Olive oil enhances flavors and ensures everything cooks evenly without sticking—it’s like a warm embrace for your ingredients! Should you need an alternative, vegetable oil works equally well here.
- 1 tsp Salt – Salt is essential in enhancing all the flavors in our bowl; it’s like the magic fairy dust that makes everything sing! Adjust according to taste as some may prefer less saltiness depending on dietary needs or personal preference.
- 1 tsp Pepper – Freshly cracked black pepper adds warmth and complexity—don’t underestimate its importance! It balances beautifully with all other components and elevates them into something truly extraordinary.
- 1 tsp Garlic Powder – This ingredient delivers an aromatic punch without any chopping hassle! Garlic powder infuses our beef with that beloved savory essence reminiscent of classic cheeseburgers. Trust me when I say it’s important; fresh garlic is great too but can burn easily when cooked at high temperatures.
- 1 tsp Onion Powder – Just like garlic powder, onion powder gives us that sweet-savory backbone we crave in comfort food dishes. It’s fantastic because it dissolves seamlessly into our beef mixture without needing any chopping or sautéing beforehand!
- 2 cups Romaine Lettuce – Crisp and refreshing lettuce adds not only texture but also brightness to our dish! It provides that crunch we adore while balancing out the richness from our beef and cheese. If you want something different, consider using coleslaw mix—it adds an exciting twist!
- 1 cup Dill Pickles – These tangy bites are non-negotiable; they provide acidity that cuts through the richness of the meat and cheese beautifully. Think about whether you prefer classic dill pickles or want to experiment with sweet pickles for a unique flavor dimension.
- 1 cup Shredded Cheddar Cheese – Cheddar brings that gooey melty goodness we all love in cheeseburgers! While sharp cheddar offers boldness, feel free to mix things up by adding pepper jack cheese if you’re craving some heat or even go with a blend of cheeses for added complexity.
- 1/2 cup Mayonnaise – Creamy mayonnaise ties everything together while providing richness—like dressing for a salad but so much better! For those looking for lighter options, Greek yogurt serves as an excellent substitute without compromising on creaminess.
- 1 tbsp Yellow Mustard – A staple condiment reminiscent of classic burgers! Yellow mustard adds zing and brightness—the contrast between creamy mayo and sharp mustard creates an utterly intoxicating flavor profile! If you’re after something sharper, Dijon mustard fits perfectly too!
- 1 tbsp Dill Pickle Relish – Packed with flavor yet simple enough not to overpower other ingredients, relish adds another layer of deliciousness. If you’re short on time or ingredients, finely chopped pickles work just as well!
- 1 tbsp Apple Cider Vinegar – This tangy addition brightens everything up—it’s crucial! It cuts through richness while bringing balance; if needed, lemon juice acts as a lovely substitute too!
- 1 tbsp Sugar – Just a hint helps round out flavors nicely without making it overly sweet—it’s like magic! Adjust according to taste based on how tangy your pickles are; sometimes sweetness compliments tartness perfectly!
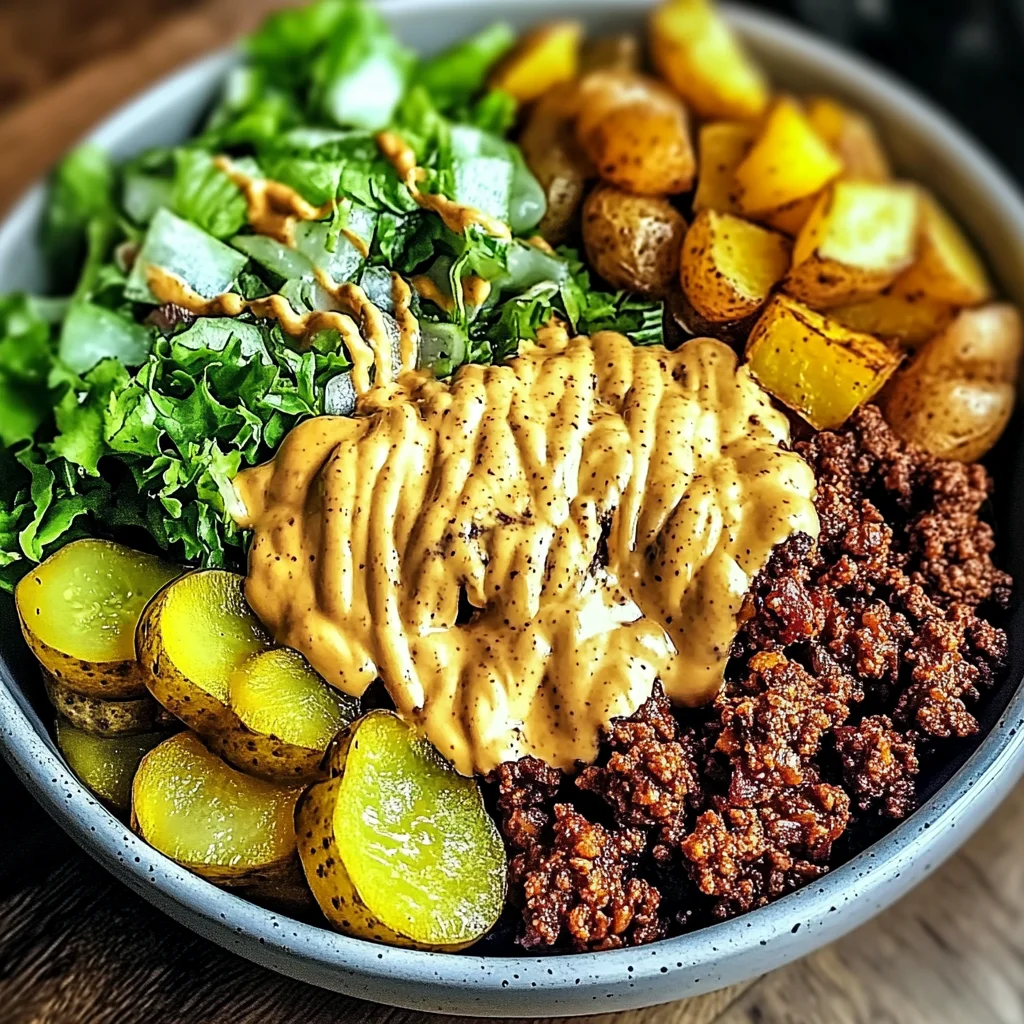
Equipment You’ll Need:
Having the right tools can make all the difference when preparing our Savory Cheeseburger Bowl: Comfort Food Made Your Way. Each piece of equipment serves as an essential partner in crafting this delightful meal smoothly and efficiently—let’s gather these trusty companions together!
- Large Skillet or Frying Pan – A deep skillet is vital here because we’ll be browning our ground beef until it’s beautifully caramelized while allowing plenty of space for stirring without fear of splatters everywhere! A cast iron skillet can also do wonders by distributing heat evenly if you have one handy.
- Potato Peeler & Knife – These are fundamental tools when preparing our russet potatoes—peeling them allows us access their wonderful starchy flesh while ensuring uniformity in size so they cook evenly during frying!
- Cutting Board – A good quality cutting board is essential not just for peeling potatoes but also chopping pickles if needed later on—it keeps everything organized while avoiding any messes along the way!
- Mixing Bowls – Having several mixing bowls at hand helps keep things tidy as we prepare different components such as sauces or toppings before assembling everything into one glorious bowl!
Let me pause here so we can breathe deeply before diving into preparation steps together… Are you excited? I know I am! Let’s get started on making this incredible Savory Cheeseburger Bowl come alive in your kitchen!
Step 1: Preparing Your Potatoes
First things first—let’s give those beautiful russet potatoes some love! Begin by peeling them carefully—this step might seem trivial but trust me when I say leaving skin could alter texture significantly during cooking later down line (plus who likes potato skins anyway?). After peeling each potato completely free from blemishes or eyes (the little sprouts), chop them into bite-sized cubes roughly about half-inch thick—that size ensures they fry up golden-crisp without burning before fully cooking through inside which would ruin their fluffy interior goodness we’re aiming for here!
Once chopped up nicely into even pieces place them aside temporarily while we get ready frying them off shortly—it’s always best practice keeping prepped ingredients close at hand so nothing gets forgotten about along way especially since these nuggets add delightful crunch once topped atop everything else later down line!
Step 2: Browning Your Beef
Now onto one my favorite parts—the ground beef transformation process begins now friends! Heat your large skillet over medium-high heat until hot enough where droplets water flicked onto surface dance happily away rather than linger there languidly—that tells us exactly right moment begin introducing meat into pan without risk losing precious juices trapped inside first place which would lead dryness instead of moist tenderness desired outcome here!
Once hot enough pour olive oil directly into center then swiftly follow suit by adding entire pound ground beef breaking apart gently using wooden spatula ensuring no clumps remain intact (we want individual bits caramelizing beautifully!). Season generously right away sprinkling salt pepper atop surface evenly across meat mixture along garlic onion powders providing aromatic backdrop whilst enhancing overall flavor profile immensely too—let those savory aromas waft through air inviting everyone nearby come investigate what’s happening kitchen right now!
Continue cooking until browned thoroughly about 5–7 minutes stirring occasionally watching carefully so nothing sticks bottom pan risking burning chances—we’re looking golden-color indicating readiness rather than gray mushy mess instead—which happens quickly under high heat unfortunately if ignored too long…so stay vigilant here folks okay?!
Step 3: Getting Crispy Potatoes Ready
With fragrant ground beef now resting aside gently drained excess grease off top don’t forget saving those delectable drippings left behind—they’ll serve great purpose later trust me! Now bring focus back onto cubed russet potatoes waiting patiently nearby—they deserve their moment glory too don’t ya think?
In original empty skillet pour additional tablespoon olive oil letting coat surface well then toss those potato cubes directly inside covering entire base area ensuring even exposure direct heat throughout cooking process—this vital step guarantees crispiness achieved later-on rather than steaming effect occurring otherwise ruining texture altogether instead sadly…
Cook potatoes undisturbed initially about 5 minutes allowing develop nice golden crust underneath then gently flip each cube over using spatula every few minutes checking progress maintaining consistent browning happening evenly across board till fully tender inside approximately same time frame total roughly around 15–20 minutes total—but keep eyes peeled folks ‘cause nobody wants burnt offering served tonight either right?!
Step 4: Bringing It All Together
Now comes most exciting part assembling glorious masterpiece before us—it feels almost magical doesn’t it? Grab yourself four bowls (or however many servings needed) ready lay foundations down starting first crisp romaine lettuce layer right bottom followed next by generous scoop sautéed seasoned ground-beef mixture heaped lovingly atop greens—imagine beautiful colors contrasting visually already coming together delightfully pleasing sight kitchens should always strive achieve…now sprinkle diced dill pickles over top giving kick freshness desired alongside shredded cheddar cheese melting deliciously throughout entire dish transforming ordinary meal extraordinary ones enjoyed everyone’s hearts tonight guaranteed friends believe me when I say so confidently here too!!
This step finalizes visual appeal leading mouth-watering adventure awaits ahead soon once finished plating done properly—I encourage indulging creativity at this point adding dollops mayonnaise mustard relish drizzle apple cider vinegar sugar mixture lightly across entire bowl turning humble creation culinary triumph simply unforgettable moment shared among family friends alike gathered around table eagerly anticipating first bites heavenly flavors soon enter palate exploring realms possible delights offered within savories cherish most life often brings forth…stay tuned next steps enjoying every last morsel savored rightly deserved time spent loving nourishment prepared warmly heart-filled manner possible ever known!!
Now let’s move forward together don’t rush ahead please remember patience required sometimes greater rewards await those willing wait longer appreciate beauty unfolded slowly take moments unfold wonderfully step-by-step process revealing treasures hidden beneath layers waiting discovery patiently awaiting recognition granted only special occasions such these cherished moments shared fondly over comforting meals created lovingly hearts touched souls filled joy forevermore shared experiences enriched nourished beyond measure!!!
Step 5: Building the Flavor Base
Now that your potatoes are perfectly roasted, it’s time to turn our attention to the ground beef—a truly essential component of our Savory Cheeseburger Bowl. Begin by heating a large skillet over medium-high heat. Add in those glorious 2 tablespoons of olive oil, allowing it to shimmer like liquid gold before introducing the beef. This step is crucial, as the hot oil ensures that the meat sears beautifully, creating that delectable crust we all crave. You want to hear that satisfying sizzle as you add the 1 pound of ground beef; it’s not just a sound; it’s the promise of flavor development.
As the beef cooks, use a wooden spoon or spatula to break it apart gently. This technique, known as browning, is absolutely paramount because it helps develop those rich, complex flavors through the Maillard reaction—a process where sugars and proteins react under heat to create that deeply savory taste we associate with a good burger. After about 8-10 minutes, or when you see no pink remaining in the meat and it has taken on a beautiful brown color, sprinkle in your seasonings: 1 teaspoon each of salt and pepper, 1 teaspoon garlic powder, and 1 teaspoon onion powder. These spices are not just there for taste; they elevate your beef into something truly extraordinary! Stir well and allow everything to mingle for another minute or two until fragrant. Trust me on this—your kitchen will be filled with an utterly intoxicating aroma that will make everyone wonder what’s cooking.
Step 6: Assembling Your Flavorful Bowl
With your beef beautifully browned and seasoned, it’s time to layer those flavors into a cohesive masterpiece. Grab four generous bowls—these will be the vessels where all those comforting ingredients come together in perfect harmony. Start with a base of your freshly roasted potatoes; they should be warm and slightly crispy on the outside while fluffy on the inside—just how you want them! The warmth will help melt any cheese you add later, making every bite sensationally gooey.
Next up is layering in that vibrant romaine lettuce—2 cups should do nicely! It’s not just about crunch; this adds a refreshing element that cuts through the richness of the meat and potatoes beautifully. If you’re feeling adventurous, consider swapping out romaine for coleslaw mix for an extra crunchy texture that will bring another dimension entirely! Now comes one of my favorite parts: draping over your savory beef mixture in equal portions across each bowl. Don’t rush this step; take your time to ensure each bowl has its fair share of that wonderfully seasoned beef—this is comfort food made your way after all!
Step 7: The Cheese Moment
Ahh, cheese—the crowning glory of our Savory Cheeseburger Bowl! At this point, it’s time to introduce 1 cup of shredded cheddar cheese (or whatever melty delight your heart desires) atop each bowlful of deliciousness. If you’re opting for pepper jack for a little kick or perhaps a blend of cheeses for complexity, I promise you won’t regret it! Gently sprinkle the cheese over the still-warm beef so it begins to melt into that luscious layer below.
Here’s why this step matters: melting cheese adds both richness and creaminess which ties all elements in the bowl together seamlessly—trust me when I say you’ll want every bite to have some cheesy goodness! Cover each bowl loosely with foil or place them back on low heat for about 3-5 minutes—this gentle heat allows everything to meld together while keeping moisture intact without overcooking anything else.
Step 8: The Finishing Touches
While we wait for that glorious cheese to melt into velvety perfection, let’s prepare our toppings—the final elements that will elevate these bowls from good to absolutely unforgettable! In a small mixing bowl, combine ½ cup mayonnaise with 1 tablespoon yellow mustard (feel free to use Dijon if you prefer a bolder taste), 1 tablespoon dill pickle relish (or chopped pickles if you’re short on relish), and 1 tablespoon apple cider vinegar—which can easily swap out for fresh lemon juice if needed—and finally, stir in about 1 tablespoon sugar (this is optional but really brings balance). This creamy dressing is going to add a delightful tanginess and richness that’ll complement all those savory flavors beautifully.
Once everything is combined into a luscious sauce full of flavor contrasts, set this aside for just a moment longer while we check on our bowls. Peek underneath that foil; if you’ve got melted cheese that’s bubbly and inviting—you’ve done well! Now drizzle generously over each assembled cheeseburger bowl—don’t skimp here! It’s these finishing touches that transform what could simply be dinner into something profoundly satisfying—a meal meant for gathering around the table with loved ones.
Final Touches: Serving Up Comfort
As we approach the grand finale of our Savory Cheeseburger Bowl experience, let’s not forget about those dill pickles! Slice up about 1 cup worth of pickles (whether dilly or sweet) and arrange them artistically atop each bowl like little green jewels—they add both crunch and zing!
To serve these beauties up right? Gather everyone around your table—make sure they see those hearty bowls brimming with comfort goodness—and watch their faces light up with joy at such simple yet profound satisfaction awaiting them. Share stories as you dig into these creations together; after all, food tastes better when enjoyed among friends and family.
And there you have it—the ultimate Savory Cheeseburger Bowl: Comfort Food Made Your Way! Each bite encapsulates warmth, creativity, and love—all served up in one delightful dish that’s infinitely customizable based on your preferences or what you’ve got in hand. I can’t wait for you to try this recipe; I promise it’ll become one of those cherished go-to meals you’ll return to time and again!
Storage and Enjoyment Tips for Your Savory Cheeseburger Bowl: Comfort Food Made Your Way
Now that you’ve crafted your delightful Savory Cheeseburger Bowl, it’s time to dive into the joyous experience of enjoying this comfort food masterpiece! Trust me when I say there’s nothing quite like sitting down with a warm, hearty bowl that’s bursting with flavor and texture. But what if you find yourself with leftovers? No worries at all! Storing this dish is simple and can keep that deliciousness alive for days to come.
Storing Leftover Savory Cheeseburger Bowl: Comfort Food Made Your Way
When it comes to storing your leftover Savory Cheeseburger Bowl, opt for airtight containers, as they lock in freshness and flavor while keeping unwanted odors at bay. If you have a large batch, consider dividing it into individual portions; this makes it easier to reheat just what you need. You can store it in the refrigerator for up to three days, which is perfect for those busy weeknights when you want a quick meal without any fuss. To maintain the quality, I suggest placing a slice of bread in the container—trust me on this trick! It helps absorb excess moisture and keeps everything from getting soggy. The flavors meld beautifully over time, creating an even more profound taste experience when reheated. When you’re ready to indulge again, simply pop it in the microwave or reheat on the stovetop over low heat until warmed through; I promise you’ll be transported back to that first bite!
Freezing Components for Later
If you’re looking to extend the life of your Savory Cheeseburger Bowl even further, freezing is an excellent option! The key here is to freeze the components separately for optimal texture retention. For example, portion out your cooked ground beef and allow it to cool completely before placing it in freezer-safe bags or containers—removing as much air as possible is absolutely paramount for preventing freezer burn. You can freeze these components for up to three months without sacrificing flavor or quality. When you’re ready to enjoy a comforting bowl again, simply thaw them overnight in the refrigerator or use the microwave’s defrost setting. This method means you can always have that cozy meal on hand without needing to start from scratch every time! Imagine how convenient it’ll be after a long day—just reheat your components, toss them together, and savor every delicious bite!
Savory Cheeseburger Bowl: Comfort Food Made Your Way
- Total Time: 50 minutes
- Yield: Serves 4
Description
Gathering around a comforting meal has never been as delightful as with the Savory Cheeseburger Bowl: Comfort Food Made Your Way. This customizable dish combines perfectly seasoned ground beef with crispy russet potatoes, fresh greens, and tangy pickles—all harmoniously layered in a single bowl. Imagine the nostalgic flavors of a classic cheeseburger reinvented in a vibrant, satisfying way! Whether you’re hosting family or enjoying a cozy night in, this recipe adapts effortlessly to suit your taste. Swap in grilled zucchini for a low-carb option or add jalapeños for an extra kick. With its balance of textures and robust flavors, each bite is sure to bring warmth and joy to your table.
Ingredients
- 1 lb ground beef (85/15)
- 2 medium russet potatoes
- 2 tbsp olive oil
- 2 cups romaine lettuce
- 1 cup dill pickles
- 1 cup shredded cheddar cheese
- ½ cup mayonnaise
- 1 tbsp yellow mustard
- 1 tbsp apple cider vinegar
Instructions
- Peel and cube the russet potatoes into half-inch pieces.
- Heat olive oil in a large skillet over medium-high heat, then add the ground beef, breaking it apart.
- Season with salt, pepper, garlic powder, and onion powder. Cook until browned (about 8-10 minutes).
- In another skillet, fry the potato cubes until golden and crispy (about 15-20 minutes), turning occasionally.
- Assemble bowls starting with romaine lettuce at the base; add ground beef followed by crispy potatoes.
- Top each bowl with shredded cheddar cheese and drizzle with a mixture of mayonnaise, mustard, relish, and apple cider vinegar.
- Prep Time: 20 minutes
- Cook Time: 30 minutes
- Category: Dinner
- Method: Frying
- Cuisine: American
Nutrition
- Serving Size: 1 bowl (approximately 550g)
- Calories: 610
- Sugar: 3g
- Sodium: 800mg
- Fat: 38g
- Saturated Fat: 12g
- Unsaturated Fat: 21g
- Trans Fat: 0g
- Carbohydrates: 36g
- Fiber: 4g
- Protein: 36g
- Cholesterol: 105mg



Leave a Comment