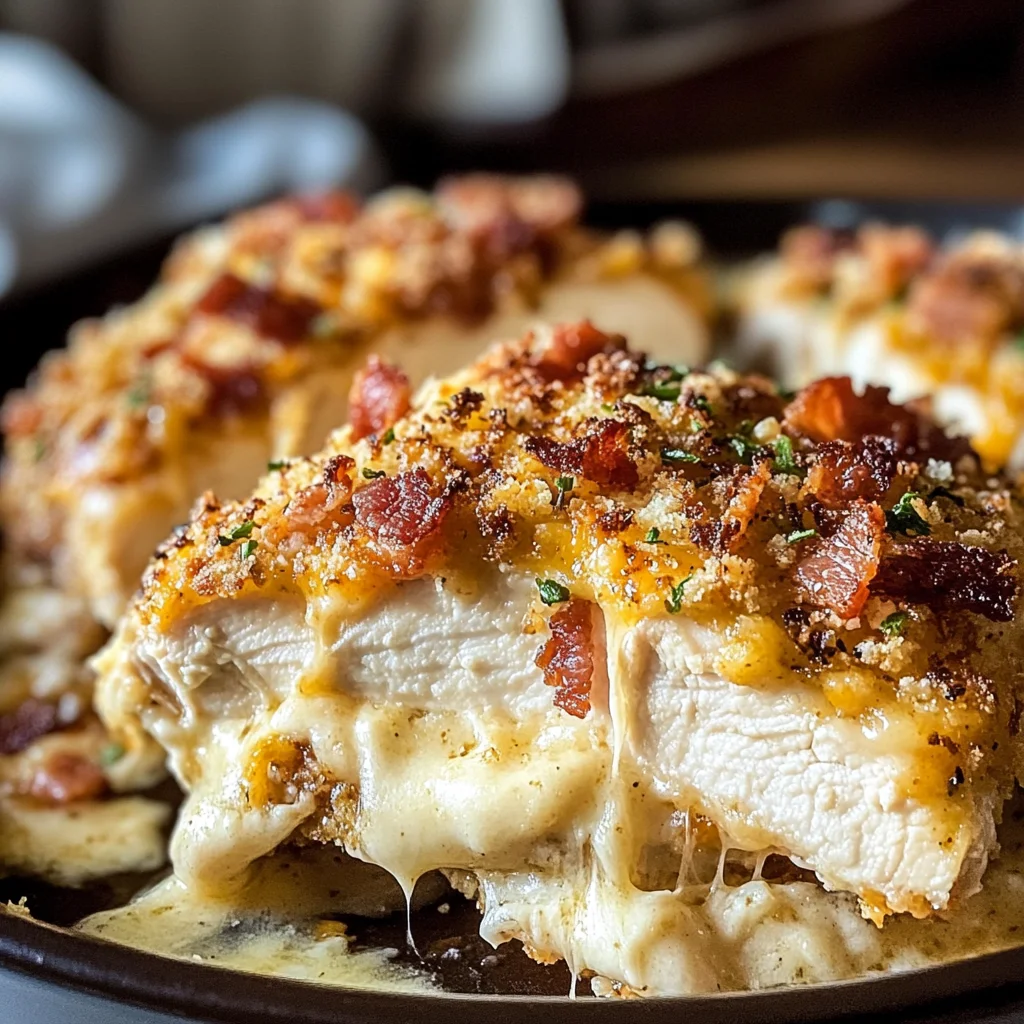
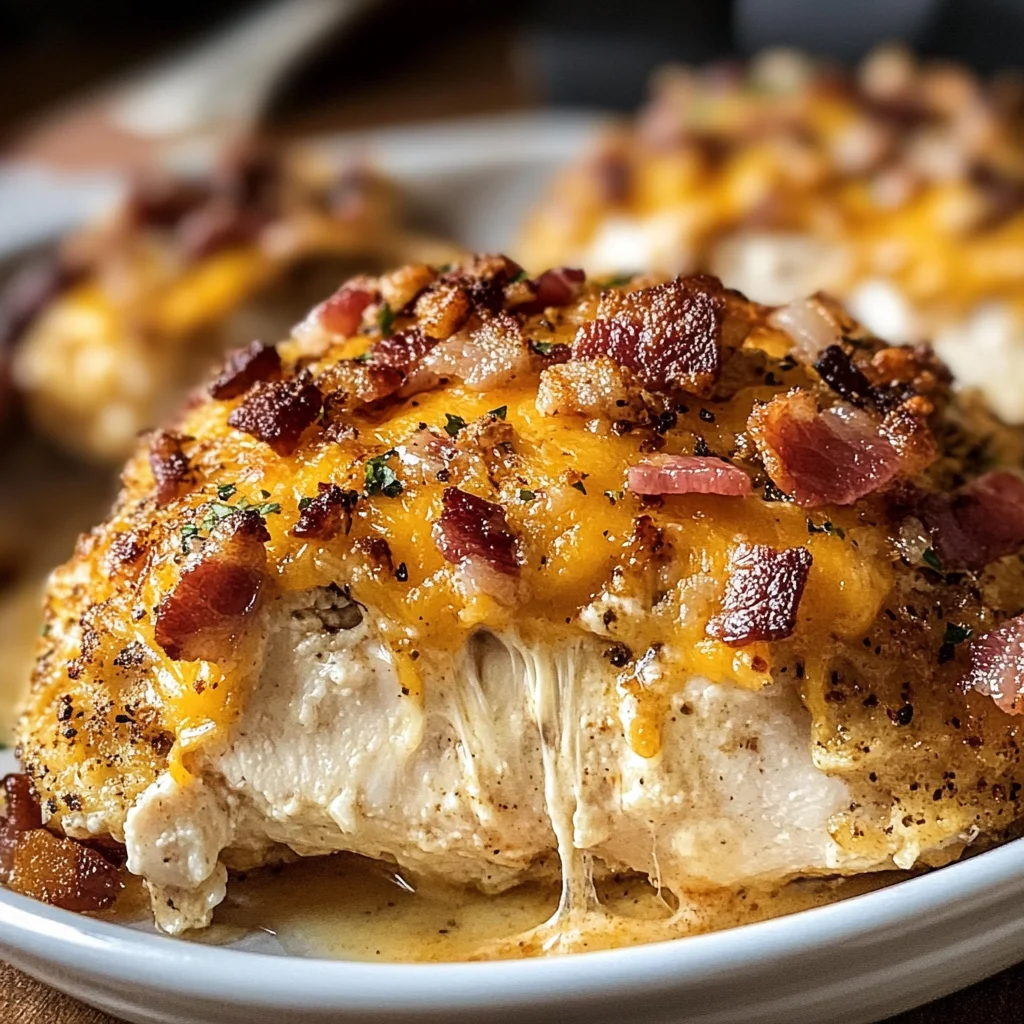
There’s something truly magical about the aromas that waft through your kitchen when you bake, isn’t there? It’s like an embrace, wrapping you in warmth and comfort, whispering promises of a delicious meal shared with loved ones. Today, I want to share with you my delightful recipe for Baked Crack Chicken Breasts—a dish that transcends mere sustenance and ventures into the realm of joyful connection. Imagine juicy chicken breasts adorned with a molten cream cheese ranch topping, bubbling away in your oven until they are golden and inviting. This isn’t just food; it’s an experience, a celebration of flavors that brings people together around the table. And trust me when I say, every bite is a journey—a wonderful blend of savory, creamy goodness that’s utterly intoxicating.
As I think back on my own culinary adventures, I can’t help but smile at the times I’ve prepared this dish for friends and family—I promise you, it never fails to impress. The combination of rich cream cheese and zesty ranch seasoning creates a topping so luscious that it feels like a warm hug for the taste buds. Topped off with crispy bacon and melted cheddar cheese, this dish is not only visually stunning but also deeply satisfying. It’s perfect for those cozy weeknight dinners or even for gatherings where you want to impress without spending all day in the kitchen. So grab your apron and let’s dive into making these unforgettable Baked Crack Chicken Breasts together!
Baked Crack Chicken Breasts: The Ultimate Comfort Dish
This recipe for Baked Crack Chicken Breasts combines simplicity with indulgence—a true testament to how easy it is to create something extraordinary in your own kitchen. With minimal prep time and just a handful of ingredients, you’ll be well on your way to serving up a comforting meal that everyone will rave about. So let’s embark on this culinary adventure together; I can’t wait for you to try it!
Ingredients:
As we begin our cooking journey today, let’s take a moment to appreciate each ingredient that makes up this beautiful dish. Each one plays a vital role in creating that symphony of flavors we all crave.
- 4 boneless skinless chicken breasts: This is the foundation of our dish—the star of the show! When choosing chicken breasts, look for those that are plump and have a nice pink color; avoid any that appear dull or have any strange odors. Boneless skinless chicken breasts are perfect here as they cook quickly and absorb flavors beautifully without any distractions from skin or bones. The result will be tender, juicy chicken that’s absolutely bursting with flavor after baking.
- Salt and pepper to taste: While these might seem like basic pantry staples, don’t underestimate their power! Seasoning your chicken breasts with salt and pepper before anything else allows the natural flavors to shine through while also enhancing every bite’s overall taste profile. Remember, seasoning is essential—don’t rush this step! A light sprinkle before cooking ensures each piece is flavorful right down to the core.
- 8 oz cream cheese, softened: This creamy gem is what takes our dish from ordinary to extraordinary! Softened cream cheese blends seamlessly into the ranch seasoning mix, creating an irresistibly smooth topping that adds richness and texture to our baked chicken. Make sure it’s at room temperature before using—this step ensures it mixes easily without lumps. If you’re looking for alternatives, consider using a dairy-free cream cheese if necessary.
- 1 packet (1 oz) ranch seasoning mix: Ahh—the magic ingredient! This seasoning mix infuses our dish with an incredible depth of flavor—a combination of herbs and spices that brings everything together beautifully. While store-bought ranch seasoning works wonders here, feel free to make your own using dried herbs like dill or parsley mixed with garlic powder if you’re feeling adventurous!
- 8 strips bacon, cooked crispy and crumbled: Bacon adds an irresistible crunch and savory element that elevates this dish even further! When cooked properly until crispy, it becomes a delightful contrast against the creamy topping. You can opt for turkey bacon or even plant-based bacon if you prefer; both will still bring that delightful crunch we love so much.
- 1.5 cups shredded cheddar cheese: Cheese lovers rejoice! Shredded cheddar provides another layer of flavor along with gooeyness when melted over our baked chicken breasts. For the best results, choose sharp cheddar—it has a more pronounced flavor than mild varieties which balances beautifully against the other ingredients.
- 1 tablespoon fresh chives, chopped: Fresh herbs like chives not only add brightness but also offer an appealing pop of color atop our finished dish—think of them as nature’s confetti! Their mild onion-like flavor complements all components wonderfully without overpowering them.
- Extra chives and bacon for topping: Just when you think you’ve got enough flavor going on, adding additional toppings creates visual appeal while enhancing taste even further! A sprinkle of crispy bacon bits and fresh chives elevates your presentation game—after all, we eat first with our eyes.
Equipment You’ll Need:
Having the right tools at hand simplifies things immensely in the kitchen; trust me on this one! These essential partners will ensure your cooking process goes smoothly while allowing you to focus on what truly matters—the love infused into every step of making Baked Crack Chicken Breasts.
- Baking dish (9×13 inch): A sturdy baking dish is crucial here as it evenly distributes heat throughout our chicken breasts while providing ample space for everything else to come together nicely without overcrowding! If you’re looking for alternatives due to size constraints or personal preference—just ensure whatever you use fits comfortably within your oven.
- Mixing bowl: This versatile tool will be where all magic begins as we combine our cream cheese with ranch seasoning; having enough room ensures proper blending without messes flying everywhere! Choose one large enough so whisking doesn’t get too cramped—it makes cleanup easier too!
- Measuring cups & spoons: Precision matters when cooking—even just eyeballing ingredients can lead down paths we didn’t foresee! Having measuring cups handy allows us to stay consistent throughout—and guarantees those fabulous flavors develop just right!
- Sharp knife & cutting board: For chopping chives (and anything else), having a sharp knife makes tasks effortless while ensuring safety as well since dull knives can lead accidents instead! Pair it up with a clean cutting board dedicated solely for veggies/herbs keeps cross-contamination worries away!
Preparing the Baked Crack Chicken Breasts
Step 1: Preheat Your Oven
Before diving into mixing those luscious toppings, let’s preheat our oven to 375°F (190°C). Why start here? Well, allowing your oven ample time to heat up ensures even cooking from start-to-finish while preventing undercooked centers that could ruin dinner plans! This simple yet vital step sets us up perfectly for crisp edges alongside juicy interiors once we place everything inside later on—trust me; patience pays off!
Step 2: Season & Prepare Your Chicken
Next up comes prepping our chicken breasts! Start by giving each piece a light sprinkle of salt and pepper on both sides—don’t hold back here because we want every bite bursting with flavor throughout this entire journey together! Once seasoned generously yet evenly coat them onto your chosen baking dish snugly side-by-side (that means no overlapping!)—this ensures even cooking across all pieces while avoiding dry spots during baking time.
Step 3: Mix Up That Creamy Topping
Now comes one of my favorite moments—the creation of our rich topping! In a medium-sized mixing bowl (the kind where dreams are born!), combine softened cream cheese along with ranch seasoning mix until smooth—this process combines textures beautifully while infusing aromatic notes into each dollop destined for those beautiful chicken breasts below! Feel free to use an electric mixer if preferred; otherwise whipping by hand works too (just remember not skip blending well!).
Step 4: Layer It On
With both components ready now awaits their union—the moment where everything comes alive together harmoniously in one baking vessel! Spread generous spoonfuls over each seasoned breast ensuring coverage across surfaces so they bake evenly underneath layers upon layers… oh yes—it’s pure magic unfolding right before eyes here folks! Then sprinkle crumbled bacon bits followed by shredded cheddar generously across top—it’ll melt gloriously during baking creating pools oozing perfection worth celebrating long after meal ends!
I can already feel how deliciously comforting these Baked Crack Chicken Breasts are going to be as they bake away in your oven—stay tuned because soon enough they’ll emerge golden brown & bubbly just waiting patiently till served alongside favorite sides such mashed potatoes or green beans… Let’s keep going—we’re almost there!
Step 5: Layering the Flavorful Base
Now comes one of my favorite parts—creating that luscious, creamy base that makes these Baked Crack Chicken Breasts truly sing! Start by preheating your oven to a cozy 375°F (190°C). While that’s warming up, take a moment to prepare your chicken breasts. Rinse them gently under cold water and pat them dry with paper towels; this helps ensure that the seasoning sticks beautifully. Place the chicken breasts in a 9×13 inch baking dish—this is where all the magic will happen!
Next, season the chicken generously with salt and pepper. This step is absolutely paramount because it enhances the natural flavors of the chicken, setting a flavorful foundation for everything else to come. Don’t be shy with the seasoning; after all, we want every bite to be bursting with flavor! Once seasoned, set them aside while you whip up that dreamy cream cheese mixture. In a mixing bowl, combine the softened cream cheese and ranch seasoning mix until it’s smooth and well-blended. I promise you, this mixture is like liquid gold—it’s rich, creamy, and utterly intoxicating! The ranch seasoning not only adds depth but also brings a delightful tanginess that pairs perfectly with the other ingredients.
Step 6: Spreading on the Creamy Magic
Now that your cream cheese ranch mixture is ready, it’s time to spread it over those beautiful chicken breasts. Using a spatula or even the back of a spoon, dollop generous amounts of this creamy concoction onto each piece of chicken. Make sure every inch is covered—trust me when I say this will ensure that each bite is as satisfying as possible! As you spread it out, watch for any cracks in the cream cheese; smooth them out as best as you can.
This step is crucial because it creates a barrier that locks in moisture while cooking. The cream cheese acts like an insulating layer around the chicken, preventing it from drying out during baking. The heat from the oven will melt this mixture into an ooey-gooey topping that’s just heavenly when you dig in later on. You might find yourself wanting to sneak a taste right now—don’t worry; I won’t tell anyone!
Step 7: Adding Crunch and Depth
With that creamy goodness spread across your chicken, we’re ready to add layers of texture and flavor by incorporating our crispy bacon crumbles and shredded cheddar cheese! Take those eight strips of bacon you’ve cooked until crispy—if they’re still warm, even better—and crumble them over each breast generously. The salty crunch of bacon adds such an exciting contrast to the creamy ranch topping; I’ve always been captivated by how these textures play together so beautifully.
Afterward, sprinkle over one-and-a-half cups of shredded cheddar cheese as if you’re snowing magical flavor over your dish! Cheddar melts into an irresistible gooeyness that complements both the cream cheese and bacon perfectly. At this point, you should see your dish transforming into something truly extraordinary—a symphony of flavors waiting to come together in harmony in your oven! Make sure to distribute everything evenly; no one wants to miss out on any of these delicious components!
Step 8: Oven Time – The Transformation Begins!
Now it’s time for our Baked Crack Chicken Breasts to take center stage in the oven! Gently slide your prepared baking dish into that preheated oven and let it work its magic for about 30 minutes. As it bakes, keep an eye on it; you’ll know it’s nearly done when you start catching whiffs of savory aromas wafting through your kitchen—oh my goodness, nothing beats that smell!
After approximately 30 minutes have passed, check for doneness by making sure the internal temperature reaches at least 165°F (75°C). You can use an instant-read thermometer for this; it’s an invaluable tool in ensuring perfectly cooked chicken every time! When you pierce one of those gorgeous breasts with your thermometer, look for juices running clear rather than pink—a visual cue indicating they’re ready for their grand unveiling. If needed, feel free to pop them back in for an additional few minutes until they reach perfection.
Final Touches: Elevating Your Dish
Step 9: Garnishing Your Masterpiece
As soon as your Baked Crack Chicken Breasts are fully cooked and bubbling away with golden edges, carefully remove them from the oven. Give them a few moments to rest—this step is crucial for allowing those juices to redistribute throughout each breast, resulting in moist and tender pieces when it’s time to serve. As they rest for about five minutes—don’t rush this step—you’ll notice that even just sitting there allows all those flavors to meld together beautifully.
To elevate your masterpiece even further, sprinkle some extra chopped chives over the top along with additional crumbled bacon if desired—it’s these small details that turn an incredible meal into something unforgettable! Trust me on this; garnishing not only adds visual appeal but also enhances flavor and freshness with every bite.
Finally, serve these glorious Baked Crack Chicken Breasts alongside a vibrant green salad or perhaps fluffy rice or mashed potatoes drizzled with gravy; whatever makes your heart sing! Each forkful will deliver layers upon layers of flavor—from rich and creamy to salty and crunchy—that will leave everyone at your table raving about how extraordinary dinner was tonight!
Enjoy every moment spent savoring this comforting dish—it’s more than just food; it’s pure love shared among friends and family around the table!
Storage and Enjoyment Tips for Your Baked Crack Chicken Breasts
Now that your kitchen is filled with the intoxicating aroma of Baked Crack Chicken Breasts, it’s time to revel in the deliciousness! Picture yourself gathering around the table with family or friends, sharing stories and laughter as you dig into this creamy, cheesy delight. But let’s be honest—sometimes we can’t finish it all in one sitting, and that’s perfectly okay! Storing your leftovers thoughtfully ensures that you can savor this dish later without losing any of its magic.
Storing Leftover Baked Crack Chicken Breasts
To keep your Baked Crack Chicken Breasts fresh and delicious, I recommend transferring any leftovers into an airtight container. This will retain the moisture and flavors that make this dish so profoundly satisfying. Place the container in your refrigerator where it will stay good for about 3 to 4 days. To maintain the quality even longer, consider placing a slice of bread in the container; this little trick helps absorb excess moisture and keeps your chicken from drying out. When you finally pull it out for a second round, you’ll find that it tastes just as heavenly as when it was freshly baked. Reheating is simple—just pop it in the microwave or give it a quick warm-up in the oven until heated through, and voilà! You’ve got a meal that feels like a warm hug on a plate.
Freezing Baked Crack Chicken Breasts for Later
If you’ve made a big batch (which I wholeheartedly encourage), freezing is an absolutely brilliant way to enjoy your delicious creation at a later date. To freeze properly, allow your chicken breasts to cool completely first before transferring them into freezer-safe bags or containers—this is crucial! Squeeze out as much air as possible before sealing them up tight, which helps prevent freezer burn. When stored correctly, they will keep well for up to 3 months in your freezer. The beauty of having these little treasures waiting for you is that when you’re ready to indulge again, you can simply thaw them overnight in the fridge and reheat them just like fresh. Trust me on this: there’s nothing quite like pulling out a comforting meal after a long day; it’s pure convenience wrapped in love!
CATEGORY_NAME

Baked Crack Chicken Breasts
- Total Time: 45 minutes
- Yield: Serves 4
Description
Baked Crack Chicken Breasts are the ultimate comfort food that brings warmth and joy to your dining table. This easy-to-make dish features juicy chicken breasts smothered in a rich cream cheese and ranch seasoning topping, creating a melt-in-your-mouth experience that’s hard to resist. Perfect for weeknight dinners or special gatherings, these chicken breasts are easy to prepare and sure to impress everyone. With the delightful crunch of crumbled bacon and gooey melted cheddar cheese, each bite is a celebration of flavors that will have your loved ones coming back for seconds. Get ready to dive into this satisfying and flavorful meal that’s destined to become a household favorite.
Ingredients
- 4 boneless skinless chicken breasts
- Salt and pepper to taste
- 8 oz cream cheese, softened
- 1 packet (1 oz) ranch seasoning mix
- 8 strips turkey bacon, cooked crispy and crumbled
- 1.5 cups shredded sharp cheddar cheese
- 1 tablespoon fresh chives, chopped
Instructions
- Preheat your oven to 375°F (190°C).
- Season the chicken breasts with salt and pepper, then place them in a 9×13 inch baking dish.
- In a mixing bowl, combine softened cream cheese and ranch seasoning until smooth.
- Spread the cream cheese mixture evenly over the chicken breasts.
- Top with crumbled turkey bacon and shredded cheddar cheese.
- Bake for approximately 30 minutes or until the internal temperature reaches 165°F (75°C).
- Remove from the oven and let rest for five minutes before garnishing with extra chives and serving.
- Prep Time: 15 minutes
- Cook Time: 30 minutes
- Category: Dinner
- Method: Baking
- Cuisine: American
Nutrition
- Serving Size: 1 chicken breast (170g)
- Calories: 423
- Sugar: 2g
- Sodium: 919mg
- Fat: 28g
- Saturated Fat: 14g
- Unsaturated Fat: 12g
- Trans Fat: 0g
- Carbohydrates: 5g
- Fiber: 0g
- Protein: 38g
- Cholesterol: 157mg

Leave a Comment