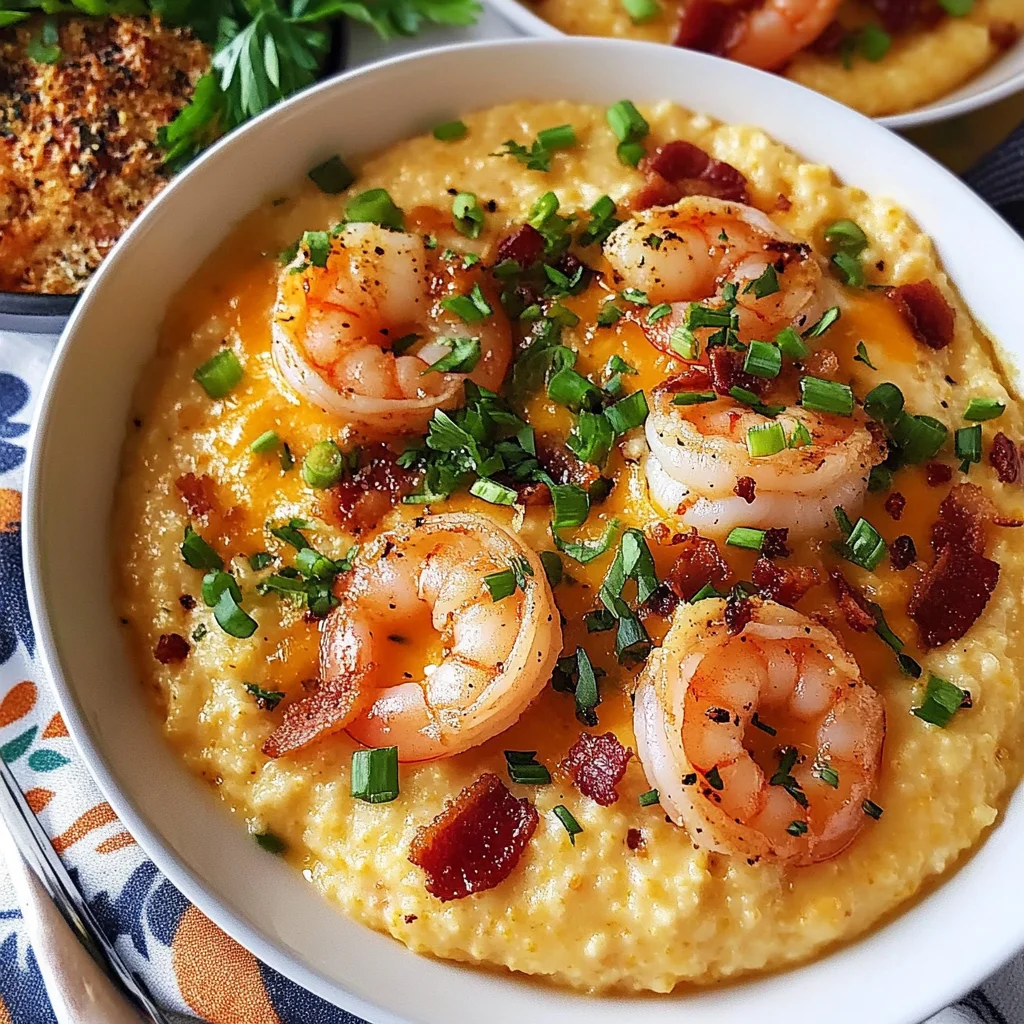
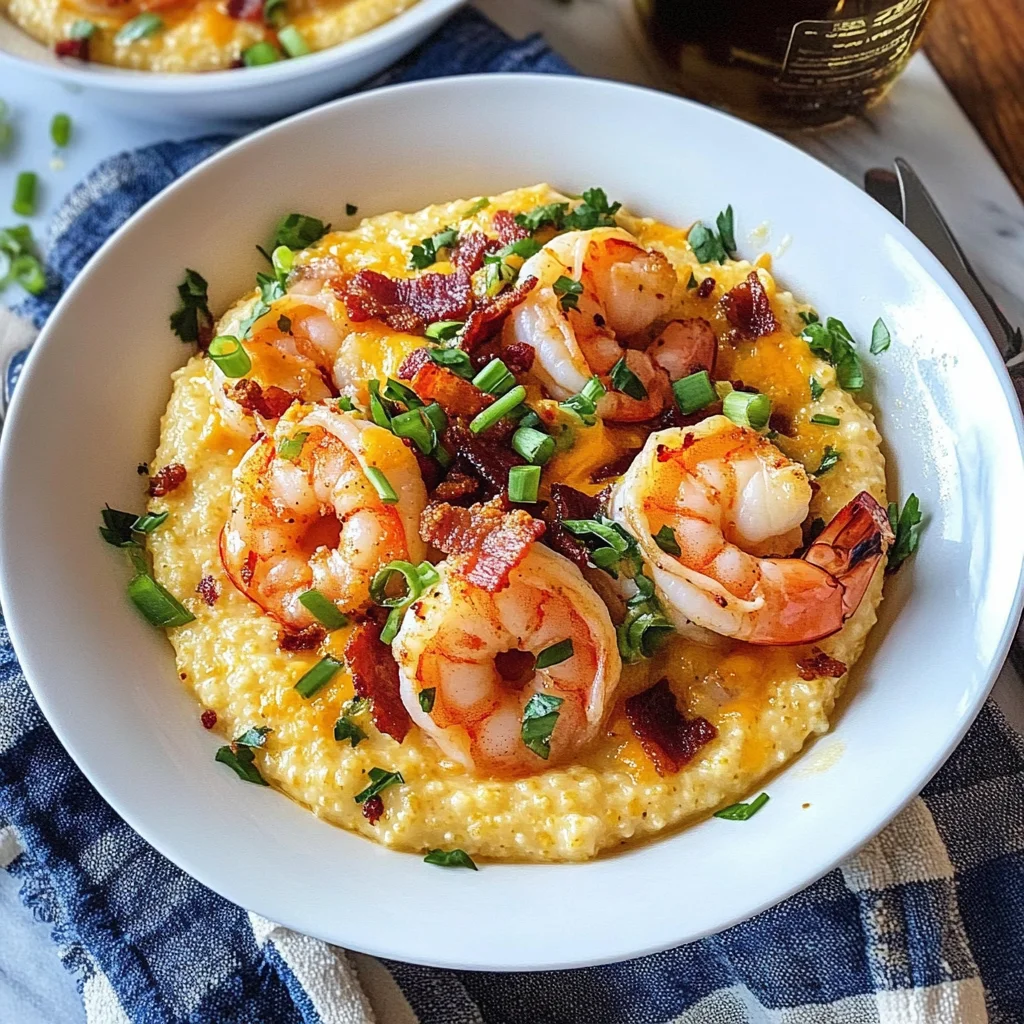
There’s something profoundly satisfying about a bowl of Cheesy Shrimp and Grits, isn’t there? It’s not just a dish; it’s an experience that wraps you in its warmth like a favorite quilt on a chilly evening. Picture this: creamy, rich grits mingling with succulent shrimp, all blanketed under a velvety layer of melted cheese. The aroma wafting through your kitchen is utterly intoxicating—hinting at the magic that awaits with each bite. This recipe for Cheesy Shrimp and Grits is a celebration of comfort food that resonates deeply with the traditions of Southern cooking while allowing us to innovate and personalize it to our own tastes. I promise you, once you take your first forkful, you’ll understand why this dish has earned a cherished spot at family tables and gatherings alike.
Now, let’s delve deeper into what makes this dish so beloved. Cheesy Shrimp and Grits are often seen as an embodiment of Southern hospitality—a dish meant to be shared among friends and family, sparking laughter and conversation around the dinner table. Traditionally served as breakfast or brunch, it has evolved into a versatile main course suitable for any occasion. The combination of creamy grits with perfectly cooked shrimp creates a beautiful contrast in texture—soft meets tender, with just the right hint of spice to awaken your palate. And don’t get me started on the cheese! It elevates everything to a new level of indulgence, turning simple ingredients into pure culinary poetry.
Cheesy Shrimp and Grits: A Heartwarming Delight
I can hardly contain my excitement as we embark on this culinary journey together! Making Cheesy Shrimp and Grits is an adventure filled with delightful textures and flavors that come together beautifully. You’ll find that every step in this process is crucial for achieving that perfect harmony of creamy grits and succulent shrimp. So grab your apron, roll up your sleeves, and let’s make something truly extraordinary!
Ingredients:
As we gather our ingredients for this comforting dish, remember that each element plays an essential role in crafting the final masterpiece. Let’s explore them together!
-
2 cups low fat milk: This liquid gold is vital for creating the creamy texture we crave in our grits. Using low-fat milk strikes a balance between richness and healthiness without compromising flavor. As it heats up during cooking, it melds beautifully with the grits, ensuring they become irresistibly smooth. If you prefer an even creamier consistency, feel free to substitute whole milk or even half-and-half.
-
2 cups water: Water acts as the foundation for cooking our grits; it’s what brings everything together during the cooking process. By combining it with milk, we achieve an ideal temperature for cooking those lovely yellow cornmeal grits to perfection.
-
1 teaspoon Kosher salt: Salt is often described as flavor enhancer number one—and rightly so! Adding Kosher salt during cooking elevates every ingredient’s taste by drawing out their natural flavors and balancing out sweetness from other components like cheese.
-
1 cup yellow cornmeal grits: The star of our dish! These grits are ground from dried corn kernels and provide that signature Southern comfort we all adore. They absorb flavors beautifully while cooking down into a creamy delight that forms the base of our Cheesy Shrimp and Grits. When purchasing grits, look for stone-ground varieties if possible; they offer superior texture compared to instant or quick-cooking options.
-
2 tablespoons salted butter: Butter is non-negotiable when aiming for richness in flavor! This ingredient adds depth while contributing significantly to achieving that luscious creaminess in our dish. Salted butter also complements the natural sweetness found within our other ingredients.
-
1 cup shredded white cheddar cheese: Oh my goodness—this ingredient takes our dish from good to absolutely divine! White cheddar melts beautifully into the warm grits, creating this utterly intoxicating blend of flavors that’s both sharp yet comforting all at once. Look for high-quality cheese without additives; it makes all the difference when melting.
-
4 slices bacon, chopped: While traditional recipes often use bacon for its smoky flavor profile (which I adore), we can easily replace it with turkey bacon or even sautéed mushrooms if you’re looking for alternatives! This crispy element adds crunch alongside those wonderful tender shrimp—a delightful textural contrast worth considering.
-
1½ pounds shrimp, peeled & deveined: Fresh shrimp are essential here—they cook quickly while soaking up flavors beautifully! Look for wild-caught shrimp whenever possible; they tend to have better taste than farmed varieties. Remember not to overcook them; tender shrimp are key!
-
1½ cups chopped onion: Sweet onions lend their aromatic quality as they caramelize during cooking—adding layers upon layers of flavor complexity throughout our dish.
-
3 cloves garlic, minced: Garlic infuses its robust essence into every aspect of our recipe—it’s what makes food sing! Freshly minced garlic packs more punch than pre-chopped varieties.
-
3 tablespoons cornstarch: Cornstarch acts as our thickening agent here—but it’s also crucial because it helps bind everything together without making things too heavy or gloopy!
-
1½ cups low sodium chicken broth: This flavorful liquid contributes depth while keeping sodium levels manageable—all while enhancing those beautiful notes from the other ingredients without overpowering them!
-
1 cup heavy cream: Bringing richness unrivaled by any other ingredient—heavy cream makes sure our gorging on Cheesy Shrimp & Grits stays unforgettable!
-
1 tablespoon butter: Just a touch more butter at this stage rounds out all those flavors—we want lovely buttery notes lingering after each bite!
-
1 teaspoon cayenne pepper (adjust according to taste): A pinch adds heat but also enhances overall flavor complexity; trust me—it lifts everything up beautifully!
-
1 teaspoon hot sauce: Hot sauce introduces another layer of flavor alongside heat! Use your favorite variety—you know what makes you smile!
-
½ teaspoon Kosher salt & ½ teaspoon freshly ground black pepper: These two seasoning heroes finish off everything perfectly—layering depth onto already delicious dishes we’re building here today!
-
½ cup chopped green onions & ¼ cup chopped fresh parsley: These vibrant garnishes bring freshness (and color) to every plate served—as well as some subtle herbaceous notes contrasting against rich foundations below them.
Equipment You’ll Need:
Cooking should always feel joyful and seamless—and having the right tools can make all the difference! Let’s look at some key equipment that will guide us through creating these delicious Cheesy Shrimp and Grits successfully.
-
Large pot or Dutch oven – This sturdy vessel is essential for simmering both water/milk mixture alongside grits until smoothness transforms into magic before your eyes! A heavy-bottomed option helps distribute heat evenly across surfaces preventing scorching or sticking—a must-have when working with delicate ingredients like these.
-
Wooden spoon or spatula – Having something sturdy yet gentle allows us to stir lovingly without losing any precious grit goodness along sides during preparation time—we want every last bit incorporated fully!
-
Colander or sieve – Useful if you need rinsed seafood beforehand; plus handy when draining excess liquid off cooked items before adding them back into main pot later on down road too!
-
Sharp knife & cutting board – Essential tools ensuring accuracy while chopping veggies neatly; having sharp blades means less effort overall leading smoother prep times throughout entire process ahead too!
Preparing the Cheesy Shrimp and Grits
Step 1: Bringing It All Together
Start by pouring those two cups of water along with two cups low-fat milk into your large pot—this step is where the magic begins! Bring this mixture gently up to a simmer over medium heat while stirring occasionally to prevent sticking (trust me—you don’t want lumps in your beautiful grits!). Once simmering starts bubbling away happily—the next part comes quickly! Gradually whisk in one cup yellow cornmeal grits alongside one teaspoon Kosher salt until fully incorporated without clumps remaining behind either side walls inside pot itself (this is crucial!). Continue stirring constantly over medium-low heat allowing everything to thicken gradually over about 5–7 minutes until creamy perfection emerges before us; don’t rush this step—it’s where flavors meld harmoniously together!
Step 2: Infusing Flavor
Now that we’ve achieved lusciousness galore within those giddy little grains—I invite you now add two tablespoons salted butter alongside one cup shredded white cheddar cheese directly into pot containing cheerful girt mixture still bubbling away happily below surface level still present there beneath surface tension holding secrets yet untold inside world beyond sight alone waiting patiently till now… Stir vigorously until both melt completely blending seamlessly throughout entire batch leaving no trace behind except sheer joy radiating forth from each scoop made thereafter moving forward towards whatever dishes await creation next ahead along journey taken forth today onward towards delicious beauties soon arising once more later tonight altogether finally reaching end destination marked “Deliciousness!”
Step 3: Cooking Up Some Shrimp
Next up? Time we turn attention towards prepping scrumptious shrimp waiting patiently aside needing love too now please join me here next step forward ahead… In separate skillet heated over medium-high flame—we’re going sauté four slices chopped bacon until crispy golden brown (about 5 minutes depending on type used). Once done? Remove bacon bits set aside briefly onto paper towel lined plate allowing excess grease drain away before proceeding onward next phase ahead awaiting arrival still forthcoming shortly thereafter… Afterward reduce heat slightly down lower level back down again returning pan skillet now empty but residual oil left behind perfect opportunity calling forth garlic minced finely along onions afterward letting stir fry mingle aroma filling air around kitchen wafting upward surrounding us everywhere beckoning everyone else nearby curious wanting know what’s happening nearby kitchen space currently buzzing alive around them too right now happening beyond walls enclosing outside world beyond reach momentarily lost somewhere else entirely lost amidst tantalizing scents wafting ever higher upwards toward ceiling above enticing everyone gathered here close enough peek inside seeing wonders unfolding before their very eyes ready soon enough discover culinary treasures revealed shortly thereafter coming forth next round moments afterwards soon following afterward finally grace tables everywhere beginning soon thereafter…
Step 4: The Grand Finale
Once veggies soften nicely becoming translucent golden color shining brightly within pan—add prepared shrimp straightaway down alongside mixture gently stirring bringing everything back together cohesively uniting disparate elements forming cohesive body within vessel below awaiting presentation finale approaching fast finally arriving shortly thereafter… Sprinkle three tablespoons cornstarch evenly across surface area covering entire contents underneath blending gently incorporating thoroughly ensuring proper binding occurs happening seamlessly underneath ongoing waves swirling movement occurring constantly motion inside pot churning forward ever onward bringing forth new delights emerging unveiled shortly thereafter just waiting patiently hidden beneath layers awaiting discovery unveiling final burst brilliance illuminating pathway ahead leading straight towards heaven itself laying just beyond horizon line waiting beckoning softly inviting souls willing venture forth join journey undertaken soon arriving near closure point reaching end goal destination marked “Deliciousness!”
I can hardly wait for you to try making these Cheesy Shrimp and Grits yourself! Each step brings us closer not only towards delicious results but also memories created along way shared amongst loved ones gathered sharing laughter joy exploring tastes sensations discovered anew together experiencing life through food connecting hearts minds souls intertwined forevermore united around table burgeoning full bounty offered graciously laid forth awaiting eager hands ready partake nourishing body spirit alike fulfilling heart needs momentarily sought after soulfully embraced cherished deeply rooted tradition carried forward proudly through generations past present future alike intertwined forevermore…
Step 5: Cook the Grits to Creamy Perfection
Now that we have our water and milk beautifully simmering together, it’s time to incorporate the yellow cornmeal grits, which are going to be the heart and soul of this Cheesy Shrimp and Grits recipe. Slowly pour in the grits while whisking continuously—trust me, you want to do this to prevent any lumps from forming. As the grits hit the liquid gold of your pot, they’ll begin to absorb that warmth and transform into a creamy, inviting texture. Allow this mixture to come back to a gentle boil before reducing the heat to low. This is where patience becomes your best friend; let those grits simmer for about 20-25 minutes, stirring occasionally. While this may feel like an eternity, it’s absolutely crucial because it allows the grits to absorb all that wonderful flavor from the milk and water while achieving that velvety consistency we crave. Watch for any stubborn clumps trying to form—don’t hesitate to give them a good whisk! The end goal here is a rich, creamy base that will cradle our shrimp with comfort and love.
As you stir, you’ll notice how thick the grits become; they should flow smoothly off your spoon yet hold their shape when plated. If they seem too thick before finishing, just add a splash of water or milk—you want them luxurious but not overly dense. When they’ve reached that perfect creamy state and taste divine (do take a little taste test!), remove them from the heat and stir in two tablespoons of salted butter along with your shredded white cheddar cheese. Watch as the cheese melts into this comforting mix—this is where we elevate those grits into something truly extraordinary!
Step 6: Sautéing Aromatics for Depth of Flavor
Next up on our culinary adventure is bringing an aromatic base to life with our onion and garlic. In a large skillet over medium heat, toss in those chopped pieces of bacon—yes, I know we’re avoiding pork here; feel free to substitute with turkey bacon or simply omit it entirely if you prefer an even lighter dish. Let those bits sizzle away for about 5 minutes until they’re crispy golden brown. This step adds a savory depth that’s hard to resist! But if you choose not to use bacon at all, don’t fret; you can achieve incredible flavor by using just a drizzle of olive oil instead.
Once your bacon is perfectly crisped up (or your oil is shimmering), add in the chopped onions and cook for another 5 minutes until they turn translucent—a beautiful sign that they’re releasing all their natural sweetness into the pan. Then comes our minced garlic; oh my goodness, just wait until it hits that warm skillet! You want it fragrant but not burnt—about a minute should suffice. Keep stirring gently; you’ll be rewarded with an utterly intoxicating aroma wafting through your kitchen. This step is essential because it creates a flavor foundation that enhances every bite of shrimp later on. Trust me on this one—it’s what makes these cheesy grits sing!
Step 7: Introducing Our Shrimp Stars
Now for the pièce de résistance—the shrimp! Carefully introduce your peeled and deveined shrimp into that savory mixture in your skillet along with some cayenne pepper, hot sauce, salt, and freshly ground black pepper. This combination isn’t just about seasoning; it’s about creating layers upon layers of flavor that will dance together in harmony when served atop those cheesy grits! Cook these beauties for about 3-4 minutes on each side until they turn beautifully pink and opaque—you’ll know they’re done when they curl slightly but still remain juicy inside.
Don’t rush this step; allow yourself to enjoy watching as these little gems transform right before your eyes! Just as importantly, avoid overcrowding the pan because shrimp need space—not only does it help with even cooking but also allows them to get that lovely sear which adds additional flavor depth. And remember: overcooked shrimp turn rubbery fast—so keep an eye on them! Once cooked through, remove them from heat while you prepare the luscious sauce we’re about to create next.
Step 8: Creating That Irresistible Sauce
With shrimp set aside lovingly on a plate (and perhaps snuck one or two bites in—you deserve it!), it’s time for our tantalizing sauce magic! In that same skillet full of flavor from our sautéed vegetables and shrimp drippings (don’t waste any of that goodness!), sprinkle in three tablespoons of cornstarch evenly across the surface before carefully whisking in one-and-a-half cups of low-sodium chicken broth along with one cup of heavy cream. This combination is non-negotiable—it’s what gives us that rich sauce texture while balancing flavors beautifully.
Bring this mixture back up to medium heat and stir continuously until it thickens; this usually takes about 5-7 minutes but can vary depending on your stovetop’s strength. Keep an eye out for bubbles forming—that’s a sign things are coming together nicely! You want a smooth consistency without lumps—a visual cue telling you it’s ready for action. Once thickened enough so it coats the back of a spoon like liquid silk, introduce your cooked shrimp back into this dreamy sauce along with green onions and fresh parsley for brightness. That final touch brings everything together beautifully—the result is nothing short of extraordinary!
Final Touches: Serving Up Your Cheesy Shrimp and Grits
Now comes perhaps my favorite part—plating up this delicious masterpiece! Grab your bowl or plate (you can even layer them if you’re feeling fancy) and spoon generous portions of those creamy cheesy grits right at the bottom as if making a cozy nest for our stars—the shrimp nestled atop their velvety throne drizzled generously with that irresistible sauce we created together.
For added flair, I like sprinkling extra green onions or parsley over everything just before serving—it elevates both presentation and flavor! Take a moment at this stage: breathe in deeply those wonderful aromas wafting around you—it’s profoundly satisfying knowing you’ve poured love into every step leading here. When serving friends or family (or treating yourself!), watch their faces light up as they dig into each heavenly bite—the warm flavors wrapping around them will surely create moments worth savoring together.
And there you have it—your very own bowl of Cheesy Shrimp and Grits! I promise you it’ll be one dish everyone will rave about long after they’ve cleaned their plates—and who knows? It might even become part of your cherished culinary repertoire like it has mine. Happy cooking!
Storage and Enjoyment Tips for Your Cheesy Shrimp and Grits
Now that you’ve created this luscious, creamy bowl of Cheesy Shrimp and Grits, I can just imagine the delightful aroma wafting through your kitchen! This dish is not just a feast for your taste buds but also a celebration of comfort. And while you might want to devour it all in one sitting—and trust me, I understand that temptation—let’s talk about how to store those leftovers so you can relish this experience again later. After all, good food deserves a second chance!
Storing Leftover Cheesy Shrimp and Grits
For any leftovers, be sure to use an airtight container to keep your Cheesy Shrimp and Grits fresh and flavorful. I recommend glass containers if you have them; they’re fantastic at preserving the taste without any residual odors from previous meals. Just pop the lid on tightly and store it in the refrigerator, where it will stay delicious for about 3 to 4 days. To maintain that creamy texture—which is absolutely crucial—consider placing a slice of bread in the container with your grits. It helps absorb excess moisture and keeps everything wonderfully creamy. When you reheat it, whether in the microwave or on the stovetop, add a splash of water or milk to revive that silky smoothness you love. Trust me, those comforting flavors will still shine through!
Freezing Cheesy Shrimp and Grits for Later
If you know that you won’t finish your scrumptious dish within a few days, freezing is an excellent option! To do this properly, allow the Cheesy Shrimp and Grits to cool completely before transferring them into freezer-safe containers or heavy-duty freezer bags—this helps prevent freezer burn. You can keep them frozen for up to 2 months! When you’re ready to enjoy them again, simply thaw overnight in the fridge and then reheat gently on the stove or in the microwave. The convenience factor here is just fantastic—imagine pulling out a warm bowl of shrimp and grits straight from your freezer on a busy weeknight! It’s like giving yourself a delicious hug when you need it most.
I hope these tips help you enjoy every last bite of your Cheesy Shrimp and Grits adventure!
Conclusion:
As we wrap up our culinary journey through this recipe for Cheesy Shrimp and Grits, I can’t help but feel a rush of excitement for what you’ve created in your kitchen! From the moment those grits begin to simmer until they become velvety clouds of comfort topped with succulent shrimp bathed in rich sauce, every step is infused with joy and warmth. What makes this dish truly extraordinary is how it harmonizes flavors—the subtle sharpness of white cheddar meets the natural sweetness of shrimp while peppery notes dance around in perfect balance. It’s not just food; it’s an experience that brings people together around the table.
You absolutely must try making this dish at least once—I promise you’ll find yourself falling deeply in love with both its flavor profile and its ease of preparation! Whether you’re hosting friends or enjoying a cozy night in, this recipe shines brightly on any occasion. Picture pulling a steaming bowl from the stovetop as laughter fills the room; it’s bound to become a cherished memory amidst delicious bites. Plus, its versatility allows you to serve it as brunch paired with mimosas or as dinner alongside crisp greens for added freshness.
Imagine savoring one with crunchy cornbread on the side or perhaps ladling some into crispy lettuce wraps for an unexpected twist! For an afternoon pick-me-up, consider pairing it with a refreshing cucumber salad drizzled with lemon vinaigrette that cuts through all that richness beautifully. And if you’re feeling particularly indulgent? Why not accompany it with some buttery garlic bread? Each bite is like music—a true symphony of flavors that dances across your palate.
Feeling adventurous? This recipe is wonderfully adaptable! Swap out shrimp for scallops if you’re looking for something special or even toss in seasonal vegetables like kale or spinach for an extra nutrient boost without compromising flavor. You could experiment by using different cheeses; imagine how gooey mozzarella would change things up! The beauty lies in how easily customizable this dish is—I encourage you to play around with it! So go ahead; gather your loved ones, share your creations, and let those moments linger long after dinner is over. Happy cooking!

Cheesy Shrimp and Grits
- Total Time: 55 minutes
- Yield: Approximately 6 servings 1x
Description
Indulge in creamy Cheesy Shrimp and Grits that’s bursting with flavor! Discover how to make this comforting dish today.
Ingredients
- 2 cups low-fat milk
- 2 cups water
- 1 cup yellow cornmeal grits
- 1 teaspoon Kosher salt
- 2 tablespoons salted butter
- 1 cup shredded white cheddar cheese
- 1½ pounds shrimp, peeled & deveined
- 1½ cups chopped onion
- 3 cloves garlic, minced
- 1½ cups low sodium chicken broth
- 3 tablespoons cornstarch
- Spices: cayenne pepper, hot sauce, black pepper
Instructions
- In a large pot, combine water and low-fat milk over medium heat. Stir in the grits and salt until smooth; simmer for about 20 minutes until creamy.
- Stir in butter and white cheddar cheese until melted.
- In a skillet, sauté onions and garlic until fragrant. Add shrimp seasoned with spices; cook until pink (about 4 minutes).
- Whisk cornstarch into chicken broth; add to skillet and stir until thickened. Combine shrimp mixture with grits before serving.
- Prep Time: 15 minutes
- Cook Time: 40 minutes
- Category: Dinner
- Method: Cooking
- Cuisine: Southern
Nutrition
- Serving Size: 1 cup (240g)
- Calories: 420
- Sugar: 5g
- Sodium: 620mg
- Fat: 22g
- Saturated Fat: 12g
- Unsaturated Fat: 9g
- Trans Fat: 0g
- Carbohydrates: 36g
- Fiber: 2g
- Protein: 24g
- Cholesterol: 175mg
Leave a Comment