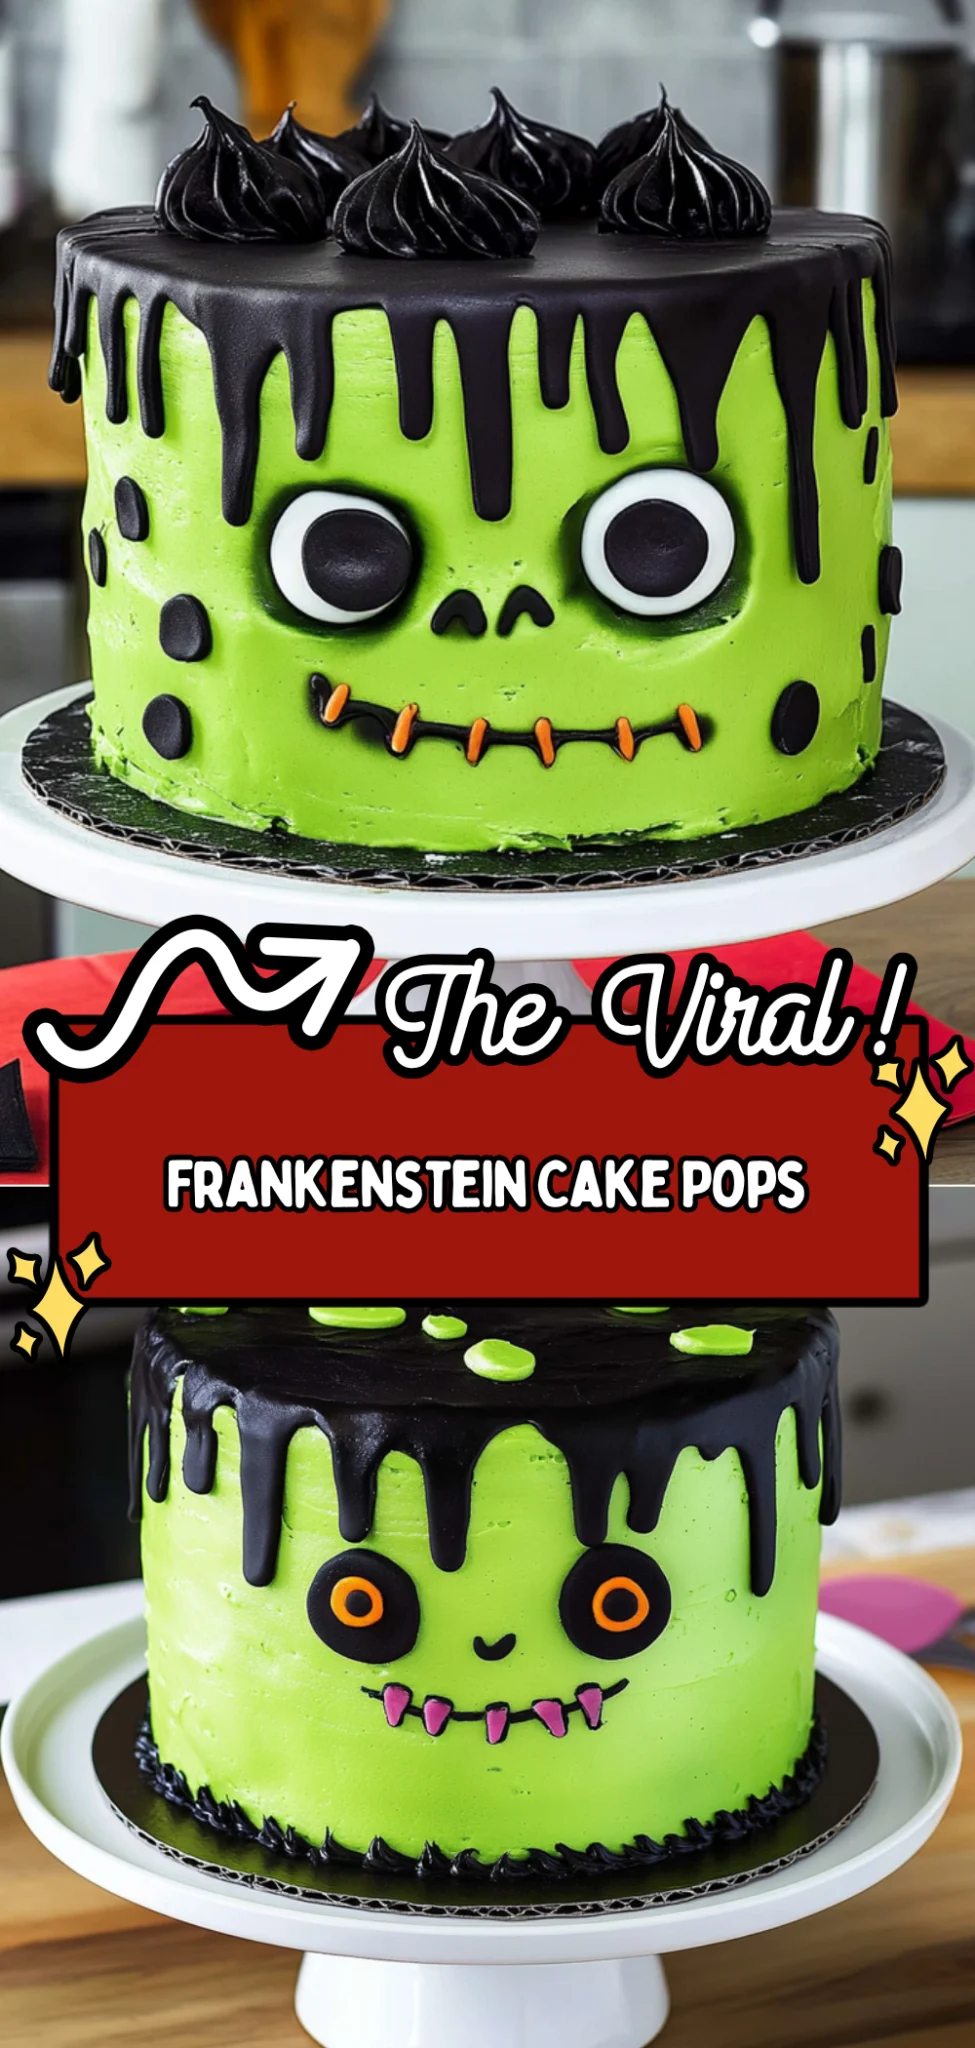
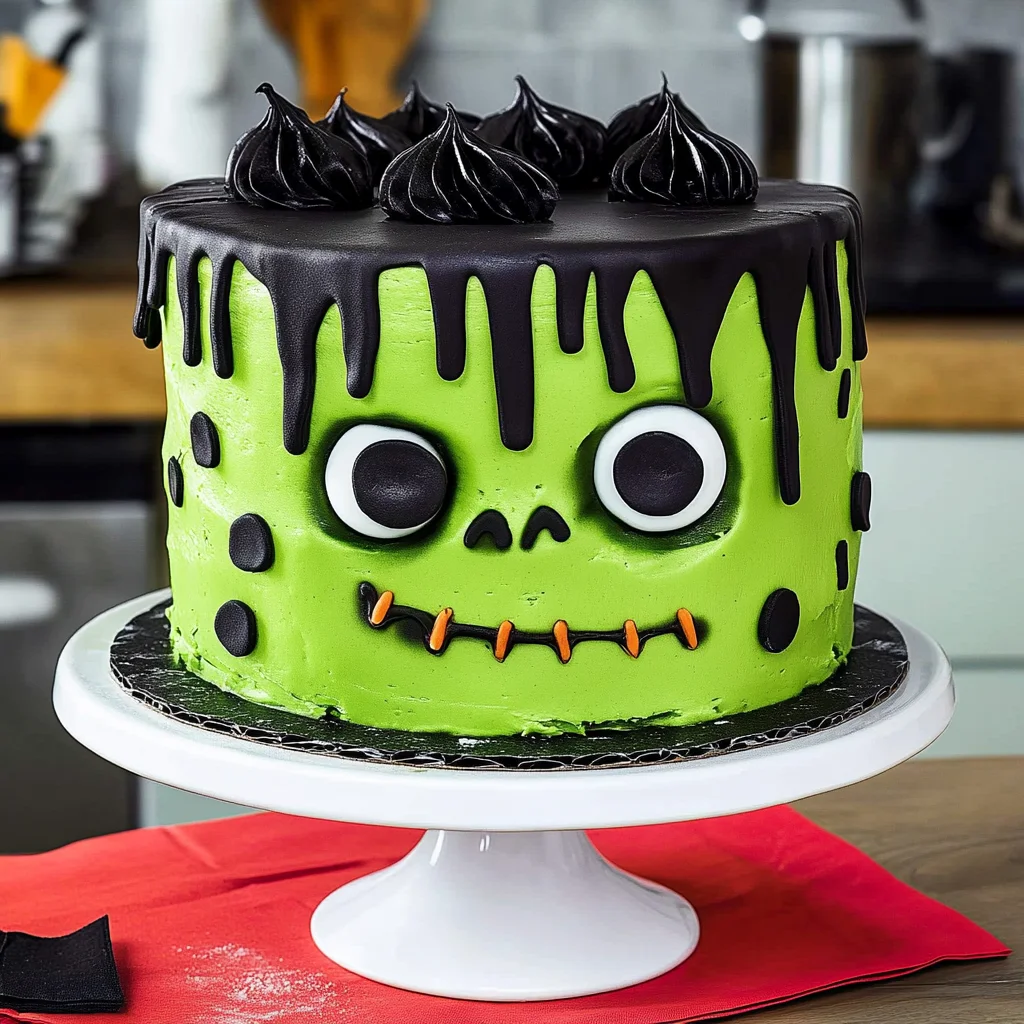
As the oven door swings open, a tantalizing aroma of rich chocolate and vanilla wafts through the air, beckoning you closer to the delightful chaos of Halloween. The Frankenstein Cake stands proudly, its vibrant green frosting contrasting beautifully with dark chocolate layers, inviting you to indulge in a slice that balances sweetness with a hint of mischief. This whimsical creation is more than a dessert; it embodies the spirit of celebration and togetherness, making it the perfect centerpiece for your spooky gatherings.
What truly sets this Frankenstein Cake apart is not just its playful appearance but also the clever technique behind its construction. A moist and tender crumb is achieved through a combination of buttermilk and coffee, enhancing the chocolate flavor while adding depth. Topped with charmingly crafted eyes and bolts, each slice promises laughter and joy, making it an irresistible treat that will enchant both kids and adults alike. Gather your loved ones and dive into this deliciously fun project that brings a touch of magic to your Halloween festivities!
Why You’ll Love This Frankenstein Cake
You’ll adore this Frankenstein Cake not just for its playful Halloween theme, but also for its rich, decadent flavor and moist texture. The combination of all-purpose flour and unsweetened cocoa powder creates a cake that’s delightfully soft and chocolatey, while the generous amount of granulated sugar ensures a perfect balance of sweetness that will leave everyone wanting more. Topped with creamy buttercream frosting and adorned with vibrant fondant decorations, this cake is as much a feast for the eyes as it is for the palate. It’s an irresistible centerpiece for any Halloween gathering, making it the perfect treat to whip up today!
What Kind of All-Purpose Flour Should I Use?
For the Frankenstein Cake, you should use high-quality all-purpose flour, as it provides the perfect balance of structure and tenderness for this rich, chocolatey cake. A good all-purpose flour will help create a light yet moist crumb, allowing the cake to rise beautifully while still being able to hold the weight of the frosting and decorations. If you find yourself without all-purpose flour, you can substitute it with cake flour for a softer texture; just remember that you may need to adjust the amount slightly—typically about 1 cup plus 2 tablespoons of cake flour can replace 1 cup of all-purpose flour. This adaptation will give you a lighter cake but may require closer monitoring during baking to avoid overcooking.
Ingredients You’ll Need
Each ingredient in this dish plays an essential role in flavor and texture. Here’s what you’ll need:
- 2 cups all-purpose flour: Provides structure and stability to the cake.
- 1.5 cups granulated sugar: Sweetens the cake while helping it to rise.
- 1 cup unsweetened cocoa powder: Delivers rich chocolate flavor and color.
- 1 tablespoon baking powder: Acts as a leavening agent for a light texture.
- 1 teaspoon baking soda: Enhances the cake’s rise and contributes to browning.
- 1 teaspoon salt: Balances sweetness and enhances overall flavors.
- 2 large eggs (room temperature): Binds ingredients together while adding moisture.
- 1 cup milk (room temperature): Adds moisture and helps dissolve dry ingredients.
- 0.5 cup vegetable oil: Keeps the cake moist and tender throughout.
- 2 teaspoons vanilla extract: Infuses a warm, aromatic flavor that complements chocolate.
How To Make the Frankenstein Cake
Preheat the Oven and Prepare Pans
Preheat your oven to 350°F (175°C) and prepare two 9-inch round cake pans by greasing them with butter or cooking spray, then dusting them with flour. This will ensure that your cakes release smoothly after baking.
Mix the Dry Ingredients
In a large mixing bowl, combine 2 cups of all-purpose flour, 1.5 cups of granulated sugar, 1 cup of unsweetened cocoa powder, 1 tablespoon of baking powder, 1 teaspoon of baking soda, and 1 teaspoon of salt. Whisk these dry ingredients together until well blended and free of lumps, ensuring a uniform base for your cake.
Incorporate Wet Ingredients
Add in 2 large eggs (room temperature), 1 cup of milk (room temperature), 0.5 cup of vegetable oil, and 2 teaspoons of vanilla extract to the dry mixture. Mix everything together on medium speed until the batter is smooth and fully combined, which should take about 2-3 minutes.
Divide the Batter
Carefully pour the batter evenly into the prepared cake pans. You can use a kitchen scale to ensure each pan has an equal amount if you want precision. This step is important for even baking and stacking later on.
Bake the Cakes
Place the pans in the preheated oven and bake for about 30 minutes, or until a toothpick inserted into the center comes out clean. Keep an eye on them towards the end; they should rise nicely and have a slightly firm top when done.
Cool the Cakes
Once baked, let the cakes cool in their pans for about 10 minutes. Afterward, carefully transfer them to a cooling rack to cool completely. This is crucial as frosting a warm cake can cause it to melt and slide off.
Beat the Butter for Frosting
In another mixing bowl, beat 1 cup of softened unsalted butter until it’s creamy and light in color. This should take about 2-3 minutes at medium speed; a properly creamed butter will provide a fluffy texture to your frosting.
Combine Frosting Ingredients
Gradually add in 4 cups of powdered sugar and 0.5 cup of cocoa powder while mixing on low speed until just combined. Once incorporated, increase the speed to medium and mix until everything is well blended and smooth.
Add Flavorings
Pour in 1 teaspoon of vanilla extract and add in up to 2 tablespoons of milk to achieve your desired frosting consistency. Beat again until fluffy—this should take an additional minute or two for that perfect spreadable texture.
Assemble the Cake Layers
Once your cakes are completely cooled, place one layer on a serving plate with the flat side facing up. This will create a stable base for stacking your cake layers without wobbling.
Frost Between Layers
Spread a generous layer of frosting on top of the first cake layer using an offset spatula or knife. Make sure it’s even so that when you place the second layer on top, it sits perfectly level.
Frost the Entire Cake
Carefully place the second cake layer on top with its flat side facing up as well. Using the remaining frosting, cover the entire surface and sides of the cake smoothly; this will be your canvas for decoration later on.
Cover with Green Fondant
Roll out your green fondant into an even sheet to cover both the top and sides of your frosted cake. Use cornstarch or powdered sugar on your work surface to prevent sticking while shaping Frankenstein’s face—make sure it adheres well by gently pressing it onto the frosting.
Add Black Fondant Hair
Next, roll out black fondant into strips for Frankenstein’s hair and attach it securely at the top of the cake using a little water or edible glue as adhesive. The hair should appear wild and spiky to mimic his monster look!
Create Eyes with White Fondant
Shape small circles from white fondant for eyes and position them appropriately on Frankenstein’s face before placing chocolate chips as pupils right in their centers. Ensure they are evenly spaced for a spooky yet adorable appearance.
Final Touch with Red Fondant Stitches
Finally, roll out red fondant into thin strips or shapes resembling stitches and place them across Frankenstein’s face where desired. This adds those finishing touches that make your cake truly come alive!
How to Serve and Store Frankenstein Cake
This delightful Frankenstein Cake serves 8, making it perfect for Halloween gatherings or spooky parties. For an unforgettable presentation, slice the cake into generous pieces and serve them on colorful plates adorned with a drizzle of chocolate sauce. Pair it with a scoop of vanilla ice cream to balance the rich cocoa flavor and create a fun contrast with the vibrant green and black decorations.
To store leftovers, keep your Frankenstein Cake in an airtight container in the refrigerator for up to 4 days. When you’re ready to enjoy another slice, simply reheat it in the microwave for about 10-15 seconds to maintain its moist texture—just be careful not to overheat, as this can dry out the cake. While this cake is best enjoyed fresh, it can also be frozen for up to a month; however, the texture may change slightly upon thawing.
What to Serve With Frankenstein Cake
Garlic Mashed Potatoes
The rich, buttery flavor of garlic mashed potatoes provides a delightful contrast to the sweet and chocolatey notes of Frankenstein Cake.
Roasted Brussels Sprouts
These caramelized sprouts bring a touch of earthy bitterness that beautifully balances the cake’s sweetness while adding a satisfying crunch.
Cheesy Garlic Bread
The warm, gooey cheese and toasted garlic on bread create a savory, comforting pairing that complements the cake’s dessert-like qualities.
Spinach Salad with Balsamic Vinaigrette
A fresh spinach salad drizzled with tangy balsamic vinaigrette cleanses the palate and enhances the overall dining experience with its vibrant flavors.
Creamy Macaroni and Cheese
This indulgent comfort food offers a rich creaminess that pairs exceptionally well with the cake’s chocolate layers, making every bite feel decadent.
Pumpkin Soup
A velvety pumpkin soup adds seasonal warmth and spice, creating a delicious contrast to the sweetness of Frankenstein Cake while enhancing the Halloween theme.
Can I use whole wheat flour instead of all-purpose flour? Yes, you can substitute whole wheat flour for all-purpose flour, but it may result in a denser cake. For best results, consider using a mix of both flours to keep the cake light while still adding some whole grain goodness.
Is there a dairy-free option for this recipe? Absolutely! You can replace the milk with a plant-based alternative like almond milk or oat milk. Additionally, use a dairy-free butter substitute for the frosting to keep the entire cake dairy-free.
Can I make the Frankenstein Cake ahead of time? Yes, you can bake the cake layers in advance and store them wrapped tightly in plastic wrap at room temperature for up to two days. Frost and decorate it closer to the time you plan to serve for the best presentation.
How do I know when the cake is fully baked? The cake is done when a toothpick inserted into the center comes out clean or with a few moist crumbs. If it comes out wet with batter, continue baking for an additional 2-5 minutes and check again.
What can I use if I don’t have fondant for decorating? If fondant isn’t available, you can use colored buttercream frosting as an alternative. Simply tint your frosting green for Frankenstein’s face and pipe it on to create the same effect without needing fondant.
Conclusion
The Frankenstein Cake is not just a dessert; it’s a delightful centerpiece that brings the spirit of Halloween to life with its fun and spooky design. For more festive treats, don’t miss out on [Witch’s Brew Cupcakes] or [Mummy Cookies] that will perfectly complement your Halloween festivities. We’d love for you to save this recipe on Pinterest and share your creations with us in the comments—let’s celebrate together!
Frankenstein Cake
Ingredients
Method
- Preheat the oven to 350°F (175°C). Grease and flour two 9-inch round cake pans.
- In a mixing bowl, combine flour, sugar, cocoa powder, baking powder, baking soda, and salt.
- Add eggs, milk, oil, and vanilla extract. Mix until well combined.
- Divide the batter evenly between the prepared pans.
- Bake for 30 minutes or until a toothpick inserted into the center comes out clean.
- Let the cakes cool in the pans for 10 minutes, then transfer to a cooling rack to cool completely.
- In a mixing bowl, beat the softened butter until creamy.
- Gradually add powdered sugar and cocoa powder, mixing until combined.
- Add vanilla extract and milk, and beat until smooth and fluffy.
- Once the cakes are completely cool, place one layer on a serving plate.
- Spread a layer of frosting on top of the first cake layer.
- Place the second cake layer on top and frost the entire cake with the remaining frosting.
- Roll out green fondant and cover the top and sides of the cake to create Frankenstein's face.
- Use black fondant to create hair and attach it to the top of the cake.
- Shape white fondant into eyes and place chocolate chips as pupils.
- Use red fondant to create stitches on the face.
Leave a Comment