The joy of cooking isn’t just about the food we create; it’s about the memories we forge, the laughter we share, and the warmth that fills our homes. Whenever I whip up my High Protein Crack Dip, it transports me back to sun-drenched afternoons by the pool, laughter echoing around me, and friends gathered with plates piled high. This dip isn’t merely a dish; it’s a sensory experience that bursts with flavor and comfort—a celebration of good times and great company. Each bite is a delightful blend of creamy richness from Greek yogurt, the unmistakable zing of ranch seasoning, and the satisfying crunch of bacon. It’s an extraordinary twist on a classic that keeps everyone coming back for more. I promise you, this high protein crack dip recipe will become a cherished part of your gatherings.
As someone who has always been captivated by the art of cooking, I can’t help but share how this dip embodies both tradition and modern health consciousness. It takes inspiration from classic dips that often rely heavily on unhealthy ingredients and transforms them into something lighter yet utterly indulgent. The beauty of this recipe lies in its versatility—whether you’re hosting a summer barbecue or just enjoying a quiet movie night at home, this dip fits perfectly into any occasion. Plus, it’s low-carb and gluten-free! How wonderful is that? You can also easily customize it to be dairy-free without losing any of that delicious flavor.
High Protein Crack Dip Recipe: A Creamy Delight for Every Occasion
Let’s dive into creating this delectable dip together! You’ll see how easy and fun it is to prepare while bringing a delightful dish to your next party or casual gathering. Picture yourself mixing together vibrant ingredients, all while your kitchen fills with mouth-watering aromas that will have everyone asking what you’re making.
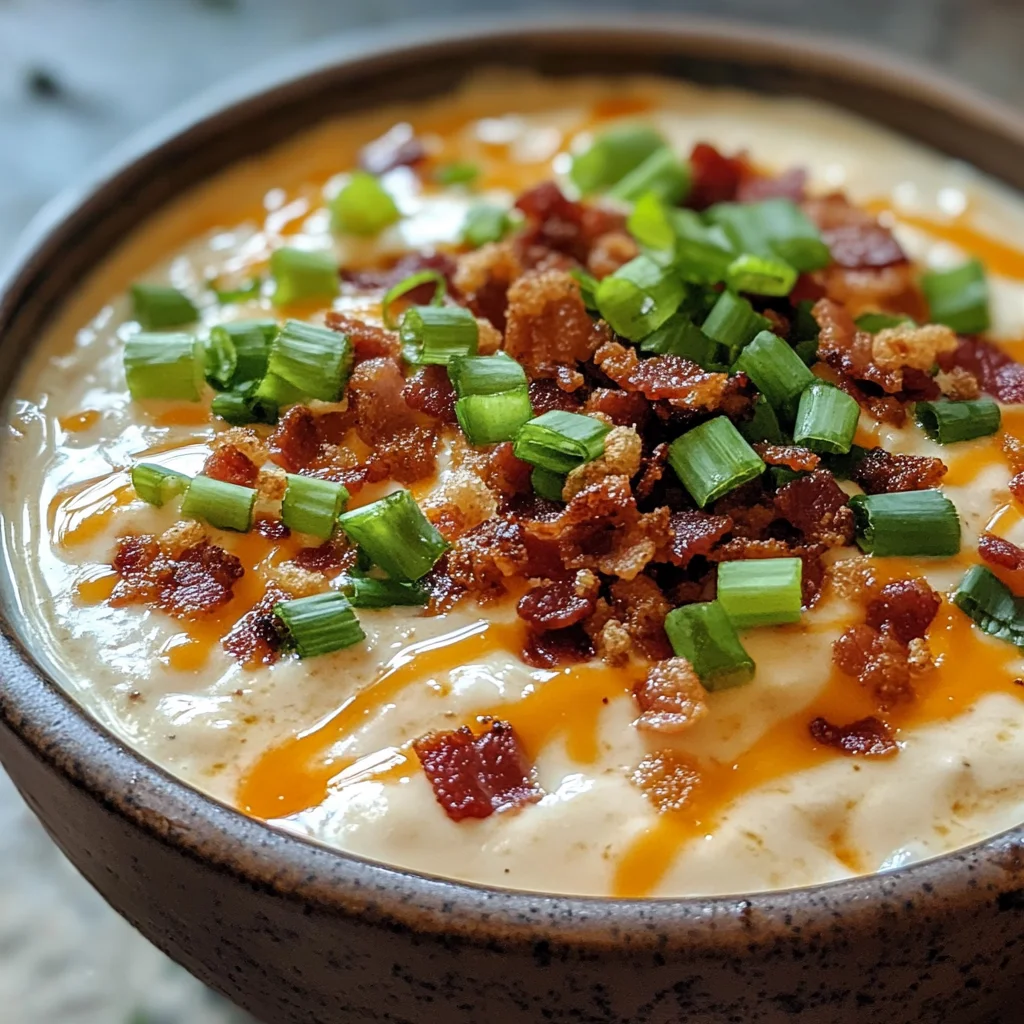
Ingredients:
As we embark on this culinary journey, let me share why each ingredient in our High Protein Crack Dip Recipe is essential for creating that perfect balance of flavors and textures.
- 2 cups Greek yogurt or dairy-free yogurt of choice. This is truly the star of our dip! Greek yogurt adds an incredible creaminess while being packed with protein—making every bite satisfyingly rich without weighing you down. If you’re opting for a dairy-free version, look for coconut or almond-based yogurts that are thick and creamy. This base not only provides texture but also tanginess that balances beautifully with other ingredients. Just make sure it’s not overly sweetened; we’re aiming for savory here!
- 2-2.5 tbsp ranch seasoning (or 1 packet ranch dressing mix). This ingredient is absolutely paramount in giving our dip its signature flavor profile! Ranch seasoning brings an irresistible combination of herbs like dill and parsley along with garlic powder that dances on your taste buds. You can buy pre-made packets or make your own blend using dried herbs from your pantry if you want to control the flavor intensity better—trust me on this; homemade ranch blends are fantastic! When choosing packets, look for those without artificial additives for a more wholesome touch.
- 1 cup shredded cheddar cheese (or dairy-free cheese alternative). Cheese lovers rejoice! The shredded cheddar adds a deep, savory undertone to our dip with its gooey meltiness when mixed in. Cheddar provides not just flavor but also richness that elevates every scoop you take. If you’re going dairy-free, there are excellent nut-based cheeses available now that melt beautifully too—just ensure they are finely shredded to integrate smoothly into the yogurt base.
- 1/2 cup crumbled bacon or turkey bacon (about 5 strips cooked bacon). Ahh—the crispy goodness! Bacon gives our dip an umami punch that’s hard to resist. The crunchy texture juxtaposes perfectly against the creamy yogurt base while imparting its smoky flavor throughout every bite. If you’re looking for a healthier option or prefer turkey bacon, just cook it until it’s delightfully crisp before crumbling it into the mixture—it adds so much depth!
- 1/2 cup chopped green onions. These little green wonders bring freshness and brightness to our dip! The sharpness of green onions cuts through the richness beautifully while adding color to your dish—because we eat with our eyes first! When chopping them up, make sure to include both the white and green parts for maximum flavor impact.
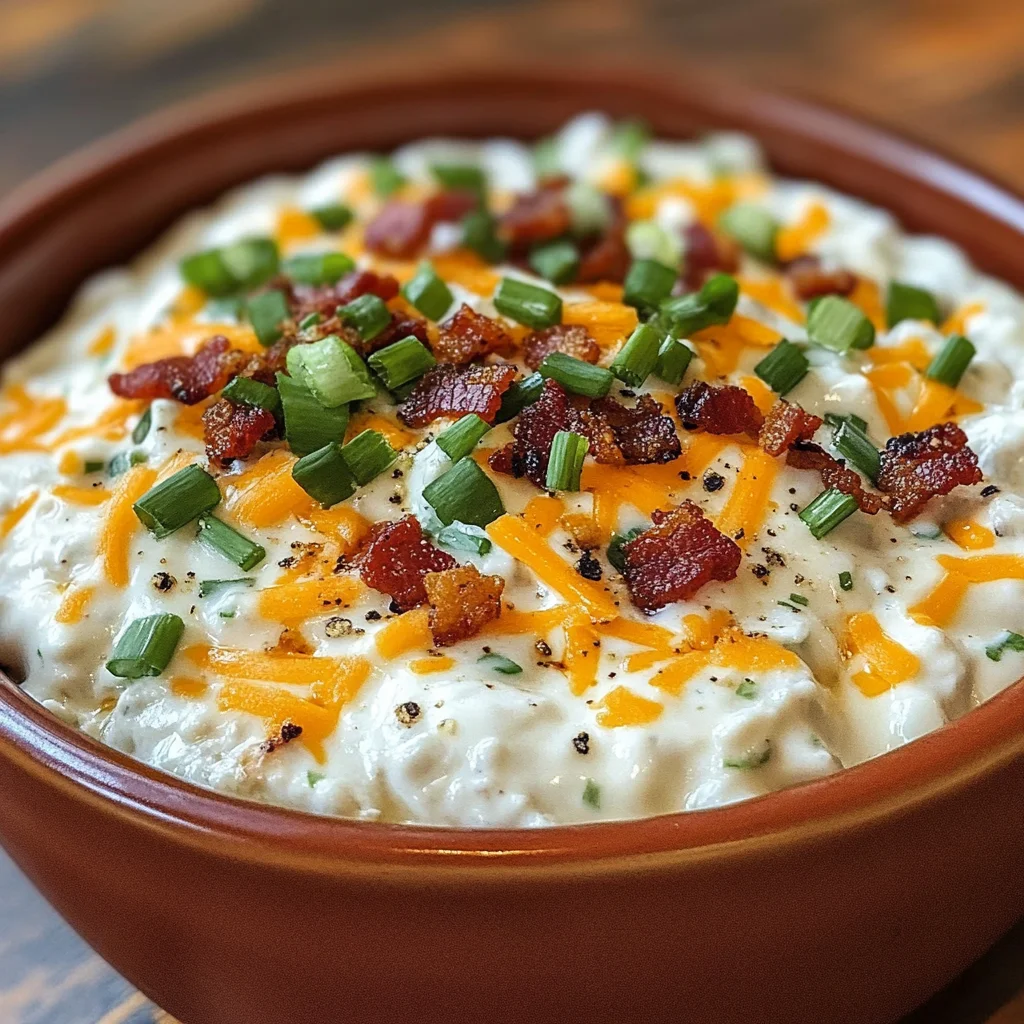
Equipment You’ll Need:
Cooking becomes such an enjoyable experience when you have the right tools at your fingertips! While these items may not be ingredients themselves, they play essential roles as partners in crafting something wonderful from scratch.
- Large mixing bowl – This trusty companion is where all those delicious ingredients come together! Opt for one with enough space so you can comfortably mix without worrying about spills; nobody wants a mess during this joyful process.
- Spatula or wooden spoon – A sturdy spatula will help you combine everything smoothly while ensuring no lumps remain. Wooden spoons add a rustic touch to mixing while providing durability—perfect for mashing up those crumbles!
- Measuring cups & spoons – Precision counts even in casual cooking; measuring cups ensure you’re adding just the right amounts of each ingredient to achieve balance in flavors.
Now that we have our ingredients lined up beautifully and know what tools we’ll need let’s jump into preparing our savory High Protein Crack Dip Recipe!
Step 1: Blend It All Together
To start off, grab your large mixing bowl and combine those two cups of Greek yogurt along with either ranch seasoning or dressing mix into one luscious mixture—you want everything combined thoroughly so each scoop delivers consistent flavors throughout! Stir gently but firmly until well blended; this step ensures that every bit gets coated evenly in creamy goodness! As you stir away, take a moment to breathe in those fragrant notes wafting up from the bowl—it’s simply intoxicating!
Step 2: Add Cheddar & Bacon
Next up, fold in one cup of shredded cheddar cheese and half a cup of crumbled bacon into your yogurt mixture like you’re wrapping them in a warm embrace. This process allows all those flavors to intertwine beautifully—the saltiness from bacon complements cheesy richness perfectly here! As you mix gently but thoroughly again (avoid over-mixing), keep an eye out for how creamy everything starts looking—it’s like liquid gold forming right before your eyes!
Step 3: Embrace Freshness
Now comes my favorite part—adding half a cup of chopped green onions gives life beyond belief! Their vibrant color against all that creamy goodness makes my heart sing every time I see it come together visually too—not just taste-wise—and believe me when I say they provide an explosion of fresh flavor in each bite too! Gently fold them into your mixture until evenly distributed throughout; try not to squish them too much so they retain their lovely crispness!
Step 4: Chill Out
Once everything’s mixed harmoniously together in delicious unison—cover up that bowl tightly with plastic wrap (or transfer it into an airtight container) before popping it into your refrigerator for at least one hour (but ideally longer if possible!). Why chill? Allowing these delicious components time together lets flavors meld beautifully over time—a crucial step leading towards profound satisfaction once served later on!
And there you have it—the beginnings of what will soon become everyone’s favorite dip at gatherings near or far away! Continue following along as we complete our majestic creation shortly…
Crafting Your High Protein Crack Dip Recipe
Now that you’ve prepped your ingredients and are ready to dive into the flavor-packed world of dips, let’s get into the juicy details of how to create this High Protein Crack Dip Recipe. Trust me, every step in this process is a little piece of culinary magic that will leave you and your guests absolutely enchanted.
Step 5: Mixing the Base – A Foundation of Flavor
To start, take out a large mixing bowl—this is truly where the magic begins. Measure out 2 cups of Greek yogurt, or if you prefer a dairy-free option, choose a yogurt alternative that has a thick, creamy texture. This ingredient not only provides a rich base but is also packed with protein—perfect for keeping your energy levels up during those summer parties by the pool or cozy movie nights at home. Add 2 to 2.5 tablespoons of ranch seasoning; if you have a packet of ranch dressing mix on hand, feel free to use that as well! Now, here’s where it gets exciting: stir these two ingredients together until they’re fully combined and smooth. You want to see that luscious white mixture come together like clouds in a bright blue sky; there should be no lumps or patches of dry seasoning left behind.
Why is this step so crucial? Well, think about it: the yogurt is the heart of your dip, providing creaminess and tanginess, while the ranch seasoning brings in that familiar flavor profile we all know and love. This harmonious blend not only serves as a delicious dip on its own but will later act as the canvas upon which we build our flavor masterpiece. So don’t rush this step! Take your time to ensure everything is mixed perfectly; it will pay off beautifully when you take that first bite!
Step 6: Incorporating Cheddar and Bacon – Layering in Decadence
Once your base is smooth and inviting, it’s time to fold in 1 cup of shredded cheddar cheese—and don’t hesitate here; this cheese adds an utterly intoxicating richness to our dip! If you’re opting for dairy-free cheese, make sure it melts well and has a taste profile you love. Carefully sprinkle in 1/2 cup of crumbled bacon or turkey bacon; if you’re using traditional bacon, about five strips should suffice after they’ve been cooked crispy and crumbled into delightful bits. Gently use a spatula or wooden spoon to fold these ingredients into your yogurt mixture—think about embracing them rather than stirring them wildly. The aim is to keep those delicious morsels intact while ensuring they’re evenly distributed throughout the dip.
This step is significant because it adds texture and depth to your dip; the cheesy gooeyness pairs perfectly with the crunchiness of the bacon bits, creating an exquisite symphony of flavors with every scoop. As you mix, take a moment to appreciate how these ingredients transform your base into something extraordinary—it’s exciting to watch as simple components come together! Remember to pause and taste along the way; adjusting flavors at this point can make all the difference.
Step 7: The Green Onion Boost – A Fresh Pop
Now comes one of my favorite parts—the addition of freshness! Chop up 1/2 cup of green onions (also known as scallions), including both the green tops and some white parts for added crunch and flavor. Gently fold these vibrant greens into your mixture just like we did with our cheese and bacon. These onions bring not only color but also a mild oniony zing that cuts through the creaminess and adds brightness to each bite.
Why include green onions? Well, they provide that contrast needed between richness and freshness—a balance that elevates any dish from good to great! Plus, their crisp texture adds another layer of complexity that makes each scoop intriguing. Don’t shy away from tasting again at this stage; this is where you can adjust seasoning if needed! Maybe add a pinch more ranch seasoning or even some freshly cracked black pepper for an extra kick—this is your chance to personalize!
Step 8: Chilling Time – Patience Pays Off
Once all those glorious ingredients are beautifully blended together in harmony, it’s crucial now more than ever to let it chill out in the fridge for at least one hour, although I often recommend letting it sit longer if possible—up to four hours or even overnight if time allows! Cover your bowl tightly with plastic wrap or transfer everything into an airtight container before placing it in the refrigerator.
But why chill? Patience here transforms flavors profoundly—it allows them time to meld together so each bite becomes an explosion of deliciousness rather than distinct layers competing for attention. The cooling process also thickens up your dip just enough so that when you finally serve it, you’ll find it’s perfectly creamy yet sturdy enough for dipping without falling apart on you! While waiting might feel like torture (especially with how heavenly it already smells), I promise the end result will be so worth it—you’ll be savoring every mouthful with joy.
Final Touches Before Serving Your High Protein Crack Dip Recipe
Step 9: Garnishing for Glory
As we approach serving time, let’s add those final touches that will not only enhance presentation but also elevate flavor—a touch that’s absolutely paramount for any delightful appetizer! After allowing your dip ample chilling time, remove it from the fridge just before serving. This moment offers you an opportunity for creativity—take some additional crumbled bacon (yes please!) and sprinkle it generously over the top alongside extra chopped green onions for visual appeal. I adore how these vibrant colors pop against the creamy backdrop—it’s inviting and utterly irresistible!
And here comes my favorite part: serve your High Protein Crack Dip alongside an array of dippers such as crunchy chips, pretzels, fresh vegetable sticks like carrots or cucumbers, or even some whole-grain crackers for those who enjoy healthier options. It creates not just an appetizer but an experience—the kind where everyone gathers around excitedly dipping in while sharing stories and laughter.
Trust me when I say that once people take their first bite—they’ll be hooked! This recipe isn’t just about food; it’s about bringing people together over something pleasurable and satisfying—and isn’t that what cooking is all about? Enjoy every bit of this journey from prep to plate because I promise you—it’s one worth savoring!
Storage and Enjoyment Tips for Your High Protein Crack Dip Recipe
Now that your High Protein Crack Dip is ready to shine on your table, let’s talk about how to keep this delightful creation fresh and flavorful for all your snacking needs! There’s nothing more satisfying than knowing you can whip up this dip in mere minutes and have it last for several days. Whether it’s a spontaneous gathering or just a cozy night at home with a movie, having this dip prepped and ready is an absolute game changer. So grab your favorite storage container, and let’s dive into some essential tips to store and enjoy this delicious dip!
Storing Leftover High Protein Crack Dip Recipe
To preserve the creamy goodness of your High Protein Crack Dip, you’ll want to transfer any leftovers into an airtight container. Glass containers are my personal favorite since they don’t retain odors and help keep everything fresh. Place the container in the refrigerator, where it will happily chill for about 3-4 days. I always recommend checking on it after a day or two—trust me, the flavors only deepen over time! While it’s not necessary, placing a slice of bread in the container can help absorb excess moisture and maintain that luscious texture; it’s a little trick I learned from my grandmother that works like a charm! When you’re ready to enjoy again, you’ll find that the dip remains just as creamy and rich as when you first made it. You can serve it cold straight from the fridge or give it a gentle stir to revive those flavors. I promise you; each bite will still be utterly intoxicating!
Freezing Your High Protein Crack Dip for Later
If you find yourself with too much dip (though I doubt it!), freezing is an excellent option for longer storage. To freeze your High Protein Crack Dip properly, scoop portions into freezer-safe bags or airtight containers, ensuring there’s minimal air inside—this prevents freezer burn! Label them with the date so you can keep track of freshness; ideally, use them within 2-3 months for optimal taste. When you’re ready to indulge again, simply take out what you need and let it thaw overnight in the refrigerator. You can also pop it in the microwave for a quick reheat if you’re feeling impatient! The beauty of this method lies in its convenience—imagine pulling out a batch of creamy goodness on busy weeknights or during impromptu gatherings. Trust me; having this dip stashed away will make you feel like a culinary superhero!
CATEGORY_NAME

High Protein Crack Dip
- Total Time: 15 minutes
- Yield: 8 servings 1x
Description
Indulge in the creamy, savory delight of our High Protein Crack Dip Recipe, a crowd-pleasing appetizer that blends rich Greek yogurt with zesty ranch seasoning and the crunch of turkey bacon. Perfect for any gathering, this dip is not only packed with protein but also low-carb and gluten-free, making it an ideal choice for health-conscious snackers. Each bite delivers a burst of flavor that will have your guests coming back for more. Whether you’re hosting a summer barbecue or enjoying a cozy movie night, this versatile dip is sure to impress!
Ingredients
- 2 cups Greek yogurt (or dairy-free yogurt)
- 2–2.5 tbsp ranch seasoning (or 1 packet ranch dressing mix)
- 1 cup shredded cheddar cheese (or dairy-free cheese alternative)
- ½ cup crumbled turkey bacon (or cooked turkey bacon)
- ½ cup chopped green onions
Instructions
- In a large mixing bowl, combine Greek yogurt and ranch seasoning until smooth.
- Gently fold in shredded cheddar cheese and crumbled turkey bacon until evenly distributed.
- Add chopped green onions and mix gently to incorporate.
- Cover and chill in the refrigerator for at least one hour before serving to allow flavors to meld.
- Prep Time: 15 minutes
- Cook Time: 0 minutes
- Category: Appetizer
- Method: Mixing
- Cuisine: American
Nutrition
- Serving Size: 1 serving
- Calories: 100
- Sugar: 3g
- Sodium: 270mg
- Fat: 5g
- Saturated Fat: 2g
- Unsaturated Fat: 3g
- Trans Fat: 0g
- Carbohydrates: 6g
- Fiber: 1g
- Protein: 8g
- Cholesterol: 20mg


Leave a Comment