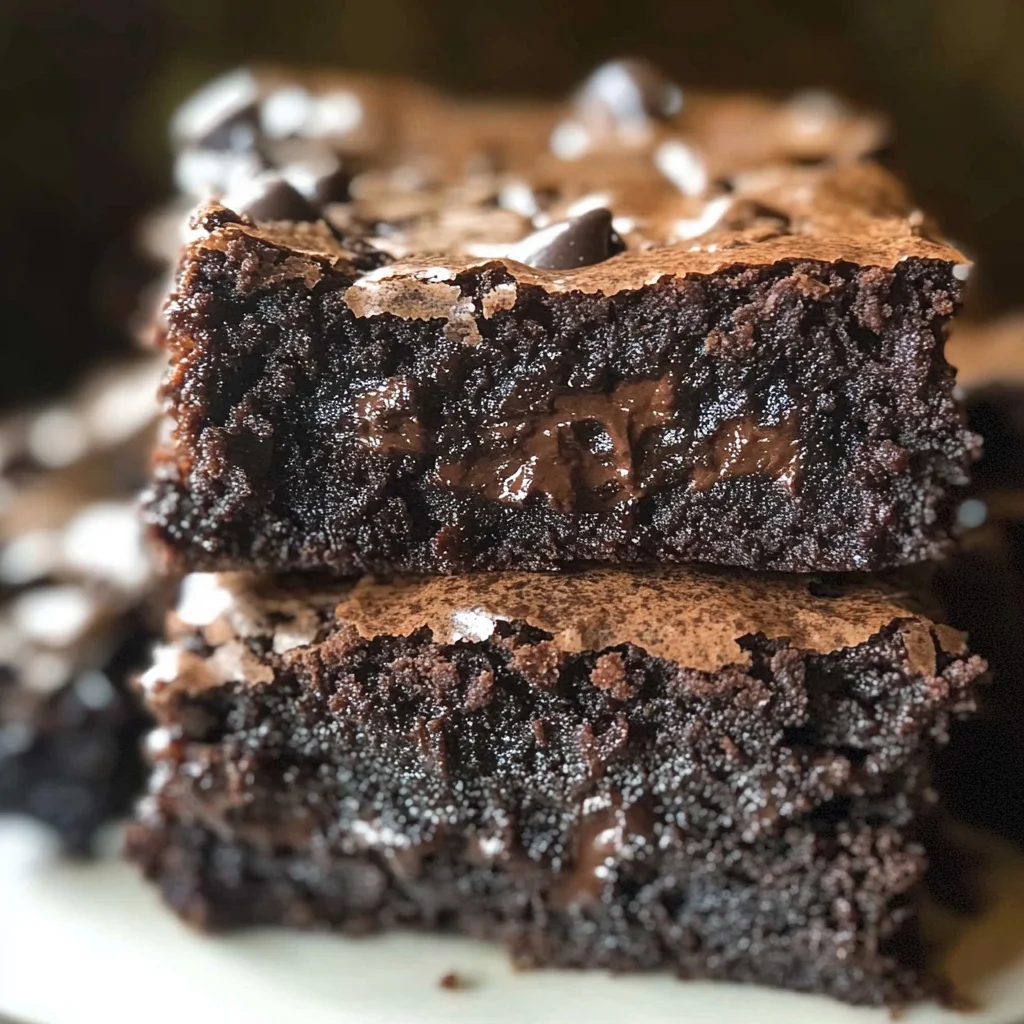
There’s something profoundly magical about the aroma of freshly baked brownies wafting through your home. It’s a scent that wraps around you like a warm hug, beckoning loved ones to gather in the kitchen, eyes wide with anticipation. This homemade brownie recipe isn’t just an ordinary treat; it’s a heartfelt invitation to share joy, laughter, and cherished memories. As the rich chocolate mingles with the buttery goodness, you’re not just creating dessert – you’re crafting an experience that will linger in your heart long after the last crumb has disappeared. I promise you, once you try these brownies, boxed mixes will be a distant memory!
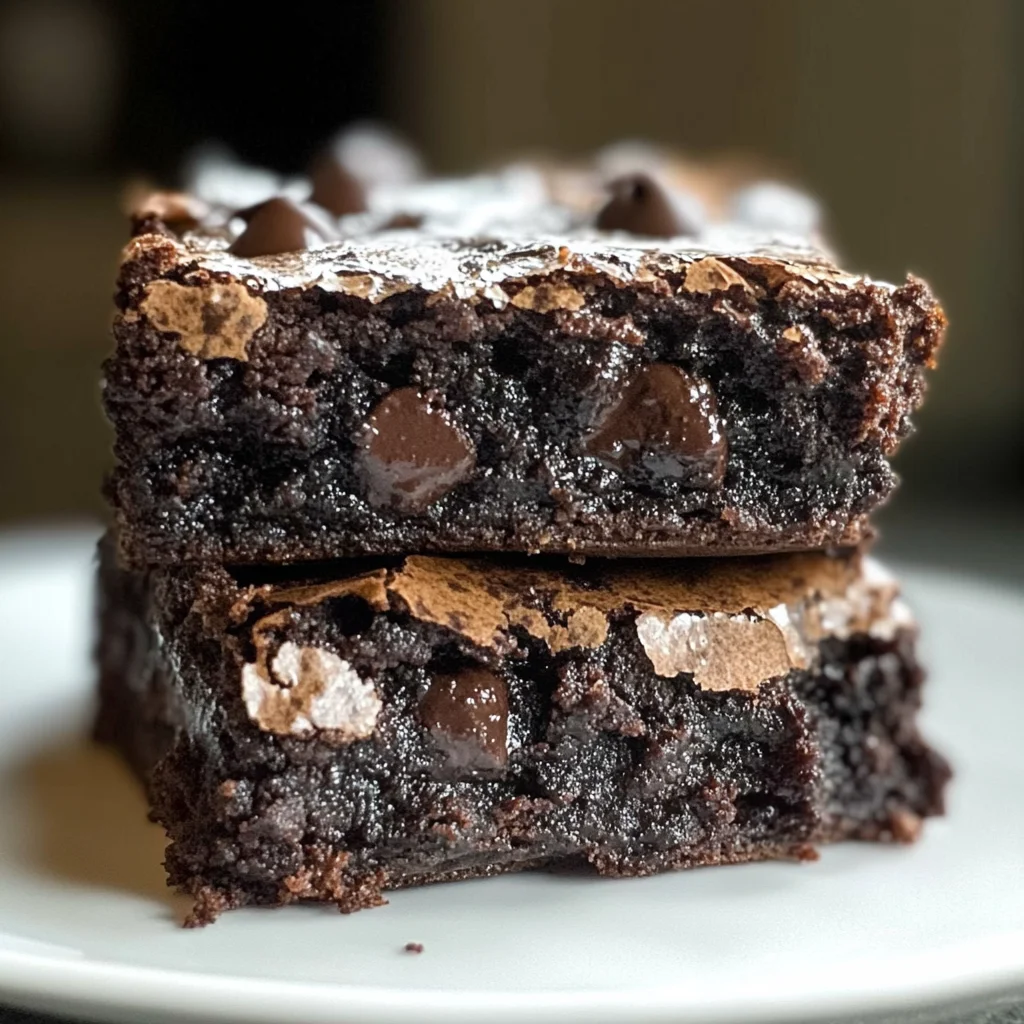
These brownies are a delightful fusion of fudgy and cake-like textures, resulting in a truly extraordinary bite every time. What makes this recipe even more special is its simplicity; it requires no fancy gadgets or obscure ingredients. Just pure love and dedication to the craft of baking! You might find that they become your go-to dessert for every occasion – from birthday celebrations to cozy family gatherings on a rainy Sunday afternoon. Trust me on this one: when you serve these homemade brownies, people will inevitably ask for seconds (and maybe even thirds!).
Homemade Brownies: The Ultimate Chocolate Indulgence
Let’s dive into what makes these homemade brownies so special. With each bite, you’ll discover layers of rich chocolate flavor that dance upon your tongue, while their moist texture keeps you coming back for more. Whether you’re a novice baker or someone who has whipped up countless treats in the kitchen, this recipe is designed to be approachable yet impressive. I can’t wait for you to embark on this delicious journey with me!
Ingredients:
As we set off on our brownie-making adventure, let’s take a moment to gather our ingredients. Each one plays a pivotal role in crafting the perfect brownie experience.
- 1 cup (2 sticks or 226g) unsalted butter. This is crucial for achieving that luscious texture we all crave in brownies. Butter adds moisture and richness; it also helps create those irresistible edges that are slightly crispy while keeping the center wonderfully fudgy. Opt for high-quality butter if possible—European-style butters have higher fat content and yield even richer results.
- 2 1/4 cups granulated sugar. Sweetness is essential here; sugar not only sweetens but also contributes to the structure and moisture of our brownies. When combined with melted butter over low heat, sugar creates an almost syrupy mixture that enhances both flavor and texture, making these brownies utterly intoxicating.
- 4 large eggs. Eggs are the binding agents in this recipe; they bring everything together while contributing to the overall structure and richness of the brownie. They help create that beautiful rise we’re looking for without making them too cake-like, ensuring each bite remains decadent.
- 1 1/4 cups unsweetened cocoa powder. Here’s where we get our chocolatey depth! Cocoa powder gives these brownies their signature dark color and intense chocolate flavor without adding any extra sweetness. Look for high-quality Dutch-process cocoa if available; it provides a smoother taste profile.
- 1 teaspoon salt. While salt might seem counterintuitive in a sweet recipe, it actually elevates flavors beautifully! A pinch of salt balances out the sweetness and accentuates the chocolate, creating a symphony of flavors that dances on your palate.
- 1 teaspoon baking powder. This leavening agent is non-negotiable if we want our brownies to be perfectly tender rather than dense like fudge (though some may prefer that). Baking powder provides just enough lift to give our brownies that delightful texture without compromising their fudgy quality.
- 1 teaspoon espresso powder (optional). Oh yes! This secret ingredient amplifies the chocolate flavor without imparting any coffee taste—trust me on this one! If you happen to have some espresso powder lying around or can easily find it at your local grocery store, consider adding it; you’ll be amazed at how much richer your brownies taste!
- 1 tablespoon vanilla extract. Vanilla is like a warm hug for your taste buds! It enhances all other flavors in this recipe and adds depth to our already exquisite batter.
- 1 1/2 cups all-purpose flour. Flour provides structure to our brownies while still allowing them to maintain that gooey center we adore so much! Make sure not to overmix when incorporating it into the batter; otherwise, we risk developing gluten which could lead to tougher brownies.
- 2 cups semi-sweet chocolate chips. These little gems add bursts of melting chocolate goodness throughout each bite! Using semi-sweet chips strikes an ideal balance between sweetness and deep chocolate flavor—plus they create delightful pockets of warm chocolate as they melt during baking.
Equipment You’ll Need:
Before we roll up our sleeves and get down to business, let’s ensure we have all our tools ready at hand because having proper equipment makes everything smoother and more enjoyable!
- 9×13-inch baking dish – This size is perfect for achieving those ideal brownie proportions while ensuring even baking throughout! If you don’t have one handy, feel free to use two smaller pans or adjust accordingly; just keep an eye on baking times as they may vary slightly.
- Mixing bowls – A large mixing bowl is essential for combining wet ingredients before introducing dry ones into the mix—this helps ensure everything blends harmoniously! If you have both glass and metal bowls available, I recommend using glass since it retains heat better during mixing.
- Saucepan – We’ll start by melting our butter on low heat in a small saucepan before combining it with sugar—this method helps achieve optimal incorporation without burning anything!
- Whisk or electric mixer – For beating ingredients together effectively (especially those eggs!), choose whichever tool feels comfortable for you! An electric mixer can save time but don’t underestimate how therapeutic whisking can be—it allows you full control over how well mixed everything becomes!
Now that we’ve gathered our ingredients and equipment let’s jump into preparing these scrumptious homemade brownies!
Preparing the Homemade Brownies
Step 1: Preheat Your Oven & Prepare Your Baking Dish
Before diving into mixing those glorious ingredients together, let’s make sure we’re setting ourselves up for success right from the start! Preheat your oven to 350 degrees Fahrenheit (175 degrees Celsius)—this step ensures optimal baking conditions once we pour in our brownie batter later on. While that lovely warmth builds in your oven, take a moment to butter your 9×13-inch baking dish generously—this nonstick layer is absolutely paramount because nobody wants their delicious creation stuck at the bottom of their pan after hours of hard work! I usually use unsalted butter since we’ll be adding salt later on anyway; however feel free if you’d like another option such as parchment paper lining instead!
Step 2: Melt Butter & Combine Sugar
In your trusty saucepan over low heat, add one cup of unsalted butter—watch it closely as it melts down into liquid gold! Stir occasionally until fully melted before sprinkling in those two-and-a-quarter cups of granulated sugar—this step is vital because heating helps dissolve sugar granules more quickly than room temperature would allow us otherwise! Continue stirring gently for about one or two minutes until combined well (but avoid boiling!). The result will resemble thick syrup—a beautiful foundation for luscious fudgy goodness ahead!
Step 3: Mix Wet Ingredients
Once you’ve achieved that silky-smooth consistency from melting butter combined with sugar blissfully mingling together under gentle warmth—remove from heat immediately (we don’t want this mixture too hot when introducing eggs!). Allow cooling slightly before transferring everything into either large mixing bowl or stand mixer—just let it rest there patiently while taking time out yourself (about two minutes should do nicely). Now it’s time for fun: beat four large eggs right into this wonderful concoction along with cocoa powder (make sure there aren’t any lumps!), saltiness from added teaspoonfuls worth plus optional espresso powder if desired—and finally drizzle heavenly tablespoonfuls worth vanilla extract straight into mix too—all these additions promise profound satisfaction once baked off beautifully!
Step 4: Incorporate Dry Ingredients
Now comes another exciting moment where we get messy by folding flour gently through batter mixture—it’ll feel thick at first so don’t rush this step; patience pays off here as it’ll lighten up gradually when stirred slowly enough alongside those semi-sweet chocolate chips joining party soon after too! Once flour disappears completely without streaks left visible anywhere else then spread everything evenly across prepared pan surface using spatula—it’ll be sticky but trust me every bit counts towards creating unforgettable bites ahead when baked properly within oven’s embrace next thirty minutes roughly until edges firm up nicely whilst center remains slightly moist inside just enough still appearing uncooked yet flavorful altogether simultaneously!
And there you have it—the process leading us toward divine indulgence awaits completion soon enough once cooled down completely afterward placed wire rack too… But remember folks patience yields rewards especially when enjoying richly textured homemade brownies sure bring smiles all around wherever served next time everyone gathers together again eagerly awaiting treats shared amongst close friends & family alike during tomorrow’s gathering planned ahead carefully now too… Stay tuned because we’re nearly done here shortly thereafter getting ready savor every last heavenly morsel made lovingly possible today itself!!!
Step 5: Combine the Rich Ingredients for a Decadent Batter
Now that you’ve created a luscious butter and sugar mixture, it’s time to elevate those flavors by introducing the cocoa powder, eggs, and other essential ingredients into the mix. Pour that warm butter-sugar concoction into a large mixing bowl or stand mixer—trust me, this is where the magic truly begins! Allow it to cool for about two minutes; this short wait is crucial because adding eggs to hot mixtures can lead to unwanted scrambling, which we definitely want to avoid. Once cooled slightly, sift in the cocoa powder—this not only breaks up any lumps but also introduces an aromatic chocolate essence that will waft through your kitchen.
Next, crack in those four large eggs, one at a time, whisking them vigorously. You want to achieve a smooth and glossy batter here; it’s the beating that incorporates air into your brownies, lending them that delightful texture we all crave. Add in the salt and baking powder—these ingredients are absolutely paramount! The salt enhances the chocolate flavor while balancing out the sweetness, and baking powder helps create just enough lift for that perfect chewy brownie texture without compromising their fudgy nature. If you choose to add espresso powder (and I highly recommend it!), it will provide an extra depth of flavor that complements—and amplifies—the chocolate without making them taste like coffee. Finally, drizzle in your vanilla extract; this finishing touch rounds out the flavors beautifully. Mix until everything is just combined; over-mixing could lead to tough brownies.
Step 6: Fold in Flour and Chocolate Chips for Ultimate Indulgence
With your chocolate base ready, it’s time to bring in the flour and chocolate chips! Sift in the all-purpose flour gently—it’s important not to stir aggressively here as we want to keep that lovely airiness intact while also ensuring there are no pockets of dry flour left behind. As you fold in the flour using a spatula or wooden spoon, you’ll start to see your brownie batter transform into something thick and sticky—a glorious sign of what’s about to come! The key here is to fold gently but thoroughly until no streaks of flour remain; an under-mixed batter might yield uneven brownies while over-mixing can lead to dense results.
Now let’s talk about those semi-sweet chocolate chips—oh my goodness! These little morsels are gems of melted bliss waiting to happen. Stir them in delicately so they’re evenly distributed throughout your batter. As you do this, envision those gooey pockets of melted chocolate bursting forth with every bite—a truly extraordinary experience! I promise you, if you manage to save some for later (which can be quite challenging), these chips will continue melting even after baking, creating an irresistible contrast between chewy brownie and molten chocolate.
Step 7: Spread Into Pan Like a Master Pastry Chef
Once your batter is well mixed and oozing with divine chocolatey goodness, it’s time for another exciting step: transferring it into your prepared baking dish. Spread that glorious batter into a greased 9×13-inch pan with care; use an offset spatula or simply wet your hands slightly if you prefer that method. You’ll notice how thick and sticky this mixture is—don’t rush this step! Take your time smoothing it out evenly across the bottom of the pan because achieving an even bake is absolutely paramount for perfectly cooked brownies.
As you spread it out, make sure to reach all corners of the pan; otherwise, you may end up with some parts being undercooked or burnt due to uneven heat distribution. Press down gently but firmly so that every inch has contact with the pan—this helps create a nice crust on top as they bake while keeping that fudgy center moist. Remember not fret if things aren’t perfectly neat; rustic charm is part of what makes homemade brownies so special!
Step 8: Baking Your Perfect Homemade Brownies
Now comes perhaps one of the most thrilling moments: sliding that pan into a preheated oven! Set your timer for about 30 minutes—they’ll need just enough time for their transformation from raw batter into decadent squares of joy. As they bake at 350 degrees Fahrenheit, keep an eye on them around the 25-minute mark. You’re looking for visual cues here: those edges should appear set and firm while the center still looks slightly moist but not uncooked—that’s where they get their signature fudgy texture!
To check for doneness without disturbing their baking process too much, insert a toothpick or tester into the center; if it comes out mostly clean with just a few moist crumbs clinging on—that’s perfection achieved! Remember though—if it comes out completely clean or covered in wet batter, they need more time; resist opening the oven door too soon as this could cause them to collapse due to sudden temperature changes. Once they’re done baking, remove them from the oven and allow them to cool on a wire rack—a step often overlooked but absolutely vital! Cooling allows them to set up nicely before cutting—trust me on this one; nothing worse than trying to cut warm brownies!
Next Major Phase – Final Touches
As we near the end of this beautiful journey toward creating homemade brownies that’ll have everyone begging for seconds (or thirds!), let’s talk about those final touches that elevate these delectable treats beyond mere dessert status.
Step 9: Cooling Before Cutting – The Sweet Anticipation
Ahh… patience—it’s both a virtue and a challenge when deliciousness awaits! Once you’ve pulled those beauties from the oven and allowed them some cooling time on a wire rack (about 20-30 minutes), take a moment to breathe in their intoxicating aroma drifting through your kitchen—it’s utterly divine! But resist diving right in; allowing these brownies ample cooling time is crucial because it gives them structure—a soft yet firm foundation that keeps everything together when slicing.
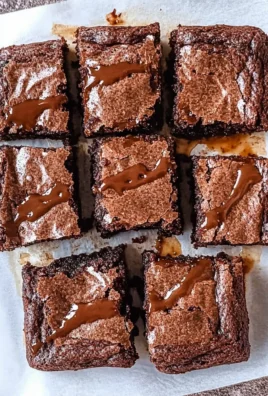
To cut into these rich squares without leaving behind crumbles everywhere (which can be frustrating!), let them cool completely before you reach for your knife—ideally around an hour or more if you can resist! When you’re finally ready to cut, use a sharp knife dipped in warm water for smoother slices—you’ll be amazed at how beautifully defined each brownie becomes with this simple trick. I promise you’ll enjoy serving these impressive squares at gatherings or simply indulging yourself at home; each slice reveals layers upon layers of rich chocolate flavor intertwined with hints of sweetness that make every bite profoundly satisfying.
And there you have it—the best Homemade Brownies recipe around! With just love poured into every step alongside carefully chosen ingredients resulting in utter blissfulness packed within each square—these aren’t merely desserts; they’re memories waiting to happen! So gather friends or family around (or keep them all for yourself—I won’t judge!) and relish every moment spent delighting in these timeless treats.
Storage and Enjoyment Tips for Your Homemade Brownies
Now that you’ve created these utterly intoxicating homemade brownies, it’s time to talk about how to keep the magic alive! Trust me when I say, these brownies are not just a one-time delight; they have the potential to bring joy long after they’ve come out of the oven. Whether you’re planning to share them with friends, family, or even savor them all to yourself (I won’t judge!), knowing how to store them properly is absolutely paramount. So let’s dive into the best ways to preserve their rich, fudgy goodness.
Storing Leftover Homemade Brownies
To keep your homemade brownies fresh and delicious, it’s essential to store them in an airtight container at room temperature. A good-quality glass or plastic container works wonders! If you’ve baked a big batch and need to save some for later indulgence, they’ll stay delectable for up to a week when stored this way. Here’s a little pro tip: place a slice of bread inside the container with the brownies. This magical trick helps maintain moisture, keeping those luscious squares soft and chewy instead of turning them into dry bricks. Now, as for the taste after storage? Oh my goodness! The flavors meld together beautifully over time, making each bite even more profound and satisfying than the last. When you’re ready to enjoy another piece, pop them in the microwave for a few seconds—trust me on this—to warm them up just enough so they feel like they’ve just come out of the oven again!
Freezing Homemade Brownies for Later
If you’re planning ahead or simply want to stock up on these heavenly treats, freezing homemade brownies is an excellent option! To freeze them properly, cut your brownies into squares and wrap each piece tightly in plastic wrap before placing them in a freezer-safe bag or container. This prevents freezer burn and preserves their rich flavor. They can be kept frozen for up to three months without losing that incredible taste. When you’re ready for a sweet treat, pull out a brownie (or two!) from the freezer and let them thaw at room temperature for about 20-30 minutes or pop them in the microwave for just a few seconds—this will make your kitchen smell divine as they warm back up! Having homemade brownies readily available is such a convenience; imagine coming home after a long day and being able to indulge in one of these little squares of happiness without any fuss!
Homemade Brownies
- Total Time: 45 minutes
- Yield: Approximately 16 servings 1x
Description
Indulge in the ultimate homemade brownies that blend fudgy and cake-like textures into a rich chocolate experience. As the aroma fills your kitchen, these brownies become more than just a dessert; they invite joy and create lasting memories. Crafted with simple ingredients, this recipe is perfect for bakers of all skill levels. Whether it’s a birthday celebration or a cozy family night, these brownies will have everyone reaching for seconds (or thirds!). With a luscious texture and bursts of melted chocolate chips, each bite is pure bliss. Get ready to transform your baking game and savor the delightful journey with every square!
Ingredients
- 1 cup unsalted butter
- 2 1/4 cups granulated sugar
- 4 large eggs
- 1 1/4 cups unsweetened cocoa powder
- 1 teaspoon salt
- 1 teaspoon baking powder
- 1 tablespoon vanilla extract
- 1 1/2 cups all-purpose flour
- 2 cups semi-sweet chocolate chips
Instructions
- Preheat your oven to 350°F (175°C) and grease a 9×13-inch baking dish.
- Melt the butter in a saucepan over low heat, then mix in the sugar until combined.
- Remove from heat, allow to cool slightly, and whisk in eggs, cocoa powder, salt, baking powder, and vanilla extract.
- Gently fold in the flour and stir in chocolate chips until just combined.
- Spread the batter evenly into the prepared pan.
- Bake for about 30 minutes or until edges are set but the center remains slightly moist.
- Allow cooling before slicing into squares.
- Prep Time: 15 minutes
- Cook Time: 30 minutes
- Category: Dessert
- Method: Baking
- Cuisine: American
Nutrition
- Serving Size: 1 brownie (60g)
- Calories: 250
- Sugar: 24g
- Sodium: 90mg
- Fat: 12g
- Saturated Fat: 7g
- Unsaturated Fat: 4g
- Trans Fat: 0g
- Carbohydrates: 35g
- Fiber: 2g
- Protein: 3g
- Cholesterol: 50mg
Leave a Comment