I’m so thrilled you’re here, ready to dive into the world of cooking! Today, I want to share a dish that’s not just about filling your belly; it’s about creating memories, sharing laughter, and wrapping your loved ones in warmth. Imagine sinking your teeth into juicy, tender chicken with a perfectly crispy skin that crackles as you bite into it. It’s coated in a honey garlic sauce that dances between sweet and savory, leaving you craving just one more piece. This Honey Garlic Crispy Chicken is truly an experience—a delightful journey on your taste buds that bridges the comfort of home-cooked meals with a touch of gourmet flair. Whether it’s a cozy weeknight dinner or a gathering with friends, this dish promises to be the star of the show.
As I think back on my own culinary adventures, I realize how much joy comes from cooking dishes like this. They bring people together around the table, sparking conversations and laughter over shared bites. When I first stumbled upon this honey garlic sauce, it was like discovering liquid gold—an elixir that transforms ordinary chicken into something utterly intoxicating. And trust me when I say this: once you make this recipe, you’ll find yourself coming back to it time and time again because of its profound simplicity and satisfaction it offers. So let’s roll up our sleeves and get started on crafting this unforgettable Honey Garlic Crispy Chicken!
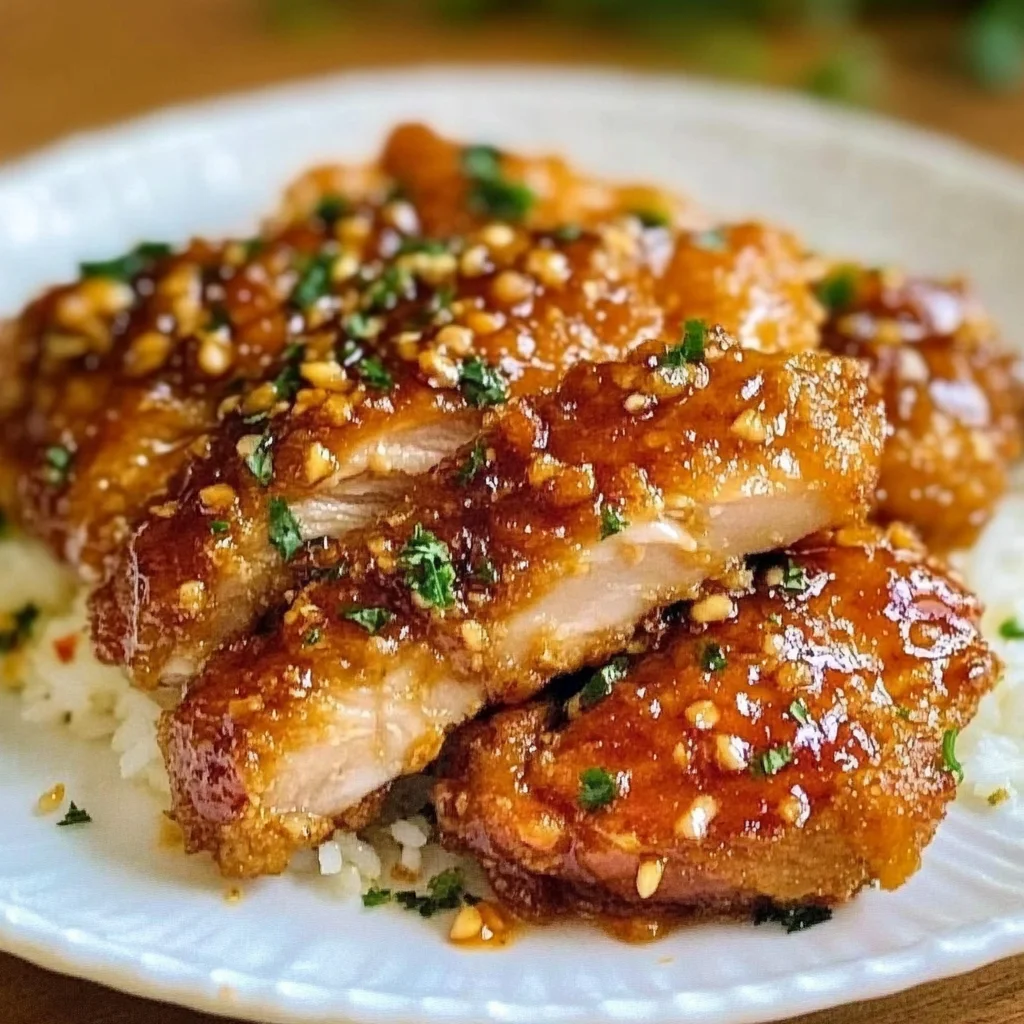
Honey Garlic Crispy Chicken: A Sweet Symphony of Flavors
Let’s embark on this culinary journey together! The ingredients we’ll use are simple yet impactful; each one plays a vital role in bringing our dish to life. You’ll discover how they work in harmony to create something truly special.
Ingredients:
- 4 boneless chicken thighs (skin on, about 1–1.2 lb / 500 g). Choosing chicken thighs for this recipe is absolutely paramount; they are known for their juiciness and flavor thanks to their higher fat content compared to breasts. The skin-on aspect is critical too—it provides that coveted crispiness we’re after while keeping the meat moist during cooking. When selecting your chicken, look for pieces with firm skin and a vibrant color; avoid any that have discoloration or an unpleasant smell. If you can find organic or free-range options, those often yield even better flavor.
- 1.5 tbsp soy sauce. This ingredient adds depth and umami—a savory richness that elevates our dish from simple to spectacular. Soy sauce is also wonderful for marinating because it penetrates the meat beautifully while adding moisture. Always opt for low-sodium soy sauce if you’re watching your salt intake; it will still pack plenty of flavor without overwhelming the dish.
- 1 tbsp oyster sauce. Now here’s where things get interesting! Oyster sauce contributes an exquisite sweetness along with its savory profile—it’s what makes our chicken sing in harmony with the honey later on. If you’re looking for substitutes due to dietary preferences, try using mushroom stir-fry sauce as an alternative; it offers a similar umami kick without any seafood.
- 1 tsp garlic powder. Garlic powder is one of those pantry staples that can instantly elevate any dish with its warm aroma and robust flavor profile. While fresh garlic could be used instead, garlic powder dissolves easily into marinades providing consistent flavor throughout the chicken without overpowering it.
- 1/4 tsp salt. Salt is crucial when cooking! It enhances flavors and balances out sweetness in our honey garlic combination, ensuring every bite is well-seasoned without being overly salty. Remember, we’re using soy sauce as well—so adjust accordingly based on the overall saltiness of all ingredients.
- Black pepper to taste. A dash of black pepper adds just enough heat to cut through the sweetness of our sauce while bringing out other flavors beautifully; consider grinding fresh peppercorns if possible for maximum aroma!
- 1/4 cup cornstarch (for coating). This ingredient acts as a magical dusting that forms a crispy crust during frying—think of it as armor for our chicken! Cornstarch absorbs moisture and creates an exceptional texture when fried compared to flour or breadcrumbs alone; make sure to shake off excess before frying so we achieve that perfect crunch!
- 1/4 cup oil (for pan frying). The choice of oil matters tremendously here; use something with a high smoke point like vegetable or canola oil for frying our chicken—this way we achieve beautiful golden-brown results without burning any delicate flavors away.
- 2 tbsp butter. Butter brings richness and complexity to our honey garlic sauce—it adds creaminess alongside flavor depth that simply cannot be matched by oil alone! I always recommend using unsalted butter so we can control salt levels perfectly throughout cooking.
- 1 bulb garlic (finely minced). Freshly minced garlic infuses our sauce with a pungent aroma that will waft through your kitchen as it cooks—trust me when I say there’s nothing like it! Use fresh garlic whenever possible; it has far more pronounced flavors than powdered versions do.
- 1 tbsp honey. Here comes the star ingredient—the sweet nectar that binds everything together! Honey not only sweetens but also thickens sauces as they cook down, creating that luxurious glaze over our crispy chicken pieces—choose raw honey if accessible for its unfiltered goodness!
- Dried parsley for garnish (optional). While optional, garnishing with dried parsley not only adds color but also offers subtle herbal notes which brighten up rich dishes like this one! Feel free to leave it off if you prefer simplicity or don’t have any available at home.
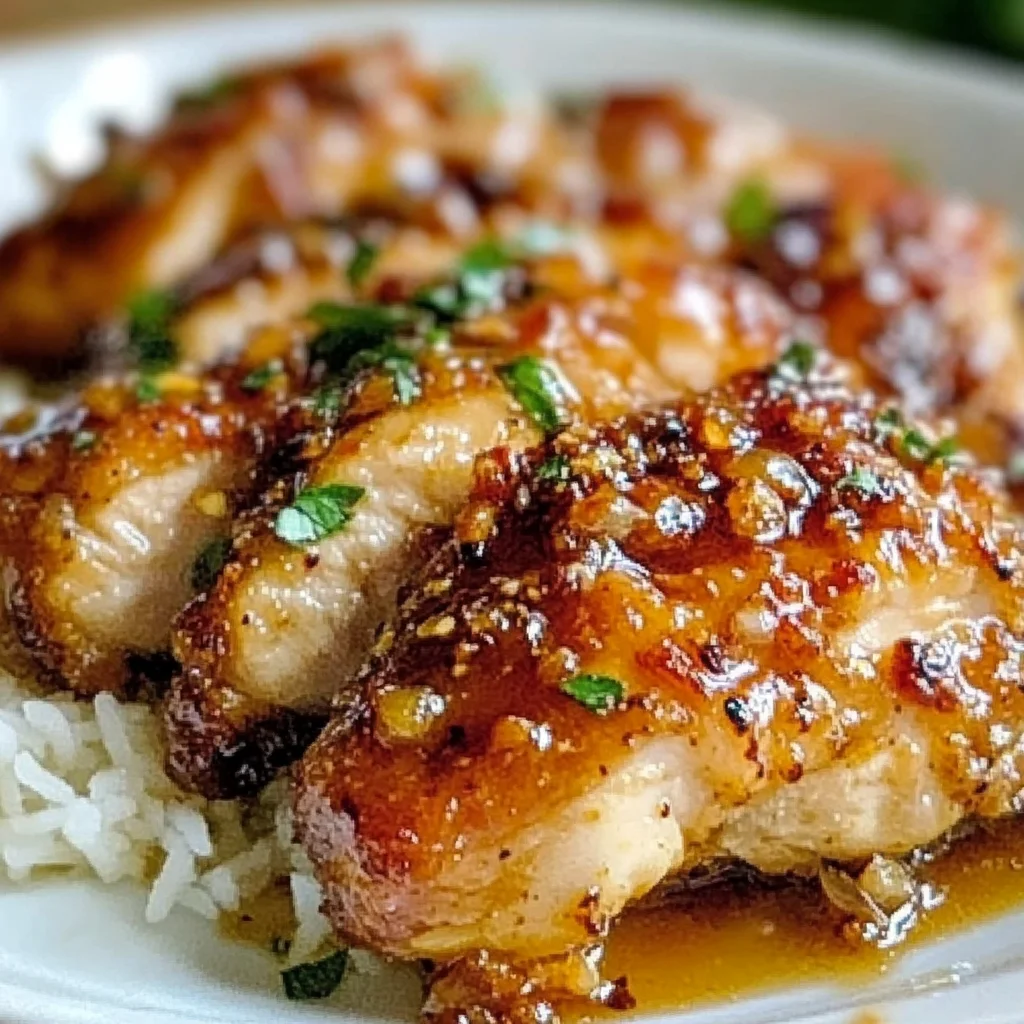
Equipment You’ll Need:
Having the right tools at hand makes all the difference in creating delicious meals effortlessly! While these items might not be ingredients, they are essential partners in crafting your Honey Garlic Crispy Chicken masterpiece.
- Large skillet or frying pan – A sturdy skillet is vital for achieving even heat distribution while frying; choose one with high sides to prevent splatter during cooking—a non-stick option can be helpful too when working with saucy recipes like ours!
- Tongs – These handy tools are perfect for flipping our chicken thighs without losing all those lovely juices trapped within them! Having good tongs makes transferring food easy and ensures safe handling—never underestimate their importance!
- Mixing bowl – A medium-sized mixing bowl provides ample space for marinating the chicken comfortably while allowing flavors meld beautifully together before cooking begins—you want room to toss everything nicely!
- Meat thermometer – To ensure perfectly cooked chicken every time, having an instant-read meat thermometer is non-negotiable! Aim for an internal temperature of 165°F (74°C) so you know your meal is both safe and succulent—the last thing we want is dry meat after all your hard work!
Preparing the Honey Garlic Crispy Chicken
Step 1: Prepping Our Chicken
First things first: let’s prepare those gorgeous chicken thighs! If they’re not already deboned (which often depends on where you buy them), take some time now to remove any bones while keeping that precious skin intact because we want all its crispiness come fry-time! Gently wash each thigh under running water before patting them dry with paper towels—this step helps ensure optimal browning later on by removing excess moisture from their surface prior to seasoning.
Now here’s where technique comes into play: lightly score the meat side several times before flipping them over onto their skins—and don’t forget to pound lightly using just the back edge of your knife’s blade! Why do we do this? Scoring allows marinades penetrate deeper into fibers while pounding tenderizes meat slightly making every bite melt-in-your-mouth tender; perfect preparation leads us toward juicy results ahead!
Step 2: Marinating Magic
In a medium-sized bowl—not too big or small—we’re going mix together our marinade concoction: pour in 1½ tablespoons soy sauce along with 1 tablespoon oyster sauce followed by a generous sprinkle of garlic powder alongside salt & black pepper according taste preference (don’t rush this part!). This blend becomes infused within those marinated beauties over at least 15 minutes while prepping other ingredients gives us maximum flavor saturation during cooking process later on… Trust me on this step—it truly makes all difference!
Step 3: Coating Time
Once marinated blissfully rests aside patiently soaking up all those delicious flavors from marinade mixture above—let’s move onto coating each thigh generously using cornstarch next! Take care shaking off excess dusting gently ensuring they are evenly coated without clumps forming anywhere—which would affect final crunch factor immensely once fried rather than achieving golden-brown perfection desired outcome instead… We need light layer only folks—this helps ensure crispy texture forms beautifully during frying process ahead!
Step 4: Frying for Flavor
Heat up oil within large skillet over low-medium flame till shimmering gently shows readiness indicating time has come place carefully prepared thighs skin-side down inside hot pan! As they sizzle away magic begins unfolding right before eyes… Fry approximately four-five minutes per side until glorious golden brown color emerges revealing hidden treasures underneath surface waiting eager taste buds ready devour next moment felt irresistible urge kick-in at sight alone… Just keep watchful eye here folks since internal temperature should reach minimum safety threshold marking at least 165°F (74°C)—you got this!!
I can’t wait for you to try out these steps as we continue crafting this extraordinary dish together! Keep following along—there’s so much more deliciousness ahead waiting just around corner…
Honey Garlic Crispy Chicken Recipe: A Culinary Love Affair
There’s something truly extraordinary about the combination of honey and garlic, isn’t there? The way they intertwine to create a symphony of flavors that dances on your palate is nothing short of magical. As we continue crafting this Honey Garlic Crispy Chicken, I promise you will find each step not just a task, but a delightful journey that leads you to a plate bursting with flavor and warmth. Let’s dive right into the heart of our cooking adventure!
Step 5: Achieving That Golden Brown Crisp
Now comes the moment we’ve all been waiting for—the pan-frying! This step is crucial because it’s where our chicken transforms from marinated goodness into golden-brown perfection. Start by heating your oil in a large skillet over low to medium heat. We want a nice, controlled temperature here; too high, and you’ll end up with burnt chicken on the outside while it remains raw inside—definitely not what we’re aiming for! Once the oil shimmers invitingly, gently place your chicken thighs in the skillet, skin side down. This is the moment you’ll hear that satisfying sizzle, like music to a cook’s ears!
Let them fry undisturbed for about 4-5 minutes on each side. Resist the temptation to flip them too soon—trust me on this one! This patience allows the skin to become gorgeously crispy, creating a delightful texture that contrasts beautifully with the tender meat underneath. As they cook, keep an eye on their color; you’re looking for that rich golden brown hue that promises incredible flavor. Use a meat thermometer if you’re unsure; once they hit 165°F (74°C), you’ll know they’re perfectly cooked through. Once done, remove them from the pan and set them aside on a plate—don’t worry if they look slightly less crispy at this stage; they will get another glorious coat of sauce shortly!
Step 6: Creating That Irresistible Sauce
Now let’s talk about what makes this Honey Garlic Crispy Chicken so utterly intoxicating—the sauce! Pour out any excess oil from your frying pan but leave just enough behind to capture all those flavorful bits left over from cooking the chicken. This is where we harness every ounce of deliciousness! Lower your heat to let things simmer gently as you add in the butter. Watch it melt slowly into a pool of liquid gold—there’s something incredibly comforting about this moment.
Once your butter has melted completely and starts bubbling ever so slightly, toss in that finely minced garlic. Stir it continuously for about 30 seconds until it becomes fragrant—this aroma will fill your kitchen and entice everyone nearby! Be careful not to let it brown too much; burnt garlic can turn bitter quickly, which we definitely want to avoid in our sweet sauce. After this, stir in your honey and an extra tablespoon of soy sauce. Let it simmer for approximately 2-3 minutes until it thickens slightly; you’ll see bubbles forming as it transforms into a luscious glaze that clings beautifully to the chicken.
Step 7: The Grand Return
Now it’s time for our star ingredient—the chicken—to return to its rightful place in the pan! Gently place those beautifully fried thighs back into the pan with your heavenly honey garlic sauce. Using tongs or a spoon, turn each piece over several times so they become generously coated in that sticky goodness. This step is absolutely paramount because it’s not just about adding flavor; it’s about allowing each bite to be enveloped in sweetness that’s perfectly balanced by savory undertones.
As you do this, take a moment to appreciate how everything comes together—the glossy sheen of that sauce coating every inch of chicken makes my heart sing! Allow them to cook together for another minute or two so that the flavors can meld cohesively. Don’t rush this step; it’s where everything transforms into something truly special—a harmonious blend of textures and tastes that makes every mouthful memorable.
Step 8: Garnishing with Love
Finally, we arrive at our finishing touch—a sprinkle of dried parsley if you’d like! This might seem like a simple addition, but trust me when I say it elevates your dish from home-cooked comfort food to something worthy of company at your dinner table. The vibrant green adds not only visual appeal but also a hint of freshness that complements our rich honey garlic sauce beautifully.
Take a moment now to plate up your Honey Garlic Crispy Chicken—a feast for both the eyes and stomach! Serve these succulent pieces alongside fluffy rice or crisp steamed vegetables so that every bite can soak up those extra drips of glorious sauce. I guarantee you’ll hear gasps of delight when everyone takes their first bite!
Final Thoughts on Your Culinary Creation
As you serve this delectable dish and watch everyone dig in with gusto, you’ll feel an immense sense of pride knowing you’ve created something profoundly satisfying and utterly delicious from scratch. Cooking is more than just preparing food; it’s about sharing love through flavors and moments enjoyed together around the table.
So next time you’re looking for something special yet easy enough for a weeknight dinner or perhaps an intimate gathering with friends, remember this Honey Garlic Crispy Chicken recipe. It’s sure to become one of those cherished family favorites passed down through generations—a true testament to comfort food at its finest! Enjoy every scrumptious bite—you’ve earned it!
Storage and Enjoyment Tips for Your Honey Garlic Crispy Chicken
Ah, the moment we’ve all been waiting for! Your Honey Garlic Crispy Chicken is ready to shine on your dinner table, bringing with it a symphony of flavors that are simply irresistible. But wait—what happens if you find yourself with leftovers? Fear not, because I have some insider tips that will keep this delectable dish just as delightful for your next meal.
Storing Leftover Honey Garlic Crispy Chicken
To ensure your Honey Garlic Crispy Chicken remains a culinary treasure even after the first serving, it’s crucial to store it properly. I recommend placing any leftovers in an airtight container—this is non-negotiable if you want to maintain that glorious crispiness! Pop the container in the refrigerator, and your chicken will keep for about 3-4 days. Now, here’s a little pro tip: add a slice of bread into the container before sealing it; this helps absorb excess moisture and keeps your chicken from turning soggy. Trust me on this one! When reheating, I suggest using an oven at a low temperature so that it warms through without sacrificing that beloved crunch. The flavors of honey and garlic will still sing beautifully, proving that good food only gets better with time.
Freezing Honey Garlic Crispy Chicken for Later
If you find yourself wanting to save some of this scrumptious dish for another day, freezing is a fantastic option! To do this properly, let your chicken cool completely before transferring it into a freezer-safe zip-top bag or airtight container—removing as much air as possible is key to preventing freezer burn. Stored correctly, your Honey Garlic Crispy Chicken can last up to 2-3 months in the freezer while still retaining its deliciousness! When you’re ready to indulge again, simply thaw it overnight in the fridge; then reheat in an oven or skillet—this way, you’ll recapture that crispy exterior along with the luscious honey garlic sauce. It’s like having a little taste of happiness ready whenever you need it!
By following these storage tips, you can savor every bite of your Honey Garlic Crispy Chicken over multiple meals without losing any of its charm.
Dinner

Honey Garlic Crispy Chicken
- Total Time: 35 minutes
- Yield: Serves approximately 4 people 1x
Description
Enjoy Honey Garlic Crispy Chicken that’s juicy and tender with a perfect crunch! Try this recipe today for an unforgettable meal bursting with flavor.
Ingredients
- 4 boneless chicken thighs (skin on)
- 1.5 tbsp soy sauce
- 1 tbsp mushroom stir-fry sauce
- 1 tsp garlic powder
- 1/4 tsp salt
- Black pepper to taste
- 1/4 cup cornstarch (for coating)
- 1/4 cup oil (for pan frying)
- 2 tbsp unsalted butter
- 1 bulb garlic (finely minced)
- 1 tbsp honey
- Dried parsley for garnish (optional)
Instructions
- Prepare chicken thighs by removing bones while keeping the skin intact. Rinse under cold water and pat dry.
- Score the meat side of each thigh lightly and marinate in a mixture of soy sauce, mushroom stir-fry sauce, garlic powder, salt, and black pepper for at least 15 minutes.
- Coat each thigh evenly with cornstarch, shaking off excess.
- Heat oil in a large skillet over low-medium heat. Fry chicken thighs skin-side down for about 4-5 minutes per side until golden brown and cooked through (165°F internal temperature).
- Remove from the skillet and set aside.
- In the same skillet, melt butter and sauté minced garlic until fragrant. Stir in honey and additional soy sauce; simmer until slightly thickened.
- Return chicken to the skillet, coating each piece in the glaze for another minute.
- Garnish with dried parsley if desired before serving.
- Prep Time: 20 minutes
- Cook Time: 15 minutes
- Category: Dinner
- Method: Frying
- Cuisine: Asian-inspired
Nutrition
- Serving Size: 1 chicken thigh (175g)
- Calories: 355
- Sugar: 8g
- Sodium: 635mg
- Fat: 23g
- Saturated Fat: 7g
- Unsaturated Fat: 15g
- Trans Fat: 0g
- Carbohydrates: 12g
- Fiber: 0g
- Protein: 28g
- Cholesterol: 95mg


Leave a Comment