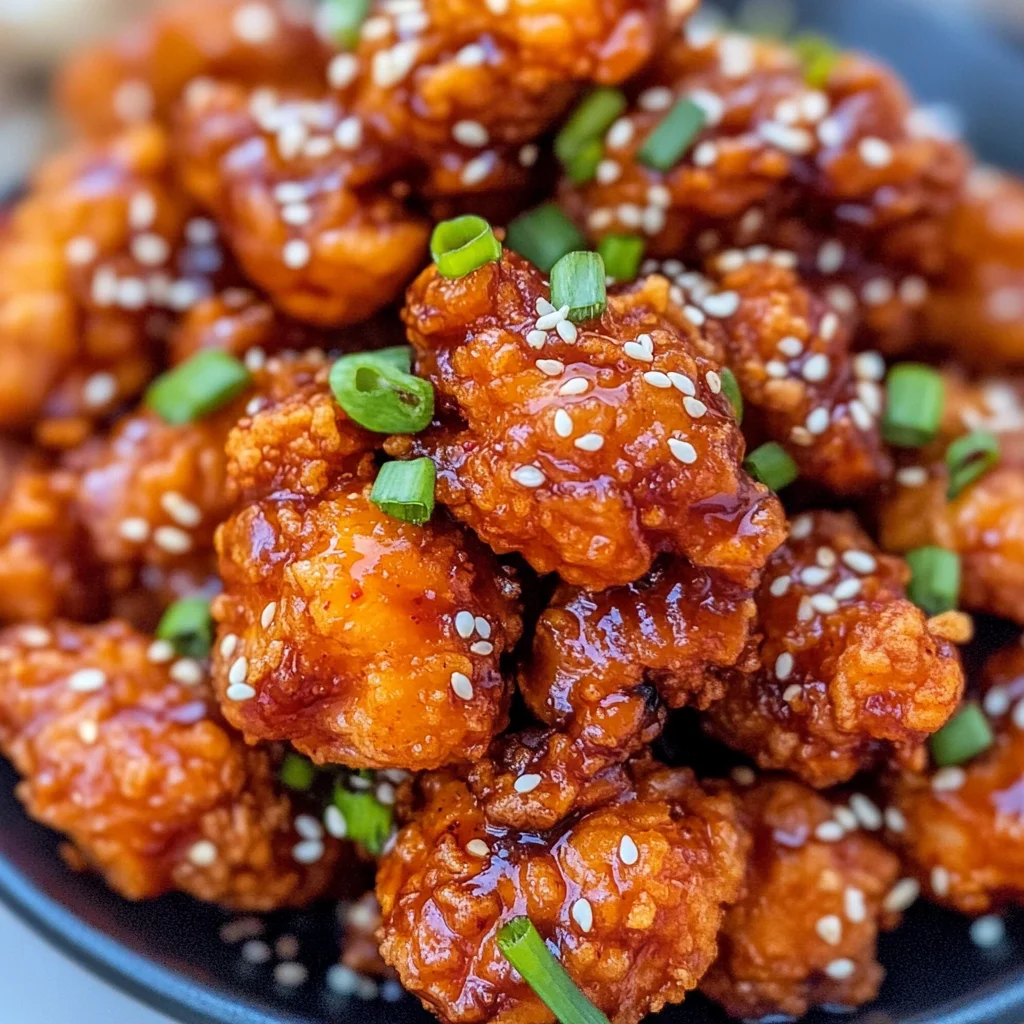
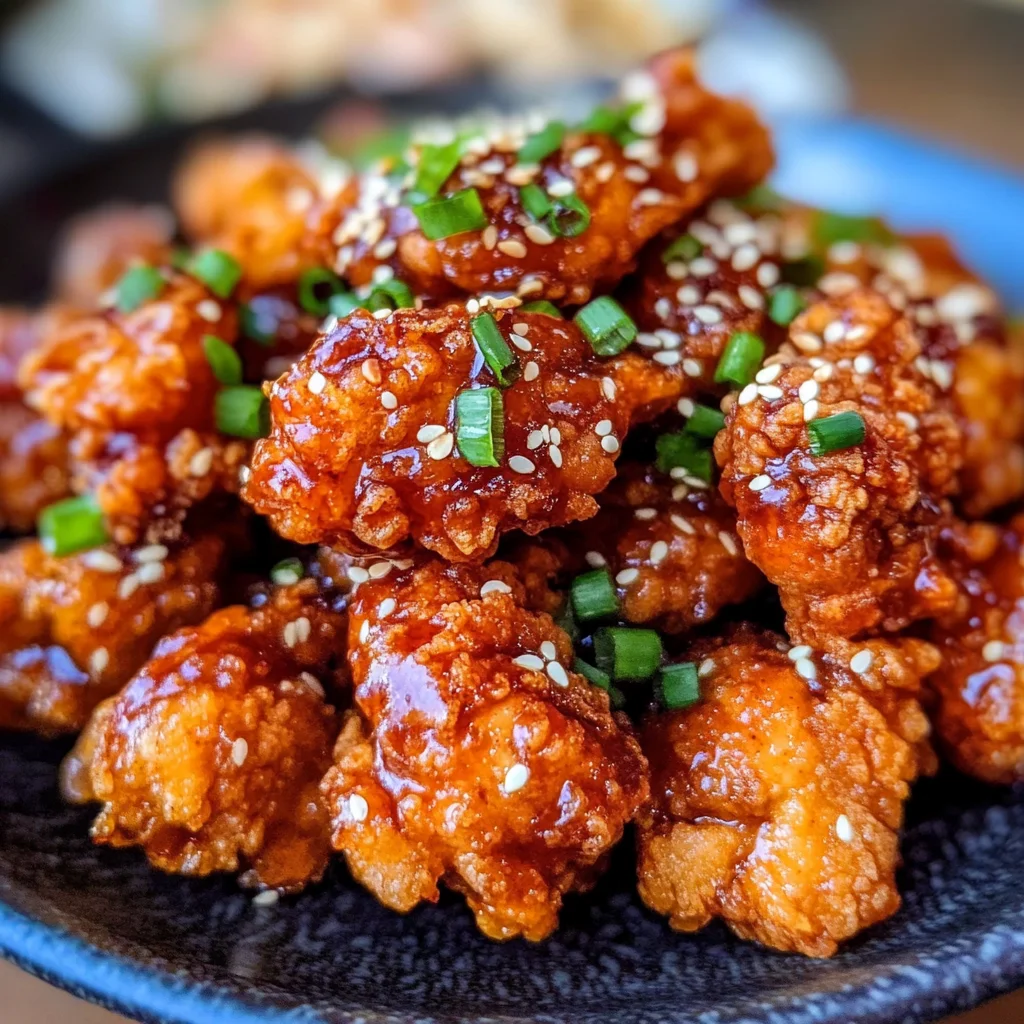
The moment you take a bite of perfectly crispy Korean Fried Chicken, it’s like a delightful explosion of textures and flavors dancing on your palate. The crunch of the golden-brown coating gives way to tender, juicy chicken that is coated in an utterly intoxicating sauce that balances sweetness and spice like nothing else. This dish isn’t just food; it’s an experience that brings friends and family together, evoking memories of laughter around the dinner table and the joy of sharing something truly special. I’ve always been captivated by the art of frying chicken, but when I discovered this particular recipe, it felt as if I had unlocked a secret treasure chest filled with flavor! Trust me when I say that after trying this Korean Fried Chicken at home, you may never want to order takeout again.
What makes this dish so extraordinary is its rich history and cultural significance in Korean cuisine. Known for its tantalizing crunch and vibrant flavors, Korean Fried Chicken has garnered love from food enthusiasts around the globe. Traditionally enjoyed as a snack or appetizer in Korea, it’s often served with beer during gatherings—a perfect pairing! But here’s the beauty: with my easy-to-follow recipe, you can make this beloved classic right in your own kitchen anytime you crave that satisfying crunch without the hassle of going out. Whether it’s game night with friends or a cozy family dinner, this dish will elevate any occasion into something memorable.
Korean Fried Chicken: A Crunchy Love Affair
Let me guide you on this culinary journey where we’ll create a version of Korean Fried Chicken that is not only authentic but also incredibly easy to whip up within just 30 minutes! You don’t need to be a culinary wizard to achieve that signature crunch and flavor—just follow along as I share my tips and tricks for making this dish absolutely irresistible!
Ingredients:
As we embark on this delicious adventure together, let’s take a moment to appreciate each ingredient that contributes to our stunning Korean Fried Chicken. Each one plays a vital role in crafting those layers of flavor and texture we’re aiming for!
-
2 pounds chicken breast (cut into 1-inch chunks). The star of our dish! Using chicken breast ensures that each piece remains juicy while being enveloped in a crunchy exterior. When selecting your chicken, look for fresh cuts with minimal discoloration or odor. If you’re looking for alternatives, boneless thighs can be used for even more tenderness.
-
1 cup cornstarch. This ingredient is non-negotiable for achieving that coveted crispiness! Cornstarch creates an airy coating when fried, leading to an unbelievably crunchy texture. Be sure to sift it before using; this helps prevent clumps and ensures even coating.
-
1/4 cup flour (gluten-free works as well). Flour adds flavor and structure to our batter while also helping bind everything together during frying. If you prefer gluten-free options, feel free to substitute with almond flour or another gluten-free blend.
-
1/2 teaspoon salt. A fundamental seasoning that enhances every other flavor in our dish. Don’t underestimate salt; it elevates the taste profile from bland to beautiful!
-
1/4 teaspoon ground black pepper. Just a hint of pepper adds depth without overwhelming the other flavors. Freshly ground black pepper will provide the best aroma and taste.
-
2 eggs (beaten). Eggs are crucial for creating a rich adhesive layer on our chicken pieces before they’re coated in cornstarch. This additional layer helps achieve maximum crunch when fried.
-
Canola oil for frying. Choosing the right oil is important; canola oil has a high smoke point which makes it perfect for frying without imparting any unwanted flavors onto your chicken.
-
1/4 cup ketchup. This ingredient adds both sweetness and tanginess to our sauce—think of it as a comforting hug for the entire dish!
-
3 tablespoons gochujang paste (or chili sauce). Gochujang is essential for bringing authentic Korean flavor into our recipe! Its unique blend of heat and sweetness will transform our sauce into something truly special—feel free to adjust how much you use based on your spice preference.
-
1/4 cup honey. Sweetness meets savory in this magical ingredient! Honey not only enriches the sauce but also creates a lovely glaze on our chicken when tossed together.
-
3 tablespoons brown sugar. Similar to honey but with added depth from molasses, brown sugar intensifies the sweetness while balancing out spicy notes.
-
1/3 cup soy sauce. Full-bodied umami goodness! Soy sauce acts as both seasoning and moisture enhancer in our sauce; make sure you’re using low-sodium soy if you’re watching your salt intake.
-
1/2 cup water. This helps balance out the thickness of our sauce while ensuring it’s pourable enough to coat every piece evenly!
-
3 cloves garlic (minced). The aromatic punch from garlic cannot be overstated—it infuses our sauce with warmth and richness that’ll have everyone coming back for more.
-
1/4 teaspoon red pepper flakes. These little flakes add an extra kick! Feel free to adjust based on how spicy you’d like your dish—just remember that they pack quite a punch!
-
1 tablespoon cornstarch. We’ll use this later in our cooking process as part of thickening up our delicious sauce—it’s all about layering those flavors!
-
2 teaspoons sesame oil. This fragrant oil adds complexity—its nutty essence rounds out the flavors beautifully and gives us that authentic touch reminiscent of traditional Korean dishes.
Equipment You’ll Need:
Cooking can be such an enriching experience, especially when armed with the right tools! While these items aren’t ingredients per se, they are essential partners in creating something wonderful—let’s explore what you’ll need:
-
Deep frying pan or Dutch oven – A sturdy pan is key for frying; it allows us to control heat effectively while providing enough space for our chicken pieces so they don’t crowd each other—this prevents sogginess!
-
Slotted spoon or spider strainer – This handy tool will help us safely lift those crispy golden pieces from hot oil without losing any precious coating along the way!
-
Mixing bowls – You’ll need different sizes—a medium bowl for combining sauces and larger ones (preferably shallow) for dredging those chicken pieces efficiently.
-
Whisk or fork – Essential tools for mixing eggs and combining dry ingredients thoroughly—this ensures uniformity across all batches!
Now that we have everything ready let’s dive into preparing those delectable bites of crispy Korean Fried Chicken! Are you excited? I know I am!
Step 1: Crafting Our Irresistible Sauce
First things first: let’s whip up our luscious sauce because trust me—it’ll be worth every second spent waiting! In a medium bowl, combine ketchup, gochujang paste (or chili sauce), honey, brown sugar, soy sauce, water, minced garlic, red pepper flakes, cornstarch, and sesame oil until well blended—a whisk does wonders here! As you mix these ingredients together, think about how each one plays its part; sweet honey dances harmoniously with spicy gochujang while garlic provides richness unlike anything else! Set this bowl aside once you’ve achieved a smooth consistency—we’re building layers upon layers of flavor here!
Step 2: Preparing Our Crunchy Coating
Next up is where we bring some serious texture into play! In another large shallow bowl (a plate works too), whisk together cornstarch flour, salt, and ground black pepper until evenly combined—this step is absolutely paramount as it creates that signature coating we crave so much in fried foods! Meanwhile grab another bowl where you’ll beat those two eggs until homogeneous—it’s important not just because they act as glue but also because they help form those glorious bubbles during frying which leads us straight toward ideal crunchiness!
Step 3: Dredging Time!
With everything prepped nicely beforehand let’s get down to business—dredging! Begin by heating about two inches of canola oil over medium-high heat until shimmering but not smoking (about 350°F). While waiting patiently (I promise it’ll be worth it!), dip each piece of chicken into beaten eggs first then immediately toss them into cornstarch mixture ensuring complete coverage; repeat this process until all chunks are properly coated—the double-dipping method works wonders here since it locks in moisture ensuring juicy insides beneath their crisp exteriors!
Step 4: Frying Until Golden Perfection
Okay friends—the moment we’ve all been waiting for has arrived! Once your oil reaches optimal temperature carefully lower several pieces at once using slotted spoon/spider strainer—not overcrowding is key here so allow room for bubbling action around every tasty morsel! Let them fry away blissfully about five minutes per batch or until they turn golden brown—the sound alone will make mouths water everywhere nearby! Keep an eye on color change since nobody likes burnt bits ruining their feast right?
Stay tuned as we continue this delightful journey toward serving up some seriously scrumptious homemade Korean Fried Chicken together next…
Step 5: The Golden Dip – Preparing the Chicken
Now that you have your chicken pieces prepped and ready, it’s time to give them a deliciously decadent coating that transforms them into crispy bites of heaven. Begin by taking each piece of chicken and gently dipping it into the beaten eggs, ensuring every nook and cranny is enveloped in that rich, velvety goodness. This egg wash isn’t just there for decoration; it plays a crucial role in helping the cornstarch adhere to the chicken, creating that coveted crunch we all crave. Trust me on this—don’t rush this step! The egg acts as a binder, allowing the next layer to cling beautifully when we toss the chicken later.
Once you’ve dipped each piece in the egg, it’s time to move on to the next phase—the cornstarch mixture. This combination of cornstarch and flour is what will give your Korean Fried Chicken its characteristic texture. The secret here lies in the cornstarch; it creates a barrier that crisps up wonderfully when fried. So after dipping in the egg, transfer your chicken pieces directly into your cornstarch mixture. Make sure to toss them well until every piece is generously covered. It might feel a bit messy; however, this step is absolutely paramount as it prepares your chicken for frying perfection.
Step 6: The Art of Resting
After you’ve coated all your chicken pieces with cornstarch, it’s essential to let them rest for about 10 minutes if you can spare the time. Why chill? This resting period allows the coating to set and adhere firmly to the chicken, which not only helps prevent it from falling off while frying but also enhances that delightful crunch we’re aiming for. As those minutes pass by, imagine how transformed those little chunks will be once they hit the hot oil! If you’re feeling extra patient (and I truly encourage you to be), consider chilling them in the refrigerator during this time; this further solidifies that coating and takes your dish from good to absolutely extraordinary.
While waiting, you can prepare your frying station! Gather all necessary tools: a deep frying pan or pot filled with about two inches of canola oil—this depth is crucial for achieving even cooking. You want enough oil so that the chicken can float freely without touching the bottom of the pan, which helps prevent sticking and ensures an even golden-brown finish.
Step 7: Frying with Care
It’s finally time for one of my favorite steps—frying! Heat your oil over medium-high heat until it reaches around 350°F (175°C). This temperature is where magic happens; it’s hot enough to create a perfect sear without burning. To check if your oil is ready, you can drop a small amount of your cornstarch mixture into the oil—if it sizzles immediately and rises to the surface, you’re good to go! Don’t rush this step; patience will reward you with perfectly crispy chicken.
When ready, gently lower your first batch of chicken pieces into the hot oil. Work in batches rather than overcrowding your pan—each piece deserves its space for optimal frying. You’ll hear that beautiful sizzle; it’s music to any cook’s ears! Fry each batch for about 6-8 minutes or until they turn a stunning golden brown and float effortlessly at the top of the oil—the visual cues are truly satisfying here! As they cook, resist any urge to poke or prod them too much; let them do their thing and achieve that glorious crust on their own.
Step 8: The Crunch Factor – Perfectly Cooking Your Chicken
As you fry each batch of chicken, keep an eye on those visual cues: look out for a rich golden color and listen for that delightful sound of bubbling oil—it tells you everything! After about 6-8 minutes in hot oil, use tongs or a slotted spoon to carefully lift out each piece once cooked through. They should feel firm yet tender inside—what you’re aiming for is no pinkness at all when cut through (the internal temperature should hit at least 165°F or 74°C). Place your golden treasures onto a plate lined with paper towels—a quick soak will remove excess grease while still keeping them crispy as they await their saucy transformation.
Now comes an important note: avoid adding too many pieces at once into your pan because this can lower the oil temperature dramatically and lead to soggy results instead of crispy ones—no one wants soggy fried chicken! Always prioritize quality over quantity here; trust me when I say that these little nuggets deserve all that love you’re pouring into them.
Conclusion:
As we wrap up our delightful journey through crafting this spectacular Korean Fried Chicken, I can’t help but feel that infectious excitement bubbling within me—it’s like sharing a warm hug over food with someone dear. This recipe isn’t just about frying chicken; it’s about embracing those bold flavors that dance so beautifully together—the spicy gochujang balances perfectly with the sweet honey and brown sugar, creating a glaze that’s utterly intoxicating. The crunch of each piece contrasts delightfully with the tender juiciness inside, making every bite profoundly satisfying and memorable.
Why is this recipe a must-try? Well beyond just taste lies the joy of making something special right in your own kitchen—it invites creativity and experimentation while being accessible enough for anyone to master. Whether it’s game day gatherings or cozy family dinners, serving up this dish will surely impress your friends and loved ones alike. Picture yourself pulling out steaming trays from the oven as everyone gathers around with eager smiles—it’s moments like these that create lasting memories filled with laughter and connection.
Imagine savoring one piece with a side of crisp pickled vegetables or perhaps enjoying another alongside fluffy rice topped with scallions—a match made in culinary heaven! For an afternoon pick-me-up with friends, pair them with refreshing drinks or serve them as tantalizing appetizers at parties—endless possibilities await! You may even want to whip up some homemade kimchi on the side for that perfect tangy contrast.
Feeling adventurous? This recipe is wonderfully adaptable! You could try swapping out the sauce ingredients for different flavor profiles—think garlic soy sauce or even a citrusy twist if you’re craving something lighter. Not only does each variation offer something unique, but they also invite personal touches based on what delights your taste buds most. So why not dive into this experience? I wholeheartedly invite you to try out this recipe for yourself, share your journey in crafting these unforgettable bites, and connect with fellow food lovers who appreciate good home-cooked meals just like we do!
Korean Fried Chicken
- Total Time: 30 minutes
- Yield: Serves approximately 4 people 1x
Description
Korean Fried Chicken is a culinary delight that brings together a satisfying crunch and a symphony of sweet and spicy flavors. Each bite features tender, juicy chicken coated in a golden-brown crust, making it an irresistible treat for any occasion. Whether you’re entertaining friends on game night or enjoying a cozy dinner with family, this dish is sure to impress. With an easy-to-follow recipe that can be prepared in just 30 minutes, you’ll find yourself enjoying the authentic taste of Korean cuisine right in your own kitchen. Say goodbye to takeout and hello to homemade goodness!
Ingredients
- 2 pounds chicken breast (cut into 1-inch chunks)
- 1 cup cornstarch
- 1/4 cup flour (gluten-free optional)
- 1/2 teaspoon salt
- 1/4 teaspoon ground black pepper
- 2 eggs (beaten)
- Canola oil for frying
- 1/4 cup ketchup
- 3 tablespoons gochujang paste (or chili sauce)
- 1/4 cup honey
- 3 tablespoons brown sugar
- 1/3 cup soy sauce (low-sodium if preferred)
- 1/2 cup water
- 3 cloves garlic (minced)
- 1/4 teaspoon red pepper flakes
- 2 teaspoons sesame oil
Instructions
- Prepare the sauce by mixing ketchup, gochujang, honey, brown sugar, soy sauce, water, minced garlic, red pepper flakes, and sesame oil in a bowl. Set aside.
- In another bowl, combine cornstarch, flour, salt, and black pepper.
- Beat the eggs in a separate bowl.
- Dip each piece of chicken into the eggs then coat thoroughly with the cornstarch mixture.
- Heat canola oil in a deep frying pan to about 350°F (175°C).
- Fry the chicken pieces in batches for about 6-8 minutes until golden brown.
- Once cooked, toss the fried chicken in the sauce until evenly coated.
- Serve hot and enjoy!
- Prep Time: 15 minutes
- Cook Time: 15 minutes
- Category: Main
- Method: Frying
- Cuisine: Korean
Nutrition
- Serving Size: Approximately 4 pieces (200g)
- Calories: 520
- Sugar: 20g
- Sodium: 720mg
- Fat: 24g
- Saturated Fat: 3g
- Unsaturated Fat: 18g
- Trans Fat: 0g
- Carbohydrates: 54g
- Fiber: 2g
- Protein: 28g
- Cholesterol: 165mg
Leave a Comment