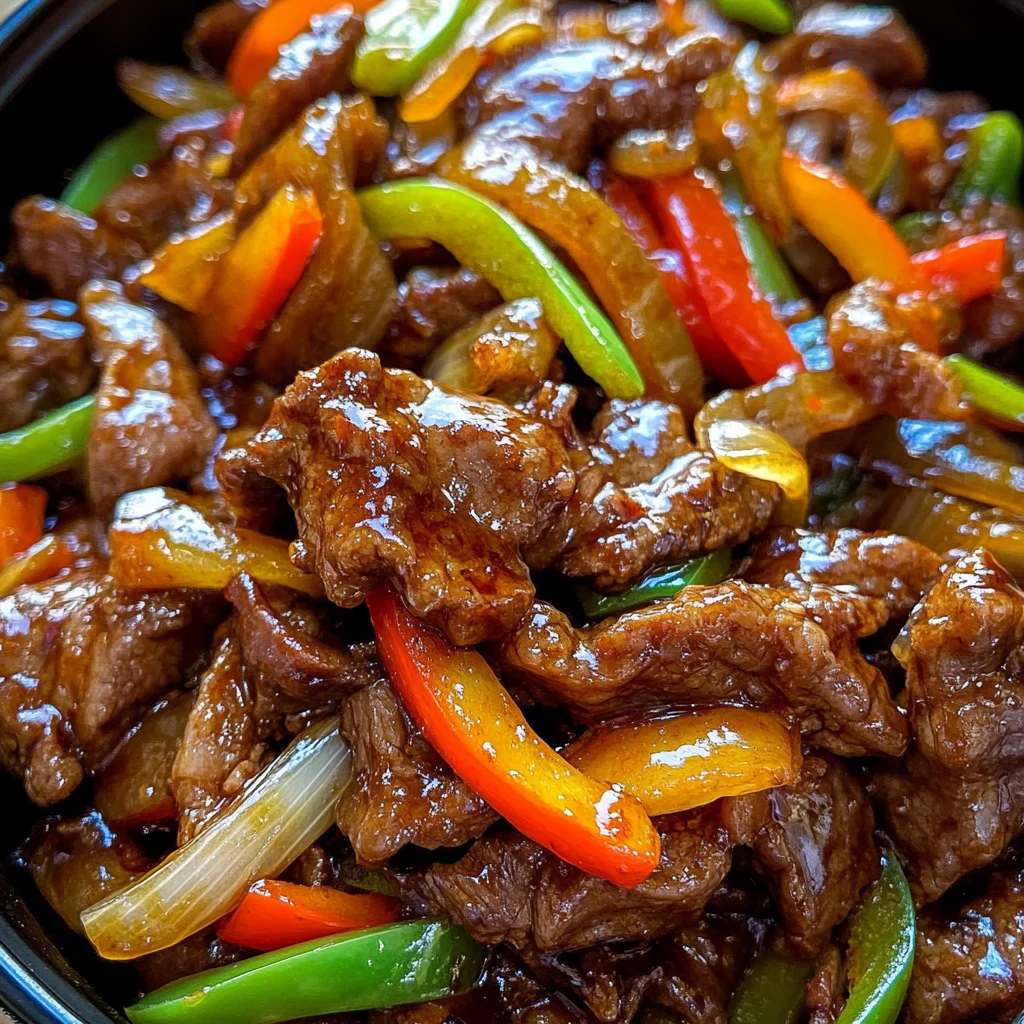
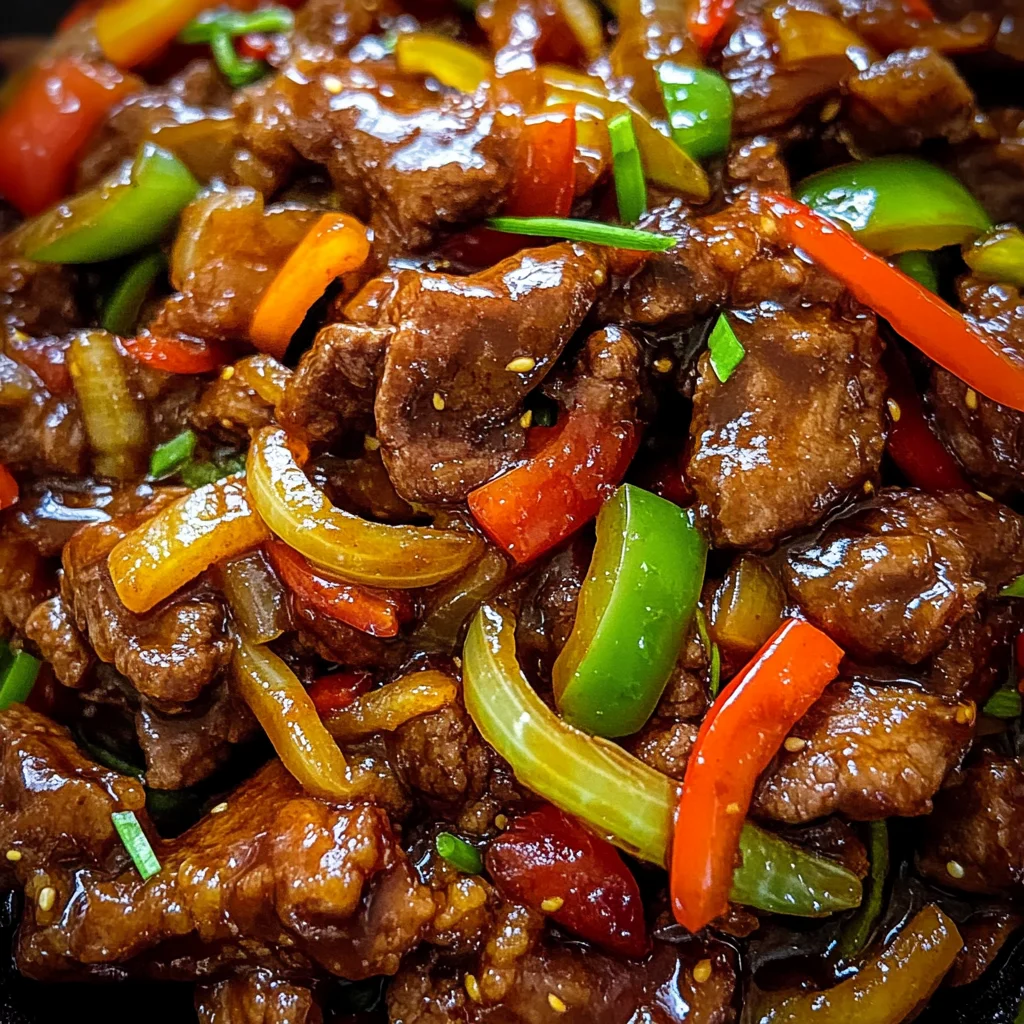
There’s something incredibly heartwarming about sharing a recipe that feels like a hug from the inside out. This Mongolian Beef Recipe is more than just food; it’s an experience that wraps you in warmth and comfort. Picture this: juicy strips of beef, perfectly seared to a mouthwatering golden brown, mingling with vibrant bell peppers and sweet onion, all enveloped in a sauce that’s both savory and slightly sweet, creating a symphony of flavors that dance on your palate. And when you serve it over hot, fluffy rice, it transforms into a meal that sings of love and togetherness. I promise you, each bite feels like a celebration of culinary delight.
This dish has roots that intertwine tradition with modern taste. Mongolian beef is often celebrated for its bold flavors and satisfying textures, making it perfect for family dinners or cozy gatherings with friends. What truly captivates me about this recipe is its ability to evoke memories of shared meals—laughter around the table, stories exchanged over steaming bowls of rice, and the joy of cooking together. It’s a beautiful reminder of how food can connect us across generations and cultures, creating bonds that last long after the last plate has been cleared.
Mongolian Beef Recipe: A Flavorsome Journey to Your Table
Let’s dive into this captivating culinary adventure! Making Mongolian Beef at home is not only rewarding but absolutely delightful. Trust me when I say this dish will impress your loved ones and leave them asking for seconds (or thirds!). As you prepare each ingredient and follow the steps, you’ll find yourself enveloped in rich aromas that will make your kitchen feel like a bustling restaurant in the heart of Mongolia.
Ingredients:
Embarking on this culinary journey requires some essential ingredients that come together to create magic in every bite. Each component plays a pivotal role in achieving that authentic Mongolian flavor profile we’re striving for.
-
2 lb beef stew tips, flank steak, or New York strip steak (extra fat trimmed), cut against the grain into thin strips. This choice of beef is non-negotiable for achieving tender pieces that are full of flavor. Cutting against the grain is crucial here—it shortens the muscle fibers, making each bite melt-in-your-mouth tender. When shopping for meat, look for cuts with good marbling; this intramuscular fat will enhance flavor as it cooks.
-
1/2 cup cornstarch. This might seem like an ordinary pantry item, but it’s absolutely paramount in our quest for crispy beef strips. Dusting our meat with cornstarch before searing creates a protective coating that locks in juices while developing a beautiful crust during cooking. If you’re looking for alternatives due to dietary preferences or availability, potato starch can work wonders as well!
-
1/2 cup neutral oil. Opting for a neutral oil—like canola or grapeseed—is essential because we want our beef to shine through without being overshadowed by strong flavors from oils like olive or sesame. The high smoke point allows for perfect searing without burning, ensuring your beef gets that lovely golden crust while staying tender inside.
-
4 stalks green onion (green part only), cut into 2-inch pieces. These vibrant green beauties add freshness and color to our dish, offering a mild onion flavor that’s less pungent than their bulbous counterparts. They also provide a lovely crunch when sautéed briefly at the end—don’t skip these!
-
3 bell peppers (cut into strips). Using colorful bell peppers not only enhances the visual appeal but contributes sweetness and texture as they caramelize during cooking. Feel free to mix colors—red, yellow, and orange offer sweetness while green brings slight bitterness—creating layers of flavor and vibrancy on your plate.
-
1 large onion (cut into 1/4 rings). Onions are the backbone of many great dishes; they bring depth and sweetness as they cook down into soft perfection. Slicing them into rings ensures they retain some structure while absorbing all those delicious flavors from our sauce.
-
2 tsp ginger powder (or double if using fresh grated ginger). Ginger adds warmth and complexity to our sauce—a little goes a long way! Fresh ginger will lend an even more vibrant aroma compared to dried; however, if you’re opting for powdered ginger due to convenience or availability, don’t fret—it will still impart fantastic flavor.
-
4-5 garlic cloves (minced). Garlic is another foundational ingredient that elevates our sauce with its aromatic punch! The fragrant oils released during cooking create an intoxicating aroma that’s hard to resist; fresh garlic has magical properties when cooked right—browning lightly brings out its natural sweetness.
-
1/2 cup low sodium soy sauce. This liquid gold acts as both seasoning and base for our sauce—it’s salty yet umami-rich! Using low sodium soy sauce gives us more control over the saltiness of the dish while still providing robust flavor without overwhelming your taste buds.
-
1/2 cup water. Water serves as the balance needed in our sauce; it helps dissolve sugar evenly while ensuring we achieve just the right consistency without making it too thick or pasty—an important consideration since we want everything to coat beautifully!
-
1/2 cup brown sugar. The addition of brown sugar provides necessary sweetness which balances out the saltiness from soy sauce perfectly! It helps create that lovely glaze we’re after—a caramelization effect that adds richness to every bite.
-
1 tsp Sriracha sauce (add more or less for desired spiciness). Here’s where things get exciting! Sriracha introduces heat along with tanginess—you can easily control how spicy your dish becomes by adjusting based on personal preference! Trust me on this one: a little kick can make all the difference in elevating flavors throughout your meal!
Equipment You’ll Need:
Having just the right tools makes all the difference when you’re venturing into new recipes—it sets you up for success while allowing creativity to flourish! Here’s what you’ll need:
-
Large skillet or wok – A spacious skillet or wok helps achieve high heat quickly without overcrowding ingredients; this ensures proper searing which leads to those coveted crispy bits on your beef! If you don’t have either option available at home? A large frying pan will do just fine!
-
Sharp knife & cutting board – A sharp knife is essential not only for ease but also safety—dull blades are more dangerous as they require extra force which can lead to slips! A sturdy cutting board provides stability while slicing through your vegetables neatly.
-
Measuring cups & spoons – Precision matters here! Using measuring cups and spoons ensures accurate quantities leading towards balanced flavors throughout every layer—we want nothing less than perfection!
-
Mixing bowl – We need somewhere safe to combine all those flavorful ingredients together before introducing them onto heat! A medium mixing bowl works wonderfully here; plus it’s helpful later when tossing veggies around before adding them back into our stir-fry!
Now that we’ve gathered all our ingredients and tools let’s dive headfirst into preparing this delightful recipe together!
Step 1: Preparing Your Beef
Start by trimming any excess fat from your chosen cut of beef before slicing it against the grain into thin strips about ¼ inch thick—this step is crucial because cutting against the grain shortens muscle fibers allowing tenderness throughout cooking time later on! Once sliced uniformly place them in a mixing bowl then sprinkle liberally with cornstarch tossing gently until every piece gets coated evenly—it may seem tedious but trust me when I say achieving crispiness requires patience here!
Step 2: Searing Time!
In your large skillet or wok set over medium-high heat add the neutral oil until shimmering but not smoking—it should look glossy! Carefully add coated beef strips one by one ensuring not overcrowding them so they can develop proper browning instead of steaming away moisture… This is key folks—the Maillard reaction happening here creates those delicious caramelized flavors we crave! Allow them sufficient time on each side before flipping; around 3 minutes per side should do nicely depending upon thickness—and keep an eye out: once browned remove them promptly onto plate keeping warm covered up under foil whilst continuing with remaining batches until finished.
Step 3: Sautéing Vegetables
Once all your glorious beef pieces are set aside take advantage of leftover flavorful juices left behind by adding sliced onions first stirring constantly until softened (about 5 minutes). Follow swiftly thereafter with bell pepper strips alongside minced garlic & ginger powder stirring continuously so nothing burns… Oh my goodness—the aroma wafting through my kitchen right now is absolutely intoxicating—you’ll understand why soon enough! After 3 minutes toss in green onion pieces letting everything mingle beautifully together further enhancing color aesthetics along way…
Step 4: Creating Our Sauce
Now comes perhaps my favorite part—the creation of luscious sauce combining low sodium soy sauce mixed thoroughly with brown sugar plus water whisked together until dissolved completely—you want all sugars incorporated nicely so nothing sinks down bottom later during serving time! Pour mixture directly over sautéed veggies gently stirring ensuring even coating occurs allowing everything simmer together briefly while absorbing sweetness balancing out salty tones beautifully…
And there you have it—a tantalizing start toward creating something truly extraordinary that’ll fill hearts & bellies alike around dinner tables near & far… Stay tuned as we finish off this vibrant dish next time—trust me it’s worth waiting just moments longer!
The Art of Cooking Your Mongolian Beef Recipe
Step 5: Coating the Beef to Perfection
Now that you have your beautifully sliced beef strips ready, it’s time to coat them in cornstarch. This isn’t just a simple dusting; it’s a transformative step that creates that delightful crispy exterior while locking in moisture and tenderness. In a large bowl, add the cornstarch and gently toss the beef strips until they are evenly coated. It’s important not to rush this step; each piece should be enveloped in a fine layer of cornstarch, making sure every corner is covered. Trust me on this—this coating is what will allow the beef to achieve that coveted texture once it hits the hot oil.
As you work through this process, take a moment to appreciate the textures and colors before you. The soft, pink hue of the beef against the snowy white cornstarch is a beautiful sight! Once all your beef has been coated, let it sit for about 10 minutes. This brief resting period allows the cornstarch to adhere properly to the meat, ensuring a satisfying crunch when cooked. While waiting, you can bask in the anticipation of what’s to come—this dish is going to be utterly intoxicating!
Step 6: Searing for Flavor
Now comes one of my favorite parts—the searing! In a large skillet or wok over medium-high heat, pour in your neutral oil and let it heat up until it shimmers like liquid gold. This step is absolutely paramount because achieving the right temperature for cooking is crucial; too low, and your beef will steam instead of sear—resulting in sad, soggy bites instead of those beautifully caramelized morsels we crave. Once your oil is hot enough (you can test by dropping in a small piece of coated beef), carefully add half of your beef strips in a single layer.
Allow them to cook without moving them around for about 2-3 minutes or until they develop a gorgeous brown crust on one side. Don’t rush this process—it’s during this time that those rich flavors begin to meld and create that deeply satisfying umami profile we’re after! After they’ve developed that lovely color, flip them over and cook for another minute or two until they’re browned but not fully cooked through; we’ll finish cooking them later when we combine everything. Once done, remove them from the pan and set them aside while repeating with the remaining beef strips.
Step 7: Stir-Frying Vegetables for Vibrancy
With your beef perfectly seared and set aside, it’s time to bring some vibrant color into our dish! In the same skillet (don’t clean it out—those delicious brown bits left behind are flavor gold!), add your sliced onions and bell peppers. Sauté them over medium-high heat for about 4-5 minutes until they begin to soften but still retain their crispness—a crucial balance here! The natural sugars in these vegetables will start caramelizing beautifully, creating an aromatic base that elevates our Mongolian Beef Recipe even further.
As you stir-fry, take a moment to inhale deeply—the fragrant aroma wafting up is nothing short of extraordinary! If you’ve opted to use fresh ginger instead of ginger powder, now’s the time to toss it into the mix along with minced garlic cloves. I promise you; this combination will create an utterly intoxicating aroma that fills your kitchen with warmth and comfort. Keep stirring for another minute or so until everything is well combined and fragrant before moving onto our next exciting step.
Step 8: Creating That Irresistible Sauce
Now we’re diving into what makes this Mongolian Beef Recipe truly shine—the sauce! In a separate bowl, whisk together your low-sodium soy sauce, water, brown sugar, and Sriracha sauce until well combined. This harmonious blend combines salty, sweet, and spicy elements into something akin to culinary magic! Pour this mixture into your skillet with those sautéed vegetables while scraping up any flavorful bits stuck at the bottom; don’t miss out on those treasures!
Bring everything to a gentle simmer—it’s essential at this step because simmering allows all those flavors to meld together beautifully! Allow it to bubble away for about 2-3 minutes until slightly thickened; you’ll notice how glossy and inviting it becomes as it cooks down into an almost syrupy consistency—a true symphony of flavors developing right before your eyes! After achieving that perfect thickness (you’ll know it’s ready when you can run a spatula through it and leave a trail), return your seared beef back into the pan. Now gently toss everything together—coating every morsel with that luscious sauce is non-negotiable if you want authentic flavor!
Conclusion:
As we wrap up this culinary adventure through my beloved Mongolian Beef Recipe, I can’t help but feel excited about sharing this experience with you! From those first vibrant stir-fried vegetables to the luscious sauce enveloping those perfectly cooked beef strips, every step in creating this dish is imbued with warmth and joy. What truly makes this recipe special is not just its harmonious blend of sweet and savory flavors but also how effortlessly it brings people together around the dinner table.
This dish isn’t merely about satisfying hunger; it’s about cultivating memories and sharing laughter with loved ones over steaming bowls of rice adorned with generous portions of that mouthwateringly saucy beef. Whether you’re hosting a cozy family dinner or seeking something extraordinary for an intimate gathering with friends, I assure you that this Mongolian Beef will impress everyone at the table. The experience of pulling out that rich, glossy dish from your kitchen feels like unearthing a treasure—each bite bursting with flavors that make hearts sing.
When it comes to serving suggestions, imagine ladling generous portions over fluffy steamed rice or perhaps pairing it with fragrant jasmine rice that complements every bite beautifully. For an afternoon pick-me-up, serve it alongside some crispy spring rolls filled with crunchy vegetables—a perfect contrast to the tender beef! And if you’re looking to elevate your dining experience even further, consider offering a side of stir-fried bok choy; its slight bitterness pairs exquisitely with the sweetness of the sauce.
Feeling adventurous? This recipe is wonderfully adaptable! You could swap out bell peppers for vibrant snap peas or even toss in some baby corn for added crunch—each tweak adds a unique twist while keeping that classic flavor profile intact. What’s more exciting is experimenting with different herbs or spices; perhaps a touch of sesame oil drizzled at the end or some crushed red pepper flakes if you’re craving extra heat could enhance your creation even further! I encourage you to embrace these variations and let your creativity shine through in this already extraordinary recipe. Try it out, share your experience, and let’s connect over our love for cooking together!
Mongolian Beef Recipe
- Total Time: 35 minutes
- Yield: Serves approximately 6
Description
Experience the heartwarming flavors of this Mongolian Beef Recipe, which combines tender strips of beef, vibrant bell peppers, and a savory-sweet sauce that captures the essence of comfort food. Perfectly seared beef mingles with fresh vegetables in a luscious sauce, creating an irresistible dish that is both satisfying and easy to prepare. Serve it over fluffy rice for a delightful meal that brings everyone together, making it perfect for family dinners or gatherings with friends. With its bold flavors and inviting aroma, this recipe promises not just a dinner but a cherished experience around the table.
Ingredients
- 2 lb beef stew tips or flank steak (cut into thin strips)
- 1/2 cup cornstarch
- 1/2 cup neutral oil (canola or grapeseed)
- 4 stalks green onion (cut into 2-inch pieces)
- 3 bell peppers (cut into strips)
- 1 large onion (cut into rings)
- 2 tsp ginger powder
- 4–5 garlic cloves (minced)
- 1/2 cup low sodium soy sauce
- 1/2 cup water
- 1/2 cup brown sugar
- 1 tsp Sriracha sauce (adjust for spiciness)
Instructions
- Prepare the beef by trimming excess fat and slicing against the grain into thin strips. Coat the beef evenly with cornstarch and let rest for about 10 minutes.
- Heat neutral oil in a large skillet over medium-high heat until shimmering. Add half of the beef strips in a single layer and sear for 2-3 minutes per side until browned. Remove from the pan and set aside.
- In the same skillet, add sliced onions and bell peppers. Sauté for about 4-5 minutes until softened, then add minced garlic and ginger; cook for another minute.
- In a bowl, whisk together soy sauce, water, brown sugar, and Sriracha sauce. Pour over the sautéed vegetables and bring to a simmer.
- Return the seared beef to the skillet, tossing everything together until well coated with the sauce. Stir in green onion pieces just before serving.
- Prep Time: 20 minutes
- Cook Time: 15 minutes
- Category: Main
- Method: Stir-Frying
- Cuisine: Asian
Nutrition
- Serving Size: Approximately 6 oz (170g)
- Calories: 350
- Sugar: 14g
- Sodium: 720mg
- Fat: 18g
- Saturated Fat: 3g
- Unsaturated Fat: 15g
- Trans Fat: 0g
- Carbohydrates: 30g
- Fiber: 2g
- Protein: 23g
- Cholesterol: 70mg

Leave a Comment