There’s something truly magical about the first spoonful of creamy mac and cheese, isn’t there? It’s not just a dish; it’s a warm embrace, a nostalgic hug from childhood, and a comforting reminder that some of life’s best moments are spent gathered around the table with loved ones. This Panera Mac and Cheese Recipe captures all of that warmth in every velvety bite. The moment you indulge in this rich concoction of tangy white cheddar cheese and perfectly cooked pasta, you’re transported to a place where worries fade away, and joy takes center stage. I promise you, this is more than just food—it’s an experience, an invitation to savor life’s simple pleasures.
As I’ve embarked on my culinary journey, I’ve always been captivated by recipes that manage to bridge tradition with innovation. This copycat version of the beloved Panera Mac and Cheese is a testament to that philosophy. It pays homage to the classic comfort food we’ve all come to love while inviting us to explore our own kitchens and creativity. Whether it’s a rainy afternoon or a cozy family gathering, this dish has the power to transform any occasion into something extraordinary. So grab your apron and let’s dive into this delightful adventure together!
Panera Mac and Cheese Recipe: A Heartfelt Comfort Food Classic
Let me take you on a journey through this heavenly mac and cheese recipe that will have your taste buds dancing! With its rich creaminess and sharp cheddar flavor, it’s like wrapping yourself in a soft blanket on a chilly evening. You’ll want to keep this recipe close because it’s destined to become one of your go-to favorites for gatherings or simply when you crave something indulgent yet satisfying.
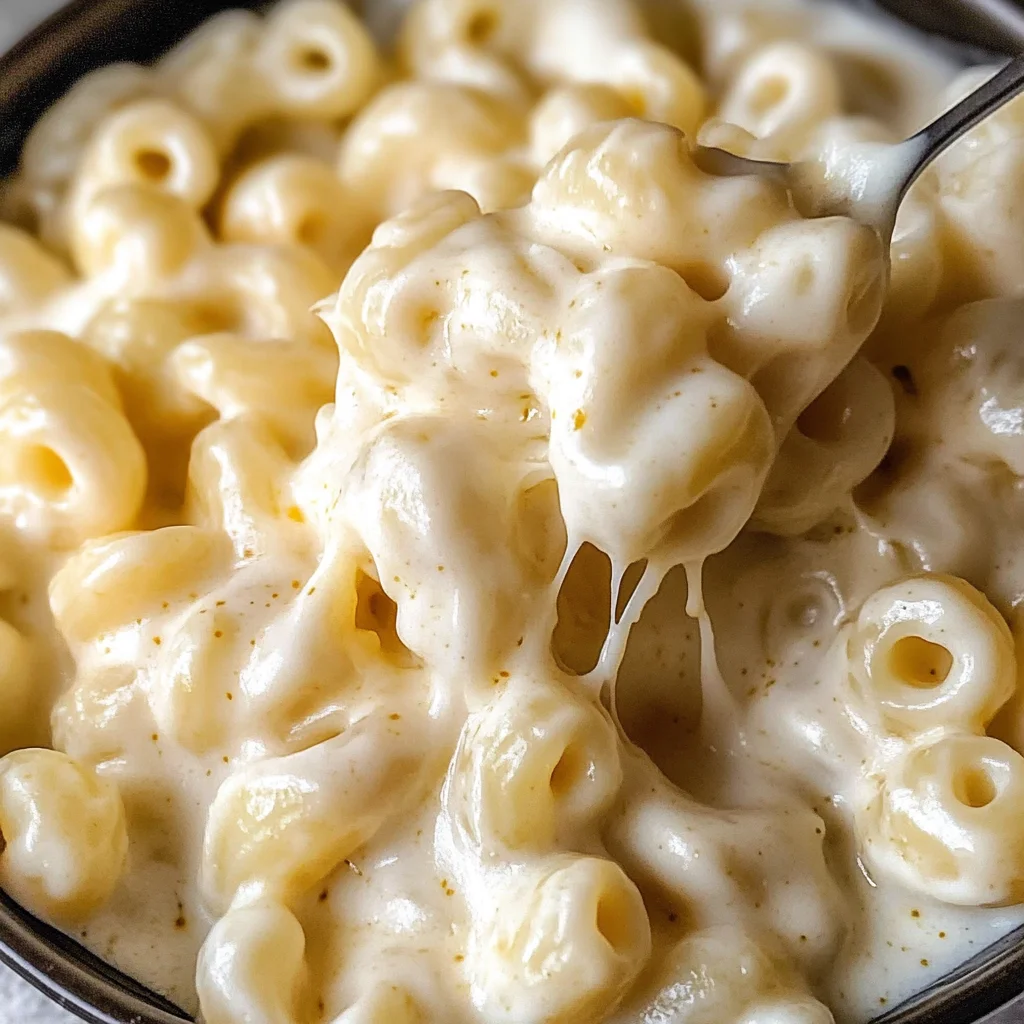
Ingredients:
Before we embark on this delicious culinary journey together, let’s gather our ingredients. Each one plays an essential role in crafting the creamy masterpiece that is our Panera Mac and Cheese!
- 1 pound dry medium shell pasta (1 box), or any short pasta will work. The shells cradle the creamy cheese sauce perfectly, creating little pockets of flavor with every bite. These shapes are particularly good at holding onto all that cheesy goodness, ensuring no spoonful is ever lacking in richness. When choosing your pasta, opt for high-quality brands if possible; they hold their shape well during cooking and give you that delightful al dente texture which is absolutely paramount in achieving the right mouthfeel.
- 6 tablespoons unsalted butter (¾ stick). Butter serves as the foundation for our sauce by providing richness and depth while acting as an emulsifier when combined with flour. Opting for unsalted butter allows us to control the seasoning throughout the recipe more effectively. Make sure your butter is at room temperature before starting; this way, it melts evenly into the roux without clumping, leading us toward that silky smooth sauce we’re after.
- ¼ cup all-purpose flour. This ingredient is crucial for thickening our sauce through a process known as creating a roux. When cooked alongside melted butter until slightly golden, it develops flavor and removes any raw flour taste which can be quite unpleasant in our final dish. Look for unbleached flour if possible—it tends to have better flavor and texture compared to bleached varieties.
- 2 cups whole milk (room temperature). Whole milk contributes both creaminess and sweetness to our sauce while helping create that luscious texture we love so much in mac and cheese. Using room temperature milk ensures it blends seamlessly into the heated roux without cooling down our mixture too abruptly, which can inhibit thickening. If you’re looking for alternatives due to dietary preferences or availability issues, consider using oat milk or cashew milk for similar results!
- 1 cup heavy cream (room temperature). Heavy cream is what elevates this recipe from merely good to utterly intoxicating! It provides an unparalleled richness that makes each bite feel indulgent while also balancing out the sharpness of the cheddar cheese beautifully. Again, using room temperature cream helps everything meld together smoothly—trust me on this one!
- 1¼ teaspoons kosher salt. Salt is an essential ingredient in any savory dish; it enhances flavors beautifully without making them taste salty if used appropriately. Kosher salt is wonderful because its larger grains dissolve slowly and evenly throughout our sauce without overpowering other flavors.
- ½ teaspoon dry mustard powder. This seemingly small addition adds an unexpected depth of flavor—a subtle tanginess that complements the cheeses wonderfully! If you don’t have dry mustard on hand, feel free to replace it with Dijon mustard; just remember to adjust your salt accordingly since Dijon can be saltier than its powdered counterpart.
- Freshly ground black pepper (to taste). The beauty of using freshly ground black pepper lies not only in its robust flavor but also in the aromatic oils released during grinding that elevate dishes significantly! Start with just a pinch; you can always add more at the end once you’ve tasted your creation.
- 4 cups freshly shredded Vermont Cheddar cheese (I used Cracker Barrel but you can use any brand). Cheese is undoubtedly the star ingredient here! I adore Vermont Cheddar for its sharpness which resonates beautifully against our creamy backdrop while offering that quintessential mac & cheese flavor everyone knows and loves. Always opt for freshly shredded cheese over pre-packaged varieties whenever possible—those contain anti-caking agents that can affect melting quality!
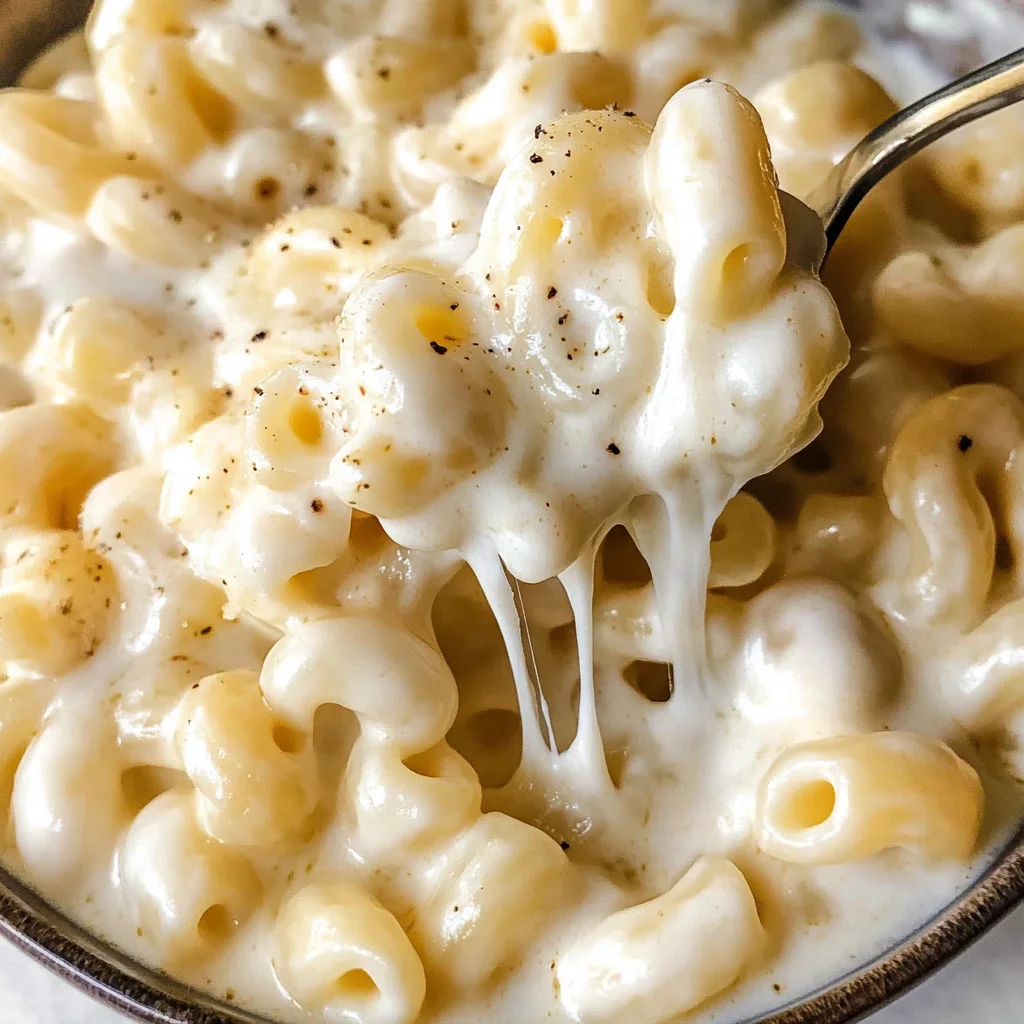
Equipment You’ll Need:
Having the right tools makes all the difference when creating something wonderful in your kitchen! While these aren’t “ingredients,” they are essential partners in crafting our delectable mac and cheese masterpiece.
- Large pot or Dutch oven – A sturdy pot ensures even heat distribution when melting butter or cooking pasta while providing ample space for stirring without fear of overflowing sauces! Look for one with a heavy bottom; it minimizes scorching during cooking—a common pitfall when making creamy sauces.
- Whisk – This tool isn’t just for beating eggs! A good whisk helps incorporate ingredients smoothly into our sauce while preventing lumps from forming as we introduce flour into melted butter.
- Colander – Perfectly draining cooked pasta requires precision! A colander allows water drainage without losing those precious shells—it’s also handy when rinsing vegetables or herbs later on.
- Measuring cups & spoons – Precision matters when baking or cooking; having reliable measuring tools ensures consistency across batches so you’ll achieve delicious results every time!
- Wooden spoon or silicone spatula – These tools provide excellent mixing capabilities while being gentle enough not to scratch non-stick surfaces or cast iron pans—a must-have duo in any kitchen!
Now that we have everything prepped let’s get started making this incredible Panera Mac and Cheese Recipe—you’re going to fall head over heels for how easy yet exquisite it turns out!
Step 1: Boil Your Pasta
Begin by bringing a large pot of salted water to boil—this step is non-negotiable as it infuses flavor directly into your pasta while ensuring proper cooking technique! Once boiling vigorously, add your 1 pound of dry medium shell pasta (or whichever short pasta you’ve chosen) according to package directions until al dente—which usually takes around 8–10 minutes depending on type used—check frequently as overcooked pasta can become mushy instead of delightfully chewy! When done cooking perfectly al dente (you want just a hint of firmness), carefully drain over a colander but don’t rinse—this allows starches left behind from boiling water help sauces cling beautifully later on!
Step 2: Create Your Roux
In the same large pot used earlier (no need for extra dishes!), melt 6 tablespoons unsalted butter over medium heat until bubbly but not browned—this step creates an aromatic base filled with flavor essence needed throughout our dish! As soon as butter has melted completely—whisk in ¼ cup all-purpose flour gently until combined thoroughly; cook mixture continuously stirring constantly until light golden brown appears—a process taking roughly 2–3 minutes known as ‘cooking out’ raw flour flavors present initially before adding liquids later on—we want those yummy nutty notes shining through!
Step 3: Combine Dairy
Gradually pour in 2 cups room-temperature whole milk followed immediately by adding 1 cup room-temperature heavy cream slowly while whisking continuously—this helps prevent clumps forming during integration process resulting smoother consistency overall! Keep stirring until mixture begins bubbling gently around edges indicating thickening action taking place—a beautiful transformation occurs here—the liquid gold starts resembling silky smooth custard-like consistency which signals readiness for next phase ahead!
Step 4: Seasoning Magic
Once bubbling has commenced indicating thickness achieved correctly—you’ll want stir-in actual seasonings now: add 1¼ teaspoons kosher salt along with ∕2 teaspoon dry mustard powder plus freshly ground black pepper according personal preference levels adjusting accordingly after tasting final product later once combined fully here—we’re building those layers upon layers glorious flavors already present within sauce! Stir these ingredients well ensure even distribution enhancing overall profile immensely—all eyes should start glistening excitedly watching unfold magic happening within pot before moving forward adding star players next!
Stay tuned my friend—we’re almost there! Next up? The pièce de résistance: CHEESE… lots of glorious CHEESE!!
Step 5: A Cheesy Transformation
Now comes the moment we’ve all been waiting for—the cheese! Once your creamy concoction has reached that perfect bubbling point, it’s time to remove the pot from the heat. Trust me, taking it off the burner is absolutely paramount; this allows you to control the melting of your cheese without risking the dreaded separation or curdling. As you add in those glorious four cups of freshly shredded Vermont Cheddar cheese, take a moment to revel in the intoxicating aroma that fills your kitchen—seriously, it’s like a warm hug on a plate! Stir gently but confidently, ensuring that each strand of cheese has the opportunity to melt and mingle within that velvety sauce. You’ll know it’s ready when you see it transform into this rich, gooey masterpiece that clings lovingly to your whisk or spoon.
The key here is patience; don’t rush this step. This is where your sauce goes from good to utterly extraordinary. If you find some stubborn clumps resisting your stirring efforts, fear not! Just keep at it with steady hands and gentle encouragement; they’ll surrender soon enough. And let’s not forget about taste testing—once everything is beautifully melted together, take a tiny spoonful and savor that first bite. Adjust salt if necessary, as this could enhance those cheesy flavors even more!
Step 6: Marrying Pasta and Sauce
With your cheese sauce now transformed into liquid gold, it’s time for our pasta to join the party! Carefully add your al dente medium shell pasta to the pot of cheesy goodness. I love using shells because they cradle that luscious sauce in every nook and cranny—each bite becomes a symphony of flavors! Use a large spatula or wooden spoon to gently fold the pasta into the cheese sauce, making sure every piece gets its fair share of that creamy coating.
This step isn’t just about mixing; it’s about creating harmony between the pasta and sauce. The warmth from the pasta will help everything meld together beautifully as they become one delicious entity on your plate. But here’s where many home cooks might go awry: do not overmix! You want each piece of pasta to be coated but still maintain its shape and texture. Overly vigorous stirring can lead to mushy pasta—a fate we definitely want to avoid! Once everything looks well combined, give it another quick taste test; you might find that a pinch more salt is just what this comforting dish needs.
Step 7: The Resting Period – Why It Matters
Now that you have this gorgeous bowl of mac and cheese, let’s talk about an often-overlooked crucial step—letting it rest for about 5-10 minutes before serving. I know what you’re thinking: “But it’s so tempting right now!” Believe me, I’ve been there too! However, allowing it to sit undisturbed will do wonders for both flavor and texture. During this resting period, the cheese sauce thickens slightly as it cools down just enough for those flavors to deepen and mingle even further.
This resting phase is not merely a suggestion; it’s an essential transformation process! While it cools, those beautiful cheesiness bonds continue developing, creating a richer experience when you finally dig in. Plus, if you’re serving guests (or even just yourself), giving it a little time helps avoid those scalding mouthfuls of hot cheese! Trust me on this—you’ll thank yourself later when you’re able to savor every delectable bite without rushing.
Step 8: Serving Up Comfort
As you prepare to serve up this comforting bowl of joy, consider how best to present it for maximum appeal. A simple sprinkle of freshly cracked black pepper or even a touch of paprika can elevate this dish from mere comfort food to something truly special—a feast for both the eyes and palate! If you’re feeling adventurous, consider garnishing with finely chopped chives or parsley for a burst of freshness that beautifully contrasts with the richness of the cheese.
When plating, don’t rush—take care in portioning out each delightful scoop so everyone can appreciate its creamy texture and cheesy allure. This dish serves around six hearty bowls, perfect for sharing with family or friends during cozy gatherings or even just as an indulgent treat on a quiet evening at home after a long day. As you ladle out generous servings into bowls or plates, take a moment to inhale deeply—the aroma alone will have everyone eagerly anticipating their first bite.
Next Major Phase – Customizing Your Panera Mac and Cheese Recipe
While classic Panera mac and cheese is undeniably delicious in its original form, don’t hesitate to make this recipe your own! You can easily customize it by adding sautéed vegetables like spinach or broccoli for some extra nutrients and color—or even cooked chicken if that’s something you’d enjoy. You might also consider stirring in some crispy breadcrumbs on top before baking for added texture—that crunch against such creaminess is simply divine!
Whatever path you choose in personalizing this dish, remember that cooking is all about expressing yourself through flavors and techniques you’ve learned along your culinary journey. This Panera Mac and Cheese Recipe serves as an excellent foundation for creativity while providing comfort at its core—a truly extraordinary experience awaits every time you whip up this beloved recipe!
Storage and Enjoyment Tips for Your Panera Mac and Cheese Recipe
Now that your kitchen is filled with the mouthwatering aroma of creamy, cheesy goodness, it’s time to dig in and relish every decadent bite of this delightful Panera mac and cheese recipe! However, if you find yourself with leftovers (which I sincerely hope you do because they’re just as fantastic!), there are some wonderful ways to store and enjoy this dish later. Trust me, nothing feels better than knowing you have a comforting bowl of this liquid gold waiting for you after a long day.
Storing Leftover Panera Mac and Cheese Recipe
To keep your luscious leftovers in tip-top shape, transfer your cooled mac and cheese into an airtight container. Make sure to seal it tightly before popping it in the fridge—this will help lock in that delightful creaminess we all adore. Properly stored, your Panera mac and cheese recipe can last up to four days in the refrigerator. Now, here’s a little pro tip: if you want to maintain its velvety texture, place a slice of bread on top of the mac and cheese before sealing the container. This simple trick helps absorb excess moisture, keeping your dish from becoming too dry. When you’re ready to enjoy it again, simply reheat on the stove over low heat or pop it in the microwave until warmed through; add a splash of milk for extra creaminess if needed. I promise you’ll be amazed at how well it holds up!
Freezing Panera Mac and Cheese Recipe for Later
If you’re looking to extend the life of this marvelous dish even further, freezing is an excellent option! To freeze your mac and cheese properly, allow it to cool completely before transferring it into freezer-safe containers or heavy-duty freezer bags—make sure to leave some space for expansion as it freezes. When stored correctly, your delightful creation can stay fresh for up to three months in the freezer. The convenience factor here is absolutely paramount; imagine having a homemade meal ready at a moment’s notice! When you’re craving comfort food but short on time, just thaw overnight in the fridge and reheat on the stove or microwave as described earlier. The flavors meld beautifully during freezing, making each bite feel like a warm hug when you finally indulge.
CATEGORY_NAME

Panera Mac and Cheese
- Total Time: 40 minutes
- Yield: Serves approximately 6 people 1x
Description
Indulge in the creamy delight of our Panera Mac and Cheese Recipe, a heartwarming dish that’s perfect for any gathering or cozy night in. This copycat version brings together the rich sharpness of Vermont cheddar and perfectly cooked pasta nestled in a velvety sauce that envelops your senses. With each spoonful, you’ll experience a nostalgic embrace reminiscent of childhood comfort food. Easy to make and customizable, this dish invites you to explore your culinary creativity—whether by adding vegetables or trying different cheese blends. Gather your loved ones around the table and enjoy moments filled with warmth and laughter over this delightful meal.
Ingredients
- 1 pound dry medium shell pasta
- 6 tablespoons unsalted butter
- ¼ cup all-purpose flour
- 2 cups whole milk
- 1 cup heavy cream
- 1¼ teaspoons kosher salt
- ½ teaspoon dry mustard powder
- Freshly ground black pepper (to taste)
- 4 cups freshly shredded Vermont Cheddar cheese
Instructions
- Boil salted water in a large pot; add pasta and cook until al dente (8–10 minutes). Drain without rinsing.
- In the same pot, melt butter over medium heat. Whisk in flour until golden brown (2–3 minutes).
- Gradually add whole milk and heavy cream while whisking continuously until thickened.
- Stir in salt, mustard powder, and black pepper.
- Remove from heat; fold in cheese until melted and smooth.
- Add cooked pasta to the cheese sauce, gently mixing without over-mixing.
- Let rest for 5–10 minutes before serving.
- Prep Time: 15 minutes
- Cook Time: 25 minutes
- Category: Main
- Method: Stovetop
- Cuisine: American
Nutrition
- Serving Size: 1 cup (240g)
- Calories: 570
- Sugar: 6g
- Sodium: 790mg
- Fat: 33g
- Saturated Fat: 20g
- Unsaturated Fat: 10g
- Trans Fat: 0g
- Carbohydrates: 48g
- Fiber: 2g
- Protein: 22g
- Cholesterol: 90mg


Leave a Comment