There’s something utterly magical about baking, isn’t there? It’s like a dance of flavors, colors, and textures that all come together to create something beautiful and delicious. Today, I’m thrilled to share with you a recipe that is more than just dessert; it’s a celebration of summer, joy, and the vibrant spirit of our cherished holidays. These Red, White, & Blue Cherry Cheesecake Macarons are not only visually stunning with their festive hues but also encapsulate the essence of what makes life sweet: love, laughter, and a little bit of creativity in the kitchen. Imagine taking a bite and being enveloped in the symphony of sweet almond, tangy cream cheese, and juicy cherries—it’s an experience that transcends taste.
I’ve always been captivated by how macarons manage to bring people together. Whether it’s a Fourth of July barbecue or a Memorial Day picnic, these delightful little treats are guaranteed to be the stars of the dessert table. The crunchiness of their outer shell gives way to the soft, luscious filling inside—a texture contrast that is simply heavenly. Plus, they’re so easy to personalize! With their vibrant red and blue hues complemented by a creamy white filling, these macarons are perfect for celebrating freedom and unity. So let’s embark on this culinary journey together; trust me when I say your friends will be begging for the recipe!
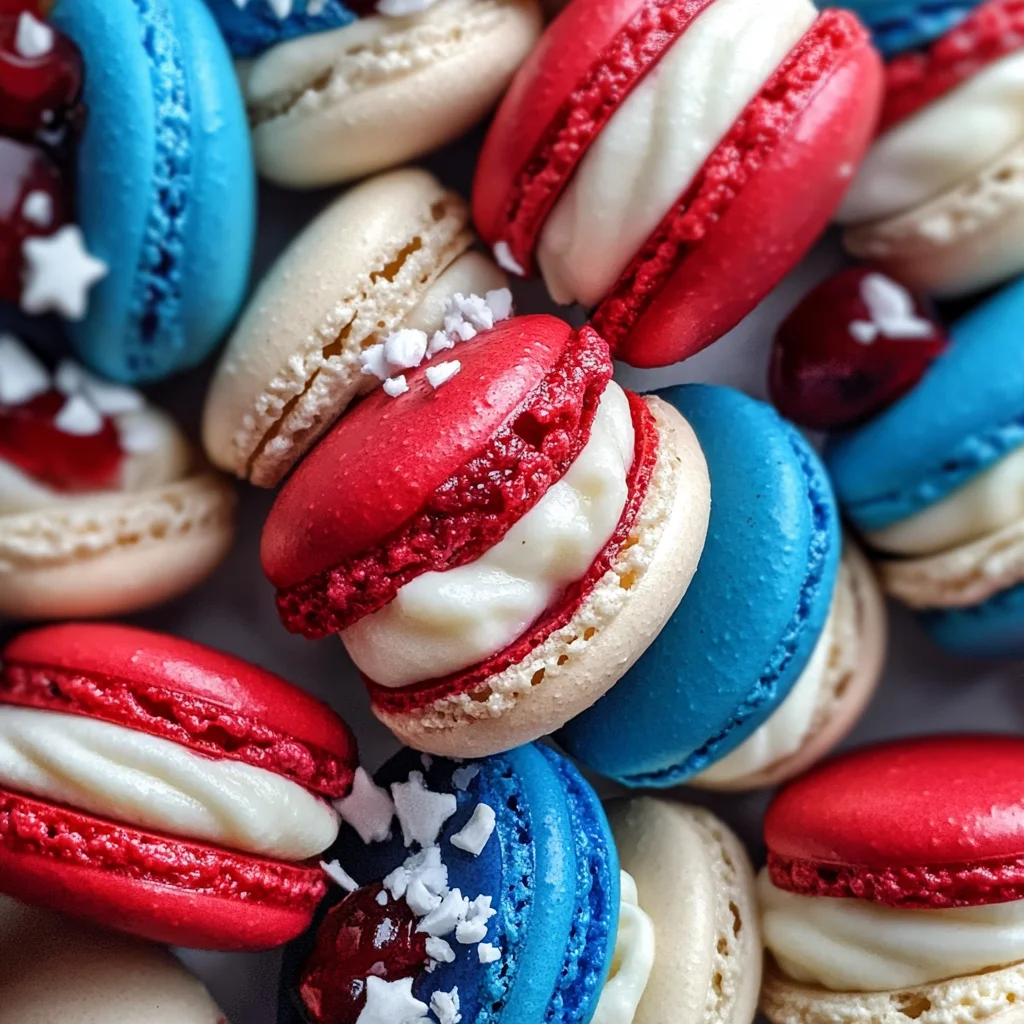
Ingredients:
Before we dive into the fun part—making these gorgeous macarons—let’s gather our ingredients. Each one plays an essential role in creating those perfect shells and that decadent filling you’ll fall head over heels for.
- 120 grams egg whites (from about 4 large eggs). Egg whites are absolutely crucial for achieving that iconic macaron texture—you know, the kind that’s crisp on the outside yet chewy on the inside? Using aged egg whites works wonders here because they whip up better and have less moisture. To ‘age’ them, simply separate your egg whites at least 24 hours in advance and leave them uncovered in the refrigerator. This air exposure helps them stabilize when whipped into peaks!
- 170 grams almond meal (also called almond flour). Almond meal is what gives macaron shells their signature nutty flavor and tender crumb. When selecting almond meal, aim for finely ground options without any large chunks; this ensures smooth shells without graininess. If you ever find yourself without almond meal, feel free to substitute half with ground sunflower seeds for an equally tasty alternative.
- 200 grams powdered sugar. This ingredient not only sweetens your macarons but also helps to create a smooth batter by eliminating any gritty texture from granulated sugar. The powdered sugar dissolves beautifully when mixed with almond flour and egg whites—trust me on this point! If you want to make your own powdered sugar at home, just blend granulated sugar until it becomes fine; it’s super simple!
- 1/8 teaspoon kosher salt. Salt is essential—it amplifies flavors in both sweet and savory dishes alike! Just a pinch will enhance all those delightful notes in your macaron shells while balancing out sweetness.
- 1/4 teaspoon cream of tartar. This ingredient stabilizes our egg whites as they whip into those glorious peaks we need for macarons. Without this magic powder (which is actually an acid), you might find your meringue collapsing before it gets baked!
- 70 grams granulated sugar. We’ll gradually add this during whipping to help build volume in our egg whites while keeping everything stable and glossy—this step is absolutely paramount for achieving those perfect peaks!
- red gel paste food coloring / royal blue gel paste food coloring / violet gel paste food coloring. These colors will bring our patriotic theme alive! I recommend using gel paste rather than liquid food coloring since gels provide vibrant color without adding extra moisture—a common pitfall when making macarons.
- edible star glitter (for garnish). Because what’s a celebration without some sparkle? This edible glitter will top off your macarons beautifully; it catches light just right to make your treats shine like stars!
- 6 ounces cream cheese (softened but cool). Cream cheese lends its rich creaminess to our filling while also providing that classic cheesecake flavor we adore so much! Make sure it’s softened enough to mix well but not too warm; otherwise, you’ll end up with a runny filling instead of that creamy dream.
- 5 tablespoons unsalted butter (softened but cool). Just like cream cheese adds richness, unsalted butter brings a delightful smoothness to our filling as well as enhancing overall flavor without being overly salty.
- 1/2 cup powdered sugar (for the filling). We’ll use powdered sugar again here—it dissolves easily into our creamy mixture for an ultra-smooth texture that melts in your mouth!
- 1 teaspoon lemon juice. A splash of lemon juice brightens up our filling beautifully while cutting through some of that richness from butter and cream cheese—the result is a refreshingly balanced bite!
- 1/2 teaspoon almond extract. Almond extract is non-negotiable in my opinion—it complements both the cookie and filling beautifully while enhancing all those nutty flavors we love in macarons.
- 1/8 teaspoon kosher salt (for the filling). Just like before, salt enhances flavor here too; it’s amazing how such a small amount can elevate your dish dramatically!
- 15 fresh cherries (pitted and halved)—the stars of this show! Fresh cherries add bursts of juicy sweetness along with gorgeous color contrasts against our red-white-blue theme! Look for plump cherries that give slightly when pressed—they should be firm yet tender.
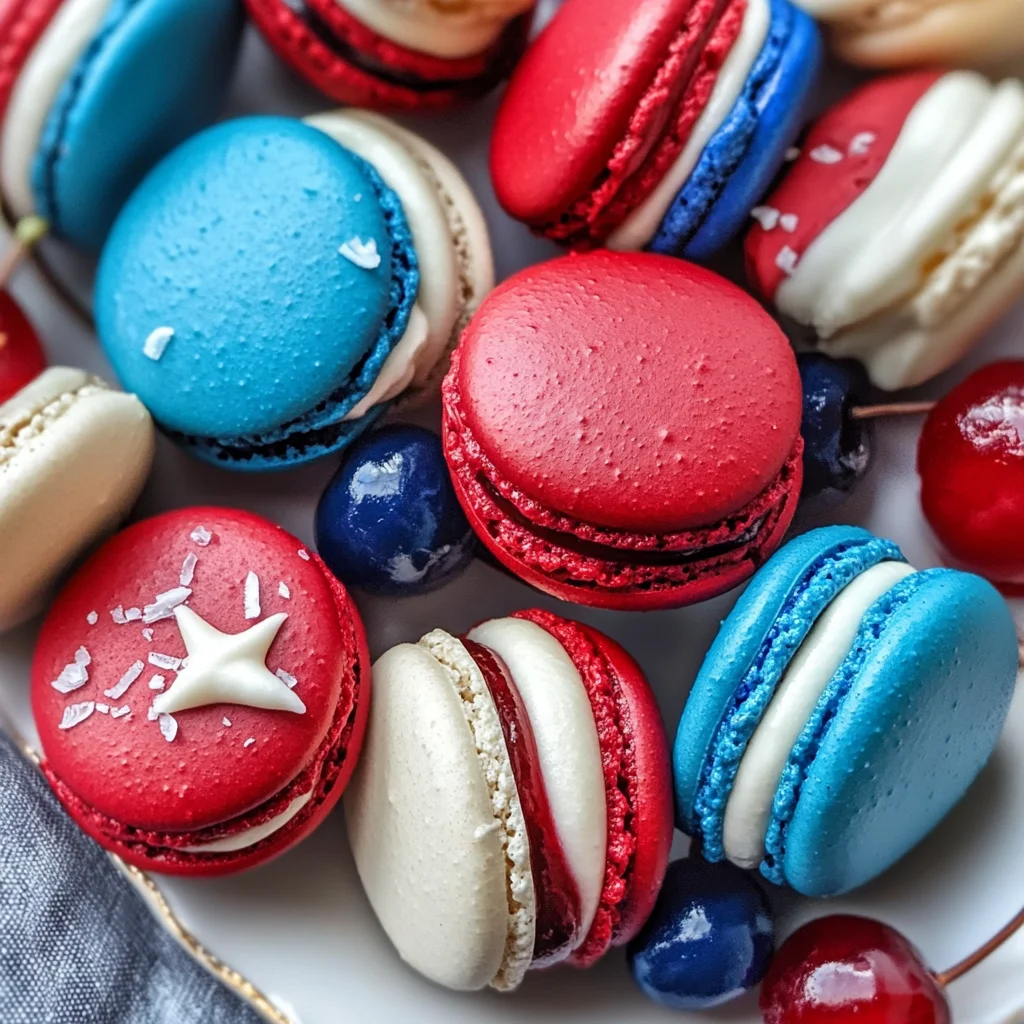
Equipment You’ll Need:
Having the right tools can make all the difference between success and frustration in baking—and when it comes to creating these exquisite Red, White & Blue Cherry Cheesecake Macarons, you’ll want everything just right! Here’s what you’ll need:
- Kitchen scale – Precision is key when measuring ingredients for macarons since even slight variations can affect their structure! A digital kitchen scale will ensure accuracy every time—and trust me when I say it’s worth investing in if you’re serious about baking.
- Mixing bowls – Opt for glass or stainless steel bowls rather than plastic ones since fats can cling onto plastic surfaces which might interfere with whipping egg whites properly.
- Electric mixer (handheld or stand mixer) – A reliable mixer will do all the heavy lifting while whipping those egg whites into fluffy peaks so you don’t have sore arms afterward!
- Sifter or fine-mesh strainer – Essential for ensuring there are no lumps in your dry ingredients—this step leads us straight towards achieving silky smooth batter which results in lovely shiny shells!
- Piping bags with round tip (size 12 or 14) – Piping bags allow us control over where exactly we place each dollop on our baking sheet! A round tip helps create perfectly shaped circles without fussing too much over details.
- Silicone baking mats or parchment paper – Either option works well but silicone mats provide added grip which prevents cookies from sliding around during baking—a definite plus!
Now that we have everything set up nicely let’s get down to business—preparing these delightful Red, White & Blue Cherry Cheesecake Macarons!
Step 1: Whip Up Those Egg Whites
Start by placing your aged egg whites into your mixing bowl—be sure there’s no trace of yolk because even one tiny drop can prevent proper whipping! Begin mixing on medium speed until foamy before gradually adding granulated sugar while raising speed gradually until reaching stiff peaks—that means holding its shape firmly yet still glossy enough without drying out completely! This process takes about 5–7 minutes total depending on mixer strength; watch closely as you approach peak stage once visible trails form upon lifting beaters away—this marks successful achievement!
Step 2: Fold In Dry Ingredients
In another bowl combine sifted almond meal & powdered sugar before gently folding into whipped egg white mixture using rubber spatula—this technique known as “macaronage” requires gentle strokes incorporating dry ingredients slowly until fully integrated—don’t rush this step as overmixing may lead down path towards deflated cookies instead of those sought-after airy delights!
Step 3: Color Your Batter
Once combined seamlessly divide batter evenly into three separate bowls carefully adding respective gel colors stirring until desired shades achieved remember balance between vibrancy versus moisture levels here avoid excess liquid content risking shell integrity later on during baking session ahead!
Step 4: Pipe Those Beautiful Circles!
Prepare piping bag fitted with round tip then fill each color separately before twisting closed allowing steady pressure throughout piping process creating uniform circles roughly two inches apart onto lined sheets take care not touch edges lest they spread beyond intended design aesthetics patience pays off now we’re getting closer showing off stunning creations soon enough…
Stay tuned as we continue crafting these fabulous treats together—I promise it’ll be worth every moment spent dreaming up delightful bites ahead!
Step 5: Whipping to Perfection – Creating the Meringue
Now that we have our dry ingredients ready, it’s time to focus on the egg whites—the heart and soul of our macarons. Start by placing your egg whites in a clean, dry mixing bowl. If you’ve ever made meringue before, you might know that any trace of grease or water can cause the egg whites to flop. So, make sure everything is squeaky clean! Begin whisking them at medium speed until they start to froth and form soft peaks—this usually takes about 2-3 minutes. Then, add in your cream of tartar; this ingredient acts as a stabilizer, helping to keep those lovely peaks intact.
Once you see those soft peaks, it’s time to gradually sprinkle in the granulated sugar while continuing to whisk. This step is crucial because the sugar dissolves into the egg whites, creating that glossy meringue texture we all love. Keep whisking until you reach stiff peaks—this means when you lift the whisk out of the mixture, the peaks stand straight up without drooping. Trust me on this one: under-whisking will lead to macarons that spread out instead of rising beautifully. When you achieve that perfect shine and stiffness, it’s a clear signal that you’re ready for the next stage!
Step 6: The Art of Folding – Combining Dry Ingredients with Meringue
Bring your dry ingredients back into play by sifting them gently into the bowl containing your whipped meringue. Now comes one of my favorite parts—the folding technique! Rather than stirring vigorously (which would deflate all that lovely air we just whipped into those egg whites), use a spatula to cut down through the center of the mixture and then lift it over itself. Rotate your bowl slightly with each fold, embracing a gentle motion as if you’re cradling something precious. This method is vital; we want to combine everything while maintaining aeration for those iconic macaron feet.
As you fold, watch closely for visual cues. The batter should start looking smooth and shiny rather quickly—it may take about 30-50 folds depending on your technique and speed. You’ll know it’s ready when it flows like thick lava off your spatula; this consistency is absolutely paramount for achieving those perfect rounded tops and feet on each macaron shell. Don’t rush this step! If your batter feels too thick or doesn’t flow smoothly when piped, it can lead to uneven baking results later on—so take your time.
Step 7: Coloring Your Macaron Shells – A Patriotic Palette
Here comes the fun part: adding color! Divide your macaron batter into three separate bowls—one for red, one for blue, and one for white (which will remain uncolored). Using gel paste food coloring is key here because it provides vibrant hues without adding extra liquid that could affect our delicate batter’s balance. For red, add about three small drops; for blue and violet, start with two drops each since these colors can be quite potent! Use a clean spatula or toothpick to mix in each color thoroughly while being careful not to overwork the batter; remember, we want those lovely folds intact!
Once mixed in, take a moment to appreciate how beautifully festive these colors are! It fills me with joy just thinking about how stunning they’ll look once baked together as Red, White & Blue Cherry Cheesecake Macarons! After coloring each portion separately, transfer each colored batter into piping bags fitted with round tips—this will help create those perfectly shaped shells when we pipe them onto our baking sheets.
Step 8: Piping Perfection – Forming Your Macaron Shells
Now that you’ve got everything prepped and ready to go, it’s time to shape our little beauties! Line two baking sheets with parchment paper or silicone mats—these surfaces are essential because they provide just enough grip for our macarons while allowing easy release once they’re baked. Holding your piping bag vertically above the parchment paper at a 90-degree angle (think of an artist wielding their brush), start piping small circles about an inch wide. You can create a pattern or just randomly alternate colors for a charmingly rustic feel—whatever makes your heart sing!
After piping all your shells onto the sheets (aim for about 15 per sheet), give them a gentle tap against your counter; this action releases any trapped air bubbles that could disrupt their smooth surface during baking. Now here’s where patience really pays off: let your piped macaron shells sit at room temperature for 30-60 minutes until they form a crust on top—a process called “skin formation.” This step is non-negotiable because it prevents cracking during baking and helps develop those desired feet that are so characteristic of macarons.
And there you have it—the complete journey from humble ingredients transformed into stunning Red, White & Blue Cherry Cheesecake Macarons ready for sharing joyfully among friends and family alike at any gathering worth celebrating! Each bite delivers sweet nostalgia paired with bright bursts from cherries elevating every moment spent indulging together around dessert tables filled memories waiting be made anew!
Storage and Enjoyment Tips for Your Red, White, & Blue Cherry Cheesecake Macarons
Congratulations! You’ve successfully crafted these stunning Red, White, & Blue Cherry Cheesecake Macarons, and now it’s time to dive into the delightful world of enjoying them. But before you indulge completely, let’s talk about how to preserve those vibrant treats so they remain just as scrumptious for days to come. Trust me when I say that these beauties deserve a little TLC in storage to maintain their irresistible charm and flavor!
Storing Leftover Red, White, & Blue Cherry Cheesecake Macarons
To keep your macarons in tip-top shape after all that hard work, store them in an airtight container. This could be a lovely glass jar or a sturdy plastic container—whatever suits your kitchen aesthetic! Place them in the fridge where they’ll stay fresh for about 3 to 5 days. Now here’s a pro tip: if you want to retain that delightful texture that makes macarons so special, consider adding a slice of white bread to the container. This little trick helps keep moisture levels just right! After storage, you might notice that the flavors have melded beautifully together, creating an even more profound taste experience. When you’re ready to serve them again, simply let them sit at room temperature for about 20 minutes before indulging—this is crucial for bringing back that fresh texture and allowing all those delectable flavors to shine through!
Freezing Macaron Components for Later
If you find yourself with extra macarons or simply want to plan ahead for future celebrations (and who wouldn’t want a stash of these delightful treats?), freezing is an excellent option! To freeze your macarons properly, lay them out on a baking sheet lined with parchment paper and place them in the freezer until they’re solid. Once frozen, transfer them to an airtight container or a zip-top bag, separating layers with parchment paper. They’ll stay good for up to three months in the freezer without losing their incredible flavor! When you’re ready to use them, just pull out as many as you need and let them thaw in the fridge overnight or at room temperature for about half an hour. This convenience factor means you can always have something special on hand for unexpected guests or spontaneous cravings.

Red, White, & Blue Cherry Cheesecake Macarons
- Total Time: 57 minutes
- Yield: Approximately 15 macarons 1x
Description
Indulge in the delightful flavors of summer with these stunning Red, White, & Blue Cherry Cheesecake Macarons. Perfect for celebrations, these vibrant French treats combine a crisp almond shell with a rich cream cheese filling and juicy cherry pieces. Each bite delivers a symphony of tastes that encapsulates joy and creativity in the kitchen. Not only are they visually appealing, but these macarons are also a guaranteed crowd-pleaser at barbecues, picnics, or any festive gathering. Get ready to impress your friends and family with this elegant dessert that celebrates the essence of summer!
Ingredients
- 120 grams egg whites (from about 4 large eggs)
- 170 grams almond meal
- 200 grams powdered sugar
- 1/8 teaspoon kosher salt
- 1/4 teaspoon cream of tartar
- 70 grams granulated sugar
- red gel paste food coloring
- royal blue gel paste food coloring
- 6 ounces cream cheese (softened but cool)
- 5 tablespoons unsalted butter (softened but cool)
- 1/2 cup powdered sugar (for the filling)
- 1 teaspoon lemon juice
- 1/2 teaspoon almond extract
- 15 fresh cherries (pitted and halved)
Instructions
- Preheat oven to 300°F (150°C) and line baking sheets with parchment paper.
- In a mixing bowl, whip aged egg whites until foamy; gradually add granulated sugar while whisking until stiff peaks form.
- Sift almond meal and powdered sugar into the meringue; gently fold to combine.
- Divide batter into three bowls, adding gel colors to two portions.
- Pipe small circles onto prepared sheets; let them rest for 30–60 minutes until they form a skin.
- Bake for 10–12 minutes until firm; cool completely on trays.
- For the filling, beat cream cheese and butter until creamy; mix in powdered sugar, lemon juice, and almond extract.
- Assemble macarons by filling half with cream mixture and topping with another shell.
- Prep Time: 45 minutes
- Cook Time: 12 minutes
- Category: Dessert
- Method: Baking
- Cuisine: French
Nutrition
- Serving Size: 1 macaron (20g)
- Calories: 90
- Sugar: 8g
- Sodium: 50mg
- Fat: 4g
- Saturated Fat: 2g
- Unsaturated Fat: 2g
- Trans Fat: 0g
- Carbohydrates: 12g
- Fiber: <1g
- Protein: 2g
- Cholesterol: 10mg
Leave a Comment