There’s something profoundly satisfying about creating a dish that’s not only vibrant and full of life but also deeply nourishing. This Viral Jennifer Aniston Salad is a beautiful reflection of that experience, combining an array of textures and flavors that dance together in perfect harmony. Imagine biting into fluffy quinoa that has soaked up all the sunshine from fresh herbs, crunchy cucumbers, and zesty lemon dressing. This isn’t just a salad; it’s a celebration of wholesome ingredients that come together to form a delightful meal or snack that’s as good for your soul as it is for your body.
What I love most about this recipe is how it transcends the ordinary. It’s not just about tossing ingredients into a bowl; it’s about crafting a dish that feels like a warm hug—comforting yet invigorating. The combination of chickpeas, creamy feta, and the nutty crunch of pistachios creates an utterly intoxicating experience that leaves you craving more. This is the kind of salad that sparks joy at lunch or elevates dinner with friends. Trust me on this: once you make it, you’ll find yourself coming back time and again, perhaps even sharing it with those you cherish most.
Viral Jennifer Aniston Salad: A Wholesome Delight
Let’s dive into this unforgettable recipe! As we embark on this culinary journey together, I want you to feel empowered and excited to create something truly special right in your kitchen. The fresh ingredients are not just components—they’re the stars of our show! Each one plays a crucial role in building layers of flavor and texture that will tantalize your taste buds.
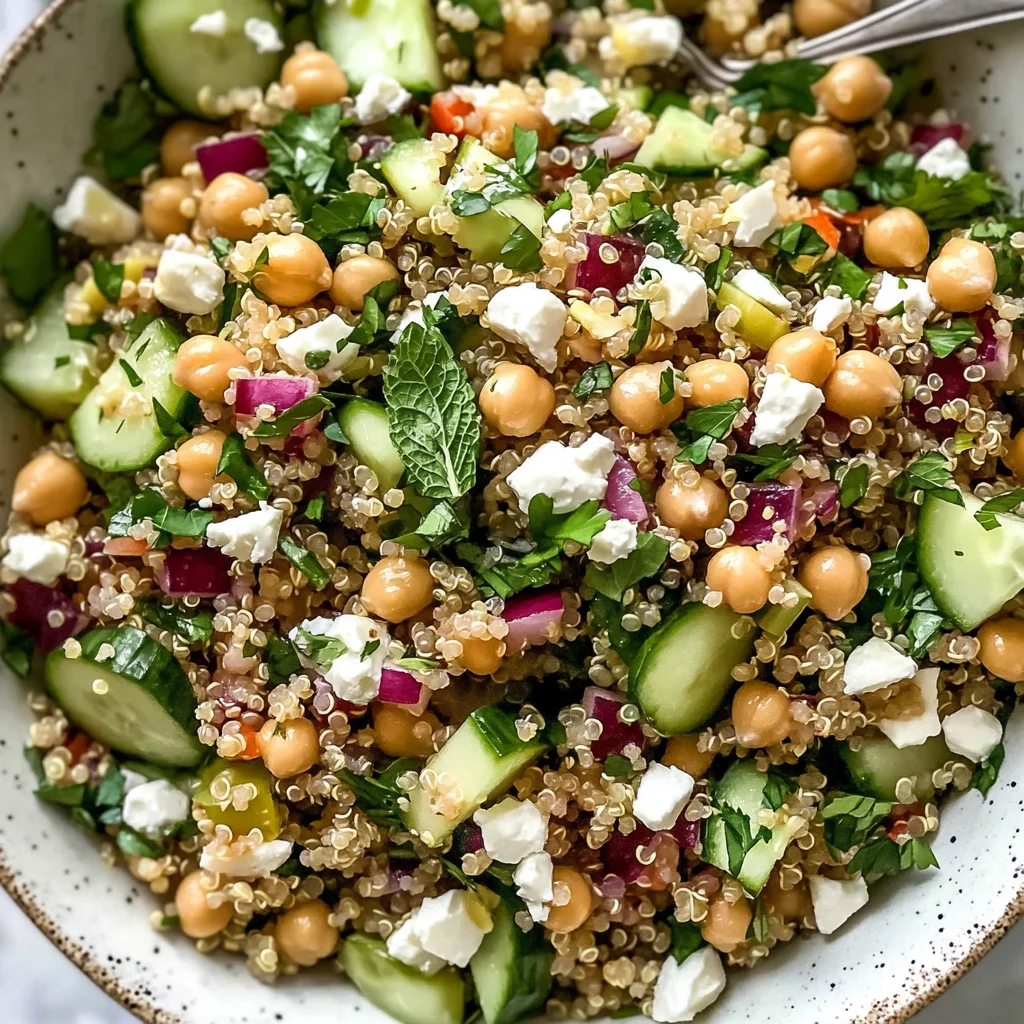
Ingredients:
Starting off with our star ingredient, let’s gather what we need for this wonderful salad—a medley of wholesome components that will come together beautifully.
-
2 cups cooked quinoa. Quinoa isn’t just any grain; it’s actually a seed packed with protein and fiber, making it a fantastic base for our salad. Its nutty flavor and slightly chewy texture provide an excellent contrast to the other crunchy elements we’ll include later. When cooking quinoa, be sure to rinse it thoroughly before boiling—this removes any bitterness from its natural coating called saponin. You want each grain to be fluffy and soft, so keep an eye on it as it cooks; ideally, you want it tender but still holding its shape.
-
1 (15 ounce) can chickpeas – drained and rinsed. Chickpeas add not only protein but also a lovely creaminess that enriches the overall texture of the salad. They soak up flavors beautifully while providing a satisfying bite. When choosing canned chickpeas, look for those labeled “no salt added” if you’re watching your sodium intake—you can always season them later! Rinsing them helps reduce excess sodium and gives them a fresher taste.
-
1 cup chopped cucumber – I used an English cucumber. Cucumbers are like little bursts of freshness in every bite! The English variety has fewer seeds and thicker skin, making it perfect for salads since they add crunch without overwhelming the other flavors. Slice them thinly or dice them into small pieces to ensure each forkful brings that refreshing crispness we crave on warm days.
-
1/2 cup diced red onion. The vibrant color and sharp flavor of red onion bring depth to this salad while balancing out the sweetness from our raisins later on. If you’re sensitive to raw onions’ intensity, consider soaking them in cold water for about ten minutes before adding them to help mellow their flavor while keeping all their delightful crunch intact.
-
1/2 cup pistachios. These little green gems are not only visually appealing but also offer a rich nuttiness that complements the salad perfectly. Toasting them lightly can elevate their flavor even more—just watch carefully so they don’t burn! If you’re feeling adventurous or have nut allergies in the mix, sunflower seeds could serve as an exciting alternative while still giving you that satisfying crunch.
-
1/2 cup crumbled feta cheese. Ahh, feta—the creamy element that ties everything together! It adds tanginess which contrasts beautifully with sweetness from the raisins and honey in our dressing later on. When selecting feta, opt for high-quality varieties packed in brine rather than crumbled versions; you’ll find they have much better flavor and texture!
-
1/2 cup golden raisins. These sweet morsels add bursts of fruity goodness throughout our dish—a delightful contrast against all those savory elements we’ve gathered so far! Their chewy texture balances nicely with crunchy cucumbers and nuts alike; if you’re not keen on raisins or prefer tartness instead, try swapping them out with dried cranberries or cherries!
-
1/4 cup sliced kalamata olives. These olives bring an essential briny note to our salad—trust me when I say they’re non-negotiable here! Their bold flavor enhances all other ingredients while contributing healthy fats too; if kalamata olives aren’t available where you are or perhaps aren’t your favorite type? Feel free to use green olives instead!
-
1/4 cup chopped parsley — Fresh herbs really elevate dishes like this one! Parsley offers brightness alongside additional nutrients plus beautiful pops of color throughout every serving—we want people diving into our creation because they can’t resist how gorgeous it looks!
-
1/4 cup chopped mint — Mint adds an invigorating touch that makes each bite feel refreshing—it’s like summer captured in leaf form! When adding herbs like mint (or parsley), be sure they’re finely chopped to release their essential oils fully!
-
3 tablespoons fresh chopped dill — Dill’s unique flavor profile pairs wonderfully with feta cheese—it’s truly magic when combined! Use fresh dill whenever possible as dried versions lack vibrancy compared to their fresh counterparts—your guests will definitely taste the difference!
-
1/4 cup extra virgin olive oil — Olive oil acts as liquid gold here—not only does its richness enhance flavors throughout but also provides healthy fats vital for nutrient absorption within salads like ours! Always aim for quality extra virgin olive oils labeled first cold press—you’ll appreciate its deep flavor even more!
-
1/4 cup fresh lemon juice — Freshly squeezed lemon juice brings acidity without being overpowering—it brightens up every ingredient while tying everything together harmoniously! Bottled versions often contain preservatives which detract from overall taste—don’t skip this step!
-
1 tablespoon honey or maple syrup — A touch of sweetness rounds out the dressing beautifully by balancing out tanginess from both feta cheese plus acidity from lemons—we want harmony here! Depending upon personal preference or dietary needs (vegan option!), feel free switching between honey/maple syrup without compromising final results whatsoever!
-
1/2 teaspoon kosher salt — Salt is absolutely paramount when seasoning anything—even salads benefit from proper salting techniques ensuring flavors pop rather than fade away unnoticed so don’t skimp on this step please!
-
1/4 teaspoon ground black pepper — Pepper adds warmth plus complexity enhancing overall profiles beyond what would otherwise exist alone without its presence—freshly cracked black pepper yields best results versus pre-ground options found at stores typically lacking potency required achieving true greatness here!
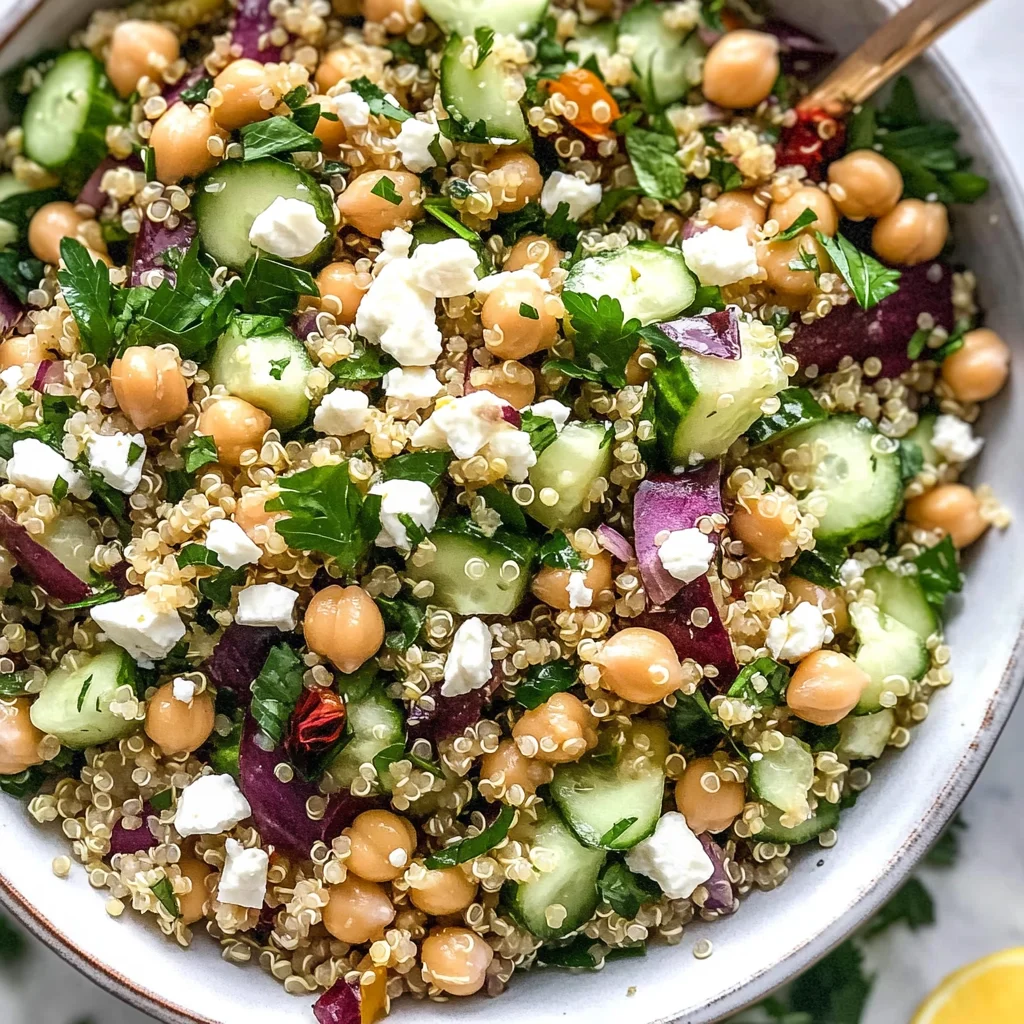
Equipment You’ll Need:
Before we start mixing everything together into blissful harmony, let’s take a moment to gather some essential tools that’ll make our cooking experience smoother than ever! While these may not be ingredients, having the right equipment ensures everything flows seamlessly as we create culinary magic.
-
Large salad bowl, perfect for mixing all those beautiful colors without worrying about spills—trust me when I say nothing beats seeing vibrant hues come alive before your eyes!
-
Mason jar or medium mixing bowl, ideal for shaking up dressings effortlessly—the lid ensures no mess while emulsifying ingredients perfectly creating luscious liquid gold ready-to-pour over salads later.
-
Sharp chef’s knife, crucial when chopping veggies/herbs precisely allowing us maximum control over cuts yielding consistency across dishes—an essential tool any home cook should invest time learning how wield effectively!
Step 1: Gather Your Ingredients
First things first: let’s set ourselves up for success by gathering all those brilliant ingredients we’ve discussed earlier! By having everything at hand before diving into actual preparation makes life infinitely easier down road allowing creativity flow unhindered whilst minimizing potential mishaps during assembly stage; trust me—it’ll save time too since there won’t be running back-and-forth searching pantry/refrigerator mid-recipe frustration involved!
Step 2: Prepare Your Quinoa
If you haven’t already cooked your quinoa ahead-of-time (which I highly recommend doing!), start by rinsing two cups under cold water until clear then boil according package instructions ensuring fluffy grains result after cooking completes—that means no stickiness allowed here folks please remember patience pays off whenever working with grains like these so don’t rush through process okay? Once ready let cool before proceeding further adding cooled nuggets directly onto large bowl mixing station prepping next components alongside once done cooling completely!
Step 3: Chop Your Veggies
Now comes one of my favorite parts—chopping veggies! Grab your sharp chef’s knife along with cutting board then slice cucumbers into fine pieces plus dice red onion ensuring precision throughout each cut achieved perfectly blending textures harmoniously within resulting salad mixture ultimately elevating overall experience enjoyed later by everyone lucky enough partake alongside us today during meal times ahead—I promise they’ll thank YOU personally afterwards after tasting delights created today themselves too!!
Step 4: Mix Everything Together
This is where all magic happens folks prepare yourselves because we’re about create something truly extraordinary here now finally combine those prepared veggies alongside previously cooked quinoa inside large bowl stirring gently incorporating everything evenly distributed throughout ensuring harmonious balance achieved amongst flavors present enhanced further once dressing poured atop shortly thereafter making sure no single ingredient overshadowed others found within mixture supports unity desired achieved through care taken during previous steps taken leading up momentous occasion unfolding right before eyes!!
Stay tuned as we continue assembling our delectable Viral Jennifer Aniston Salad—a dance between colors, textures, tastes culminating into joyful bites awaiting eager mouths ready devour soon enough!!
Time to Assemble Your Viral Jennifer Aniston Salad
Step 5: Tossing the Ingredients Together
Now that you’ve prepared all the beautiful, colorful ingredients, it’s time to bring them together into a harmonious symphony of flavors! First, take that large salad bowl filled with your vibrant quinoa, chickpeas, crunchy cucumber, diced red onion, and those utterly delightful golden raisins. Each ingredient is not just there for its flavor but also for its texture. The creamy feta cheese adds a rich tanginess that perfectly balances the freshness of the herbs and the crunchiness of the pistachios. As you add each component into the bowl, take a moment to appreciate how visually stunning it all looks—like a kaleidoscope waiting to be enjoyed!
Gently toss these ingredients using a spatula or large spoon, but don’t go overboard here; you want everything mixed without turning it into a mushy mess. The goal is for each bite to contain a little bit of everything—a piece of cucumber here, some chickpea there, and just enough feta to make your taste buds dance! This step is crucial because it ensures that every ingredient gets coated in the dressing later on, maximizing flavor in every bite. As you mix, you’ll notice how vibrant and inviting your salad looks—it’s almost as if it’s calling out to you!
Step 6: Emulsifying the Dressing
Now for one of my favorite parts—the dressing! In a mason jar (or a medium bowl if you’re feeling fancy), combine the extra virgin olive oil, fresh lemon juice, honey or maple syrup, kosher salt, and ground black pepper. I promise you this dressing will be like liquid gold drizzled over your salad. The acidity from the lemon juice brightens every flavor while cutting through the richness of the feta and olive oil. And let’s not forget about that hint of sweetness from honey or maple syrup; it ties everything together beautifully.
If you’re using a mason jar, seal it tightly and shake vigorously until all ingredients are combined and emulsified—this means they’re blended into one cohesive mixture instead of separating into layers. If you prefer whisking in a bowl, use a whisk to incorporate air into the dressing; this not only mixes but also creates a light texture that clings perfectly to each ingredient in your salad. This step is absolutely paramount because an evenly distributed dressing enhances the overall experience—you want every forkful bursting with flavor rather than some bites being bland. So don’t rush this step; take your time and enjoy watching the ingredients meld together!
Step 7: Dressing Your Salad
Once your dressing is ready to rock and roll, it’s time to pour it evenly over your kaleidoscopic salad masterpiece! I recommend doing this gradually; pour half of the dressing first and gently toss everything together before adding more if needed. The visual cue here is simple: you want just enough dressing so that everything glistens without being drenched—no one likes soggy salad! As you toss again delicately but thoroughly, feel free to taste-test along the way; adjusting seasoning with additional salt or lemon juice can elevate your dish even further.
This step allows all those incredible flavors—the nuttiness from pistachios, creaminess from feta cheese, freshness from herbs—to mingle beautifully. Don’t forget those little bits of texture you’ve worked so hard to incorporate; each bite should feel like an adventure! If you’re serving immediately (which is totally tempting), you’ll get that fresh crunch from cucumbers right away. However—trust me on this—if you can resist diving in right now and allow your salad to chill in the fridge for about 30 minutes before serving instead, you’ll be rewarded with even more profound flavors as they continue to develop.
Step 8: Chilling for Flavor Development
Ahh—the patience required here is truly worth it! If you can manage to let this delightful creation chill in your fridge for about 30 minutes (or even up to an hour), I assure you won’t regret it. Why chill? Well, during this resting period, all those incredible flavors have time to mingle and deepen their connection with one another—the crunchy cucumbers absorb some tangy goodness from the dressing while allowing their crispness to shine through. You’ll notice how much more flavorful everything becomes after chilling; it’s as if they’ve been having their own little party in there!
As you’re waiting impatiently (I get it!), think about what you’re going to pair with this fabulous salad or how you’ll serve it at your next gathering—it makes for an excellent side dish or even as a satisfying main course alongside some grilled veggies or pita bread! Just remember: when you’re ready to serve this beauty up, give it another gentle toss just before plating so that any settling can be remedied—and you’ll have an absolutely stunning dish ready for sharing (or devouring solo)!
And there we have it—the complete journey through creating your very own Viral Jennifer Aniston Salad! I hope you find joy in every step as much as I do whenever I whip up this gem in my kitchen. Remember: good food brings people together; cherish these moments around the table with loved ones and celebrate life’s beautiful flavors!
Storage and Enjoyment Tips for Your Viral Jennifer Aniston Salad
Now that you’ve crafted this stunning bowl of vibrant flavors, it’s time to dig in and enjoy every delightful bite! This Viral Jennifer Aniston Salad is not only a feast for the senses with its medley of textures and tastes, but it’s also incredibly versatile and convenient, making it perfect for meal prep or a quick lunch on busy days. If you find yourself with leftovers, don’t worry! I have some helpful tips to ensure your salad remains just as tantalizing tomorrow as it is today.
Storing Leftover Viral Jennifer Aniston Salad
To keep your salad fresh and delicious, I recommend transferring any leftovers into an airtight container. Glass containers are fantastic because they prevent any residual odors from seeping in, ensuring that the bright flavors of lemon and fresh herbs remain intact. You can store your lovely salad in the refrigerator for up to three days; however, after day two, the cucumbers may begin to lose their crispness. To maintain that satisfying crunch, consider placing a paper towel inside the container to absorb excess moisture—trust me on this trick! The flavors will continue to meld together beautifully as it sits, creating an even more harmonious blend of tastes. When you’re ready to serve it again, simply toss it gently with a squeeze of fresh lemon juice or a drizzle of olive oil to refresh it—this little touch makes all the difference!
Freezing Quinoa for Later
If you’re looking at ways to extend the life of your ingredients, freezing cooked quinoa is an excellent option. Just let it cool completely before transferring it into freezer-safe bags or containers. Squeeze out as much air as possible before sealing them tight; this prevents freezer burn and keeps your quinoa tasting fresh. Frozen quinoa can last up to three months in the freezer! When you’re ready to use it, simply thaw it overnight in the fridge or warm it up in the microwave straight from frozen until heated through. This method not only saves you time but also allows you to whip up a quick meal whenever you crave that delightful combination of flavors! Imagine pulling out those perfectly portioned bags when you’re short on time but still want something wholesome—it’s pure convenience that makes my heart sing!
Salad
Viral Jennifer Aniston Salad
- Total Time: 35 minutes
- Yield: Serves approximately 4 people 1x
Description
Indulge in the vibrant flavors and textures of the Viral Jennifer Aniston Salad, a wholesome dish that marries nutritious ingredients with delightful tastes. This refreshing salad features fluffy quinoa as its base, complemented by creamy chickpeas, crunchy cucumbers, and a medley of fresh herbs. Tossed in a zesty lemon dressing, every bite is a celebration of health and flavor. Perfect for lunch, dinner, or meal prep, this salad is not only visually stunning but also deeply satisfying. Enjoy it solo or as a side dish that will impress friends and family alike!
Ingredients
- 2 cups cooked quinoa
- 1 can (15 ounces) chickpeas, drained and rinsed
- 1 cup chopped cucumber
- 1/2 cup diced red onion
- 1/2 cup pistachios
- 1/2 cup crumbled feta cheese
- 1/2 cup golden raisins
- 1/4 cup sliced kalamata olives
- 1/4 cup chopped parsley
- 1/4 cup chopped mint
- 3 tablespoons fresh chopped dill
- 1/4 cup extra virgin olive oil
- 1/4 cup fresh lemon juice
- 1 tablespoon honey or maple syrup
- 1/2 teaspoon kosher salt
- 1/4 teaspoon ground black pepper
Instructions
- Rinse quinoa under cold water; cook according to package instructions until fluffy. Let cool.
- Chop cucumber and red onion; set aside.
- In a large bowl, combine cooled quinoa, chickpeas, cucumbers, red onion, pistachios, feta cheese, raisins, olives, parsley, mint, and dill.
- In a separate jar or bowl, mix olive oil, lemon juice, honey/maple syrup, salt, and pepper; shake or whisk until emulsified.
- Drizzle dressing over the salad; toss gently to combine.
- Chill for at least 30 minutes before serving for enhanced flavor.
- Prep Time: 20 minutes
- Cook Time: 15 minutes
- Category: Salad
- Method: Mixing
- Cuisine: Mediterranean
Nutrition
- Serving Size: 1 cup (240g)
- Calories: 320
- Sugar: 8g
- Sodium: 220mg
- Fat: 18g
- Saturated Fat: 3g
- Unsaturated Fat: 15g
- Trans Fat: 0g
- Carbohydrates: 34g
- Fiber: 8g
- Protein: 10g
- Cholesterol: 10mg
Leave a Comment