There’s something truly magical about baking, isn’t there? It’s more than just mixing flour and sugar; it’s like weaving a tapestry of flavors and memories that come together to create something profoundly satisfying. When I think about my childhood, I remember the smell of fresh brownies wafting through the kitchen, a warm hug on a chilly day. Now, imagine those rich, fudgy brownies transformed into cookies, bursting with color and joy. Enter the Red, White & Blue Brownie Cookies, a delightful treat that not only tantalizes your taste buds but also brings a sense of celebration with every bite. These cookies are an ode to nostalgia, embodying the essence of summer gatherings and festive occasions.
As you embark on this culinary adventure with me, I can’t help but feel excitement bubbling inside. Each ingredient is carefully chosen to build layers of flavor and texture that not only look stunning but also deliver a symphony of chocolatey goodness. The vibrant colors from M&M’s add an element of whimsy, making these cookies perfect for holidays or simply when you want to brighten someone’s day. Trust me, whether you’re enjoying them at a picnic or sharing them with friends during a cozy movie night, these cookies are sure to steal the show. So let’s dive in together and create something extraordinary!
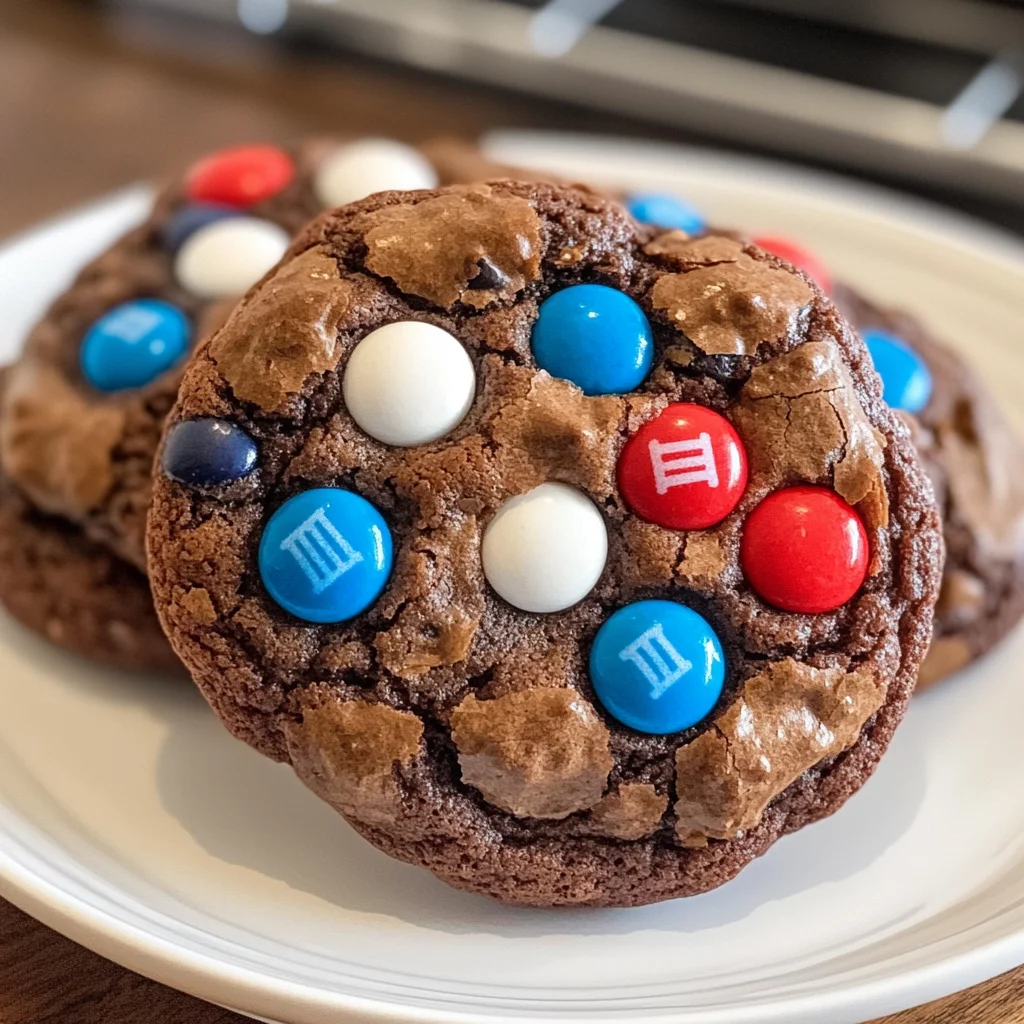
Ingredients:
Before we get our hands dirty, let’s gather all the ingredients we’ll need for these delightful Red, White & Blue Brownie Cookies. Each component plays a pivotal role in crafting these chewy bites of joy, so let’s explore what makes each one special.
- 18.9 ounces brownie mix (18.9 oz). This is the heart and soul of our cookies! Using a pre-made brownie mix not only saves time but ensures that you’re getting that rich chocolate flavor with minimal effort. Look for a high-quality mix without artificial ingredients for the best results; it should have real cocoa, which adds depth to our sweet treats. Remember, this mix serves as our foundation—it’s packed with sugar and cocoa that will create that fudgy texture we adore.
- 2 large eggs. Eggs act as binding agents in our cookie dough while adding moisture and richness. They contribute essential proteins that help structure the cookies as they bake—ensuring they hold their shape while remaining soft and chewy inside. Always use fresh eggs; you can tell if they’re good by placing them in water—if they sink, you’re good to go!
- ¼ cup butter (melted). Butter is like liquid gold when it comes to baking; it adds flavor and helps achieve that tender crumb we crave in cookies. By melting it beforehand, we allow it to blend seamlessly into the batter, creating an even consistency throughout. If you’re looking for alternatives due to dietary preferences or restrictions, coconut oil can make for an excellent substitute while still providing moisture.
- ¼ cup all-purpose flour. This small amount may seem trivial compared to the brownie mix, but it plays a crucial role in balancing out the moisture content and giving our cookies structure without making them dry or tough. It’s important to measure your flour correctly—too much can lead to dense cookies instead of delightful chewy ones.
- 1 cup M&M’s. These colorful candies add pops of sweetness and crunch—plus they make our cookies visually appealing! You can choose classic milk chocolate M&M’s or even go for dark chocolate if you prefer something richer; just ensure they’re vibrant enough to stand out against the deep brown cookie base.
- ½ cup chocolate chips. Because one type of chocolate is never enough! Chocolate chips melt into gooey pockets throughout the cookie that provide an irresistible contrast to the chewy texture of the brownie base. Feel free to experiment with different types like semi-sweet or even white chocolate for an exciting twist.
- 1 Tbsp water. This may seem like an odd addition at first glance, but this tablespoon helps bring everything together into a cohesive dough without making it overly sticky or wet—a little trick I’ve learned through years of baking! It ensures your cookie dough has just enough hydration for perfect spreading while keeping those lovely cracks on top.
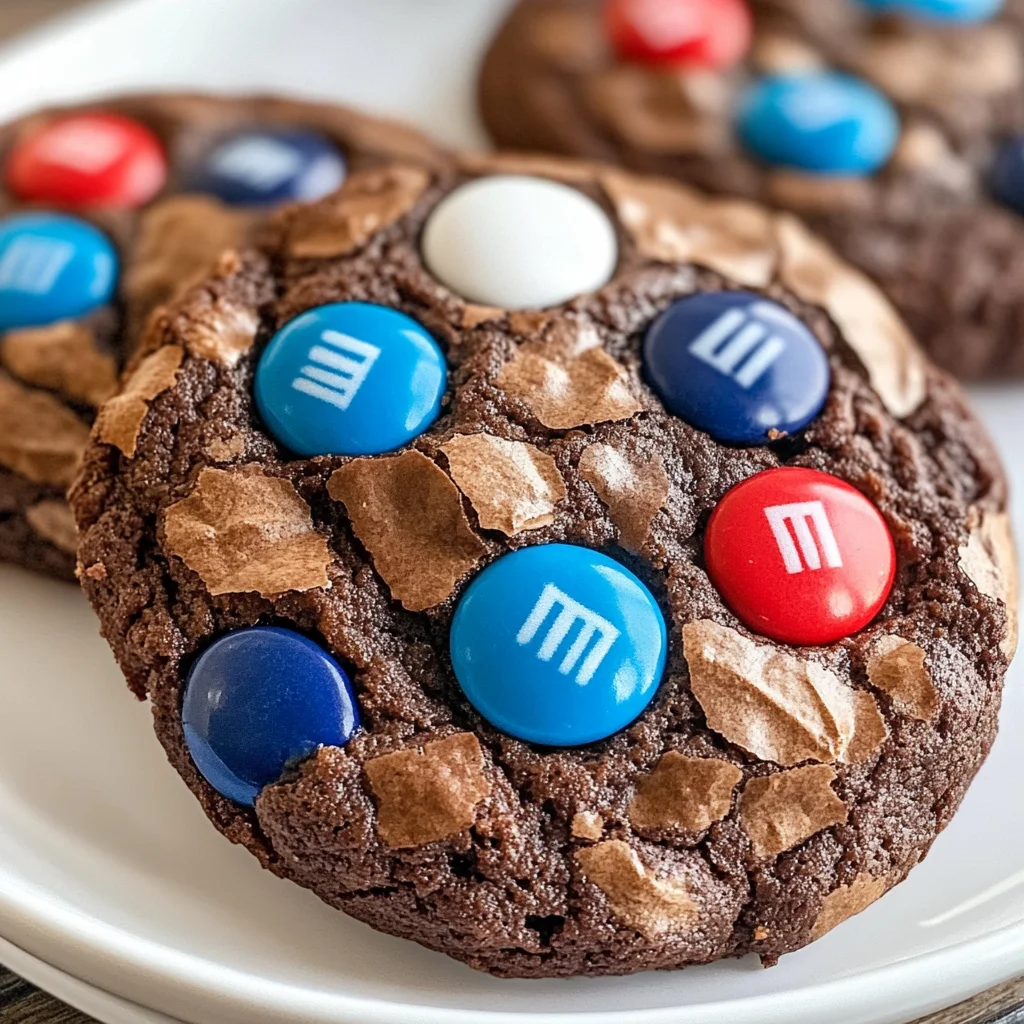
Equipment You’ll Need:
Before we start mixing up magic in our kitchen, let’s talk about the essential tools you’ll need to make this process smooth and enjoyable. While ingredients are vital in crafting these Red, White & Blue Brownie Cookies, having the right equipment will make all the difference in achieving success.
- Mixing bowl – A sturdy mixing bowl is your best friend here! Choose one that’s large enough to comfortably combine all your ingredients without any risk of spilling over as you stir vigorously. Glass or stainless steel bowls are great options because they won’t retain odors or stains.
- Rubber spatula – This versatile tool is perfect for scraping down sides of your bowl as well as folding in those delicious chocolate chips and M&M’s without damaging their delicate shapes. Plus, using a rubber spatula ensures you get every last bit of dough out—waste not want not!
- Baking sheet lined with parchment paper – Using parchment paper prevents sticking and allows for easy cleanup—a non-negotiable step if you want perfectly baked cookies without any fuss! It also helps distribute heat evenly during baking so your cookies cook uniformly.
- Cookie scoop or tablespoon – To achieve uniformity in size among your cookies (which means evenly baked treats!), consider using a cookie scoop or measuring tablespoon when portioning out your dough balls before baking.
Now that we’ve gathered our ingredients and equipment together let’s take this next step towards cookie perfection!
Preparing the Red, White & Blue Brownie Cookies
Step 1: Preheat Your Oven
First things first—let’s set ourselves up for success by preheating our oven to 375°F (190°C). Preheating is crucial because it allows your cookies to bake evenly from the get-go rather than starting at room temperature where they might spread too much before setting up properly. While that’s happening, line your baking sheet with parchment paper—it creates a non-stick surface so those glorious creations won’t cling stubbornly when it’s time to enjoy them fresh out of the oven!
Step 2: Combine Brownie Mix & Flour
In your large mixing bowl—the one we lovingly selected earlier—combine that rich brownie mix along with ¼ cup flour until well blended together; this union creates a sturdy yet tender base for our cookie dough! Mixing dry ingredients thoroughly helps distribute their flavors evenly throughout every batch; trust me when I say this simple step will elevate your baking game dramatically!
Step 3: Add Wet Ingredients
Now comes another exciting part: introducing those wet ingredients into our dry mixture! Crack in two eggs along with 1 tablespoon water followed by pouring in melted butter—oh my goodness don’t forget how heavenly this smells already! Mix everything together until fully incorporated; expect thick batter that’s almost like fudge because we’re going for richness here—not thin runny dough! Remember not to rush this step; taking time ensures each element melds beautifully together resulting in heavenly softness later on.
Step 4: Fold In Chocolate Chips & M&M’s
Once everything is mixed perfectly (you’ll know when there aren’t any dry patches left), it’s time for perhaps one of my favorite steps: folding in those luscious chocolate chips along with ¾ cup M&M’s! Use gentle motions here so as not overwork your dough—we want those little gems intact rather than crushed beyond recognition! As you do this task feel free indulge yourself by sneaking a few candies from time-to-time…after all they’re too tempting sitting right there staring back at us!
Stay tuned because soon we’ll transform this beautiful mixture into scrumptious morsels ready for baking—but until then cherish every moment spent savoring how deliciously sweet life can be through baking together!
Step 5: Forming the Cookie Dough Balls
Now that your brownie mix and flour are thoroughly combined, it’s time for one of my favorite parts: shaping the cookie dough! This step is where you’ll witness the transformation of a simple batter into something truly extraordinary. Start by adding in the eggs, water, and that luscious melted butter. As you mix these ingredients together, you’ll notice how they create a rich, thick dough that feels almost like a velvet dream under your fingers. This isn’t just about combining; it’s about coaxing out the flavors and textures that will make each bite an explosion of delight. The moisture from the eggs helps bind everything together while ensuring that each cookie remains soft and chewy when baked.
Once you’ve blended everything to perfection, it’s time to fold in those irresistible chocolate chips and three-quarters of the M&M’s. I cannot stress enough how important this folding technique is! It’s not just about throwing everything together; it’s about gently incorporating those sweet morsels so they’re evenly distributed throughout your dough. You want every cookie to boast a delightful surprise in each bite. When you scoop out portions—about one tablespoon at a time—you’ll create perfectly-sized balls that will bake beautifully. Place them on your prepared baking sheet about two inches apart because they will spread just enough to achieve that perfect cookie shape. Trust me on this: give them space to breathe!
Step 6: Baking to Perfection
With your cookies formed and ready for the oven, it’s time to bake them to that perfect state of gooey goodness. Preheat your oven to 375°F (190°C) if you haven’t already done so; this initial heat is absolutely paramount for achieving that ideal texture—crispy on the outside yet wonderfully chewy in the center. As you place your baking sheet in the oven, take a moment to appreciate how your kitchen will soon be filled with an utterly intoxicating aroma of chocolatey delight. Set a timer for 10-13 minutes, but don’t just rely on time; watch closely for visual cues! You’ll want the tops of your cookies to crack slightly and appear dry—a sign they’re close to being ready.
Why such attention during baking? Well, cookies continue cooking even after you pull them from the oven due to residual heat—this is known as carryover cooking. If you overbake them now, all those wonderful chewy textures will turn into something more akin to a crunchy biscuit—a fate we definitely want to avoid! Keep an eye out for those telltale cracks forming on top; when they do, it’s time to remove them from the oven and move on to our next delightful step.
Step 7: The Sweet Finishing Touch
This next step is where we sprinkle a bit more magic onto our cookies—the final flourish that makes them not only delicious but visually captivating as well! As soon as you pull those golden-brown cookies from the oven, grab the remaining M&Ms and immediately press them gently into the tops of each cookie. This is crucial because not only does it enhance their appearance with vibrant pops of color, but it also gives each cookie an extra burst of sweetness right where it counts.
Imagine biting into one of these beauties later on; you’ll have that glorious crunch followed by soft chocolate melting away in your mouth—the ultimate indulgence! I encourage you to be generous with those M&Ms; after all, who wouldn’t want their cookies adorned with more candy? Remember, timing is key here—the longer you wait before pressing in those candies, the less likely they’ll stick well once cooled down. So work swiftly but carefully!
Step 8: Cooling Down and Temptation
Patience is indeed a virtue at this stage as we allow our freshly baked Red, White & Blue Brownie Cookies to cool down before devouring them whole—which let’s be honest can be incredibly challenging given their intoxicating scent wafting through your home! Let them sit on the baking sheet for about three minutes before transferring them onto a cooling rack. Why this brief cooling period? It allows them to set slightly while still retaining that soft center we all adore.
When moving them to the cooling rack—gently does it! Use a spatula or even your hands (if you’re careful) because these beauties can still be quite tender until they fully cool down. After approximately ten minutes on the rack, they’ll firm up beautifully while maintaining their chewy interior—this is when you’ll want to taste test one…or maybe two (no judgment here!). Just remember: if they’re too hot, you’ll miss out on tasting all those layers of flavor waiting for you inside!
Conclusion:
As we wrap up our journey through this delightful recipe for Red, White & Blue Brownie Cookies, I can’t help but feel a wave of excitement wash over me! From the first mix of gooey brownie batter to pressing those vibrant M&M’s into each cookie, I hope you’ve felt the same anticipation and joy that comes with creating something truly extraordinary in your kitchen. These cookies are not just about flavor; they capture playful moments filled with laughter and shared happiness. The rich chocolate pairs perfectly with bursts of sweetness from the candy-coated shells—a truly remarkable harmony that elevates this dessert beyond ordinary!
So why should you make these cookies? Well, not only do they taste like pure bliss, but they also offer an effortless way to spread joy on any occasion—from festive summer barbecues to cozy family movie nights. Picture pulling them from the oven: golden edges glistening with melted chocolate chips and colorful M&M’s peeking out—can you hear the oohs and ahhs? They’re perfect for sharing with friends or keeping all to yourself when cravings strike—you’ll find no judgment here!
Imagine savoring one with your morning coffee as it melts in your mouth or serving them at gatherings where everyone reaches eagerly for another one! For an afternoon pick-me-up while watching your favorite show or even layered into a decadent ice cream sundae—these brownies adapt beautifully to whatever mood strikes. And if you’re feeling adventurous? Think about drizzling some white chocolate over them or tossing in chopped nuts for an extra crunch—each variation adds its own unique twist!
This recipe is wonderfully adaptable and encourages creativity in every bite! Whether adding sprinkles for more color or swapping out M&M’s for another favorite candy mix—it invites you into its whirlpool of possibilities. So grab your mixing bowl and get ready to whip up these delectable treats! I can’t wait to hear how yours turn out—let’s connect as we celebrate our love for baking together!

Red, White & Blue Brownie Cookies
- Total Time: 27 minutes
- Yield: Approximately 24 cookies 1x
Description
Indulge in the delightful nostalgia of summer celebrations with these Red, White & Blue Brownie Cookies. Bursting with chocolatey goodness and vibrant colors from M&M’s, these chewy treats capture the essence of festive occasions while being incredibly easy to prepare. Perfect for picnics, movie nights, or simply to brighten someone’s day, each bite offers a rich flavor that’s sure to please any crowd. Using a simple brownie mix as the base, these cookies come together effortlessly and are topped with colorful candies, making them an instant favorite at any gathering. Bake up a batch today and experience the joy they bring!
Ingredients
- 18.9 ounces brownie mix
- 2 large eggs
- ¼ cup melted butter (or coconut oil)
- ¼ cup all-purpose flour
- 1 cup M&M's
- ½ cup chocolate chips
- 1 tablespoon water
Instructions
- Preheat your oven to 375°F (190°C) and line a baking sheet with parchment paper.
- In a large mixing bowl, combine the brownie mix and flour until well blended.
- Add eggs, melted butter, and water to the dry mixture; stir until fully incorporated.
- Gently fold in chocolate chips and three-quarters of the M&M's.
- Scoop out tablespoon-sized portions of dough and place them on the prepared baking sheet, spaced about two inches apart.
- Bake for 10-13 minutes until tops crack slightly.
- Press remaining M&M's into the tops right after pulling from the oven for added color.
- Allow cookies to cool on the baking sheet for three minutes before transferring to a cooling rack.
- Prep Time: 15 minutes
- Cook Time: 12 minutes
- Category: Dessert
- Method: Baking
- Cuisine: American
Nutrition
- Serving Size: 1 serving
- Calories: 150
- Sugar: 11g
- Sodium: 80mg
- Fat: 6g
- Saturated Fat: 3g
- Unsaturated Fat: 3g
- Trans Fat: 0g
- Carbohydrates: 22g
- Fiber: 1g
- Protein: 2g
- Cholesterol: 20mg
Leave a Comment