From my kitchen to yours, I’m thrilled to share a recipe that resonates so deeply with my heart: Grilled BBQ Chicken. This isn’t just any chicken dish; it’s an experience that transforms ordinary moments into something truly exceptional. Picture this: as the sun begins to set and the warm breeze dances around you, the aroma of marinated chicken sizzling on the grill wafts through the air, enveloping you in a cozy embrace. Each bite of this juicy grilled chicken, kissed by smoky flavors and a tangy homemade BBQ sauce, is like a love letter to summer. Trust me when I say that this Grilled BBQ Chicken will not only satisfy your hunger but will also create memories that linger long after the last bite has been savored.
I’ve always been captivated by how grilling brings people together, turning simple gatherings into festive occasions filled with laughter and connection. Whether it’s a family barbecue or an intimate dinner with friends, this dish holds a special place in my heart because of its ability to unite us around the table. The balance of sweet and smoky flavors in the marinade is absolutely paramount; it enhances the natural richness of the chicken thighs, making each mouthful an utterly intoxicating experience. So grab your tongs and let’s embark on this culinary journey together!
Grilled BBQ Chicken: A Summer Classic
Welcome to my favorite grilled recipe! With its tender meat infused with rich flavors, this Grilled BBQ Chicken will become your go-to for any outdoor cookout or weeknight dinner. It’s straightforward enough for a novice yet delightful enough to impress even the most seasoned guests. Once you’ve tried it, I promise you’ll be coming back for seconds—and maybe even thirds!
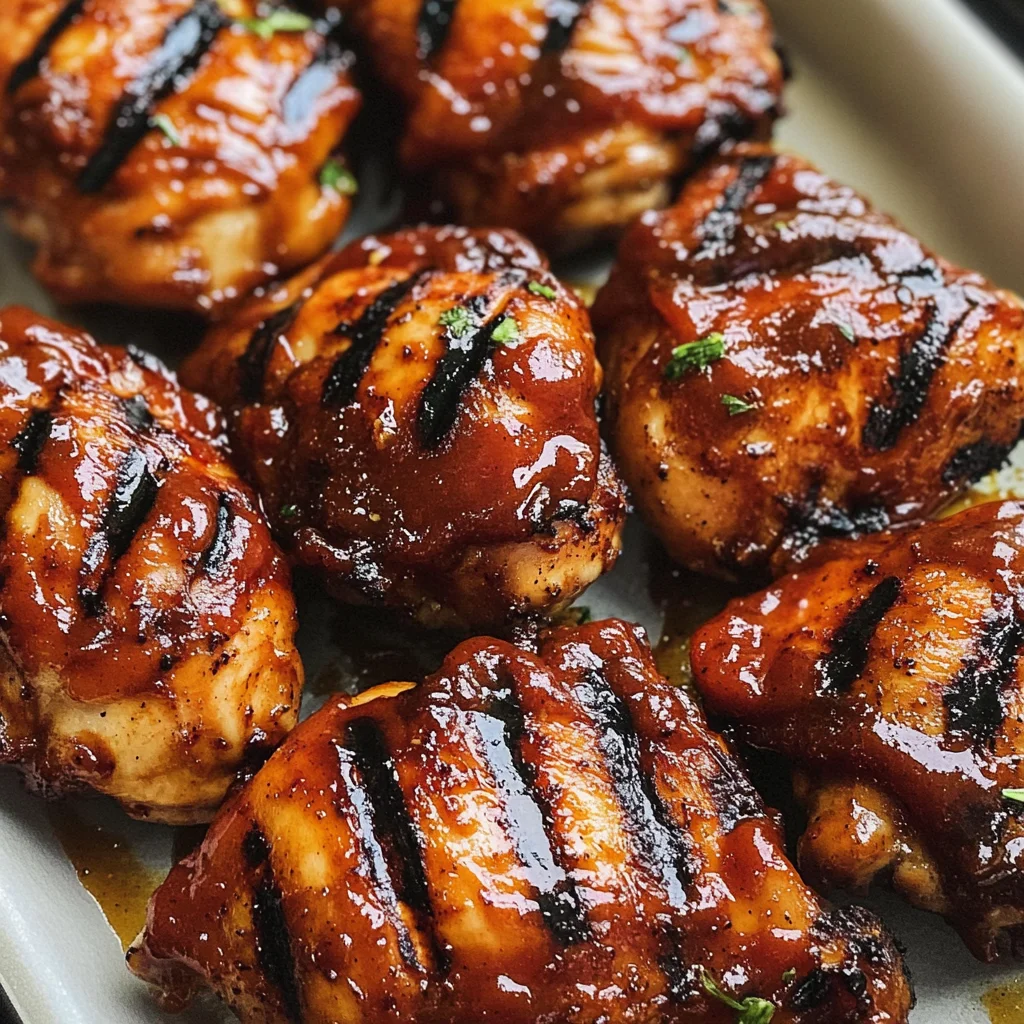
Ingredients:
As we dive into the ingredients for this beautiful dish, remember that each one plays a vital role in creating that perfect harmony of flavors—think of them as essential notes in our symphony of taste.
- 2 lb skinless boneless chicken thighs. These are truly the star of our show! Chicken thighs are not only more forgiving than breasts when it comes to cooking—thanks to their higher fat content—but they also pack incredible flavor and juiciness. When grilled correctly, they develop beautifully crispy edges while remaining succulent inside. Always look for thighs that are plump and have a nice pinkish hue; they should feel firm but spring back slightly when pressed. If you must substitute, opt for skinless boneless chicken legs for similar results.
- ¼ cup tomato paste. This liquid gold adds depth and richness to our marinade while providing a luscious texture that clings beautifully to our chicken. Tomato paste serves as the backbone of many sauces due to its concentrated flavor profile—this is crucial because it brings out both sweetness and acidity without overpowering other ingredients. If you’re in a pinch, feel free to use crushed tomatoes or even ketchup as an alternative; however, you might need to adjust other ingredients slightly since those have added sugars.
- ¼ cup brown sugar. Ah, brown sugar—the sweet touch we all adore! Not only does it contribute sweetness that balances out tangy elements in our marinade, but it also caramelizes beautifully on the grill, forming those delectable charred bits that make every bite a delight. You can use light or dark brown sugar depending on your preference; dark brown sugar will impart richer molasses notes while light offers more subtle sweetness.
- 3 tbsp balsamic vinegar. This ingredient brings something truly magical—a complex acidity that brightens up all other flavors while adding a hint of sweetness at the same time! Balsamic vinegar’s aged profile lends depth and sophistication that is simply extraordinary in marinades like ours—it’s absolutely non-negotiable if you want your chicken to sing with flavor! If you’re out of balsamic vinegar, try apple cider vinegar for a different but equally delightful twist.
- 1 tbsp Worcestershire sauce. This savory condiment adds umami richness that’s hard to replicate; it’s like giving your marinade an extra layer of dimension! Think of Worcestershire sauce as an old friend who knows just how to elevate every gathering—its fermented nature enhances all other flavors without standing out too much on its own. If you’re looking for a vegetarian alternative, tamari works wonderfully as well!
- ½ tbsp Dijon mustard. This zesty little ingredient packs a punch with its sharpness and slight heat—it’s essential here because it helps emulsify our marinade while bringing an inviting tanginess that cuts through all those rich flavors we’re layering together. Look for whole grain Dijon if you want some texture in your sauce; otherwise, classic smooth Dijon does wonders too!
- 1 tsp sweet smoked paprika. Oh my goodness—this spice is like sunshine in powder form! Sweet smoked paprika adds depth while imparting an irresistible smokiness reminiscent of campfire nights spent under starlit skies—who wouldn’t dream about tasting that? When selecting paprika, opt for high-quality brands sourced from Spain or Hungary; they’ll provide far better flavor than generic versions.
- ½ tsp salt. While seemingly simple, salt is crucial—it enhances flavor where every ingredient shines through brilliantly without overwhelming your palate! I recommend kosher salt here because its larger grains dissolve easily into marinades and help tenderize meat effectively before grilling.
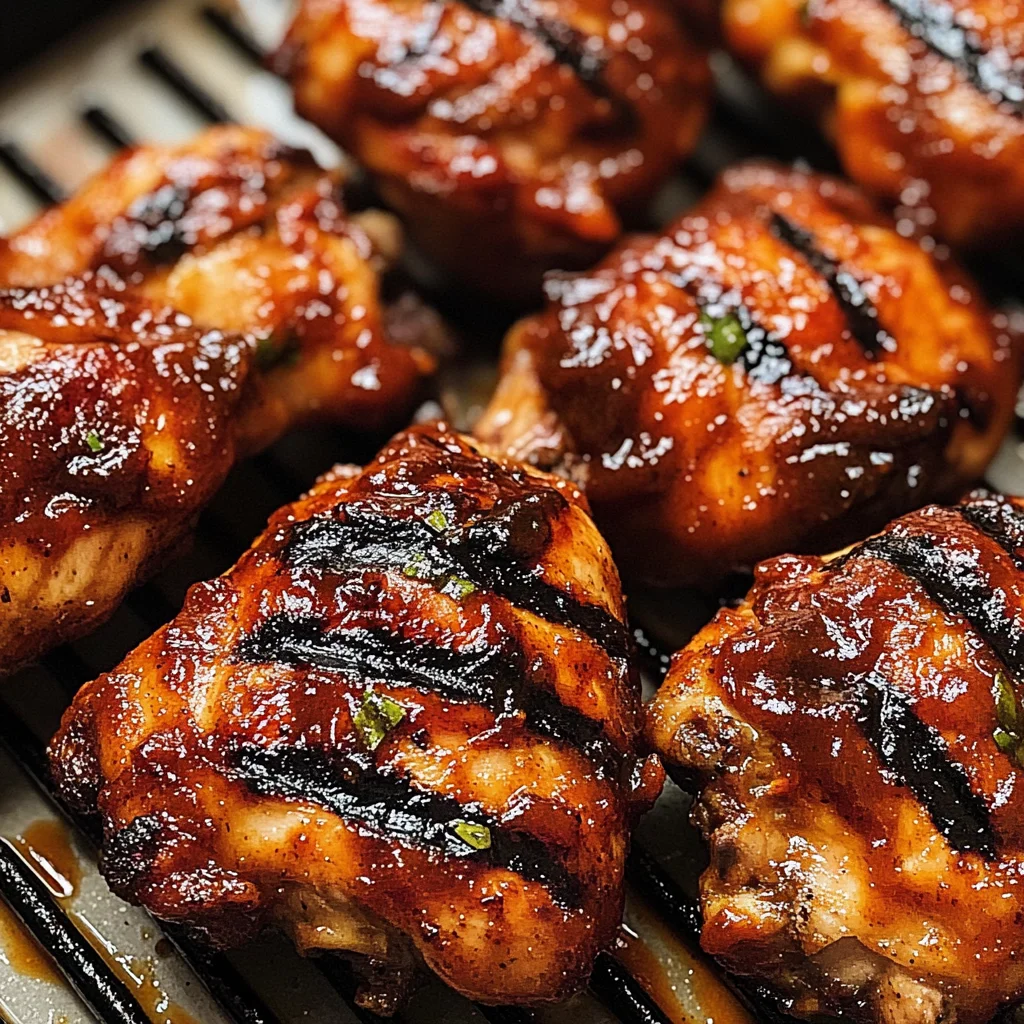
Equipment You’ll Need:
Before we get started on this delicious journey of cooking Grilled BBQ Chicken together, let’s ensure we’re fully equipped for success! Having the right tools makes everything smoother and allows us to focus solely on creating magic in our kitchens.
- Grill (gas or charcoal) – Your grill is going to be your best friend throughout this process! Whether you choose gas or charcoal depends on personal preference; gas grills offer convenience while charcoal imparts authentic smoky flavors beyond compare! Make sure it’s properly preheated before adding chicken so we can achieve those sought-after grill marks.
- Large shallow dish – A sturdy dish plays an essential role when marinating our chicken—it allows ample space for every piece to be coated evenly with our flavorful marinade without crowding them together too tightly.
- Whisk – A good quality whisk will help combine all those glorious marinade ingredients smoothly together until they form one harmonious blend ready to embrace our chicken!
- Tongs – These handy tools allow us precise control when handling hot food on the grill—they’ll help us flip those thighs carefully without piercing them unnecessarily (which releases precious juices!).
Now that we have everything we need at hand let’s dive into preparing this beautiful dish!
Step 1: Marinating Magic
To begin our adventure towards perfect Grilled BBQ Chicken, we’ll start by crafting our tantalizing marinade—this step sets up everything wonderful about this recipe! In a large shallow dish (make sure it’s spacious enough), combine all your marinade ingredients: tomato paste, brown sugar, balsamic vinegar, Worcestershire sauce, Dijon mustard, sweet smoked paprika, and salt. Using your whisk (or even just good old-fashioned elbow grease!), mix everything thoroughly until you achieve a smooth paste—this consistency ensures every nook and cranny of those chicken thighs gets coated perfectly during their marination process.
Once combined well enough so there are no lumps left behind (trust me—you don’t want any surprises!), add your skinless boneless chicken thighs into this flavorful concoction like they’re diving into paradise itself! Toss them gently until each piece is generously coated with love from top-to-bottom—don’t rush through this part; take time savoring how vibrant everything looks already! Now cover up the dish tightly with plastic wrap before placing it into refrigerator bliss—allowing at least one hour (or overnight if possible) will work wonders as flavors infuse magically into each morsel waiting eagerly within!
Step 2: Fire Up That Grill
While our chicken luxuriates in its flavorful bath within chilly confines of refrigerator bliss—let’s turn attention toward prepping our trusty grill for action! Begin by ensuring all grates are clean and ready by brushing away any remnants from previous cookouts (a clean slate makes all difference!). Then fire up your grill according instructions based on whether it’s gas-powered or charcoal-based—you want direct heat available alongside indirect heat zones too!
For gas grills: turn one side on high while leaving other burner off entirely creates ideal setup where searing occurs first before transferring over onto cooler section later if needed during cooking process! For charcoal grills: pile coals onto one side allowing ample room across from them untouched where heat won’t directly touch meat later down line as well—this technique provides flexibility when achieving perfect internal temperatures without burning outside layers prematurely!
Step 3: Sizzle Time
Once everything is prepped perfectly—the moment has arrived folks—it’s time to introduce those marinated beauties onto hot grates awaiting their transformation into fantastic perfection over flames dancing beneath them eagerly awaiting their arrival! Depending upon size/type/heat intensity present within individual grills used—it may require working in batches if space constraints arise—which isn’t problem at all since patience pays off big dividends here folks!
Carefully place each thigh down gently onto heated surface aiming slightly away from flames themselves since direct contact could lead uneven cooking patterns along way if not monitored closely enough throughout grilling process ahead—we want golden-brown crusts developing naturally instead so keep watch over them diligently whilst flipping halfway through cooking cycle lasting roughly fifteen minutes total per batch before checking internal temperature using trusty thermometer inserted deep into thickest parts where juices flow forth beautifully revealing readiness achieved once reading registers at least 165°F (75°C).
Step 4: Rest & Revel
After working tirelessly preparing these gorgeous pieces worthy feasting upon—they deserve chance rest briefly before being served alongside sides chosen accordingly (corn salad anyone?). Once you’ve reached desired doneness level remove them carefully from grill allowing juices redistribute evenly throughout each thigh creating moist bites bursting forth with flavor upon first cutting open—alluring aromas filling air surrounding creating atmosphere where everyone gathers eagerly anticipating deliciousness awaiting ahead!
Now isn’t this culinary journey worth taking? Each step woven together seamlessly contributes towards creating unforgettable meals shared amongst family friends alike celebrating life really moments found joyously lingering long after final bites taken away completely satisfied souls filled warmth brought forth through such simple yet powerful act called cooking…
Stay tuned as we continue exploring further steps leading towards conclusion building anticipation for indulgence soon approaching ahead…
Step 5: Preparing the Grill for Perfection
Now that your chicken has marinated and absorbed all those incredible flavors—think of it as a hug of seasoning—you’re ready to fire up the grill. This step is where the magic happens, transforming that raw, marinated chicken into juicy, charred perfection. First things first, you’ll want to prepare your grill for direct cooking over medium-high heat. If you have a charcoal grill, light your coals and let them burn until they are covered with a light ash—this usually takes about 20-30 minutes. For gas grills, simply preheat on high for about 10-15 minutes.
But here’s where it gets really interesting: you’ll want to create a two-zone cooking setup: one side should be hot and sizzling while the other remains cooler. Why? This setup allows you to sear your chicken beautifully on the hot side while giving it time to cook through on the cooler side without burning the marinade. Trust me, this method is absolutely paramount for achieving that perfect balance of crispy outside and tender inside. If you rush this process and throw everything onto one hot surface, you might find yourself with burnt bits and undercooked centers—definitely not what we want! So take a moment to get this right; your patience will reward you tenfold.
Step 6: Grilling Your Chicken Like a Pro
With your grill prepped and ready to go, it’s time to bring out that beautifully marinated chicken! Gently place each thigh on the hot side of the grill; listen closely as they make contact—the sizzle should be music to your ears! Make sure not to overcrowd the grill; give each piece enough space so that they can breathe and develop that coveted char. Depending on the size of your grill, you might need to work in batches. This is not only about aesthetics but also about ensuring even cooking.
Now, here’s where experience comes into play: allow the chicken to cook undisturbed for about 7-8 minutes before flipping them. This step may feel counterintuitive—after all, don’t we always want to check on our food? But resist the urge! By leaving it alone, you’re letting those beautiful caramelized marks form and sealing in those juices. You’ll know it’s time to flip when it releases easily from the grates; if it’s sticking, just give it another minute or so—patience is key! After flipping, another 7-8 minutes should do the trick until both sides are delightfully browned.
Step 7: The Indirect Heat Dance
Once you’ve achieved that gorgeous golden-brown color on both sides of your chicken thighs, it’s time for an important transition—a grand finale in our grilling symphony! If at any point during cooking you notice that some pieces are browning faster than others (which can happen!), don’t panic! Simply move them over to the cooler side of the grill. This technique—known as indirect grilling—is crucial for ensuring all pieces reach that safe internal temperature of 165°F without burning.
Remember, we’re looking for juicy goodness here—not dry meat! You can use an instant-read thermometer for precise measuring; insert it into the thickest part of a thigh without touching bone (as this will give an inaccurate reading). As soon as they hit that magical temperature, remove them from the grill and let them rest—a truly transformative step!
Step 8: The Resting Ritual
Ahh, resting! This step is often overlooked but is utterly essential for achieving perfectly juicy Grilled BBQ Chicken. Once your glorious thighs are off the grill and nestled on a cutting board or plate, cover them loosely with aluminum foil. Now I know what you’re thinking: why wait? But trust me—the resting period allows those juices that have been bubbling below the surface during cooking to redistribute throughout each piece of chicken instead of spilling out all over when you cut into them right away.
Letting your chicken rest for at least five minutes (or up to ten if you can resist!) transforms each bite into something profoundly satisfying. As those juices settle back into every fiber of meat, you’ll be rewarded with tenderness so exquisite it almost feels like biting into a cloud. During this period, why not take a moment to bask in those enticing aromas wafting through your kitchen? It’s like nature’s own air freshener!
Final Touches Before Serving
Now comes one of my favorite parts—the moment we’ve been waiting for! You’ve grilled up some tantalizingly delicious Grilled BBQ Chicken that’s just begging to be served up alongside your favorite sides. For an extra burst of flavor and visual appeal, consider drizzling a bit more homemade BBQ sauce over each thigh before serving; this simple touch elevates everything from ordinary to extraordinary!
Don’t forget about garnishing—chopped fresh herbs like parsley or cilantro can add a lovely pop of color and freshness that complements those smoky flavors beautifully. Pair this dish with grilled veggies or a light salad for balance; I love serving mine next to some creamy coleslaw or fluffy cornbread—it creates such a delightful contrast!
So gather around your table with family or friends because this Grilled BBQ Chicken isn’t just food; it’s an experience meant to be shared and savored together. I promise you will feel proud as everyone digs in and raves about how tender and flavorful these thighs turned out; their smiles will be worth every minute spent making this recipe come alive!
Storage and Enjoyment Tips for Your Grilled BBQ Chicken
And just like that, your Grilled BBQ Chicken is ready to shine on the dinner table! I can already imagine the mouthwatering aroma wafting through your kitchen, teasing your senses and making everyone gather around in anticipation. But what about those leftovers? Trust me, this recipe is so delightful that you’ll want to enjoy it well beyond the first meal. Let’s dive into how to store this succulent chicken so that every bite remains as delicious as when it first came off the grill.
Storing Leftover Grilled BBQ Chicken
To keep your Grilled BBQ Chicken at its best, start by letting it cool completely before transferring it into an airtight container. Glass containers are fantastic for storage because they don’t retain odors and can be reheated easily. If you’re using plastic, ensure it’s BPA-free and suitable for microwave use. In the refrigerator, your chicken will stay fresh for up to three days. If you’re worried about dryness, here’s a little pro tip: place a slice of bread in the container with the chicken; it helps absorb moisture and keeps everything nice and juicy! When you reheat it—whether in the oven or microwave—be sure to do so gently to preserve that tender texture you worked so hard for. Imagine biting into that warm chicken again—it’s truly a joy!
Freezing Grilled BBQ Chicken for Later
If you find yourself with more Grilled BBQ Chicken than you can eat in a few days (which is often a happy dilemma), then freezing is your best friend! Simply allow the chicken to cool completely, then wrap each piece tightly in plastic wrap or aluminum foil before placing them in a freezer-safe bag or container. This way, they’ll stay protected from freezer burn for up to three months! When you’re ready to enjoy some grilled goodness again, simply thaw the chicken overnight in the fridge or use the defrost setting on your microwave if you’re short on time. The beauty of freezing this dish lies in its convenience; whenever you’re craving that smoky flavor and juicy goodness, you’ll have perfectly preserved portions waiting just for you! So go ahead and stock up—you’ll thank yourself later.
Grilled BBQ Chicken
- Total Time: 40 minutes
- Yield: Serves about six people 1x
Description
Grilled BBQ Chicken is a summertime favorite that transforms simple gatherings into unforgettable feasts. This recipe features juicy chicken thighs marinated in a tangy homemade BBQ sauce, infused with rich flavors that tantalize the taste buds. As the chicken grills to perfection, it develops a delicious smoky char while remaining tender and succulent inside. Ideal for family barbecues or intimate dinners, this dish not only satisfies hunger but also brings people together around the table. The balance of sweet and smoky notes makes every bite a delightful experience that lingers long after the meal is over.
Ingredients
- 2 lb skinless boneless chicken thighs
- ¼ cup tomato paste
- ¼ cup brown sugar
- 3 tbsp balsamic vinegar
- 1 tbsp Worcestershire sauce (or tamari for a vegetarian option)
- ½ tbsp Dijon mustard
- 1 tsp sweet smoked paprika
- ½ tsp salt
Instructions
- In a large shallow dish, whisk together tomato paste, brown sugar, balsamic vinegar, Worcestershire sauce, Dijon mustard, smoked paprika, and salt until smooth.
- Add chicken thighs to the dish and toss gently to coat them evenly in the marinade. Cover and refrigerate for at least one hour (or overnight for best results).
- Preheat your grill to medium-high heat and create a two-zone cooking setup.
- Place marinated chicken on the hot side of the grill, cooking for 7-8 minutes per side until browned.
- Move chicken to the cooler side of the grill to finish cooking until an internal temperature of 165°F is reached.
- Remove from grill, cover loosely with foil, and let rest for 5-10 minutes before serving.
- Prep Time: 10 minutes
- Cook Time: 30 minutes
- Category: Main
- Method: Grilling
- Cuisine: American
Nutrition
- Serving Size: 1 thigh (about 130g)
- Calories: 290
- Sugar: 9g
- Sodium: 450mg
- Fat: 16g
- Saturated Fat: 4g
- Unsaturated Fat: 12g
- Trans Fat: 0g
- Carbohydrates: 18g
- Fiber: 1g
- Protein: 22g
- Cholesterol: 95mg


Leave a Comment