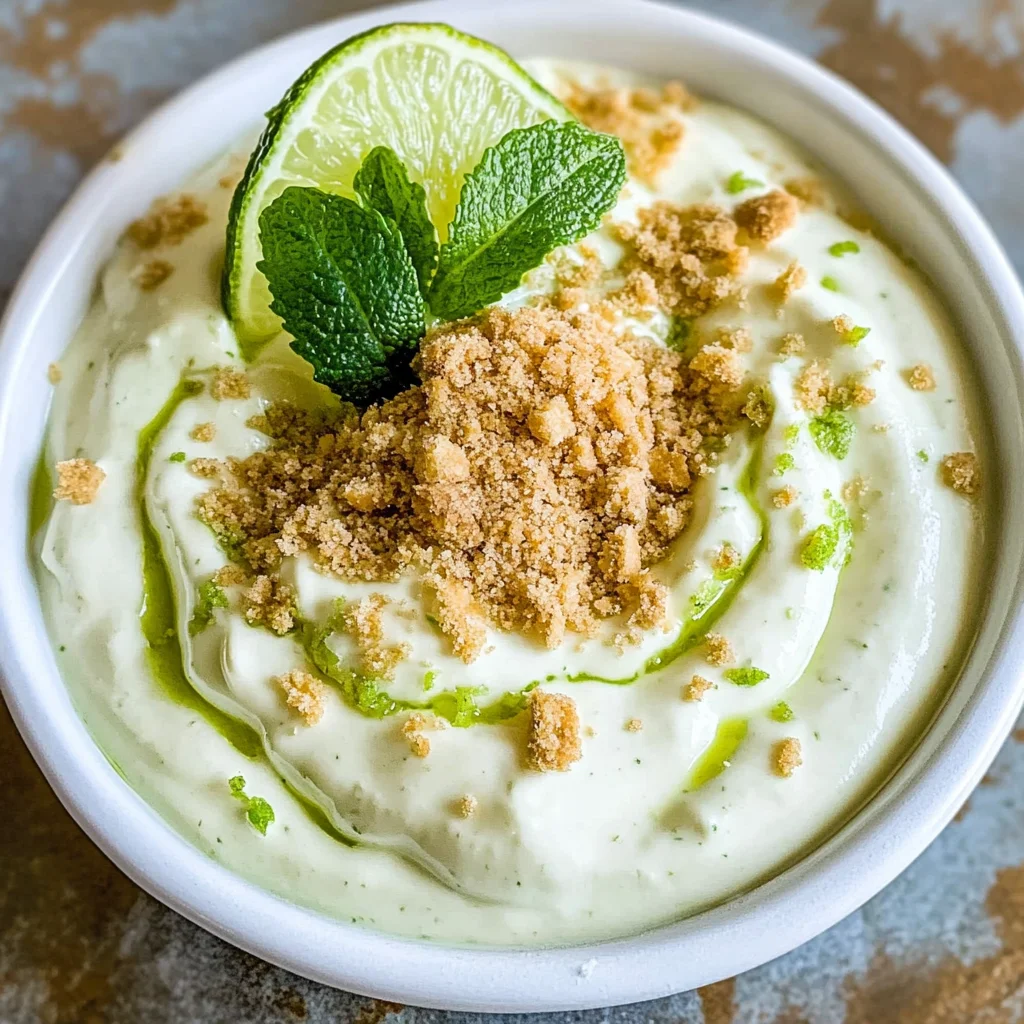
There’s something undeniably magical about a dessert that captures the essence of summer, isn’t there? When I think about the vibrant tang of fresh limes mingling with a creamy, sweet concoction, my heart skips a beat. The Key Lime Pie Cheesecake Dip is not just a recipe; it’s a celebration of flavors that transports you to sun-soaked shores with every bite. This no-bake delight embodies the spirit of easy-going gatherings, where laughter mingles with the tantalizing aroma of citrus and cream. Imagine serving this luscious dip at your next potluck or family barbecue—the smiles, the joy, and those satisfying “oohs” and “ahhs” will be like music to your ears. Trust me, this Key Lime Pie Cheesecake Dip is about more than just satisfying your sweet tooth; it’s about creating memories around the table.
What I love most is how this dip has roots in both tradition and innovation. Key lime pie has long been cherished as a classic American dessert, especially in the Florida Keys, but transforming it into a dip? Now that’s an inspired twist that I can get behind! It offers all the beloved notes of the original pie—zesty lime, creamy texture—while being effortlessly approachable. You don’t need to fuss over baking crusts or setting custards; instead, you can whip this up in mere minutes! Plus, it’s versatile enough to pair with graham crackers for that perfect crunch or fresh fruit for a refreshing counterpoint. Whether you’re hosting friends or simply indulging on a cozy night in, this dip turns any moment into something special.
Key Lime Pie Cheesecake Dip: A Zesty Delight for Every Occasion
This Key Lime Pie Cheesecake Dip is as delightful as it sounds! With its vibrant flavors and creamy texture, it promises to charm your taste buds while being incredibly easy to prepare. Let’s embark on this culinary journey together!
Ingredients:
As we gather our ingredients, let’s take a moment to appreciate each one and understand how they contribute to our delightful dip.
- 8 oz cream cheese, softened at room temperature. Cream cheese serves as the luscious base for our dip; its smooth texture creates that velvety mouthfeel we all crave. Softening it brings out its full flavor potential and ensures it blends seamlessly with the other ingredients. If you’ve ever tried mixing cold cream cheese straight from the fridge, you know it can be quite challenging—it won’t fully incorporate and can leave lumps. So trust me on this: letting it warm up is absolutely paramount for achieving that dreamy consistency we want.
- 1/2 cup sugar (or more or less to taste). Sugar does more than just sweeten our dip; it balances out the tartness of the lime juice beautifully. This balance is crucial because too much tartness can overshadow all those lovely flavors we’re working with here. Don’t hesitate to adjust this amount according to your personal preference! Taste as you go—after all, cooking is an art and should be tailored to your palate.
- 3 tablespoons lime juice (from 2 small limes or 3 key limes). Fresh lime juice is essential for providing that bright zesty kick that defines our Key Lime Pie Cheesecake Dip. Using real limes instead of bottled juice makes a world of difference—freshly squeezed juice bursts with flavor and aromatic oils that bottled varieties simply can’t replicate. Plus, squeezing them yourself allows you to experience their invigorating scent firsthand—a sensory delight!
- Zest of 2 small limes. Alongside lime juice, zest adds another layer of citrusy brightness and complexity to our dip. The zest contains aromatic oils that enhance the overall flavor profile and offer an aromatic punch reminiscent of sun-ripened limes. Make sure when you’re grating the zest that you avoid the bitter white pith underneath—just aim for those vibrant green outer layers!
- 1 pinch vanilla bean powder. This ingredient may seem subtle but trust me; it’s a game-changer! Vanilla bean powder adds warmth and depth to our dip; its rich notes beautifully complement tart flavors without overpowering them. If you can’t find vanilla bean powder, feel free to substitute with pure vanilla extract—but remember that extracts have more liquid content.
- 1 pinch salt (optional). While salt might seem odd in a dessert context, it plays an essential role in elevating flavors and balancing sweetness. Just like how salt enhances chocolate’s richness or caramel’s depth, here it helps round out all those bright elements in our dip without making it taste salty at all.
- 1/4 cup heavy whipping cream. Ahh, heavy whipping cream—the magic ingredient that transforms our mixture into something luxuriously creamy! When whipped, it adds volume and airiness while maintaining stability in our dip so it doesn’t fall flat on presentation (or taste!). Use fresh cream for best results; avoid anything labeled “whipped topping,” as they tend to contain stabilizers and additives that dilute flavor.
- Graham crackers, cookies, and/or fruit for dipping. Now we arrive at what I consider an essential element: dippers! The right accompaniment takes this dessert from good to spectacular by adding different textures—think crunchy graham crackers juxtaposed against creamy dip or juicy strawberries bursting with flavor alongside each scoop! Choose your favorites based on occasion: graham crackers scream classic key lime pie vibes while fruits add freshness.
Equipment You’ll Need:
Before we dive into making this incredible dip, let’s ensure we’ve got everything we need on hand! Having the right tools makes cooking not only smoother but also more enjoyable—you’ll see!
- Stand mixer (or hand mixer). A stand mixer will be your best friend here! It makes creaming together those rich ingredients effortless while allowing you time to focus on other parts of your dish—or just dance around your kitchen if that’s more your style! If you don’t have one handy though, a trusty hand mixer works just fine—just keep an eye on mixing speed so things don’t get splattered everywhere.
- Mixing bowl (large). Choose a bowl spacious enough for whipping up everything without worrying about overflow—it will save you cleanup time later! A glass mixing bowl often lets you see texture changes better than metal ones do too.
- Zester or microplane grater. This little tool is crucial for capturing all those fragrant oils from lime zest without taking any bitter pith along with it—it’ll help make sure every bite tastes bright!
- Juicer (optional). If you’re using fresh limes (and I really hope you are!), having a juicer helps extract every last drop efficiently while keeping seeds at bay so they don’t sneak into your mixture uninvited.
Preparing the Key Lime Pie Cheesecake Dip
Step 1: Creaming Together Our Base
Let’s kick things off by creaming together our softened cream cheese with sugar until smooth—this process known as creaming is vital because it introduces air into our mixture which lightens up our final product significantly! Start by placing your softened cream cheese into that large mixing bowl alongside half a cup of sugar—a surface area ratio here allows us maximum incorporation when whisked together at medium speed for about 1-2 minutes until completely blended (you should see no lumps remaining). As you mix away blissfully listening to KitchenAid symphonies echoing through your space (or whatever tunes float your boat), take note if everything tastes balanced before proceeding—we want just enough sweetness without overwhelming tartness from lime juice later on!
Step 2: Adding Zest & Juice
Now comes one of my favorite parts: infusing bright citrus notes into our mixture! It’s time to add three tablespoons of freshly squeezed lime juice along with zests from two lively little limes into our well-creamed base—watch how colors transform before your eyes turning light yellow against pale white tones creating stunning visual appeal already! Mix everything again at medium speed until fully incorporated—and oh my goodness—the scent wafting through will make anyone nearby drool uncontrollably—it’s simply intoxicating! Take another taste here too—you want those tangy vibes shining through beautifully—it should sing harmony rather than clash bitterly!
Step 3: Adding Vanilla Bean Powder
Next up is adding that pinch (or maybe two!) of vanilla bean powder which brings warmth alongside tropical brightness found within zesty notes already established—we’re layering complexity now folks! Gently fold in vanilla bean powder using either spatula or mixer set low speed briefly until evenly distributed throughout lush mixture—you’ll notice hints swirling through each bite while giving delightful surprises upon tasting unexpectedly too!
Step 4: Whipping Heavy Cream
Our last major component before serving comes down towards whipping heavy cream—it adds ethereal fluffiness elevating overall experience beyond ordinary dips available anywhere else out there today—to achieve perfect peaks start pouring chilled heavy whipping cream straight into another clean bowl then whisk vigorously until soft peaks form after several minutes’ worth effort involved here—you’ll know they’re ready once lifting whisk leaves behind ribbons dancing gracefully atop surface below them indicating readiness ahead! Once achieved fold gently back into previous mixture ensuring everything remains airy yet cohesive without deflating hard work put forth thus far…
And there we have it—a wonderfully vibrant Key Lime Pie Cheesecake Dip waiting patiently ahead filled generously across platters accompanied by assorted dippers ready whenever friends gather ‘round hoping they’ll indulge happily soon after tasting such deliciousness unleashed upon them…
Step 5: Whipping Up the Cream
Now that you’ve created a luscious and tangy cream cheese base, it’s time to add the heavy whipping cream, which is where the magic truly happens. This step is critical because the whipped cream will introduce an airy lightness to our dip, transforming it from a dense cheesecake filling into a dreamy, fluffy dessert that’s reminiscent of clouds on a summer’s day. Begin by pouring your 1/4 cup of heavy whipping cream into your mixing bowl. If you have a stand mixer, I recommend using it for this part because the powerful whisk attachment can whip air into the cream much more effectively than hand-whisking, which can be quite labor-intensive.
Turn your mixer to medium speed and watch as the cream begins to thicken and transform into soft peaks. This process usually takes about 2 to 3 minutes. You want to stop just before it reaches stiff peaks; we’re looking for soft peaks that gently fold over when you lift the whisk out of the bowl. When mixing in the whipped cream, make sure to fold it in gently using a spatula or wooden spoon rather than stirring vigorously. Why? Because folding helps maintain those precious air bubbles you’ve just created, ensuring your dip retains its delightful fluffiness. As you incorporate the whipped cream, you should see your mixture becoming lighter and more voluminous—this is precisely what we want!
Step 6: The Art of Mixing
Once your whipped cream is beautifully incorporated with the cream cheese mixture, take a moment to taste it—this is one of my favorite parts! You should experience that perfect balance of tartness and sweetness dancing on your palate. If you find it leans too far in either direction, don’t hesitate to adjust with a little more sugar or lime juice until it’s absolutely divine. Remember, this step is all about creating that personalized flavor profile that makes this Key Lime Pie Cheesecake Dip so special for you and your loved ones.
At this stage, if you’re feeling adventurous, consider adding some extra lime zest for an additional zing or even a sprinkle of sea salt for contrast. The salt brings out those bright flavors beautifully—a technique I swear by! Just be sure not to go overboard; a pinch is typically sufficient for that magical enhancement without overwhelming the natural flavors at play.
Step 7: The Chilling Process — A Crucial Transformation
Now comes an essential step that simply cannot be rushed: chilling. After all that hard work mixing up this creamy concoction, it’s time for our dip to relax in the refrigerator for at least 30 minutes before serving. Trust me on this; while you might be tempted to dive right in—after all, it smells heavenly—the chilling allows all those tantalizing flavors to meld together beautifully. It’s akin to letting a fine wine breathe; giving it some time enhances complexity and depth.
While chilling, cover your bowl with plastic wrap or transfer everything into an airtight container; this will prevent any unwanted odors from infiltrating your dip while it’s resting peacefully in the fridge. During this waiting period, I encourage you to think about how you’ll present this beautiful dish at your next gathering—perhaps garnishing with some more lime zest or even thinly sliced limes on top? Just imagine how stunning it will look next to a vibrant platter of fresh fruit and crunchy graham crackers!
Step 8: Serving Suggestions — The Grand Reveal
After waiting patiently (I know it’s tough!), it’s time for the grand reveal! Once chilled sufficiently—around 30 minutes but ideally up to an hour—you’ll want to give your dip one last gentle stir before serving. This final mix ensures everything remains wonderfully creamy after settling in the fridge and allows any ingredients that may have slightly separated during chilling to come back together harmoniously.
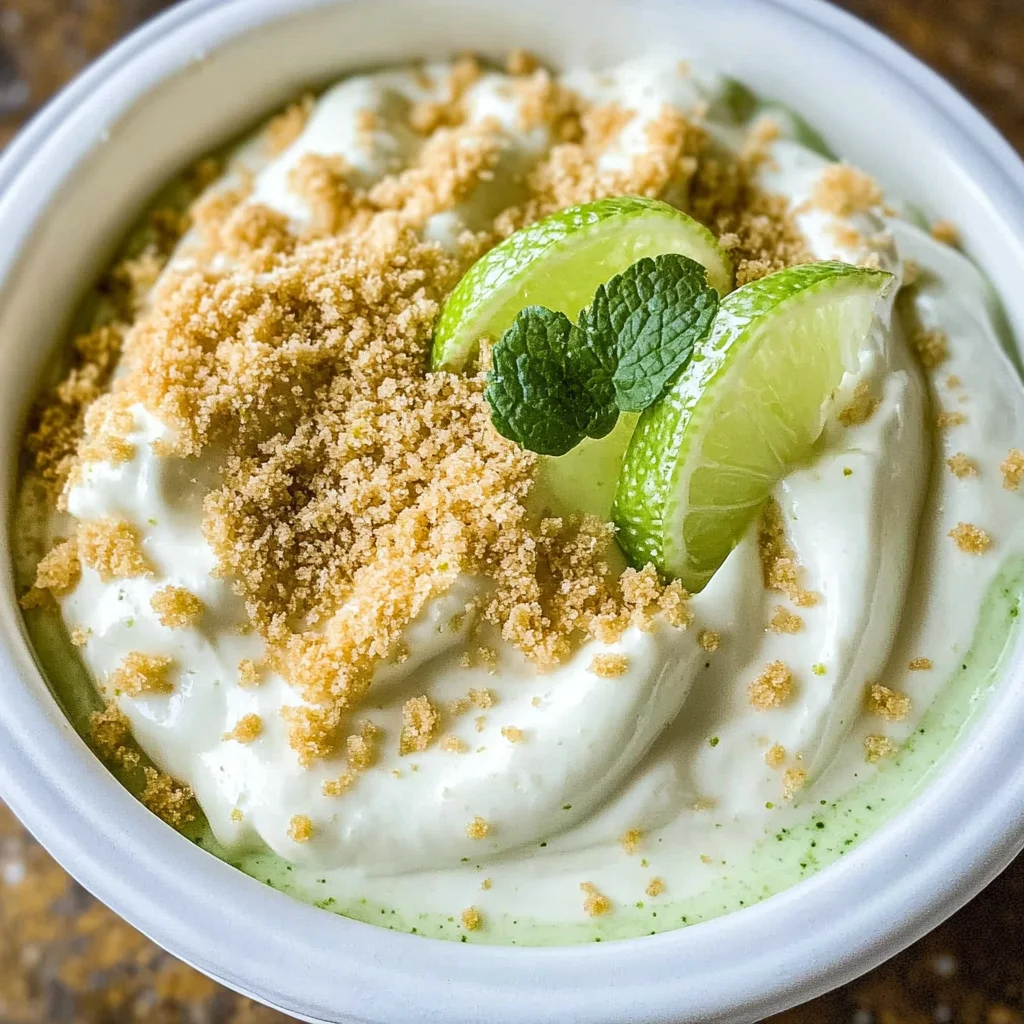
Now let’s talk presentation because eating with our eyes first is oh-so-important! Transfer your Key Lime Pie Cheesecake Dip into a beautiful serving bowl—something bright and cheerful would work perfectly here—and surround it with an array of dippers like graham crackers (the classic choice), buttery cookies, or fresh slices of fruit such as strawberries or apple slices. Each bite should be an adventure—a delightful crunch followed by creamy bliss—that makes everyone coming back for more!
Don’t forget about garnishing; sprinkle some freshly grated lime zest on top for that pop of color and freshness—it adds not only visual appeal but also enhances the aromatic experience when served. Your friends and family will be swooning over this utterly intoxicating dessert dip long after they’ve had their fill!
Final Touches: Making Memories with Every Bite
As you gather around with friends or family diving into this delightful Key Lime Pie Cheesecake Dip, remember that food is so much more than just nourishment; it’s about connection and love shared through every bite. This easy dessert dip isn’t just another recipe; it’s genuinely something special—an invitation to share laughter and stories while enjoying each other’s company.
So take pride in what you’ve created today! As you savor each delicious scoop paired with those crispy graham crackers or juicy fruits, relish in knowing you’ve brought joy into someone’s day through simple yet profound flavors—because at its heart, isn’t that what home cooking is all about? Enjoy every moment—you deserve it!
Storage and Enjoyment Tips for Your Key Lime Pie Cheesecake Dip
Now that you’ve whipped up this enchanting Key Lime Pie Cheesecake Dip, the real fun begins! Picture yourself at a gathering, laughter filling the air, as friends dive into this creamy, zesty delight. I can almost hear the clinking of graham crackers and the joyful oohs and aahs as they savor each bite. But what happens when there are leftovers? Don’t worry; I’ve got you covered with some fabulous storage tips to ensure every last spoonful remains as delightful as the first.
Storing Leftover Key Lime Pie Cheesecake Dip
To keep your dip fresh and luscious, transfer any leftovers into an airtight container. This is absolutely crucial, as it locks in moisture and flavor while keeping pesky odors at bay. Store it in the refrigerator where it will remain delightful for about 3 to 5 days—though I doubt it will last that long! As an extra tip to maintain its dreamy consistency, consider placing a slice of bread on top before sealing; this little trick helps retain moisture. After chilling, you’ll find that the flavors deepen beautifully, making each bite a more profound experience than before. When you’re ready to indulge again, simply serve it cold or give it a quick stir to revive its creamy texture.
Freezing Key Lime Pie Cheesecake Dip for Later
If you want to prepare ahead or stash away some of this heavenly dip for a later date, freezing is a fantastic option! Pour your dip into a freezer-safe container or a resealable bag (squeeze out any excess air), ensuring it’s tightly sealed to prevent freezer burn. You can freeze it for up to three months without losing its delightful charm. When you’re ready to enjoy your frozen stash, just move it from the freezer to the refrigerator for several hours or overnight until it’s thawed completely. Trust me on this; having this incredible dip on hand is not just convenient but also a brilliant way to surprise guests or elevate an ordinary day into something special!

Key Lime Pie Cheesecake Dip
- Total Time: 15 minutes
- Yield: Approximately 8 servings 1x
Description
Indulge in the creamy delight of Key Lime Pie Cheesecake Dip, a no-bake dessert that captures the essence of summer in every bite. This refreshing treat combines zesty lime juice with smooth cream cheese and whipped cream, creating a luscious dip perfect for gatherings or cozy nights in. Serve it alongside crunchy graham crackers or fresh fruit for a delightful contrast in textures. Whether you’re hosting a potluck or simply treating yourself, this easy dessert will transport you to sun-soaked shores with its vibrant flavors and irresistible charm.
Ingredients
- 8 oz cream cheese, softened
- 1/2 cup sugar (adjust to taste)
- 3 tablespoons fresh lime juice
- Zest of 2 small limes
- 1 pinch vanilla bean powder
- 1/4 cup heavy whipping cream
- Graham crackers or fruit for dipping
Instructions
- In a large mixing bowl, beat the softened cream cheese and sugar together until smooth.
- Add the lime juice, lime zest, and vanilla bean powder; mix until well combined.
- In a separate bowl, whip the heavy cream until soft peaks form. Gently fold the whipped cream into the cream cheese mixture until fully incorporated.
- Chill the dip for at least 30 minutes before serving.
- Serve with graham crackers or fresh fruit.
- Prep Time: 15 minutes
- Cook Time: 0 minutes
- Category: Dessert
- Method: No-Bake
- Cuisine: American
Nutrition
- Serving Size: 1/4 cup (60g)
- Calories: 230
- Sugar: 14g
- Sodium: 80mg
- Fat: 16g
- Saturated Fat: 10g
- Unsaturated Fat: 5g
- Trans Fat: 0g
- Carbohydrates: 20g
- Fiber: 0g
- Protein: 3g
- Cholesterol: 40mg
Leave a Comment