When I think about the heart of summer, my mind drifts to sun-drenched orchards bursting with ripe apricots, their sweet and tangy flavors whispering promises of warmth and joy. This Apricot and almond traybake is more than just a delightful dessert; it’s a celebration of those joyful moments that linger in our memories, a bridge connecting us to the simplicity and beauty of homemade delights. Each mouthful is like a warm embrace, reminding us of lazy afternoons spent enjoying life’s little pleasures with family and friends. The golden sponge cradles succulent apricots that caramelize beautifully in the oven, creating a symphony of flavors that dances on your palate.
What makes this recipe truly special is how effortlessly it brings together the nutty richness of almonds with the vibrant sweetness of apricots. As the butter and sugar meld into a creamy base, you’ll feel an undeniable excitement building—this is where magic begins! For me, baking isn’t just about following steps; it’s about weaving stories through our ingredients. With every fold and stir, we breathe life into something extraordinary. And trust me when I say that this Apricot and almond traybake will not only fill your kitchen with comforting aromas but also create cherished memories around your table.
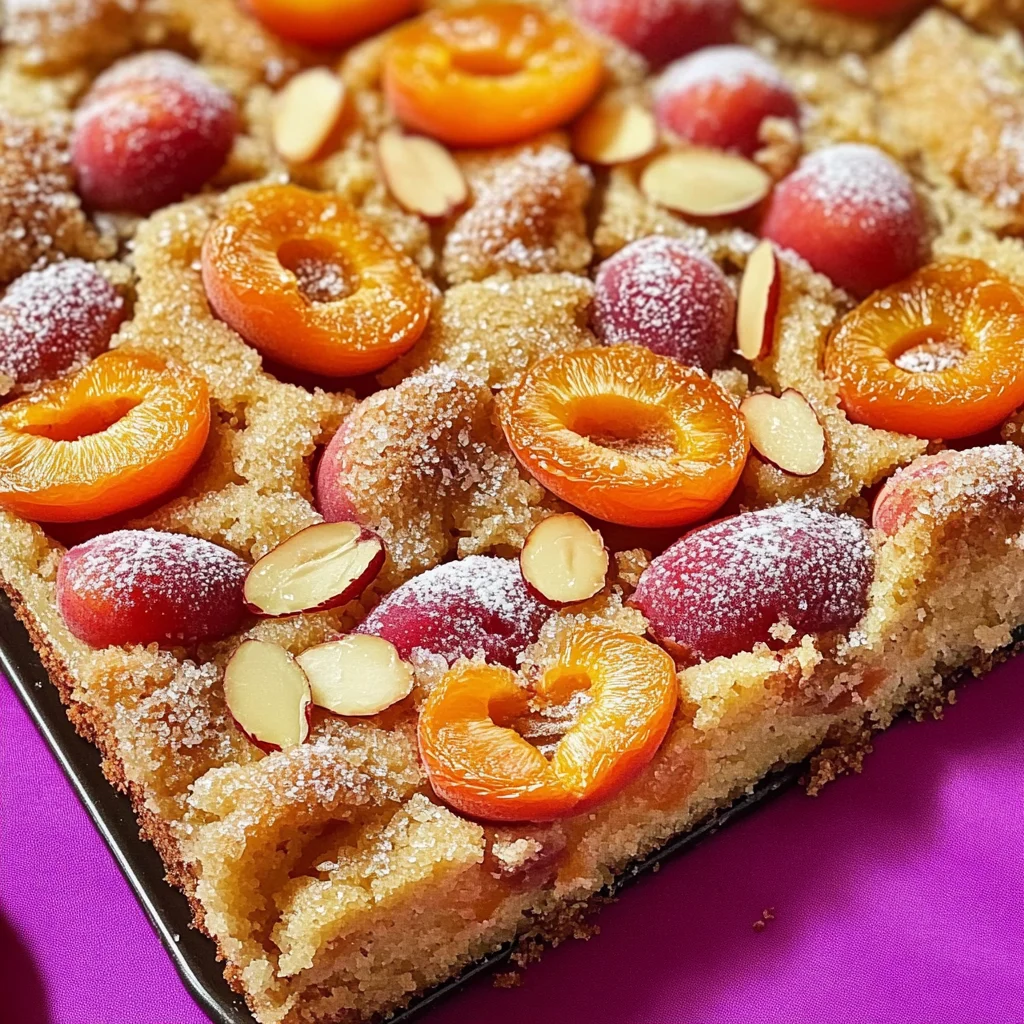
Apricot and almond traybake: Summer’s Sweet Embrace
Welcome to the world of baking where simple ingredients transform into extraordinary treats! This Apricot and almond traybake is an effortless way to indulge in the rich flavors of summer fruit while enjoying the warmth of freshly baked cake. Perfect for sharing during afternoon tea or as a delightful dessert after dinner, this recipe guarantees smiles all around!
Ingredients:
As we embark on this culinary journey together, let’s take a moment to appreciate each ingredient that plays its part in creating our delicious traybake. Each one has its unique role, contributing not just flavor but also texture and warmth to this lovely creation.
-
220 g butter: This luscious liquid gold is essential for achieving that rich flavor and tender crumb we crave in our cake. When softened to room temperature, it creamily blends with sugar, forming an emulsion that traps air—this process is crucial for creating lightness in our sponge. I often opt for high-quality European-style butter because its higher fat content adds depth to both flavor and texture. Remember, if your butter isn’t soft enough, it won’t cream well; but too warm, it can cause your batter to separate.
-
220 g caster sugar (superfine sugar): The fine granules of caster sugar dissolve effortlessly into our mixture, ensuring a smooth batter without any graininess. This sugar not only sweetens our traybake but also helps create that delightful crust on top as it caramelizes during baking. If you can’t find caster sugar at your local store, don’t worry! You can easily make your own by blitzing granulated sugar in a food processor until fine.
-
4 medium eggs: Eggs are the binding agents here—they provide structure while keeping our cake moist and fluffy. When you add them one by one, you’re allowing each egg to fully incorporate before introducing the next; this ensures even distribution throughout the batter. Look for fresh eggs with bright yolks—these will contribute both color and richness to your bake.
-
50 g ground almonds: These finely crushed nuts bring an unmistakable nuttiness and moisture to our cake. Ground almonds help create a tender crumb while adding depth to the overall flavor profile. If you’re feeling adventurous or if allergies call for it, feel free to substitute ground almonds with other nuts or seeds like ground pistachios or sunflower seeds for a unique twist!
-
170 g self-raising flour: This flour is an absolute gem in the baking world as it contains baking powder—the key player in giving our cake its glorious rise! Using self-raising flour simplifies our process because we don’t have to measure out additional leavening agents separately. Make sure to sift it before use; this aerates the flour which contributes further lightness.
-
1 tsp baking powder: Even though we’re using self-raising flour, adding just a touch more baking powder elevates the rise even further—a foolproof way to ensure that your cake isn’t dense or heavy! Baking powder works by releasing carbon dioxide gas when mixed with moisture and heat—it’s what creates those beautiful bubbles within your sponge!
-
1 tsp vanilla extract: Vanilla extract lends an aromatic sweetness that enhances all other flavors in our traybake. It’s like a gentle hug for our taste buds! Always choose pure vanilla extract over artificial options for maximum flavor impact—it makes all the difference!
-
8 apricots (halved): These sun-kissed jewels are undoubtedly the star of our dish! Their juicy sweetness pairs perfectly with the nutty base while providing natural moisture as they cook down in the oven. When selecting apricots at the market, look for ones that yield slightly when squeezed gently—their ripeness will ensure they burst with flavor during baking.
-
Caster sugar (for sprinkling over fruit): A light dusting of caster sugar on top of the halved apricots helps draw out their natural juices while adding extra sweetness as they caramelize during baking—a non-negotiable step if you want succulent fruit on top!
-
Icing sugar (to serve): Finally, icing sugar adds that beautiful finishing touch when dusted over each square before serving—a visual delight that also brings an added hint of sweetness! Sift it right before serving for best results; nothing says “I love you” quite like a sprinkle of icing sugar over your creations!
Equipment You’ll Need:
Having the right tools at hand is essential for making this Apricot and almond traybake come together smoothly—and trust me, there’s nothing worse than scrambling for equipment mid-bake! Here’s what you’ll need:
-
Mixing bowl: A large mixing bowl allows ample space for creaming butter and sugar together without any mess—this step deserves room to breathe! Opt for one made from glass or stainless steel since these materials retain less heat compared to plastic.
-
Electric mixer or whisk: While you could use a hand whisk (and get quite an arm workout!), an electric mixer saves time and energy when creaming butter with sugar until pale and fluffy—a vital step in achieving airy texture.
-
Spatula: A silicone spatula is perfect for folding dry ingredients into wet without deflating precious air bubbles you’ve worked so hard to create during mixing. Plus, they scrape every last bit from bowls—no waste here!
-
Stoneware dish or baking tin: Using stoneware creates even heat distribution which helps bake your cake evenly—plus it looks gorgeous when serving straight from oven-to-table! If using metal tins instead, remember to line them properly to avoid sticking.
With these essentials gathered around you, let’s dive into preparing your delicious Apricot and almond traybake!
Step 1: The Art of Creaming
To begin crafting this delightful treat, start by placing softened butter in your mixing bowl alongside caster sugar. This process known as creaming involves beating these two ingredients together until they’re lightened in color and fluffy—a transformation happens here that’s absolutely magical! Why do we cream? It incorporates air into the mixture which leads us toward achieving that beautifully risen cake we desire. I recommend using medium speed on your electric mixer; this ensures even blending without overwhelming those delicate bubbles forming in our mixture. Once well combined—think pale yellow fluffiness—you’ll know it’s time for eggs!
Step 2: Egg-cellent Incorporation
Now comes one of my favorite parts—adding eggs! Crack each egg into its own small bowl first (just in case there’s any shell mishap) then add them one at a time into your creamed mixture while continuing to mix at low speed until fully incorporated after each addition. This gradual incorporation allows each egg’s proteins time to bind properly within batters rather than shocking them all at once! You should notice slight thickening as they blend in—the consistency will become smooth yet still slightly loose. Trust me on this step; rushing through could result in uneven texture later on.
Step 3: Folding In Dry Ingredients
Once those lovely eggs are mixed through beautifully (you might want to take a moment here just admiring how fluffy everything looks), it’s time now to gently fold in our dry ingredients—the self-raising flour combined with ground almonds along with baking powder—and don’t forget the splash of vanilla extract too! Using a spatula here prevents knocking out created air pockets from earlier steps which provides lift during baking—a firm hand won’t do here folks! Gently cut through layers alternating between scraping down sides while lifting mixture from bottom upward until just combined—you want some streaks remaining visible because overmixing can lead us astray towards dense bakes instead!
Step 4: Preparing Your Dish
We’re almost there now! Before pouring that luscious batter into prepared stoneware dish—or whichever pan you’ve chosen—take care by greasing it well so nothing sticks after baking glory has been achieved! I like using cooking spray (like Lurpak) since it coats evenly without extra fuss involved—but melted butter brushed across works wonderfully too if preferred. Pour batter directly into center then gently smooth outwards toward edges using spatula so everyone gets equal portions once ready for slicing later—we want no sad corners here!
Stay tuned as we continue crafting this delightful Apricot and almond traybake together—I promise you’ll be amazed by how rewarding each step feels leading up towards indulgence filled goodness ahead!
Making Your Apricot and Almond Traybake Shine
Step 5: Pouring the Batter with Love
Now that you’ve expertly creamed together your butter and sugar, creating a luscious base that almost feels like a warm hug in a bowl, it’s time to bring your cake batter to life. Carefully pour the mixture into your prepared stoneware dish. This step is crucial because the way you pour can affect how the batter spreads and bakes. Using a spatula, gently smooth out the top of the batter until it’s evenly distributed across the dish. Aim for a uniform layer so that each piece has that beautiful golden crust we all crave. Trust me on this; an even bake means every square of your apricot and almond traybake will have that heavenly texture—light yet moist, with a crumb that’s just right.
You might be tempted to rush through this step, but take your time! A little care now pays off later when you’re cutting into those perfectly formed squares. As you spread the batter, take a moment to appreciate its rich color and aroma wafting through the kitchen—it’s utterly intoxicating. I often find myself sneaking a spoonful at this stage; it’s such a delight! Remember, this is about creating something special, so embrace the process and let those good vibes flow!
Step 6: Decorating with Apricots
Here comes one of my favorite parts—adding the apricots! Take those vibrant halved beauties and press them gently into the batter; I like to alternate their orientation—one cut side up, one cut side down—in a playful pattern across the surface. This isn’t merely for aesthetics; by varying their placement, you’re allowing more of that sweet apricot juice to seep into the cake as it bakes, resulting in bursts of flavor throughout each bite. Imagine slicing into your traybake only to discover small pockets of juicy goodness nestled within!
As you press them in, don’t forget to sprinkle a little caster sugar over these fruit gems. This sprinkle does wonders—it caramelizes during baking, creating a lovely contrast between sweetness and tanginess while enhancing their natural flavor. The idea here is to coax out every bit of deliciousness from these apricots; they’re going to transform into sweet little jewels embedded in soft sponge cake. So don’t rush this step; savor it like you would any beautiful moment spent in the kitchen.
Step 7: The Sweetest Transformation
With your apricots now snugly nestled in their cakey bed, it’s time for one last sprinkle of caster sugar over everything before baking. This extra touch is absolutely paramount—it not only adds sweetness but also helps form that lovely golden crust on top of your traybake as it bakes away in the oven. Picture it: as your cake rises and bakes, that sugar will melt slightly and create something akin to an apricot glaze—a perfect marriage of flavors just waiting for you!
Now let’s talk timing; preheat your oven to 180℃ (350℉) if you haven’t already done so—having that heat ready is essential for achieving that beautiful rise we all adore in baked goods. When everything is ready, pop your traybake into the oven and set your timer for 35-40 minutes. This baking time allows for that wonderful transformation where heat does its magic: turning raw batter into an irresistible sponge cake filled with flavor! Keep an eye on it towards the end; every oven behaves differently, so look for that gorgeous golden brown top and ensure a skewer inserted into the center comes out clean—it’s like finding treasure!
Step 8: The Art of Baking
As your apricot and almond traybake bakes away in the oven, take a moment to revel in those enticing aromas filling your home—they’re simply divine! You’ll notice that delightful scent wafting through every room, beckoning everyone closer like moths to a flame. At around 30 minutes in, it’s worth peeking inside—this isn’t just impatience talking! Keeping track of visual cues is essential because slight variations can lead to different outcomes depending on how hot or cool your oven runs.
When checking for doneness after around 35 minutes, watch closely for two things: first, you want to see that lovely golden-brown crust forming on top; second—and this is crucial—you want to ensure that when you insert a skewer or toothpick into the center of your cake, it comes out clean without any wet batter clinging to it. If there’s wet batter still present, give it another few minutes but check regularly—you don’t want to overbake! Overbaking can dry out what should be an exquisitely moist cake.
Final Touches: Presenting Your Masterpiece
Step 9: Cooling and Serving with Style
Once you’ve masterfully baked your apricot and almond traybake to perfection (and oh my goodness does it smell heavenly!), it’s time for some patience while it cools down in its dish—this step might feel tedious but trust me; letting it cool properly means easier cutting later on without crumbling or falling apart! Leaving it in its dish allows residual heat to finish cooking through while locking in moisture—no one wants a dry cake!
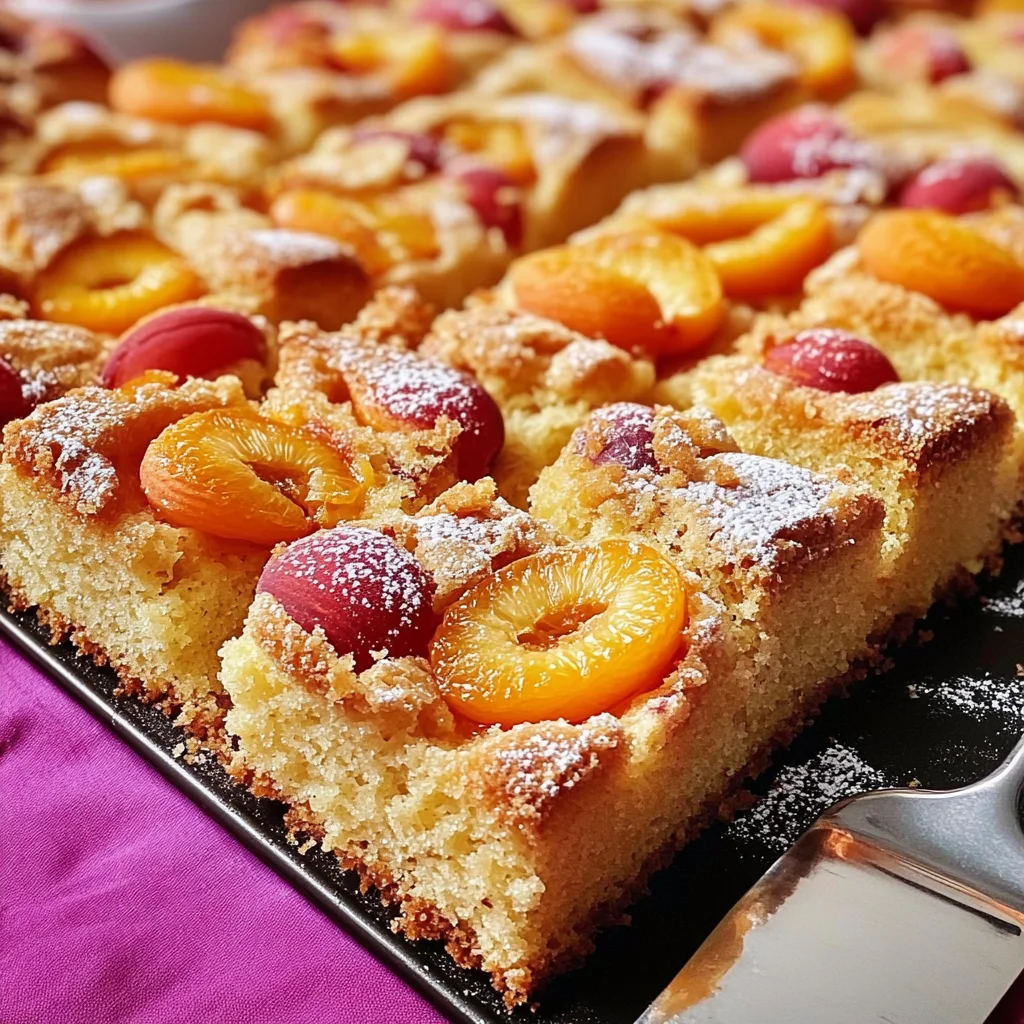
After about 15-20 minutes (you might find yourself tapping your foot impatiently), it’s time for one last flourish—a dusting of icing sugar over the top transforms this humble traybake into something truly extraordinary! Visualize how stunning those sweet apricots look against that powdered sugar backdrop—a dessert worthy of any gathering or even just an afternoon indulgence with tea.
Now comes my favorite part—cutting it into squares! I recommend using a sharp knife warmed slightly under hot water for clean cuts without tearing apart all your hard work. As you slice through each piece revealing those beautiful layers—golden sponge cradling sweet apricots—I promise you will feel immense satisfaction wash over you.
As soon as you take that first bite—oh my goodness—the combination of nutty almonds mingling with juicy apricots creates an utterly delightful symphony of flavors dancing on your palate! It’s not just food; it’s love served on a plate—a treat sure to bring smiles all around.
So gather some friends or family (or keep all these delicious squares just for yourself!) and enjoy every moment spent savoring this incredible apricot and almond traybake together! Happy baking!
Storage and Enjoyment Tips for Your Apricot and Almond Traybake
Now that you’ve baked your very own Apricot and almond traybake, the aroma wafting through your kitchen is an absolute invitation to dive in and indulge! But before you grab a slice—trust me, you’ll want to savor its delightful essence over a few days—let’s chat about how to store it properly so that every bite remains as scrumptious as the first. This delightful treat is not just meant for one sitting; it’s perfect for sharing with friends, family, or even savoring during those quiet moments when you need a little pick-me-up.
Storing Leftover Apricot and Almond Traybake
To keep your delicious creation fresh and flavorful, I recommend using an airtight container. This isn’t just any container; I like to use a glass one because it helps maintain moisture without absorbing odors from the fridge. Place your traybake inside and seal it tightly before popping it into the refrigerator. If stored this way, your cake will stay lovely for about 5-7 days—though I doubt it’ll last that long with the way everyone will be clamoring for a piece! To maintain its incredible texture, consider slipping a slice of bread into the container alongside your traybake; this simple trick works wonders to keep everything moist. And oh boy, even after a few days in the fridge, the flavors meld together beautifully, creating an even more profound symphony of tastes that’s truly extraordinary. When you’re ready to enjoy another slice, simply let it sit at room temperature for about 10 minutes or give it a gentle reheat in the microwave for about 15 seconds—trust me; it’s worth every second!
Freezing Apricot and Almond Traybake for Later
If you’re anything like me and love having sweet treats on hand but don’t always have time to bake, freezing some of your Apricot and almond traybake is an absolute game-changer! To do this properly, first cut your cooled traybake into squares and wrap each piece individually in cling film or aluminum foil. This layer of protection helps lock in moisture while preventing freezer burn. Once wrapped up snugly, toss them into a resealable freezer bag or container—you want to make sure they’re well sealed against those icy elements! When frozen correctly, they can last up to three months without losing their charm. When you’re ready to enjoy one (or maybe two!), simply take them out of the freezer and let them thaw at room temperature for about 30 minutes—or if you’re in a hurry, pop one in the microwave for about 20 seconds. The convenience of having these delightful squares ready to go makes life just a little sweeter!

Apricot and Almond Traybake
- Total Time: 50 minutes
- Yield: Serves approximately 12 slices 1x
Description
Indulge in the delightful flavors of summer with this Apricot and almond traybake. Bursting with juicy apricots and the nutty richness of ground almonds, this easy-to-make dessert is perfect for gatherings or a sweet treat after dinner. Each slice offers a soft sponge cake topped with caramelized apricots, creating a mouthwatering harmony of flavors that will transport you to sun-drenched orchards. Ideal for sharing, this traybake is not only simple to prepare but also creates cherished moments around the table with friends and family.
Ingredients
- 220 g butter (softened)
- 220 g caster sugar
- 4 medium eggs
- 50 g ground almonds
- 170 g self-raising flour
- 1 tsp baking powder
- 1 tsp vanilla extract
- 8 halved apricots
- Caster sugar (for sprinkling over fruit)
- Icing sugar (to serve)
Instructions
- Preheat oven to 180℃ (350℉). Grease a stoneware dish.
- In a mixing bowl, cream together softened butter and caster sugar until light and fluffy.
- Add eggs one at a time, mixing well after each addition.
- Gently fold in the ground almonds, self-raising flour, baking powder, and vanilla extract until just combined.
- Pour the batter into the prepared dish and smooth the top.
- Press halved apricots into the batter, cut side up, and sprinkle lightly with caster sugar.
- Bake for 35-40 minutes or until golden brown and a skewer inserted into the center comes out clean.
- Allow to cool before dusting with icing sugar and slicing.
- Prep Time: 15 minutes
- Cook Time: 35 minutes
- Category: Dessert
- Method: Baking
- Cuisine: General
Nutrition
- Serving Size: 1 serving
- Calories: 380
- Sugar: 25g
- Sodium: 150mg
- Fat: 20g
- Saturated Fat: 10g
- Unsaturated Fat: 8g
- Trans Fat: 0g
- Carbohydrates: 42g
- Fiber: 2g
- Protein: 6g
- Cholesterol: 120mg


Leave a Comment