There’s something magical about cooking that transcends mere sustenance; it’s a heartfelt expression of love, creativity, and connection. When I think about my favorite dishes, Bang Bang Chicken stands out as an experience that tantalizes the senses and brings people together. Imagine the sound of sizzling chicken in hot oil, the intoxicating aroma wafting through your kitchen, and that first crispy bite revealing tender meat beneath a golden panko crust. This dish doesn’t just fill your belly—it fills your heart with joy, reminding us why we gather around tables to share our lives. The perfect blend of sweet and spicy in the homemade bang bang sauce dances on your taste buds, creating a symphony of flavors that’s utterly unforgettable. Trust me; it’s not just food—it’s a celebration.
Now, let me tell you why this recipe is such a crowd-pleaser and how easy it is to whip up! The beauty of Bang Bang Chicken lies not only in its delightful crunch but also in its versatility. Whether served as an appetizer for your next gathering or nestled in wraps for a casual weeknight dinner, this dish shines brightly on any occasion. With its roots in Asian cuisine and a contemporary twist, it perfectly balances comfort with innovation. The combination of sweet Thai chili sauce and Sriracha creates an exhilarating flavor explosion that will keep everyone coming back for seconds—and I promise you, there will be seconds! So roll up your sleeves, and let’s dive into this culinary adventure together!
Bang Bang Chicken: A Flavorful Crunch That Delights
This Bang Bang Chicken recipe is one I hold dear to my heart—one that brings warmth to my kitchen and smiles to my table. With every bite, everyone can savor the juicy tenderloins enveloped in a crispy panko coating, all complemented by the rich tanginess of the homemade bang bang sauce. It’s truly extraordinary how simple ingredients can come together to create such profound satisfaction! So grab your apron and join me as we embark on this flavorful journey!
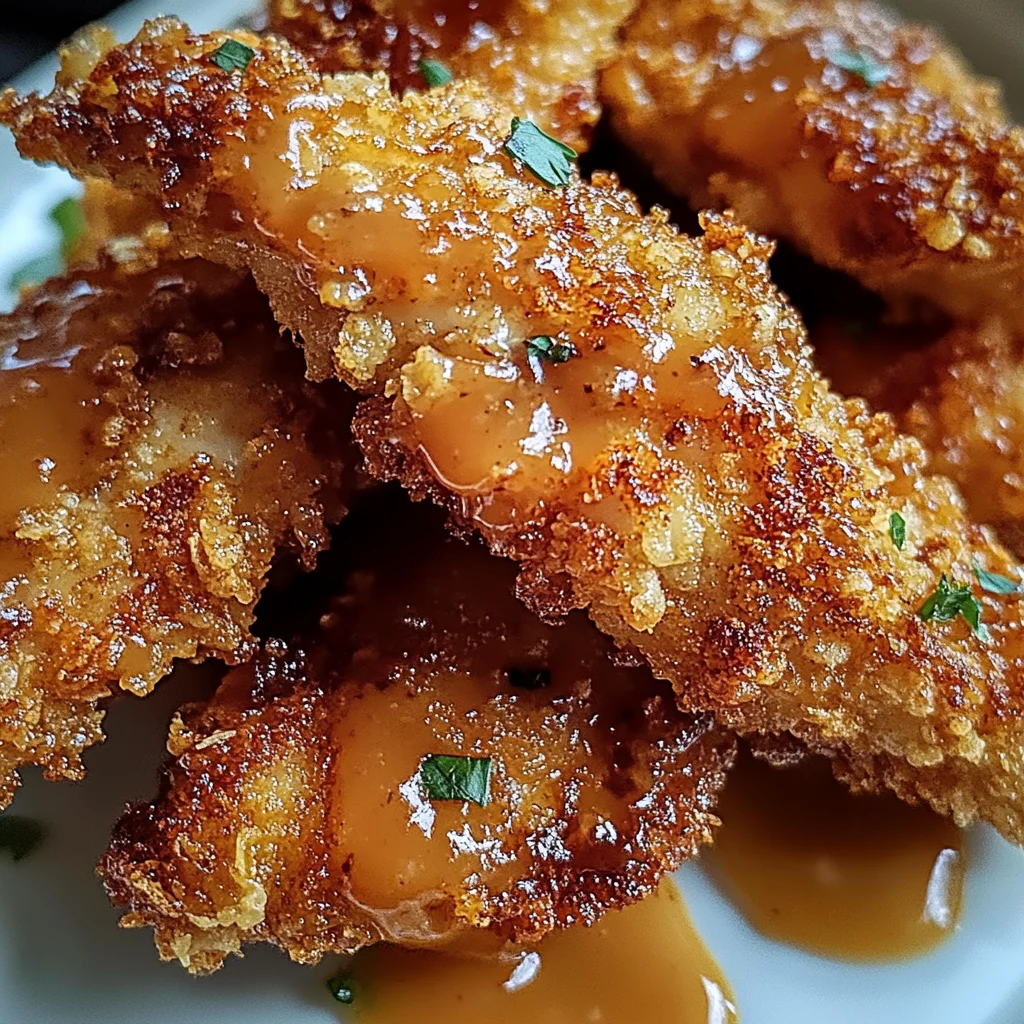
Ingredients:
As we set off on our culinary adventure to make Bang Bang Chicken, let’s take a moment to appreciate each ingredient’s role in crafting this delightful dish. Each component plays its part beautifully, contributing not just flavor but also texture and richness.
- 1 ½ pounds boneless skinless chicken tenderloins. These tenderloins are the stars of our show! Their lean yet juicy nature makes them perfect for frying—they cook quickly and remain moist inside while achieving that coveted crisp on the outside. When selecting chicken tenderloins, look for those with a fresh appearance—no gray spots or off odors—and ensure they have been stored properly at a cold temperature. Feel free to substitute with chicken breasts if you prefer; just remember they may require slightly longer cooking time.
- 1 cup buttermilk. Ah, buttermilk—the secret weapon in our marinade! It’s crucial for infusing moisture into the chicken while also acting as a tenderizer thanks to its acidity. This step is non-negotiable because it ensures that every bite remains juicy rather than dry or tough. If you don’t have buttermilk on hand, no worries! You can easily make your own by adding one tablespoon of lemon juice or vinegar to regular milk and letting it sit for about five minutes until it curdles slightly.
- ¾ cup all-purpose flour. This humble ingredient serves as the first layer in our breading process, providing structure and helping the subsequent layers stick better to our chicken pieces. It’s imperative to season this flour well (which we will do shortly) because it sets the stage for developing those delightful layers of flavor as we build our crispy coating.
- 2 cups panko breadcrumbs. Here comes the magic! Panko breadcrumbs are light and airy compared to traditional breadcrumbs; they create an irresistibly crunchy exterior that elevates our chicken from ordinary to extraordinary. Their larger flakes allow for more surface area which means more crunch—who doesn’t love that? When shopping for panko, opt for unseasoned varieties so you can control the seasoning yourself.
- 1 cup mayonnaise. Mayonnaise adds richness and creaminess to our bang bang sauce while also serving as an excellent base for flavor enhancement—it acts like liquid gold here! Not only does it create a luscious mouthfeel when mixed with other ingredients but also helps balance out spiciness from Sriracha later on.
- ½ cup Thai sweet chili sauce. This magical condiment brings sweetness and depth—a perfect counterpoint to heat from Sriracha! It adds complexity without overwhelming other flavors which is absolutely paramount when crafting our dip; think of it as a bridge between flavors ensuring harmony throughout every bite.
- 1 teaspoon Sriracha. For those who crave some heat—this fiery sauce packs quite a punch! Adjusting its quantity allows you complete control over how spicy you want your dish so feel free to experiment based on preference—after all, cooking should be fun!
- 2 tablespoons honey. Honey adds another layer of sweetness while providing viscosity that enhances texture within our sauce—trust me when I say this balance makes all the difference! Choose high-quality honey if possible; local sources often yield richer flavor profiles.
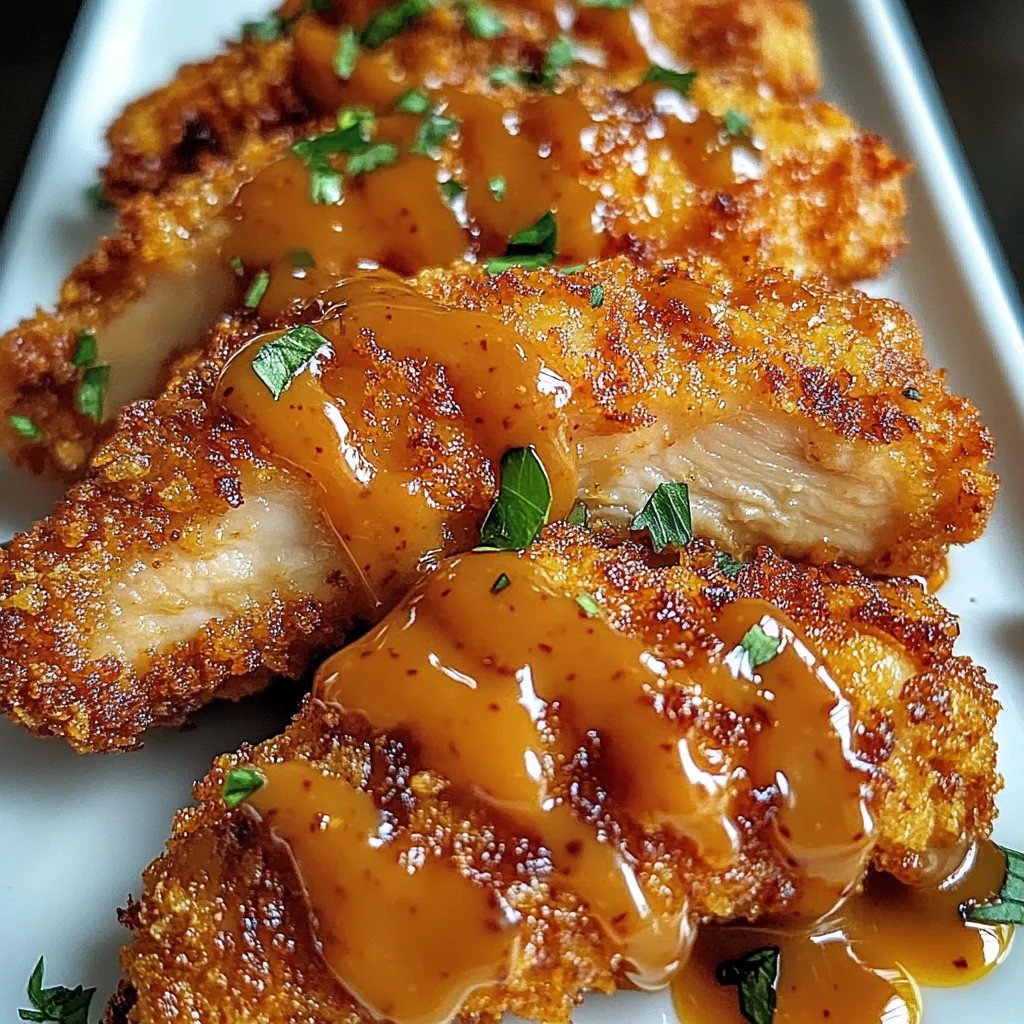
Equipment You’ll Need:
Having the right tools makes all the difference when preparing any dish—it transforms what could be ordinary into something spectacular! Let’s gather our trusty kitchen companions before diving into making this Bang Bang Chicken so we can ensure everything flows smoothly.
- Large mixing bowls – You’ll need these for marinating your chicken tenderloins as well as mixing up that decadent bang bang sauce later on! Opt for glass or stainless steel models since they won’t react negatively with acidic ingredients like mayo or vinegar.
- Whisk – A sturdy whisk is essential for combining sauces smoothly; trust me—you want everything blended harmoniously without clumps! If you don’t have one handy, using a fork works too; just be diligent about breaking up any lumps thoroughly.
- Meat thermometer – While optional, having one handy can alleviate any worries about undercooked chicken by measuring internal temperatures accurately (165°F is optimal). This little device takes away guesswork so you can relax knowing every piece has been cooked perfectly!
- Frying pan or deep pot – A heavy-bottomed frying pan will help maintain steady oil temperatures while cooking; alternatively use a deep pot if you’re comfortable submerging pieces fully during frying—just make sure it’s large enough!
- Tongs – Essential for flipping those crispy pieces without breaking their delicate coats—trust me; these are invaluable tools during frying sessions!
Now that we’ve gathered everything we need let’s jump right into preparing this irresistible Bang Bang Chicken masterpiece!
Preparing the Bang Bang Chicken
Step 1: Whisk Together Your Sauce
First things first: let’s prepare that unforgettable bang bang sauce which will drizzle over our fried chicken later on! In a medium bowl (your mixing bowl from earlier), combine one cup of mayonnaise along with half a cup of Thai sweet chili sauce—an absolute must-have ingredient—and one teaspoon of Sriracha plus two tablespoons of honey for added sweetness! Whisk everything together until smooth—this process allows each ingredient to meld beautifully creating an utterly intoxicating blend full of layers upon layers of flavor waiting eagerly atop those crispy tenders later on. Don’t rush this step; truly taking time ensures maximum flavor infusion!
Step 2: Marinate Your Tenderloins
Next comes marination—the key step responsible for achieving moistness throughout each bite! Take your 1½ pounds of boneless skinless chicken tenderloins (gently pat them dry first) then immerse them entirely within one cup of buttermilk inside another mixing bowl (or resealable plastic bag if preferred). Allow them at least fifteen minutes (or even overnight if time allows) soaking up all that tangy goodness—it softens proteins allowing deeper flavor penetration leading towards juicy results post-cooking!
Step 3: Set Up Your Breading Station
While waiting patiently during marination time (which is crucial!), prepare yourself by getting ready for breading action ahead: gather three shallow dishes side by side where things will happen magic-wise! In one dish combine three-fourths cup all-purpose flour seasoned generously with salt (about ½ tsp will do!), black pepper (a few shakes), garlic powder (one teaspoon), plus optional cayenne pepper depending upon desired spice level preference—this mixture acts as our dry dredge providing both flavor & texture enhancement throughout final product presentation!
In another dish whisk together egg beaten lightly along with remaining teaspoon worth Sriracha—you’re creating an egg wash here meant specifically designed help bind crumb coating firmly onto meat surfaces ensuring none falls off during frying sessions! Finally prepare third dish filled entirely over two cups worth panko breadcrumbs waiting patiently below surface readying themselves provide ultimate crunch factor once introduced hot oil environment soon enough!
Step 4: Coat Those Tenderloins
Now comes arguably my favorite part—the actual breading process transforming raw pieces into something spectacularly crispy & golden brown perfection waiting eagerly meet hot bubbling oil below soon enough too! First take each marinated piece out individually shaking off excess buttermilk gently before plunging directly into seasoned flour mixture ensuring full coverage achieved without too much clumping occurring either way around edges either direction applied evenly across entire surface area present here today before proceeding next stage onward forward onto egg wash bath wherein apply similar method allowing slight drip excess liquid catch itself downwards before finally finishing last leg journey into awaiting panko breadcrumb territory where final coating shall occur completely enveloped now achieving ultimate crispy exterior desired outcome sought after having passed through entire layered setup prior ahead thus leading forth towards imminent frying session awaiting arrival momentarily below surface!
With these steps completed lovingly crafted ahead already establishing foundation necessary toward creating ultimate product realization soon enough let us continue onward further down path leading straight toward cooking stage itself where deliciousness awaits us eagerly beckoning forth loudly announcing presence enticingly inviting everyone present share experience together along side warm company gathered around table enjoying wonderful moments created midst delectable dishes shared amongst loved ones gathered round safely alongside soul-satisfying nourishment provided plenty nourishing hearts contentedly fulfilled evening turned brilliant success overall collectively celebrated triumphantly together forever remembered fondly cherished lifetime memories crafted lovingly within homes everywhere alike regardless backgrounds origins alike ultimately connected through food shared lovingly amongst friends family together united spirit nourishing bonds strengthened always forevermore timelessly etched memory banks treasured dearly held close hearts beating rhythmically alive nourished souls happier whole more joyful experiences brought forth life enjoyed fully treasured eternally cherished forever after henceforth…
Bang Bang Chicken: The Crunchy, Zesty Delight
Step 5: Coating Your Chicken to Perfection
Now that your tender chicken pieces have soaked up the creamy goodness of buttermilk, it’s time to elevate them with a deliciously crunchy coating. Let’s talk about technique here; the order in which you coat your chicken is absolutely paramount to achieving that perfect crunch. Start by taking one chicken tenderloin and gently shaking off any excess buttermilk—it should be coated but not dripping. Then, roll it into the flour mixture, ensuring every inch is covered; this helps create a dry surface for the egg wash to adhere to. Trust me, this step is crucial because it acts as a glue that holds everything together—if you skip it, you’ll end up with a clump of breadcrumbs rather than a golden crust.
Once your chicken is well-coated with flour, dip it into the egg mixture. This is where the magic happens! The egg binds everything beautifully while adding moisture and richness. Afterward, transfer it to the bowl of panko breadcrumbs. Here’s where I want you to really get in there—press the breadcrumbs onto the chicken firmly. This little extra effort means that when we fry them, those crumbs will form an irresistible crust that shatters with every bite. Make sure to set each piece aside on a plate or tray after coating so they’re ready for frying all at once; this will keep your workflow smooth and efficient.
Step 6: Frying – The True Test of Crunch
Ahh, the moment we’ve all been waiting for—frying! Heat up a heavy-bottomed skillet or deep-fryer filled with canola oil until it reaches about 350°F (175°C). It’s essential to use an oil with a high smoke point like canola because we want that perfect balance between crispy and golden without burning anything. When you think about frying, visualize how those chicken pieces will transform from raw and pale into golden nuggets of joy! Carefully place a few pieces of chicken into the hot oil—don’t overcrowd the pan as it will lower the temperature and result in soggy chicken instead of crisp perfection.
Fry each batch for about 6 minutes or until they reach that gorgeous golden hue and are cooked through; you can use a meat thermometer if you’re unsure—the internal temperature should hit 165°F (74°C). Keep an eye on them while they fry; resist the urge to flip them too soon—patience is key here! You’ll know they’re ready when they float slightly and have that divine crackling sound. As they finish cooking, I recommend placing them on a wire rack set over paper towels to catch any excess oil, ensuring they remain crispy—not soggy!
Step 7: Drizzling with Sauce – The Flavor Explosion
Now comes my favorite part—drizzling those crispy tenderloins with our homemade bang bang sauce! With your fried chicken sitting charmingly on the serving platter, take a moment to admire their golden beauty before you dive in. It’s important to serve them hot so that every bite captures that delightful contrast between warm chicken and cool sauce. For added drama—and let’s be honest, who doesn’t love a little flair?—drizzle some sauce right over the top just before serving so guests can see how inviting this dish truly is.
But remember, don’t merely drown your precious creations in sauce; this isn’t just about flavor—it’s also about presentation. Just imagine serving this at your next gathering—the bright colors of the sauce against that crunchy exterior creating an irresistible visual feast! If you have some extra bang bang sauce left over (and I know you will because it’s irresistible!), serve it alongside as a dipping option; feel free to adjust the spiciness by adding more Sriracha if you dare.
Step 8: Plating and Serving – The Grand Finale
Finally, let’s talk about plating your Bang Bang Chicken because presentation matters—a lot! Arrange those beautiful golden tenders on a large platter or individual plates; consider garnishing with some finely chopped green onions or sesame seeds for an extra pop of color and texture. Not only does this enhance visual appeal, but it adds layers of flavor as well! A sprinkle of fresh cilantro would also work wonderfully if you’re looking for an herbaceous note.
As you gather everyone around for what promises to be an extraordinary dining experience, take a moment to relish in what you’ve created—the aroma wafting through your kitchen is nothing short of intoxicating! This dish isn’t just food; it’s an experience meant to be shared among friends and family. Serve them up alongside some fluffy jasmine rice or noodles for a complete meal—or why not throw together some refreshing tacos? Picture wrapping these crispy delights in soft tortillas topped with fresh veggies and drizzle more sauce over everything—it’s utterly transformative!
Final Touches: Enjoying Your Creation
With everything plated and ready for devouring, I want you to take a moment before diving in. Appreciate what you’ve crafted—the combination of textures and flavors that come together harmoniously in each bite is simply magical. And remember, cooking doesn’t just fill bellies; it’s about creating memories around the table with loved ones. So gather everyone close, share stories while enjoying these morsels of joy together, and don’t forget—you deserve all the compliments coming your way!
I promise you’ll find yourself making this dish again and again because once you’ve tasted this explosion of flavors from your own kitchen, there’s no going back! Enjoy every crunchy bite of your homemade Bang Bang Chicken—you’ve earned it!
Storage and Enjoyment Tips for Your Bang Bang Chicken
Ah, the moment has arrived—your Bang Bang Chicken is ready to be devoured! But before you dive right in, let’s talk about how to savor every last bite, even if you find yourself with leftovers. You see, this dish doesn’t just shine when it’s fresh; it has a way of transforming into something just as wonderful the next day—or even later! Storing your leftovers properly ensures that each piece retains that delightful crunch and flavor that makes it so utterly intoxicating.
Storing Leftover Bang Bang Chicken
To keep your leftover Bang Bang Chicken at its best, I recommend using an airtight container. This is crucial because it prevents moisture from ruining the crispy coating you’ve worked so hard to achieve. Simply place the chicken in a single layer if possible, or use parchment paper between layers to maintain that crunchy exterior. Stored this way in the fridge, your delicious chicken can last up to three days. Trust me, if you want to elevate the quality further, throw in a slice of bread inside the container; it absorbs excess moisture and keeps everything nice and crisp! When you reheat your leftovers, I suggest using an oven or air fryer instead of a microwave—I promise you’ll thank me for this tip. Heating them at 350°F for about 10 minutes will bring back that golden crunch while warming the chicken through beautifully.
Freezing Bang Bang Chicken for Later
Now, if you’re thinking ahead (which I wholeheartedly encourage!), freezing your Bang Bang Chicken is an excellent option. To freeze it properly, allow the cooked chicken to cool completely first; this step is non-negotiable as it prevents ice crystals from forming that could spoil your texture. Once cooled, lay the pieces on a baking sheet lined with parchment paper and freeze until solid—this helps them from sticking together. After they are individually frozen, transfer them into a freezer-safe bag or container, where they can stay good for up to two months! The beauty of freezing is that on those busy days when cooking feels like a chore, you can pull out these little nuggets of joy and have a meal ready in no time! Just pop them in the oven straight from frozen at 400°F for about 15-20 minutes. The result? A quick meal that’s still bursting with flavor and crunch!
CATEGORY_NAME
Bang Bang Chicken
- Total Time: 35 minutes
- Yield: Approximately six servings 1x
Description
Experience irresistible flavors with homemade Bang Bang Chicken! Try this quick recipe today and impress everyone at dinner!
Ingredients
- 1 ½ pounds boneless skinless chicken tenderloins
- 1 cup buttermilk
- ¾ cup all-purpose flour
- 2 cups panko breadcrumbs
- 1 cup mayonnaise
- ½ cup Thai sweet chili sauce
- 1 teaspoon Sriracha
- 2 tablespoons honey
Instructions
- In a mixing bowl, whisk together mayonnaise, Thai sweet chili sauce, Sriracha, and honey to create the bang bang sauce. Set aside.
- Marinate chicken tenderloins in buttermilk for at least 15 minutes.
- Prepare three shallow dishes: one with seasoned flour, one with an egg wash (beaten eggs mixed with Sriracha), and one with panko breadcrumbs.
- Coat each marinated tenderloin first in flour, then dip into the egg wash, and finally roll in panko breadcrumbs until fully coated.
- Heat oil in a frying pan to about 350°F (175°C). Fry chicken pieces for about 6 minutes each or until golden brown and cooked through.
- Drain on paper towels and drizzle with bang bang sauce before serving.
- Prep Time: 20 minutes
- Cook Time: 15 minutes
- Category: Main
- Method: Frying
- Cuisine: Asian
Nutrition
- Serving Size: 1 piece (100g)
- Calories: 310
- Sugar: 4g
- Sodium: 580mg
- Fat: 18g
- Saturated Fat: 3g
- Unsaturated Fat: 14g
- Trans Fat: 0g
- Carbohydrates: 25g
- Fiber: 1g
- Protein: 12g
- Cholesterol: 65mg
Leave a Comment