There’s something profoundly comforting about a warm bowl of mac and cheese, don’t you think? It’s like a big hug from the inside. Now, when you take that beloved classic and swirl in some tender, barbecue chicken, it transforms into an experience that dances on your palate—this is BBQ Chicken Mac and Cheese. The creamy, velvety sauce embraces each piece of elbow macaroni like a dear friend, while the tangy sweetness of barbecue pulls everything together harmoniously. When I make this dish, it’s more than just food; it’s an invitation to gather around the table with loved ones, share stories, and create memories over something utterly delicious. I promise you, every bite will have you reminiscing about summer barbecues while wrapped in the cozy embrace of home cooking.
I’ve always been captivated by recipes that marry two worlds—tradition and innovation—and this BBQ Chicken Mac and Cheese does just that. It’s perfect for weeknight dinners when you want to whip something up quickly yet still feel like you’re spoiling yourself with something special. The combination of creamy cheese and smoky barbecue creates a flavor profile that is both familiar and excitingly new. Whether you’re serving it at a potluck or simply indulging on a quiet evening at home, this dish has a way of bringing joy to any occasion. So gather your ingredients and let’s embark on this culinary journey together!
BBQ Chicken Mac and Cheese: A Comforting Twist on Tradition
You’re about to dive into a recipe that not only satisfies cravings but also warms the soul. This BBQ Chicken Mac and Cheese is the epitome of comfort food—creamy macaroni cloaked in rich cheddar sauce swirling with tender shredded chicken smothered in barbecue goodness. It’s easy to make yet incredibly crowd-pleasing, making it perfect for any gathering or simply a cozy night in.
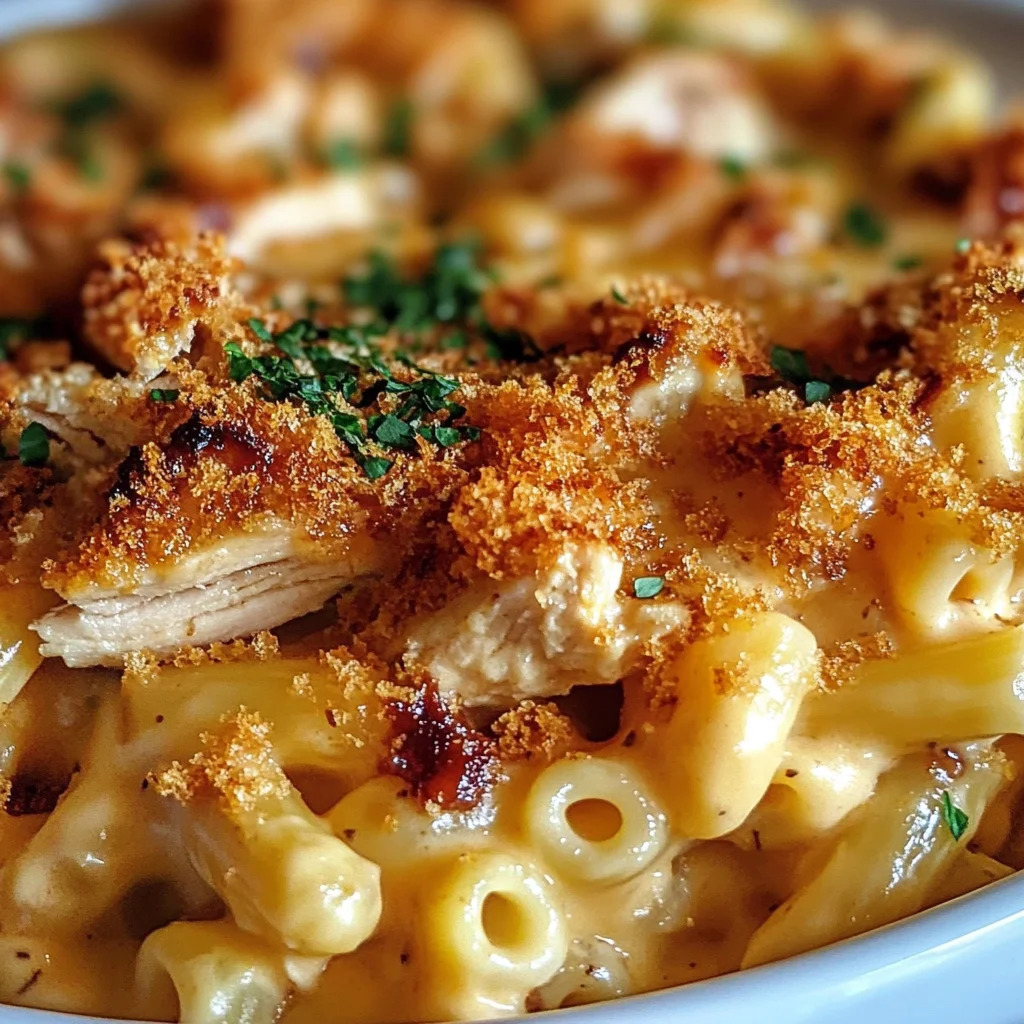
Ingredients:
As we prepare to create this comforting masterpiece, let me walk you through the essential ingredients that will bring our BBQ Chicken Mac and Cheese to life.
-
1 lb elbow macaroni (or similar short pasta). This little pasta shape is crucial for our creamy concoction; its hollow structure holds onto the sauce beautifully, ensuring each bite is filled with cheesy goodness. While elbow macaroni is traditional, feel free to use any short pasta shape you adore—shells or cavatappi also work wonderfully! Just remember to cook them until al dente; we want them firm enough to hold their shape during baking.
-
Kosher salt (for pasta water). When it comes to boiling water for pasta, salting generously is non-negotiable! It enhances the flavor of your pasta from the inside out; without it, you’ll end up with bland noodles that can’t hold their own against our luscious sauce. Aim for water that tastes slightly salty—the kind you’d expect from ocean waves gently lapping at your toes.
-
4 tbsp unsalted butter. Butter serves as our foundation for creating a rich roux—the base for our cheese sauce. Unsalted butter allows us complete control over the seasoning; plus, its creamy richness adds depth to our dish that’s utterly intoxicating. If you can get your hands on European-style butter with higher fat content, trust me—it’ll elevate your mac and cheese experience even further!
-
0.25 cup all-purpose flour. This ingredient plays a vital role in thickening our sauce—transforming milk into that dreamy cheese sauce we all crave! When combined with melted butter in our roux, it creates a silky texture that perfectly coats each piece of macaroni. Be sure to whisk it well for about a minute after adding flour; this step helps eliminate any raw flour taste before introducing liquid.
-
3 cups milk (whole or 2%, warmed). Warming milk before adding it to your roux helps create an even smoother sauce without clumps forming—a crucial step for achieving velvety perfection! Whole milk provides richness, while 2% will still yield great results if that’s what you have on hand. Just imagine pouring in warm milk—it brings everything together like magic!
-
8 oz sharp cheddar cheese (freshly shredded). Ahh, the star of our show! Sharp cheddar offers an intense flavor profile that complements the smoky sweetness of our barbecue chicken beautifully; freshly shredding ensures maximum creaminess as it melts into our sauce rather than clumping together like pre-shredded varieties can do. If you’re feeling adventurous, consider mixing in some pepper jack or gouda for an added kick!
-
0.5 tsp smoked paprika (optional). While entirely optional, adding smoked paprika introduces an irresistible depth reminiscent of outdoor grilling—perfect for enhancing those barbecue vibes! It brings warmth without overwhelming heat; trust me when I say just a pinch can elevate your dish from ordinary to extraordinary.
-
0.5 tsp garlic powder (optional). Garlic powder offers convenience without sacrificing flavor! It adds aromatic richness while eliminating prep time since there’s no need for chopping fresh cloves here! Feel free to omit if garlic isn’t your thing—but I promise this subtle addition rounds out flavors beautifully.
-
1 tsp kosher salt (to taste) & 0.5 tsp black pepper (to taste): These seasonings are crucial components in balancing flavors throughout our dish—adjust them according to personal preference but remember: when it comes down to seasoning anything creamy like this mac and cheese? A little extra salt often works wonders!
-
2 cups shredded cooked chicken (rotisserie or leftover): The heartiness brought by succulent chicken transforms this classic side into a filling entree fit for dinner! Rotisserie chicken is my go-to because it’s so convenient; however using leftover grilled or roasted chicken will add fabulous depth too!
-
1 cup barbecue sauce (plus more to taste): This ingredient brings tangy sweetness alongside smokiness—an absolute must-have component in making BBQ Chicken Mac and Cheese stand out! Choose your favorite brand or homemade variety based on preferred flavor profiles—it should complement rather than overpower other ingredients.
-
1 cup shredded cheddar cheese: Another layer of cheesy goodness awaits! Mixing additional cheddar into our final bake guarantees melty cheesiness throughout every bite—a true delight!
-
0.5 cup panko breadcrumbs (optional): For those who love crunch—a sprinkle of panko breadcrumbs provides delightful texture contrast against creamy pasta below! Tossing them with melted butter before sprinkling creates golden brown crispiness as they bake atop.
-
1 tbsp unsalted butter (melted if using breadcrumbs): If opting for topping with panko breadcrumbs—they’ll toast beautifully when mixed with melted butter beforehand adding richness along with irresistible crunch!
-
Sliced green onions or chopped parsley (for garnish – optional): A sprinkle of fresh herbs not only brightens up color but also adds freshness enhancing overall flavor profile once served!
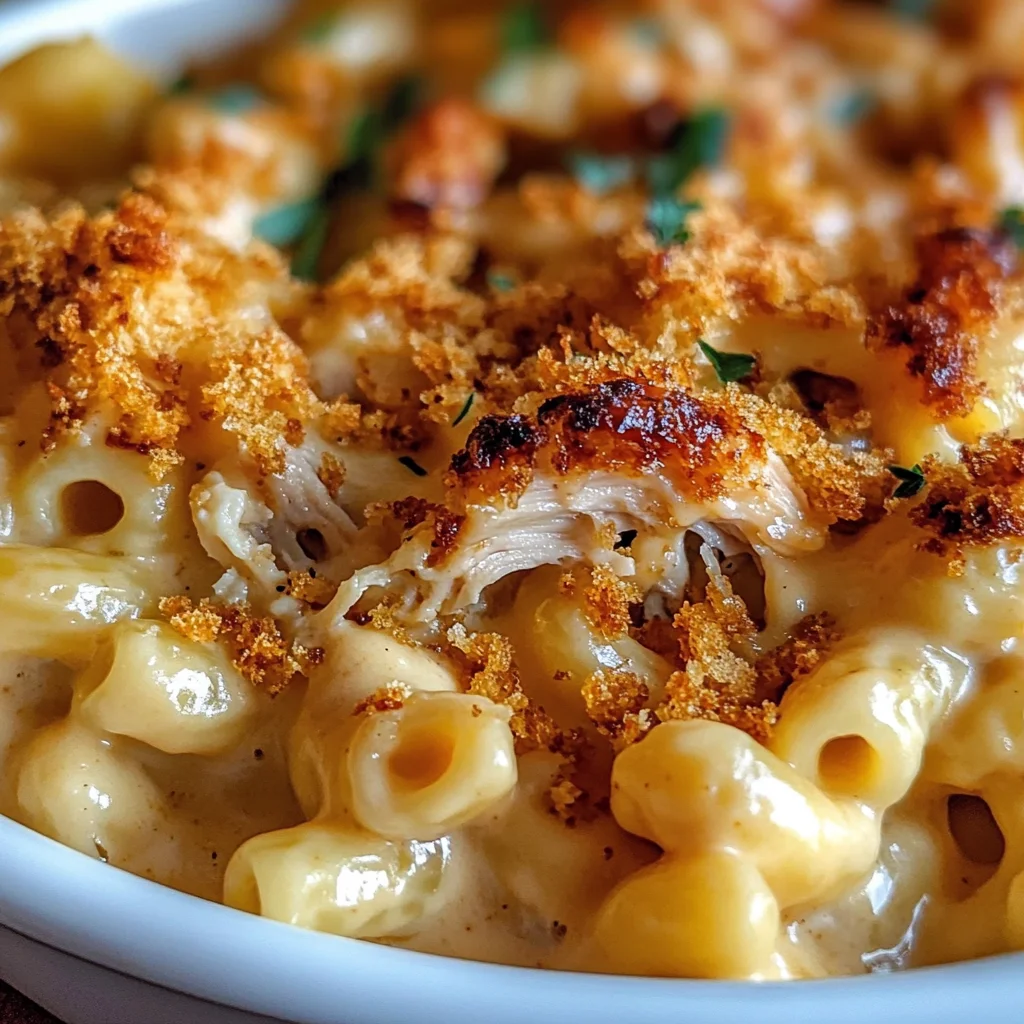
Equipment You’ll Need:
Having the right tools makes all the difference between good cooking and great cooking—it turns daunting tasks into joyful creations! These essential partners help ensure everything runs smoothly as we craft our delightful BBQ Chicken Mac and Cheese together.
-
Large pot – A sturdy large pot is essential for boiling pasta; choose one deep enough so that water doesn’t overflow during boiling while allowing ample space for stirring later on as well!
-
Colander – After cooking your pasta perfectly al dente—you’ll need this handy tool for draining excess water before mixing everything together! Look for one with small holes so none escape during straining process.
-
Whisk – An indispensable tool when preparing roux—you’ll want something sturdy enough to combine flour into melted butter smoothly while preventing lumps from forming once milk gets added too!
-
Large skillet or saucepan – You’ll use this vessel primarily for sautéing ingredients such as garlic powder along with creating smooth cheese sauce afterwards—it needs good heat conduction capabilities so nothing burns during cooking process!
-
Spatula – A flexible spatula makes folding ingredients easy while scraping down sides of bowls ensures nothing goes wasted within pots either—it really helps achieve uniform consistency throughout mixture without leaving clumps behind!
Now that we’re all set up with equipment readiness established…
Step 1: Boil Your Pasta
Begin by bringing a large pot of salted water to boil over high heat—a generous amount will allow flavors from salt permeate through every noodle creating delectable bites later on once combined! Once bubbling vigorously add elbow macaroni; cook according package instructions until just al dente—that means tender yet slightly firm when bitten into—as they’ll continue cooking once combined into cheesy goodness later! Don’t rush this step—you want those noodles perfect rather than mushy at end result after baking happens next involved stage which requires patience now upfront here first off initially before anything else proceeds moving forward…
Step 2: Create The Roux
While your pasta cooks away blissfully amidst bubbling sounds reminiscent familiarity surrounding kitchen aura…I invite you now turn attention towards preparing roux right next door upon stovetop heat source nearby waiting patiently beckoning attention needed shortly next following procedure executed prior moving onwards ahead directionally towards ultimate goal completion soon approaching nearer ever closer awaiting realization fruition moment finally achieved culmination satisfaction fulfillment derived thereafter enjoyment shared amongst everyone gathered round table awaiting eagerly prepared feast served hot steaming delicious ready plates filled generously stacked high upwards presentation glorious grandeur awaited anticipation excitement buzzing filled air palpable surrounding atmosphere…
Step 3: Prepare The Cheese Sauce
Once your roux has cooked nicely without burning finish stir within gradually warmed liquid chosen earlier combined thoroughly whisked meanwhile adjusting heat downward slightly moderating overall temperature maintained under control manageable levels generating gentle simmer instead avoiding excessive boiling preventing separation unwanted clumps forming ruining smooth silky dreamlike consistency sought desired outcome attained achievable reached eventually promised delightful sensations experienced mouthwatering sensations evoking ecstasy pure bliss achieved satisfaction fulfilled beyond measure…
Step 4: Combine Everything Together
When everything has come together harmoniously—macaroni drained well rinsed under cool running tap water briefly ensuring stopping cooking process instantly halting further softening effect occurring accidentally happening unforeseen consequences avoided altogether thus far thankfully continued vigilance maintained steadfastly focused intent clarity purposefully guided journey leads towards eventual destination realized arriving safely successfully…
Step 5: Make the Creamy Cheddar Sauce
Now that your pasta is happily boiling away, let’s dive into one of the most magical parts of this BBQ Chicken Mac and Cheese: the creamy cheddar sauce. Start by melting your four tablespoons of unsalted butter in a large saucepan over medium heat. Why butter? It’s not just about flavor; it creates a luscious base that ensures your sauce is rich and velvety. Once your butter has melted and begins to bubble gently, you’ll want to whisk in a quarter cup of all-purpose flour. This technique, known as making a roux, is crucial because it helps thicken your sauce—turning that liquid gold into something truly extraordinary.
Continue whisking for about two to three minutes until the mixture becomes light golden brown. You’re looking for a lovely nutty aroma here; trust me, it’s utterly intoxicating! This step is non-negotiable because if you skip it or rush through, your sauce may end up tasting floury instead of smooth and rich. Gradually pour in three cups of warmed milk while whisking continuously. This gradual incorporation prevents any lumps from forming, leading to a beautifully silky sauce. Keep cooking and stirring for another five to seven minutes, or until the sauce thickens enough to coat the back of a spoon—this is when the magic happens!
Step 6: Add Your Cheeses and Seasonings
Once your cheese sauce has thickened delightfully, it’s time to elevate it with flavor! Reduce the heat to low and stir in eight ounces of freshly shredded sharp cheddar cheese—oh, my friends, this is where we really start to shine! As you mix in the cheese, watch as it melts and transforms into an ooey-gooey texture that will have you swooning. I promise you; there’s nothing quite like the sight of that melty goodness! To add an extra layer of depth, sprinkle in half a teaspoon of smoked paprika and half a teaspoon of garlic powder if you’re feeling adventurous. These spices are optional but can truly elevate your dish by adding warmth and complexity.
Season with one teaspoon of kosher salt and half a teaspoon of black pepper to taste; don’t be shy here! Adjusting these seasonings is essential because they bring everything together harmoniously. Remember, tasting as you go is part of the joy in cooking—it’s how we ensure every bite bursts with flavor. Once everything is combined beautifully and creamy, set aside this glorious concoction while we prepare our chicken.
Step 7: Mix in Shredded Chicken and Barbecue Sauce
Now comes one of my favorite parts—combining our shredded chicken with that dreamy cheddar sauce! In a large mixing bowl, combine two cups of shredded cooked chicken (whether from a rotisserie or leftovers) with one cup of your favorite barbecue sauce. I always opt for one that has just the right balance between tangy and sweet; it’s absolutely paramount for achieving that signature BBQ flavor profile we crave so much. Stir everything together until the chicken is completely coated in barbecue goodness—this mixture should be vibrant and inviting!
Next, pour this luscious chicken-barbecue mixture into your creamy cheddar sauce. Gently fold everything together using a spatula or wooden spoon until every piece of chicken is enveloped in that deliciously cheesy embrace. This step is crucial because it ensures that every bite delivers an explosion of flavors—a symphony where each note plays off the other perfectly! If you’re feeling particularly indulgent (and who could blame you?), feel free to add an extra splash of barbecue sauce here for good measure—it’s all about personal preference!
Step 8: Combine Pasta with Sauce Mixture
Now that our BBQ chicken mixture is ready to rock ‘n’ roll, it’s time to combine it with our pasta! Drain your cooked elbow macaroni carefully—make sure not to rinse them since we want those little noodles coated perfectly with our cheesy goodness later on. In the same large pot used for cooking pasta (fewer dishes means more joy!), combine the drained macaroni with your heavenly BBQ chicken-cheddar mixture. Gently fold everything together again until each piece of pasta is thoroughly coated in that creamy concoction; I can already feel my heart fluttering at how delightful this looks!
At this point, take a moment to admire what you’ve created—it’s comforting and vibrant all at once! Feel free to taste again—trust me on this—you’ll want to make sure everything balances perfectly before we move on. If you’re craving just a touch more seasoning or BBQ flavor, now’s your chance! Once you’re satisfied, transfer half of this glorious mixture into a greased 9×13-inch baking dish. The layering adds texture throughout each serving when baked—it’s all about those little details!
Baking Your Perfect BBQ Chicken Mac and Cheese
Let’s move on to baking our masterpiece! Preheat your oven to 350°F (175°C)—this step ensures even cooking throughout our dish while creating an irresistible golden crust on top.
Step 9: Create the Crunchy Topping
Before we slide our dish into the oven, let’s add some texture that’ll take this BBQ Chicken Mac and Cheese over the top: crunchy panko breadcrumbs! In a small bowl, combine half a cup of panko breadcrumbs with one tablespoon of melted unsalted butter—this little addition will give us that satisfying crunch on top that contrasts beautifully with all that creaminess below. Sprinkle this buttery breadcrumb mixture evenly over your pasta dish like confetti on a celebration cake; trust me when I say you want every square inch covered!
Now carefully place the baking dish into your preheated oven for about 25-30 minutes—or until bubbly and golden brown on top. Watch closely during these final moments; ovens can vary dramatically when it comes to timing! You’ll know it’s done when you see little pockets of cheese bubbling around those crispy breadcrumbs—the sight alone will make mouths water! Allowing it to rest for about five minutes after baking lets those flavors meld even more profoundly—a small price for ensuring maximum deliciousness when serving.
Step 10: Garnish and Serve Your Creation
Finally—the moment you’ve been waiting for has arrived! Once rested slightly (just enough time for those aromas to fill every corner), serve up generous portions garnished with sliced green onions or chopped parsley if desired; these fresh herbs not only brighten up each plate but also enhance those deep flavors remarkably well. As you dig in, relish every mouthful—the tender pasta intertwined with BBQ chicken cloaked under layers upon layers of cheesiness—it’s comfort food at its finest!
Feel free to pair this dish with a crisp side salad or some roasted veggies for balance; there are no wrong choices here! And remember—this BBQ Chicken Mac and Cheese isn’t just food; it’s an experience meant to be shared among friends or family gathered around the table enjoying good conversation (and seconds!). So go ahead—dive in, savor every bite, and bask in knowing you’ve created something truly special today!
Storage and Enjoyment Tips for Your BBQ Chicken Mac and Cheese
Now that you’ve whipped up this mouthwatering BBQ Chicken Mac and Cheese, it’s time to relish every creamy, cheesy bite! But let’s be honest—sometimes we prepare a little too much goodness, and that’s perfectly okay! This dish is not only delicious when freshly baked; it also keeps well, allowing you to savor its flavors even after the first serving. So, let’s dive into how to store those delightful leftovers so they can continue to bring joy long after the initial feast!
Storing Leftover BBQ Chicken Mac and Cheese
To store your delicious BBQ Chicken Mac and Cheese, I recommend using an airtight container—this will keep the pasta from drying out and maintain that luscious creaminess we all adore. Make sure it cools down to room temperature before sealing it up; this step is crucial because letting steam build-up can lead to soggy mac and cheese instead of the perfect texture you want. In the refrigerator, your leftovers will happily stay fresh for about three to five days. If you want a little pro tip for maintaining that divine quality, consider placing a slice of bread in with your pasta; it absorbs moisture and helps keep everything nice and creamy! When reheating, I suggest using the oven if you have the time—it warms everything through evenly while giving you that delightful crispy top again. You can also microwave individual portions if you’re in a pinch; just add a splash of milk to keep things moist. Trust me, even after storing, this dish retains its profound satisfaction factor!
Freezing BBQ Chicken Mac and Cheese for Later
If you find yourself with extra servings or just want to whip up a batch ahead of time (seriously, who wouldn’t want this on hand?), freezing is an excellent option! To freeze your BBQ Chicken Mac and Cheese properly, let it cool completely before transferring it into a freezer-safe container or heavy-duty freezer bag—removing as much air as possible is absolutely paramount for preventing freezer burn. When stored correctly, it can last up to three months in the freezer! When you’re ready to enjoy your frozen treasure, simply thaw it overnight in the fridge before reheating or bake directly from frozen at a lower temperature until heated through. The convenience of having this comforting dish ready whenever you crave it is simply extraordinary; imagine pulling it out on a chilly evening or when unexpected guests arrive—pure magic in minutes!
As we wrap up our storage tips, remember that whether you’re enjoying your BBQ Chicken Mac and Cheese fresh from the oven or savoring leftovers later on, each bite is packed with love and comfort. So go ahead and enjoy every single scoop—you deserve it!
Dinner
BBQ Chicken Mac and Cheese
- Total Time: 50 minutes
- Yield: Serves approximately 6 people 1x
Description
BBQ Chicken Mac and Cheese is the ultimate comfort food that combines creamy, cheesy goodness with the smoky sweetness of barbecue chicken. This delightful dish transforms a classic favorite into a mouthwatering experience, making it perfect for weeknight dinners or gatherings with family and friends. With tender elbow macaroni enveloped in a rich cheddar sauce and topped with crispy panko breadcrumbs, every bite is an invitation to indulge. Whether you’re reminiscing about summer barbecues or simply enjoying a cozy night in, this BBQ Chicken Mac and Cheese will warm your heart and satisfy your cravings.
Ingredients
- 1 lb elbow macaroni
- 4 tbsp unsalted butter
- 0.25 cup all-purpose flour
- 3 cups milk (whole or 2%, warmed)
- 8 oz sharp cheddar cheese (freshly shredded)
- 2 cups shredded cooked chicken
- 1 cup barbecue sauce
- 0.5 cup panko breadcrumbs (optional)
Instructions
- Preheat your oven to 350°F (175°C). Cook elbow macaroni in salted boiling water until al dente; drain.
- In a saucepan, melt butter over medium heat. Whisk in flour to create a roux; cook for 2-3 minutes until golden.
- Gradually add warmed milk while whisking continuously until the sauce thickens (about 5-7 minutes).
- Stir in shredded cheddar cheese until melted. Season with salt, pepper, smoked paprika, and garlic powder if using.
- Combine the cheesy sauce with shredded chicken and barbecue sauce in a bowl.
- Fold the drained macaroni into the mixture until well combined.
- Transfer half to a greased baking dish and top with panko breadcrumbs mixed with melted butter if desired.
- Bake for 25-30 minutes until bubbly and golden brown on top.
- Prep Time: 20 minutes
- Cook Time: 30 minutes
- Category: Dinner
- Method: Baking
- Cuisine: American
Nutrition
- Serving Size: 1 serving
- Calories: 485
- Sugar: 8g
- Sodium: 770mg
- Fat: 20g
- Saturated Fat: 10g
- Unsaturated Fat: 8g
- Trans Fat: 0g
- Carbohydrates: 54g
- Fiber: 2g
- Protein: 24g
- Cholesterol: 55mg
Leave a Comment