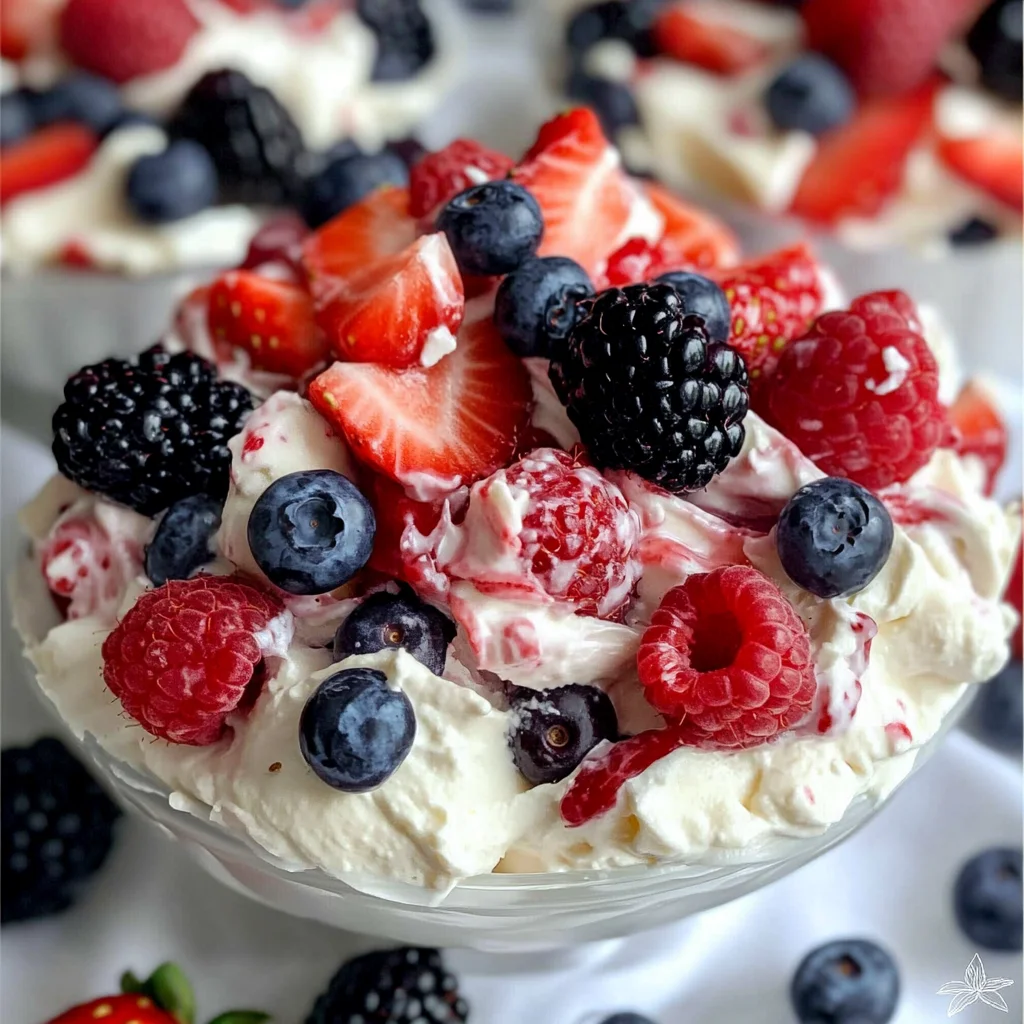
There’s something profoundly satisfying about transforming simple ingredients into a dish that sings with flavor and joy, isn’t there? The Berry Cheesecake Salad is not just another dessert; it’s an experience. Picture this: a warm summer day, the sun’s rays gently kissing your skin, and you’re surrounded by laughter, good friends, and the sweet aroma of fresh berries wafting through the air. Every bite of this creamy, berry-infused delight feels like a hug from nature itself. The rich cream cheese blends seamlessly with the vibrant colors and flavors of strawberries, blueberries, blackberries, and raspberries to create what I can only describe as a symphony of flavors. Not to mention, it’s incredibly easy to whip up in just 10 minutes! Trust me when I say that this Berry Cheesecake Salad will become a staple at your picnics and gatherings.
But why is this dish so special? It’s more than just the delightful combination of rich creaminess and tart-sweet berries; it’s about the memories we create while sharing it. I remember my first family picnic where my aunt brought along her version of this salad. As we all dug in, the laughter was infectious, and everyone was clamoring for seconds (and thirds!). The beauty of this recipe is its versatility; you can serve it as a light dessert or even as a refreshing side dish at any gathering. Whether you’re celebrating a birthday or simply enjoying a sunny afternoon in your backyard, this Berry Cheesecake Salad brings people together in the most delightful way.
Berry Cheesecake Salad: A Refreshing Delight for Any Occasion
This enchanting recipe is perfect for those sunny days when all you want is something light yet indulgent. Imagine diving into a bowl filled with luscious berries enveloped in creamy goodness. This Berry Cheesecake Salad captures that essence beautifully—it’s quick to prepare, utterly delicious, and oh-so-satisfying!
Ingredients:
Let’s gather our treasures for this culinary adventure! Each ingredient plays an integral role in making this salad not just delicious but also memorable.
- 16 ounces cream cheese (softened): Cream cheese is the heart of our salad—it gives us that signature cheesecake flavor we’re after. When softened properly, it becomes velvety smooth, allowing it to blend effortlessly with other ingredients. Look for high-quality cream cheese; trust me when I say that brands using real milk will yield the best results. If you’re aiming for a lighter version, consider using reduced-fat cream cheese—just be aware that it may not be quite as rich.
- 1/4 cup monk fruit concentrated powder: This natural sweetener adds a touch of sweetness without the calories of sugar. Monk fruit is derived from an Asian melon and doesn’t spike blood sugar levels—a wonderful choice if you’re mindful about sugar intake. When using concentrated powders like this one, always start with less since they can have an intense sweetness!
- 1/4 cup stevia concentrated powder: Similar to monk fruit, stevia brings sweetness without guilt! Its natural origins make it fantastic for those seeking healthier alternatives. Just like with monk fruit powder, remember that stevia can vary in sweetness depending on the brand—so adjust to taste!
- 1 cup heavy whipping cream: This ingredient is what transforms our mixture into something truly luxurious. Heavy whipping cream has a higher fat content which allows it to whip up beautifully into soft peaks—perfect for achieving that creamy texture we crave in our salad. For optimal results, make sure your cream is super cold before whipping; this will help achieve maximum volume.
- 16 ounces strawberries (cut into bite-sized pieces): Strawberries are juicy gems bursting with flavor! When selecting them at the market, look for vibrant red berries with no dullness or white spots; they should smell sweet and fragrant. By cutting them into bite-sized pieces, you’re ensuring each mouthful is perfectly balanced—no one wants to struggle getting their fork through oversized chunks!
- 14 ounces blueberries (about 4 cups): Blueberries are not only visually stunning but also packed with antioxidants! They burst open when bitten into, providing that refreshing pop of flavor which contrasts beautifully against the creamy base of our salad. Always rinse them gently right before use to maintain their structure—no one enjoys squished berries!
- 12 ounces blackberries (about 2 cups): These beauties are slightly tart yet incredibly sweet when ripe! Choose plump blackberries with shiny skin for the best taste experience. Remember to wash them carefully as well; their delicate nature means they can bruise easily if mishandled.
- 6 ounces raspberries (about 1 cup): Raspberries add both color and tanginess to our salad—a perfect complement to sweeter fruits! Opt for firm yet slightly soft berries for peak ripeness; avoid any mushy ones as they won’t hold up well in your salad.
- 2-3 teaspoons vanilla extract (optional): While optional, vanilla extract elevates our dessert by adding warmth and depth to its flavor profile. Make sure you’re using pure vanilla extract rather than imitation—this small detail makes a world of difference in taste!
Equipment You’ll Need:
Before we dive into creating our delightful Berry Cheesecake Salad, let’s talk about some essential tools you’ll want by your side during this process. Having the right equipment can make all the difference between cooking feeling like a chore or an enjoyable experience!
- Electric mixer: This tool is non-negotiable when it comes to mixing cream cheese until smooth or whipping your heavy cream to fluffy perfection! I recommend using an electric mixer instead of whisking by hand—it saves time and ensures consistent texture throughout your mixture.
- Mixing bowls: You’ll need these versatile vessels for combining ingredients at different stages. A large bowl is ideal for mixing together your creamy base while smaller bowls are perfect for tossing in those beautiful berries without crushing them!
- Measuring cups and spoons: Accuracy matters when it comes to baking and creating salads alike! Invest in good measuring tools so you can get each ingredient just right—this helps maintain balance within flavors throughout every serving.
- Spatula: A silicone spatula will be your best friend here—it ensures you get every last bit out from your mixing bowl while gently folding in delicate ingredients like berries without squishing them!
Preparing the Berry Cheesecake Salad
Step 1: Softening Your Cream Cheese
Start by letting your cream cheese come to room temperature until it’s soft enough to beat smoothly with an electric mixer—you want it pliable but not melted! This process is crucial because softened cream cheese creates that dreamy texture we associate with cheesecake filling; if it’s too cold or too warm, achieving that consistency will be challenging.
Step 2: Sweetening Up
Once you’ve got that glorious cream cheese whipped into submission (it should be silky!), add both monk fruit powder and stevia directly into that mixture along with your cold heavy whipping cream—and feel free to include vanilla extract here if you’re going for extra flavor depth! Mix on medium speed until everything comes together beautifully and thickens up nicely—the transformation from separate ingredients into cohesive bliss happens within minutes!
Step 3: The Whipping Game
Now comes one of my favorite parts—whipping up that heavy cream until soft peaks form! Start on low speed then gradually increase; watch those bubbles turn into foam then fluffiness before reaching peak perfection where peaks hold their shape but aren’t fully stiffened yet—that’s what we want! This step adds volume while maintaining lightness throughout each serving of berry goodness.
Step 4: Folding In Fresh Berries
With both mixtures ready—your creamy base and luscious berries—it’s time to fold them together gently using your spatula! Picture yourself cradling those precious fruits as you bring forth their bright colors against creamy hues—we want every bite filled with berry goodness while keeping textures distinctively separate rather than mushy!
I promise you; following these steps will lead you straight toward berry bliss in no time at all! Stay tuned because there’s so much more magic waiting ahead as we continue crafting this unforgettable Berry Cheesecake Salad together.
Crafting Your Berry Cheesecake Salad
Ah, my dear friend! Now that we’ve prepared our luscious cream cheese mixture and lovingly folded in our vibrant bounty of berries, the next steps are all about bringing everything together for a truly delightful experience. Trust me when I say that this is where the magic truly begins! So grab your spatula, roll up those sleeves, and let’s dive into the remaining steps of making this Berry Cheesecake Salad an absolute showstopper at your summer picnics.
Step 5: The Art of Folding
Now that your cream cheese mixture is beautifully thick and creamy, it’s time to introduce the star of the show: our dazzling array of fresh berries. This step is surprisingly crucial because the technique we use here—folding—ensures you maintain that lovely, airy texture of our cheesecake filling while still allowing those glorious berries to shine. Begin by gently placing your strawberries, blueberries, blackberries, and raspberries into the bowl with the cheesecake base.
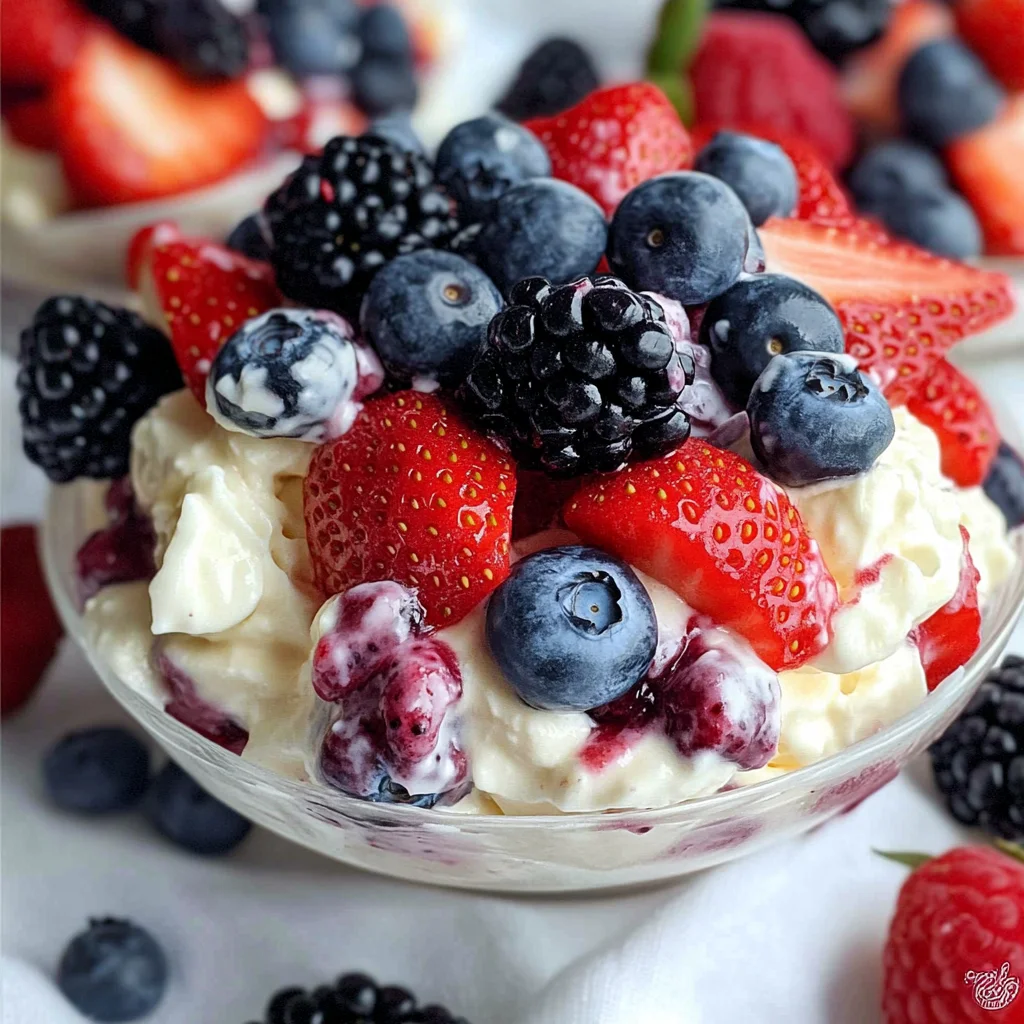
With a rubber spatula or a large spoon in hand, start incorporating the berries by expertly folding them into the creamy mixture. The key here is to be gentle; you want to preserve their beautiful form and not crush them into oblivion. Picture this: each berry bursting with juice as you bite into them, perfectly encapsulated by the rich cheesecake blend. Aim for a beautiful marbling effect rather than a uniform color—this not only looks stunning but also means every mouthful will be a surprise of flavors! As you fold, keep an eye on the visual cues; once you see that gorgeous medley of colors swirled together without any clumps of cream cheese left behind, you know you’ve done it right.
Step 6: Chill Out – The Importance of Resting
Once your Berry Cheesecake Salad is fully combined and looking irresistibly inviting, it’s time for one more crucial step—chilling. Placing this delightful creation in the refrigerator for at least an hour (or even better, two) allows all those flavors to meld together harmoniously. You might wonder why chilling is so important; well, allow me to enlighten you! During this time in the cool embrace of your fridge, the rich cream cheese filling will firm up slightly while absorbing all those sweet juices from the berries.
Imagine how transformative this waiting period can be! The flavors deepen and intensify, creating a beautifully cohesive dish that sings with freshness and sweetness when served. If you’re wondering about timing, think about preparing it ahead of your gathering—it can easily be made up to a day in advance! Just keep it tightly covered so no unwanted odors invade its flavor profile. I promise you; patience pays off here as you’ll be rewarded with something utterly extraordinary when it’s finally time to serve!
Step 7: Serving with Love
After what may feel like an eternity (but really is only an hour), it’s time for one of my favorite steps—serving your Berry Cheesecake Salad! Grab yourself a large serving bowl or individual cups if you’re feeling fancy; presentation can elevate this simple dessert into something remarkable! If you’re using a bowl, consider layering some additional fresh berries on top for that added pop of color—a beautiful visual cue that promises deliciousness awaits inside.
When dishing out portions, be generous with each scoop; after all, this is one dessert meant for sharing (or savoring all on your own!). As you serve up portions into bowls or cups, take a moment to appreciate how each swirl reveals those juicy berries nestled within clouds of creamy goodness. Encourage your friends or family members to dig in immediately—the anticipation is half the fun! And believe me when I say they won’t be able to resist going back for seconds… or thirds!
Step 8: The Finishing Touches
Now comes perhaps my favorite part—adding just a hint of extra flair before enjoying your masterpiece! While our Berry Cheesecake Salad is already a treat on its own, consider drizzling a bit of honey or agave nectar over each serving just before offering them out. This small touch can add an incredible depth of flavor—a sweet liquid gold cascading over those luscious berries and inviting everyone closer.
If you’re feeling particularly adventurous—or if there are any chocolate lovers amongst your guests—grate some dark chocolate over top right before serving; trust me when I say it adds an utterly intoxicating contrast between sweet and slightly bitter notes that will have everyone swooning! Remember not to overpower; just a sprinkle will do wonders.
As we conclude this adventure into crafting the perfect Berry Cheesecake Salad, I hope you feel inspired and ready to create something profoundly satisfying. Each layer tells its own story—from whipping up that creamy filling to folding in nature’s candy—reminding us why cooking can be such a heartfelt journey. Enjoy every moment as you share this delicious dish filled with love and joy at your next gathering. Bon appétit!
Storage and Enjoyment Tips for Your Berry Cheesecake Salad
Now that your Berry Cheesecake Salad is ready to be served, let me tell you how to make the most of this delightful creation! Picture this: a vibrant bowl of fresh berries nestled within creamy, luscious goodness, just waiting to bring smiles to everyone’s face. Whether you’re enjoying it right away or saving some for later, knowing how to store it properly will ensure that every bite stays as heavenly as the first. Trust me, you’ll want to savor this treat for as long as possible!
Storing Leftover Berry Cheesecake Salad
When it comes to preserving your Berry Cheesecake Salad, you’ll want to grab an airtight container—this is crucial! By sealing in that delicate balance of flavors and preventing any moisture from sneaking in, you’ll maintain its irresistible texture and taste. Ideally, pop your salad in the fridge where it can stay fresh for up to three days. Now, here’s a little pro tip: if you find yourself with leftover salad—and I hope that’s not too often—an old trick is to place a slice of bread inside the container. It may sound quirky, but it helps absorb excess moisture and keeps your salad from becoming soggy. After storage, when you take that lid off, you’ll still be met with a burst of berry aromas mingling beautifully with the creamy cheesecake base. No need to reheat this delightful dish; just spoon it out and enjoy. I promise you won’t be disappointed!
Freezing Your Berry Cheesecake Salad for Later
Feeling like you’d love to stash away some of this scrumptiousness for a rainy day? Freezing your Berry Cheesecake Salad is a fantastic option! Just make sure you portion it out into freezer-safe containers or freezer bags—being able to scoop out just the right amount when cravings strike is so convenient! It can stay frozen for about two months without compromising flavor or texture. When you’re ready to indulge again, simply transfer it from the freezer to the fridge and let it thaw overnight. The beauty of freezing is that it allows you to enjoy this extraordinary dessert at your own pace while still having that delightful freshness when you’re ready to dig in. Isn’t that just genius?
With all these storage options at your fingertips, there’s no reason why you shouldn’t dive into making this Berry Cheesecake Salad and relish every moment!

Berry Cheesecake Salad
- Total Time: 0 hours
- Yield: Approximately 8 servings 1x
Description
There’s nothing quite like a Berry Cheesecake Salad to brighten up your summer gatherings! This delightful dessert combines rich cream cheese with an array of fresh berries, creating a creamy, fruity treat that’s as satisfying as it is beautiful. In just 10 minutes, you can whip this dish together and impress your friends and family with its vibrant colors and luscious flavors. Ideal for picnics, parties, or simply indulging on a sunny afternoon, this salad is not only easy to make but also offers a refreshing alternative to traditional desserts. Gather everyone around and enjoy the laughter and joy that this Berry Cheesecake Salad brings!
Ingredients
- 16 ounces cream cheese (softened)
- 1/4 cup monk fruit concentrated powder
- 1/4 cup stevia concentrated powder
- 1 cup heavy whipping cream
- 16 ounces strawberries (cut into bite-sized pieces)
- 14 ounces blueberries (about 4 cups)
- 12 ounces blackberries (about 2 cups)
- 6 ounces raspberries (about 1 cup)
- 2–3 teaspoons vanilla extract (optional)
Instructions
- Soften the cream cheese until pliable. Beat it with an electric mixer until smooth.
- Add monk fruit powder, stevia, and cold heavy whipping cream to the mixture. If using, add vanilla extract. Mix on medium speed until thickened.
- In another bowl, whip the heavy cream to soft peaks.
- Gently fold the whipped cream into the cream cheese mixture.
- Carefully add the strawberries, blueberries, blackberries, and raspberries to the creamy base, folding them in without crushing.
- Chill in the refrigerator for at least one hour before serving.
- Prep Time: 10 minutes
- Cook Time: None
- Category: Dessert
- Method: No-Bake
- Cuisine: American
Nutrition
- Serving Size: 1 cup (240g)
- Calories: 320
- Sugar: 15g
- Sodium: 170mg
- Fat: 26g
- Saturated Fat: 17g
- Unsaturated Fat: 7g
- Trans Fat: 0g
- Carbohydrates: 23g
- Fiber: 3g
- Protein: 5g
- Cholesterol: 70mg
Leave a Comment