There’s something undeniably magical about food that evokes memories, stirs emotions, and creates connections, isn’t there? Every bite can transport us back to cherished moments spent around the table with loved ones, laughter echoing off the walls, and the warm aroma of home-cooked meals wafting through the air. Today, I want to share a recipe that embodies this spirit of togetherness—a delightful twist on a classic favorite: Big Mac Wraps. These wraps are much more than just a meal; they are a celebration of flavors, textures, and that comforting feeling of indulgence. The combination of seasoned ground beef, creamy sauce, and crunchy veggies wrapped snugly in a soft tortilla is truly an experience that radiates warmth and joy.
As you embark on this culinary adventure with me, I promise you’ll find not only satisfaction in each bite but also a deeper appreciation for the art of cooking. This recipe reflects a beautiful fusion of tradition and innovation—the beloved Big Mac reinvented as a portable wrap that’s perfect for busy weeknights or casual gatherings with friends. Imagine unrolling these wraps at your next movie night or picnic; they’re bound to steal the show! Trust me when I say that once you try these Big Mac Wraps, they will become a staple in your home.
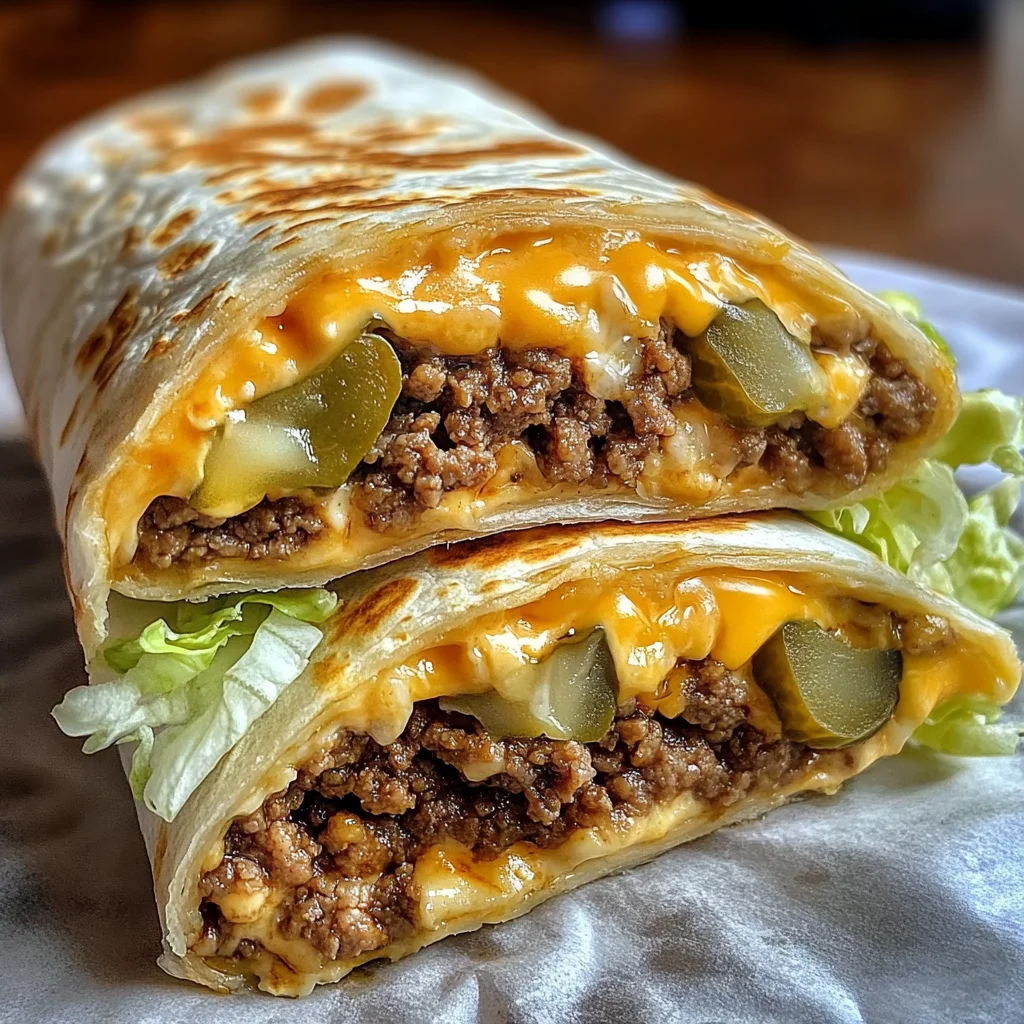
Big Mac Wraps: A Delightful Twist on a Classic
Welcome to one of my absolute favorite recipes! These Big Mac Wraps are not only quick to prepare but also incredibly satisfying. They bring all the elements we love about the classic burger into a convenient handheld delight. You can easily customize them to suit your tastes or dietary preferences while enjoying that familiar flavor profile that makes our hearts flutter.
Ingredients:
As we gather our ingredients for this culinary journey, let’s take a moment to appreciate each component. Each ingredient plays a pivotal role in crafting these delightful wraps!
- 1 lb ground beef. This is where the heartiness begins! Ground beef adds rich flavor and texture to our wraps—it’s what gives them that comforting, savory depth we crave. When selecting ground beef, look for an 80/20 blend—it strikes the perfect balance between flavor and moisture without being overly greasy. Remember, cooking it just right so it’s browned but not dried out is crucial to keeping those flavors vibrant.
- 4 large flour tortillas. These tortillas serve as the canvas for our masterpiece! A larger size allows us to pack in all those delicious fillings without risking any spills. Soft flour tortillas provide flexibility and warmth; when warmed slightly before assembling, they become pliable and easy to roll up perfectly around our filling.
- 1 cup shredded iceberg lettuce. Think of lettuce as nature’s refreshing crunch! It brings brightness and texture that contrasts beautifully with the warm fillings inside our wraps. I recommend using iceberg for its crispness—just imagine that satisfying crunch with every bite! If you’re feeling adventurous, feel free to substitute it with romaine or even spinach for added nutrition.
- 4 slices American cheese. This creamy addition melts wonderfully into our warm beef mixture, creating an ooey-gooey element that’s utterly irresistible. The mild flavor complements rather than overpowers the other ingredients. When choosing cheese, opt for fresh slices from the deli for superior melting quality—trust me; you’ll notice the difference!
- 1/2 cup diced white onions. Onions add an aromatic punch that’s essential in balancing flavors within our wraps. Their sharpness cuts through the richness of beef and cheese beautifully! Dicing them finely ensures they soften during cooking while still delivering that zingy flavor we love so much.
- 1/4 cup dill pickle slices. Here comes the zesty magic! Dill pickles bring tanginess and crunch—an absolute must-have if you want to mimic that classic Big Mac taste authentically. Always opt for good-quality pickles; their brine should be flavorful yet balanced enough not to overpower every other element in your wrap.
- 1/2 cup mayonnaise. Mayonnaise acts as the base for our special sauce—it adds creaminess while binding all those lovely components together harmoniously! For an extra kick, consider using a flavored mayonnaise or mixing in some Greek yogurt if you prefer something lighter.
- 2 tbsp ketchup. Ketchup is like liquid gold when it comes to enhancing flavors! Its sweet-tangy notes provide depth while seamlessly blending into our sauce mixture—just enough sweetness without taking center stage.
- 1 tbsp yellow mustard. Mustard brings forward a sharpness that’s absolutely paramount in achieving that authentic Big Mac vibe! Don’t skip this step—it balances out richness beautifully and adds complexity.
- 1 tsp garlic powder & 1 tsp onion powder (each). Both these pantry staples elevate our seasoning game without overwhelming our dish. Garlic powder infuses warmth while onion powder adds sweetness—together they create an aromatic harmony that’s simply divine!
- Salt and pepper to taste—the finishing touches! Seasoning is vital; it enhances every element we’ve introduced thus far and brings everything together into one cohesive symphony of flavors.
Equipment You’ll Need:
Cooking can be such an enjoyable process when you have the right tools at your fingertips! While ingredients are essential stars in this recipe’s show, having reliable equipment ensures everything runs smoothly from start to finish.
- Large skillet – A sturdy skillet is your best friend here—it’s where all those lovely flavors meld together as we cook our ground beef until perfectly browned with crispy edges. Choose one with good heat retention so you achieve even browning without hot spots.
- Mixing bowl – You’ll need this bowl for whisking together your special sauce; I recommend using one with high sides to prevent any splatters while mixing those creamy ingredients into perfection!
- Spatula or wooden spoon – This trusty tool will help you break up ground beef as it cooks and stir everything together seamlessly—choose something comfortable for prolonged use during those stirring sessions!
- Microwave-safe plate – To warm those tortillas easily before rolling them up tightly around all those delicious fillings; microwaving them briefly ensures they remain flexible instead of cracking during assembly.
- Toothpicks (optional) – These little guys come in handy if you want extra security while rolling up your wraps tight—they make serving easier too!
Now that we’re set with all our ingredients and tools ready at hand let’s dive into preparing these divine Big Mac Wraps!
Step 1: Whisk Together Your Special Sauce
First things first: let’s create that unforgettable special sauce—the heart of what makes these Big Mac Wraps sing! In a small bowl, combine ½ cup mayonnaise with 2 tablespoons ketchup and 1 tablespoon yellow mustard along with a pinch (or more) of garlic powder depending on how bold you’d like it overall flavor-wise! Whisk until smooth—the goal here is creaminess intermingled with vibrant color from both ketchup’s sweetness alongside mustard’s tanginess shining through beautifully against mayo’s richness—a visual feast indeed!
Make sure everything incorporates fully because this sauce will elevate each bite significantly—think about how much better every layer tastes when enhanced by something so delectably creamy yet subtly fragrant at once! Set aside after whipping up; let those delightful flavors meld together while we move on ahead…
Step 2: Sizzle Up That Ground Beef
Next up is where we get down to business—the star ingredient: ground beef! Heat your large skillet over medium-high heat until it’s nice and hot (you’ll know it’s ready when water droplets sizzle away upon contact). Add in your pound of ground beef directly into this preheated haven; don’t forget to break it apart gently using either a spatula or wooden spoon throughout cooking—it’s crucial not only for even browning but also ensuring every bite remains tender instead of toughened by clumping together too tightly!
As it cooks down slowly (about 6–8 minutes), sprinkle garlic powder, onion powder along with salt & pepper generously across its surface area—doing this while browning enhances potency within each morsel itself during cooking time rather than scattering afterwords which may lead uneven seasoning levels across various bites later on down line—that would be tragic wouldn’t it? Aim until well-browned throughout without any raw spots remaining alive beneath surface level goodness achieved here today…
Step 3: Warm Those Tortillas
With perfectly seasoned beef waiting patiently aside now—we turn towards warming those lovely flour tortillas next! By taking just 30 seconds within microwave (on high power) atop microwave-safe plate—you’ll manage achieving pliability necessary before wrapping things up smoothly afterward without ripping either side apart due cold temperatures inhibiting structure integrity present otherwise during assembly phase later down road ahead…
Once warmed sufficiently so feel free picking them up gently afterwards—they should feel soft yet maintain structural integrity despite temperature boost received earlier… Take care handling them now though because nobody enjoys tearing apart precious creations made painstakingly over course eventful evening spent preparing delicious food together…
Step 4: Assemble Your Wraps
Now comes one of my favorite parts—the assembly process itself where creativity flows freely like rivers cascading downhill faster than ever imagined possible before now being unleashed upon world outside surrounding us today… Spread generous spoonfuls worth special sauce across each tortilla surface evenly ensuring no corner left untouched whatsoever by luscious mixture filled abundance lovingly crafted earlier—we want maximum flavor distribution throughout entire experience enjoyed henceforth moving forward!
Then layer down some sizzling seasoned beef effortlessly followed closely behind by crispy shreds iceberg lettuce glistening under bright lights shining above creating visual contrast against darker hues present everywhere else nearby… Followed thereafter closely still by thinly diced onions alongside crunchy dill pickle slices laying cozily nestled amongst other toppings already placed gently atop proudly displayed layers awaiting final touches applied shortly…
Finally top everything off nicely rounded pieces melted American cheese resting lightly upon existing mound glorious toppings waiting patiently underneath eager embrace soon enveloping securely wrapped tightly away inside folded edges sealing goodness beneath outer shells protected forevermore until unveiled finally just moments later table laid bare before guests gathered eagerly awaiting arrival tastebud tantalizing creations birthed freshly prepared kitchen earlier today!
Stay tuned as we continue diving deeper into steps ahead shortly thereafter where wrapping techniques mastered ensure success rate remains high consistently across board throughout entire process enjoyed thoroughly…
Crafting Your Big Mac Wraps: The Heart of the Recipe
Step 5: Warm It Up – The Art of Preparing Your Tortillas
Now that you’ve created your special sauce and beautifully cooked your seasoned ground beef, it’s time to get those tortillas ready for the star of the show. Warm up your flour tortillas in the microwave for about 30 seconds. Trust me on this step; this is crucial! Warming them makes them pliable and prevents them from cracking or tearing when you’re rolling them up. Think of it as giving your wraps a cozy hug before they are filled with all those delicious ingredients! You should see them become slightly steamy and soft, which is just perfect.
As you take them out, be careful—they can be hot! Lay each tortilla flat on a clean surface or a large plate. This is where the magic starts to happen. Picture each tortilla as a blank canvas, waiting to be adorned with that incredible special sauce, seasoned beef, crisp lettuce, melty cheese, and all the toppings that make these wraps truly extraordinary. This step sets the stage for those delightful layers of flavor that will soon come together in perfect harmony.
Step 6: Layering Flavors – Building Your Wrap
Next comes the fun part—layering everything together! Start by spreading a generous amount of your homemade special sauce across each warm tortilla. Use the back of a spoon to create an even coating; this will not only add flavor but also provide moisture to balance all the textures inside. Don’t skimp on this step! The creamy richness paired with the tangy ketchup and mustard creates a beautiful symphony of flavors that brings this dish to life.
Now, take your perfectly seasoned ground beef and place a hearty portion right in the center of each tortilla. You want to make sure you have enough so that every bite is packed with flavor—after all, we’re going for comfort food at its finest here! Follow this by layering on slices of American cheese; I find that letting it rest gently on top allows it to melt slightly from the warmth of the beef underneath as it cooks later. Next comes a handful of shredded iceberg lettuce for that satisfying crunch, followed by diced white onions for a sharp bite and dill pickle slices that add an irresistible zing. Each ingredient plays its part in creating a textural wonderland; it’s like assembling a delicious edible masterpiece!
Step 7: Rolling with Care – Mastering Your Wrap Technique
Now that you have all your beautiful ingredients layered inside, it’s time to roll them up—and oh boy, does this require some finesse! Begin by folding in the sides of the tortilla over the filling first; this keeps everything snug and secure. Then, starting from one end (the side closest to you), carefully roll it away from yourself while gently tucking in any fillings that may try to escape along the way—it’s like giving each wrap its own little blanket! Make sure it’s nice and tight but not so tight that it bursts open; think snug hug rather than suffocating squeeze.
Once rolled, if needed, secure each wrap with toothpicks—this can be especially helpful if you’re making these for a gathering or meal prep. It assures they stay intact until you’re ready to enjoy them! This technique not only helps maintain shape during cooking but also enhances presentation when you slice them diagonally later on. Remember, beautiful food tastes better because we eat with our eyes first!
Step 8: Toasting Your Big Mac Wraps – Creating That Perfect Crunch
With your wraps rolled and secured, it’s time for some serious sizzle! Heat a clean skillet over medium heat—this is where things start getting crispy and golden brown, which is absolutely paramount for an enjoyable texture contrast against all those soft fillings. Place your wraps seam-side down in the skillet; listen closely—you should hear a satisfying sizzle as they begin to toast. Don’t rush this step! Allow them about 2-3 minutes per side until they’re beautifully golden brown.
This process not only enhances flavor through browning but also gives you that delightful crunch we all love when biting into a wrap. As they toast, keep an eye out for visual cues: look for golden edges forming and feel free to gently press down with a spatula for even cooking—this ensures every inch gets that lovely crispness! Once both sides are toasted perfectly, remove them from heat and let them rest briefly; this allows any steam trapped inside to settle slightly so they don’t become soggy when cut.
Final Touches – Serving Up Your Big Mac Wraps
Step 9: Slicing & Serving – The Grand Finale
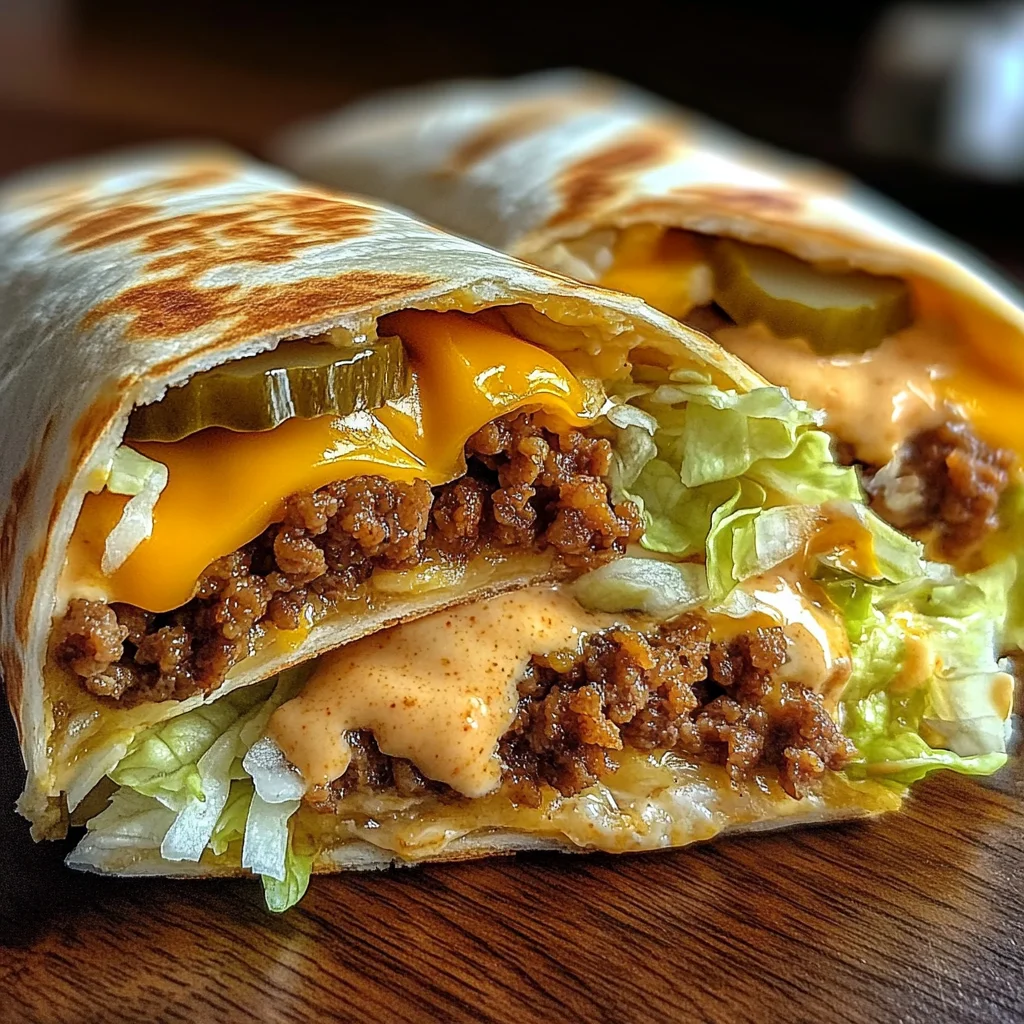
The moment you’ve been waiting for has finally arrived—it’s time to slice into those gorgeous Big Mac Wraps! Carefully remove any toothpicks if you used them (safety first!). Using a sharp knife, slice each wrap diagonally in half. This not only makes for beautiful presentation but also allows everyone to see those vibrant layers peeking through—the greens against the savory beef, glistening sauce against melted cheese—it’s simply mouthwatering!
Serve these wraps immediately while they’re still warm and crispy; trust me when I say there’s nothing quite like enjoying these fresh off the skillet! Arrange them on a platter alongside extra dipping sauce if desired—the more sauce, the merrier! I promise you’ll find yourself savoring every bite as each flavor mingles together beautifully.
So gather around your kitchen table with friends or family because these Big Mac Wraps aren’t just food—they’re an experience meant to be shared and enjoyed together. Every bite will evoke memories of fast-food classics wrapped up in wholesome goodness made right at home. Enjoy every moment—it truly is comfort food at its finest!
Storage and Enjoyment Tips for Your Big Mac Wraps
Ah, my friends, the moment has finally arrived! Your kitchen must be filled with the tantalizing aroma of sizzling beef and that irresistible special sauce—a true feast for the senses! But before you dive in, let’s talk about how to savor every delicious bite of your Big Mac Wraps even beyond this first glorious meal. Whether you’re enjoying them fresh from the skillet or planning to save some for later, I promise you, these wraps are going to be a delightful treat no matter what.
Storing Leftover Big Mac Wraps
If by some miracle you have leftovers (though I doubt it!), you’ll want to preserve their crispy goodness. The best way to store your leftover Big Mac Wraps is to place them in an airtight container—this is crucial because it helps maintain their texture. Pop them in the fridge where they’ll stay fresh for about 2-3 days. To keep that satisfying crunch alive, consider placing a paper towel inside the container; it will absorb excess moisture that can make your wraps soggy. When you’re ready to enjoy them again, simply reheat in a skillet over medium heat until they’re warmed through and crispy again—no one wants a limp wrap! Trust me on this; the flavors develop even more as they sit, making each bite profoundly satisfying.
Freezing Big Mac Wraps for Later
Now, if you’re looking to stock up on these tasty delights for future cravings, freezing is an absolute game-changer! To freeze your Big Mac Wraps properly, make sure they’re completely cool first; otherwise, you might end up with ice crystals ruining your masterpiece. Wrap each one tightly in plastic wrap and then place them in a freezer-safe bag. They can last up to 2-3 months frozen without losing their charm. When those late-night cravings hit or when unexpected guests drop by, you can pull them straight from the freezer. Simply thaw overnight in the fridge and reheat them as mentioned earlier—easy peasy! This convenience factor means you’ll always have a delicious meal waiting at your fingertips, ready to impress anyone who walks through your door.
Dinner
Big Mac Wraps
- Total Time: 30 minutes
- Yield: Serves 4
Description
Indulge in homemade Big Mac Wraps filled with seasoned beef and special sauce—perfectly crispy and utterly delicious. Try this recipe today!
Ingredients
- 1 lb ground beef
- 4 large flour tortillas
- 1 cup shredded iceberg lettuce
- 4 slices American cheese
- 1/2 cup diced white onions
- 1/4 cup dill pickle slices
- 1/2 cup mayonnaise
- 2 tbsp ketchup
- 1 tbsp yellow mustard
- 1 tsp garlic powder
- 1 tsp onion powder
- Salt and pepper to taste
Instructions
- In a small bowl, whisk together mayonnaise, ketchup, yellow mustard, garlic powder, and onion powder to create the special sauce. Set aside.
- Heat a large skillet over medium-high heat. Add ground beef and cook until browned, about 6–8 minutes. Season with salt and pepper.
- Warm tortillas in the microwave for about 30 seconds until pliable.
- Spread a layer of special sauce on each tortilla. Add cooked beef, cheese slices, lettuce, onions, and pickles.
- Roll each tortilla tightly around the filling, tucking in sides as you go.
- Place wraps seam-side down in the skillet and toast for 2–3 minutes per side until golden brown.
- Remove from heat and slice in half before serving.
- Prep Time: 15 minutes
- Cook Time: 15 minutes
- Category: Main
- Method: Frying
- Cuisine: American
Nutrition
- Serving Size: 1 wrap (250g)
- Calories: 570
- Sugar: 4g
- Sodium: 900mg
- Fat: 32g
- Saturated Fat: 12g
- Unsaturated Fat: 18g
- Trans Fat: 0g
- Carbohydrates: 43g
- Fiber: 3g
- Protein: 25g
- Cholesterol: 80mg
Leave a Comment