The aroma of freshly baked cookies wafting through the air can evoke a sense of warmth and nostalgia that few experiences can replicate. Brown Butter and Maple Chewy Pumpkin Cookies are not just a treat; they are an invitation to gather around the kitchen, to laugh, to share stories, and to create moments that linger long after the last crumb has been devoured. With each bite, you’ll discover the rich flavor of brown butter, the earthy sweetness of pumpkin, and the comforting embrace of warm spices. It’s a symphony of flavors that sings of fall and coziness—ideal for those crisp autumn days when you want nothing more than to wrap yourself in a soft blanket with a steaming cup of tea or coffee.
I’ve always been captivated by how certain recipes have the power to transport us back to cherished memories. These chewy pumpkin cookies have become a staple in my home during the fall season, bridging generations with their delightful taste. The combination of brown butter and maple syrup is truly extraordinary—it elevates these cookies from simple treats to something utterly intoxicating. The way the butter transforms into liquid gold as it browns adds depth and richness that you simply cannot replicate with regular melted butter. Trust me on this; every step in creating these cookies is imbued with love and intention, making them more than just dessert but rather an experience that warms your heart.
Brown Butter and Maple Chewy Pumpkin Cookies: A Cozy Fall Delight
Welcome to your new favorite cookie recipe! These Brown Butter and Maple Chewy Pumpkin Cookies are not only delicious but also bring the essence of autumn right into your kitchen. Imagine biting into a soft, chewy cookie infused with deep flavors—it’s like wrapping yourself in a cozy sweater made from your favorite memories.
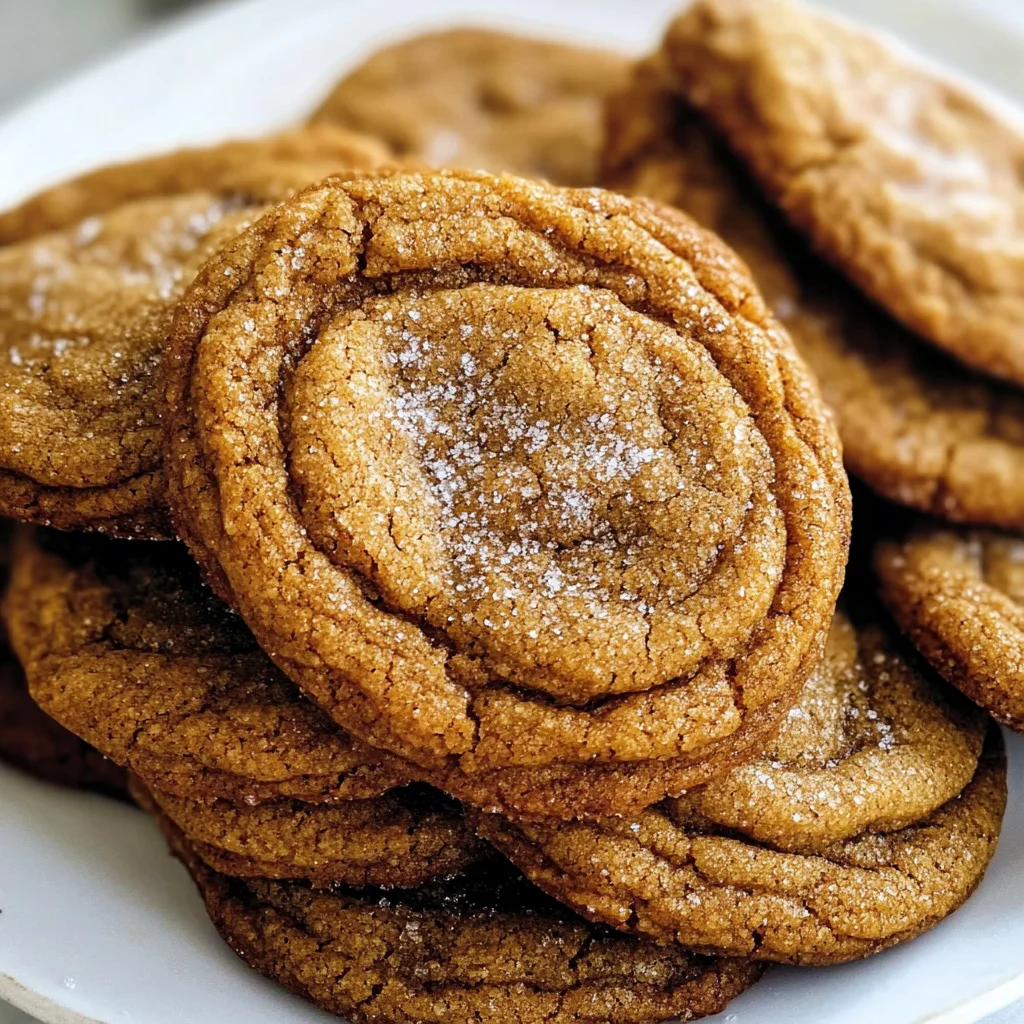
Ingredients:
As we embark on this culinary journey together, let’s take a moment to appreciate each ingredient that will contribute to these wonderful cookies. Each one plays a pivotal role in achieving that perfect balance of flavors and textures that we all crave.
-
1 cup (220g) unsalted butter. This is crucial for our cookie recipe; not only does it provide flavor, but it also contributes significantly to texture. When we brown this butter, it undergoes a magical transformation—turning golden brown and developing nutty notes that amplify the overall richness of our cookies. Make sure you’re using unsalted butter here; it allows us better control over the saltiness in our dough since we’ll be adding salt separately later.
-
1 1/2 cups (280g) dark brown sugar, packed. Now here’s where we introduce some sweetness! Dark brown sugar contains more molasses than its lighter counterpart, which means it brings moisture along with caramel-like flavors into our cookies. This contributes not only to sweetness but also helps achieve that delightful chewiness we’re after. I promise you, using dark brown sugar makes all the difference!
-
1 large egg yolk. The yolk is essential for richness; it adds moisture while helping bind everything together without making our cookies cake-like in texture. If you’re wondering about egg whites’ role here—they’re best reserved for meringues or other fluffy desserts! We want these cookies dense and chewy.
-
3 tbsp pure maple syrup. Ahh, maple syrup—the quintessential flavor of fall! Using pure maple syrup instead of artificial options is non-negotiable if you want that authentic sweetness with hints of woodiness. It complements the pumpkin beautifully and adds another layer of complexity to our cookie’s flavor profile.
-
1 tsp vanilla extract. Vanilla extract is like the secret handshake between ingredients; it enhances all other flavors without being overly dominant itself. A high-quality extract will yield much better results than imitation vanilla—trust me on this one!
-
1/3 cup (80g) pumpkin puree. Here lies the heart of our recipe! Pumpkin puree not only lends its beautiful orange hue but also keeps our cookies moist while imparting subtle earthiness. Look for 100% pure pumpkin puree without additives; it’s worth seeking out for maximum flavor.
-
2 1/4 cups (280g) all-purpose flour. Flour provides structure to our cookies while ensuring they don’t spread too much during baking—a balance we need for those delightful chewy centers surrounded by slightly crisp edges.
-
1 tsp baking soda & 1/2 tsp baking powder—these two leavening agents work hand-in-hand to give our cookies lift while still maintaining their desired chewiness. Baking soda reacts quickly when combined with acidic ingredients like pumpkin or maple syrup, giving us immediate lift during baking.
-
1/2 tsp salt—a pinch goes a long way in enhancing flavors! Salt brings balance to sweet recipes like ours by amplifying taste sensations on your palate.
-
1 1/2 tsp pumpkin pie spice & 1/2 tsp cinnamon. These warm spices evoke cozy feelings reminiscent of Thanksgiving gatherings around loved ones—adding warmth and depth that perfectly complement our pumpkin flavor profile!
-
2 tbsp brown sugar, 2 tbsp granulated sugar, & 1 tsp cinnamon for coating—this mixture creates an irresistible exterior on our cookies as they bake up beautifully caramelized yet soft within!
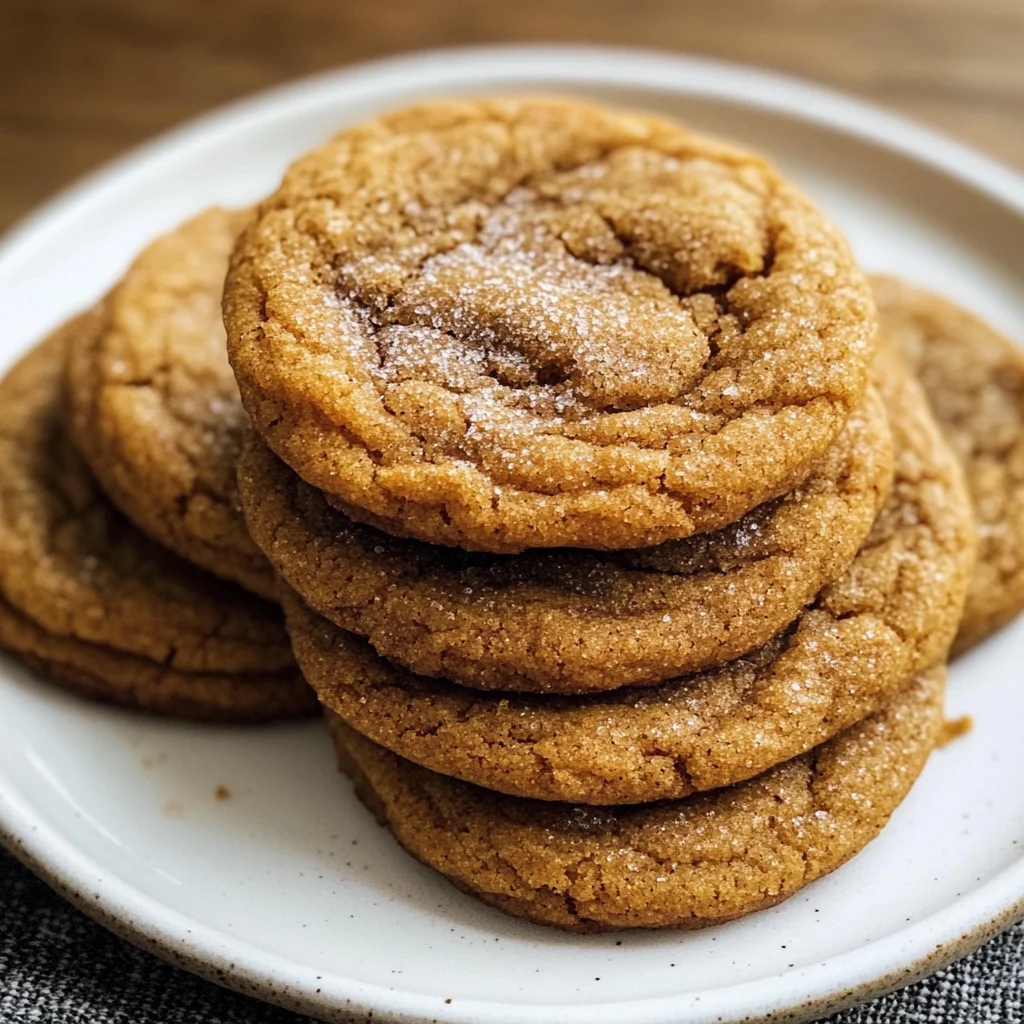
Equipment You’ll Need:
Having the right tools can make all the difference in your baking journey! While these might not be ingredients per se, think of them as essential partners in creating something truly wonderful together.
-
Mixing bowls – A sturdy set of mixing bowls will serve as your trusty companions throughout this process! They provide ample space for whisking together dry ingredients or combining wet ones without feeling cramped—a must for ensuring everything blends smoothly as you go along.
-
Measuring cups and spoons – Accurate measurements are vital when it comes to baking because even slight deviations can yield different results! Invest in good-quality measuring tools so you can confidently scoop up flour or pour out sticky syrups without worrying about missed proportions.
-
Rubber spatula – This versatile tool works wonders for folding dry ingredients into wet mixtures smoothly! It also helps scrape down sides of bowls effectively so no precious batter goes uneaten—a true hero in any baker’s toolkit!
-
Parchment paper – Lining your baking sheet with parchment ensures easy release after baking while preventing sticking issues altogether! Plus, cleanup becomes effortless since those gooey bits won’t cling stubbornly onto pans.
-
Baking sheets – Sturdy baking sheets allow even heat distribution during cooking time; opt for light-colored ones if possible so they don’t over-brown bottoms prematurely!
Now let’s dive into preparing these delectable Brown Butter and Maple Chewy Pumpkin Cookies!
Step 1: Mastering Brown Butter
First things first—we need to unlock the nutty goodness hidden within our butter by browning it properly! Start by melting 1 cup (two sticks) over medium heat in a saucepan while stirring continuously until it transforms into a beautiful amber color—the scent will be utterly intoxicating as those milk solids caramelize beautifully at precisely this point! This process typically takes around 5–7 minutes depending on your stove settings; watch closely because burnt butter quickly turns from golden perfection into bitter disappointment—which we definitely want to avoid! The key here is patience: don’t rush this step as allowing sufficient time ensures maximum flavor development occurs before moving forward!
Step 2: Pouring Perfection
Once you’ve reached that coveted brown stage, carefully pour your melted butter into a measuring glass—this will help ensure accurate measurements later on while capturing every last drop (and those delicious browned bits at bottom!). Letting it cool slightly before proceeding keeps temperatures consistent throughout dough mixing process ahead so everything remains balanced whilst preventing any potential curdling when adding eggs later on down line—a must-have tip for success!
Step 3: Prepping Your Oven
While waiting patiently for cooling action happening offside (around 20 minutes should do!), preheat oven temperature up towards 350°F (175°C). Also prepare large baking sheets lined neatly with parchment paper—the perfect surface awaiting arrival soon enough from our cookie creations once ready for action!
Step 4: Whisking Dry Ingredients Together
In another medium bowl nearby, whisk together flour along with baking soda/powder/salt/spices until well-combined—it’s important because incorporating evenly throughout assures uniformity across every single bite once baked up nicely later down line! You’ll know it’s mixed properly when no visible flour clumps remain visible plus aromas begin wafting pleasantly upward surrounding area inviting inspiration upon embarking further steps ahead…
Stay tuned as we’ll continue exploring more steps together—it’s going to be absolutely scrumptious!
Step 5: Whisking Together for a Perfectly Smooth Base
Now that your brown butter is beautifully cooled and ready to go, let’s dive into creating a luscious mixture that will serve as the heart of our cookies. In a large mixing bowl, take your packed dark brown sugar and pour in that glorious brown butter. I can’t stress enough how crucial this step is; the combination of warm brown butter with dark brown sugar creates a rich, caramel-like flavor that will elevate these cookies to extraordinary heights. Using a whisk, mix them together until they resemble clumpy wet sand—think of it like creating the base for a delightful sandy beach! You want to ensure there are no lumps of sugar left behind, as those could lead to uneven sweetness in your finished cookies.
Once you achieve that sandy texture, it’s time to introduce our wet ingredients: the egg yolk, pure maple syrup, vanilla extract, and pumpkin puree. Each of these components brings something magical to the table. The egg yolk adds richness and moisture while helping bind everything together; the maple syrup infuses that delightful autumnal sweetness; the vanilla extract offers warmth; and the pumpkin puree not only gives flavor but also contributes to that chewy texture we all adore. Mix everything until smooth—it should feel velvety under your whisk. Trust me on this: when you take your first bite of these cookies, this smooth blend will sing harmoniously with every ingredient.
Step 6: Folding in Dry Ingredients – The Gentle Embrace
After achieving that beautiful, silky mixture, it’s time to bring in our dry ingredients. Take your prepared bowl of flour, baking soda, baking powder, salt, and spices—yes, those fragrant spices are essential! They’ll create an enchanting aroma as they mingle with our other ingredients. Using a rubber spatula, gently fold the dry ingredients into your wet mixture until just combined. This gentle folding motion is important; we want to retain as much air as possible to keep our cookies light and chewy instead of dense.
You might notice the dough starting to come together but also feel very soft—that’s perfectly normal! However, if it feels too thin—almost like cake batter rather than cookie dough—don’t fret! This can happen if your butter was still too warm when mixed in. If you’ve reached this point and feel concerned about its consistency, simply pop it into the refrigerator for about 15-20 minutes. This chilling step is absolutely paramount because it allows the fats in the butter to solidify slightly. As they cool down, they’ll help give structure to your cookies when baked instead of spreading out too much on the baking sheet.
Step 7: The Sweet Coating – Creating Flavor Layers
While your dough is chilling (and trust me here—it’s worth the wait), let’s prepare a delightful cinnamon-sugar coating that will add texture and flavor right from the first bite! Grab a small dish and combine two tablespoons each of brown sugar and granulated sugar with one teaspoon of cinnamon. Mix them together until well-blended—you want every grain coated with that intoxicating cinnamon fragrance wafting through your kitchen!
This coating serves multiple purposes: not only does it provide an extra layer of sweetness on the outside—but it also creates a beautiful contrast between textures—the crispy exterior against that chewy interior is simply divine! When it’s time to scoop out your cookie dough balls later on, you’ll drop them into this mixture before placing them on your baking sheet. The visual cue here is essential: you want each ball fully coated so they emerge from the oven shimmering with spice and sweetness.
Step 8: Scooping Perfection – Shaping Your Cookies
Now comes one of my favorite parts—scooping out those precious cookie dough balls! Using a large cookie scoop or a 1/4 measuring cup makes this process easy-peasy while ensuring uniformity in size—a crucial aspect for even baking. As you scoop out each portion (aiming for about 2 ounces), drop them into your cinnamon-sugar mixture from Step 7 and toss gently to coat all sides generously.
Prepare yourself; this dough may feel soft but should hold its shape when scooped—that’s precisely what we’re looking for! If you notice any stickiness or if they’re spreading too much while resting at room temperature before baking, consider chilling them again briefly—about 10 minutes should suffice. Remember that patience pays off; letting them rest helps develop flavors further and results in cookies that are both beautiful and delicious once baked.
When placing them on your lined baking sheet (remember those parchment papers?), space them about three inches apart—you want ample room for expansion during baking without having them collide into one another! Depending on your sheets’ size or how many trays you have at hand, aim for four or five per batch; it’s always easier to manage smaller groups!
Conclusion:
As we wrap up this delightful journey through the creation of Brown Butter and Maple Chewy Pumpkin Cookies, I hope you’ve felt my excitement spill over like melted chocolate! These cookies embody everything wonderful about fall baking—the warm spices that envelop you like a cherished sweater, the lusciousness of brown butter that brings depth and richness unlike anything else, and the pumpkin puree that adds both moisture and nostalgia. Each bite is more than just dessert; it’s an experience that invites you back home, reminding us all of love-filled kitchens during autumn.
Why is this recipe such a must-try? Beyond their incredible taste—the perfect balance of chewiness and warmth—these cookies offer an accessible yet thrilling baking adventure for everyone from beginners to seasoned bakers alike. Picture this: pulling these beauties from the oven as your family gathers around, their faces lighting up with anticipation. There’s something profoundly satisfying about sharing homemade treats with loved ones; it transforms ordinary moments into extraordinary memories.
Imagine savoring one of these glorious cookies with a steaming cup of apple cider or perhaps pairing them with a scoop of vanilla non-dairy ice cream for an indulgent dessert after dinner. For an afternoon pick-me-up while working from home or studying late into the night? These chewy delights are perfect companions! And don’t forget—they also make excellent gifts packaged up in lovely boxes for friends or neighbors during the holiday season; who wouldn’t appreciate such heartfelt tokens?
Feeling adventurous? This recipe is wonderfully adaptable! You could swap out some of the pumpkin puree for mashed bananas or even sweet potato puree for unique flavors—both would add their own delightful twist while maintaining that lovely chewy texture we adore. Or try adding dark chocolate chips or chopped nuts for extra crunch! Each variation brings its own magic to this already stellar cookie recipe. So go ahead—experiment, make it your own, and share your experiences; I can’t wait to hear how yours turn out!
Dessert
Brown Butter and Maple Chewy Pumpkin Cookies
- Total Time: 35 minutes
- Yield: Approximately 24 cookies 1x
Description
Indulge in the warm embrace of autumn with these Brown Butter and Maple Chewy Pumpkin Cookies. Each bite offers a delightful fusion of rich brown butter, sweet maple syrup, and earthy pumpkin, perfectly balanced with warm spices. These cookies are soft and chewy, making them an irresistible treat for cozy gatherings or quiet moments with a cup of tea. The unique flavor profile elevates your typical cookie experience into something extraordinary—the perfect way to celebrate the season. Get ready to fill your kitchen with the enchanting aroma of fall!
Ingredients
- 1 cup unsalted butter
- 1 ½ cups dark brown sugar
- 1 large egg yolk
- 3 tbsp pure maple syrup
- 1 tsp vanilla extract
- ⅓ cup pumpkin puree
- 2 ¼ cups all-purpose flour
- 1 tsp baking soda
- ½ tsp baking powder
- ½ tsp salt
- 1 ½ tsp pumpkin pie spice
- ½ tsp cinnamon
- 2 tbsp brown sugar
- 2 tbsp granulated sugar
- 1 tsp cinnamon for coating
Instructions
- Preheat your oven to 350°F (175°C) and line baking sheets with parchment paper.
- In a saucepan, melt butter over medium heat until browned; let cool slightly.
- In a large bowl, combine brown sugar and browned butter until clumpy.
- Mix in egg yolk, maple syrup, vanilla extract, and pumpkin puree until smooth.
- In another bowl, whisk together flour, baking soda, baking powder, salt, pumpkin pie spice, and cinnamon.
- Gently fold dry ingredients into wet mixture until just combined; chill if too soft.
- Scoop dough into balls, coat in cinnamon-sugar mixture, and place on prepared sheets.
- Bake for 12-15 minutes until edges are golden; let cool before serving.
- Prep Time: 20 minutes
- Cook Time: 15 minutes
- Category: Dessert
- Method: Baking
- Cuisine: American
Nutrition
- Serving Size: 1 cookie (30g)
- Calories: 150
- Sugar: 10g
- Sodium: 80mg
- Fat: 8g
- Saturated Fat: 5g
- Unsaturated Fat: 3g
- Trans Fat: 0g
- Carbohydrates: 18g
- Fiber: 0g
- Protein: 2g
- Cholesterol: 20mg
Leave a Comment