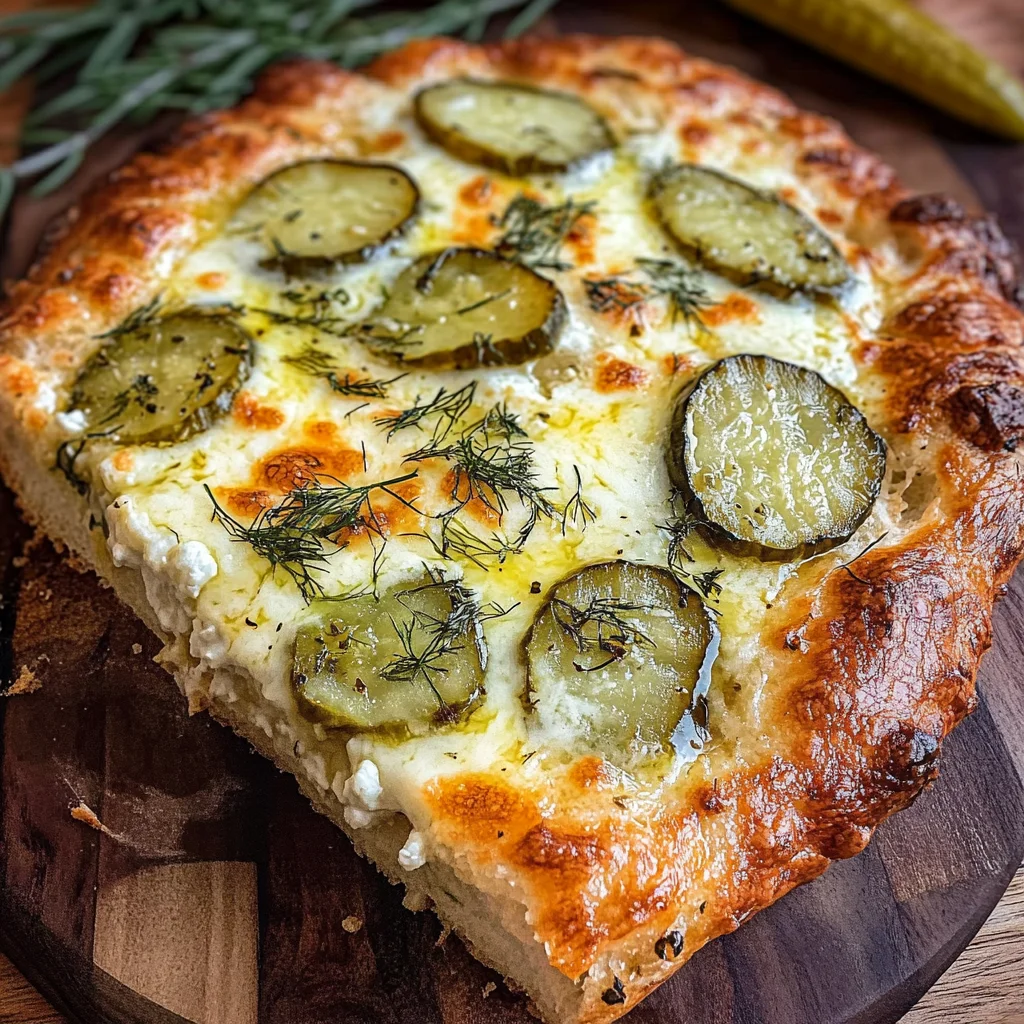
There’s something incredibly magical about the way food can connect us to our roots, evoke cherished memories, and forge new traditions. As I sit here thinking about this Dill Pickle Focaccia Bread, it’s not just a recipe; it’s an experience that marries the comforting essence of homemade bread with the zesty tang of dill pickles. Imagine pulling a freshly baked focaccia from the oven, golden and glistening, with bubbling cheese that stretches like a warm hug. Each bite is a delightful symphony of flavors—the soft, airy dough harmonizing beautifully with the creamy sauce and briny pickles. I promise you, this isn’t merely a dish; it’s an adventure for your taste buds that speaks of summer picnics and cozy afternoons spent in the kitchen.
Every time I make this Dill Pickle Focaccia Bread, I’m reminded of those casual gatherings with friends where laughter fills the air and every morsel is savored. It’s perfect as an appetizer at a laid-back gathering or even as a comforting main course paired with your favorite salad. The contrast between the soft bread and the crunchy pickles creates an utterly intoxicating experience. Plus, there’s something so satisfying about watching dough rise and transform into something beautiful. Trust me on this—whether you’re hosting a party or simply treating yourself on a quiet evening at home, this focaccia is sure to impress. So let’s dive into this culinary journey together!
Dill Pickle Focaccia Bread: A Comforting Delight with a Twist
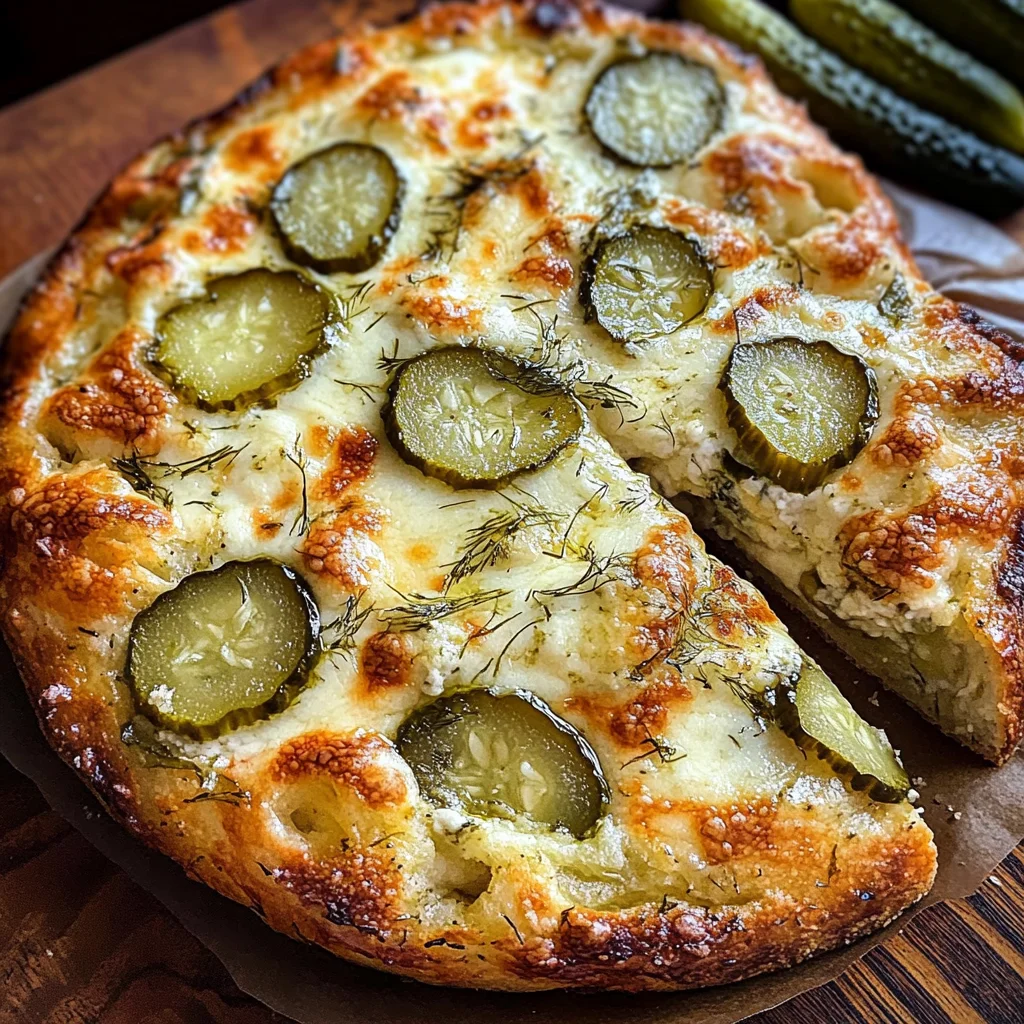
If you’ve ever craved something that combines the essence of homemade bread with a zingy kick, then you’re in for a treat! This Dill Pickle Focaccia Bread is more than just food; it’s a joyful exploration of flavors that invites you to indulge—and possibly share—with loved ones. With its crispy edges and pillowy center topped with gooey mozzarella and tart dill pickles, it truly redefines what focaccia can be.
Ingredients:
Before we embark on crafting this delightful loaf together, let’s gather our ingredients. Each one plays an essential role in creating that perfect balance of textures and flavors.
- 1 cup warm water (105°F to 115°F). This seemingly simple ingredient is absolutely paramount because it activates our yeast—your bread’s rising agent! Too cold, and the yeast will remain dormant; too hot, and you risk killing it altogether. Aim for that sweet spot where it’s comfortably warm to the touch—it should feel like liquid sunshine.
- 1 teaspoon active dry yeast. Think of yeast as little magic workers that breathe life into your dough! When activated by our warm water and sugar mixture, these tiny granules feast on sugar, producing carbon dioxide gas that causes our bread to rise beautifully. Always check the expiration date when purchasing; fresh yeast means better results!
- 2 tablespoons granulated sugar. This ingredient serves two purposes: first, it feeds our yeast during activation—helping create those fluffy bubbles—and second, it adds just a hint of sweetness to balance out the tanginess from our pickles later on.
- ⅓ cup (72 g) extra virgin olive oil. Here we introduce some liquid gold! The olive oil not only enriches our dough with flavor but also contributes to its tenderness while helping create that delightful crust we all love in focaccia. Opt for high-quality extra virgin olive oil for its robust flavor profile.
- 1 teaspoon Italian seasoning. A blend of herbs like oregano, basil, and thyme brings warmth and depth to our focaccia without overpowering those vibrant pickle notes. It’s like wrapping your dough in fragrant Italian sunshine!
- 2 teaspoons garlic (minced). Freshly minced garlic infuses each bite with aromatic goodness—what could be better than that? Its pungent yet sweet flavor mellows beautifully when baked, making every slice utterly irresistible.
- 1 teaspoon kosher salt. Salt might seem trivial, but it’s crucial in enhancing all our flavors while controlling fermentation rates in the dough—a non-negotiable step if you want balanced taste!
- 2 ½ cups (312.5 g) all-purpose flour. The backbone of our bread! All-purpose flour provides structure while giving us enough protein content for stretchiness without being too dense—a perfect canvas for all those toppings.
- ¾ cup (172.5 g) sour cream. This ingredient adds richness and moisture while also introducing a nice tang that complements our dill pickles wonderfully! If you’re looking for an alternative, Greek yogurt works beautifully here too!
- ¼ cup (58 g) mayonnaise. Mayonnaise may sound unconventional but trust me—it contributes creaminess while also acting as an emulsifier to keep everything perfectly blended together.
- 2 tablespoons whole milk. Whole milk helps create tenderness in our focaccia and adds richness without being too heavy—ideal for achieving that soft interior texture!
- 1 teaspoon lemon juice. A splash of lemon juice brightens up all those rich flavors while also interacting with the sour cream for added acidity—a little zing never hurt anyone!
- 1 teaspoon garlic (minced). Yes, we’re doubling down on garlic here! You can never have too much garlicky goodness when it comes to flavoring our sauce—it will create depth while mingling beautifully with other ingredients later on.
- ½ teaspoon dill weed. This herb brings forth those unmistakable pickle vibes right into our sauce before even hitting the oven—it’s fresh yet slightly floral aroma pairs beautifully against everything else.
- ½ teaspoon kosher salt. A bit more salt is necessary here to season our creamy sauce appropriately since we want every layer bursting with flavor!
- ¼ teaspoon ground black pepper. Just a pinch adds warmth without being overwhelming—it helps round out all those bright flavors nicely while adding character.
- 25-30 dill pickle slices. These slices are undoubtedly the star of the show! Their crunchiness combined with their tangy flavor elevates this focaccia beyond ordinary—don’t skimp on these beauties!
- 2 cups (226 g) mozzarella cheese (shredded). Melty mozzarella makes everything better! Not only does it create oozy pockets throughout your focaccia but also enhances texture—who doesn’t love cheesy bread?
- Fresh dill (roughly chopped for garnish). Finally, we need some fresh dill sprinkled on top before serving! It adds visual appeal while tying in those bright pickle notes perfectly—it’s like finishing touches on your masterpiece!
Equipment You’ll Need:
Now let’s talk tools—a well-equipped kitchen can make all the difference when embarking on any culinary adventure! Having these items at hand will ensure not only smooth sailing through preparation but also elevate your overall baking experience.
- Mixing bowl – A large mixing bowl is essential for combining all your ingredients comfortably without splashing flour everywhere! Look for one made from sturdy material; glass or stainless steel works wonders since they’re easy to clean afterward too.
- Whisk – An essential tool for blending dry ingredients together seamlessly while incorporating air into your mixture—this ensures even distribution throughout your dough itself!
- Baking sheet – A rimmed baking sheet provides ample space for your focaccia as it rises during baking while capturing any bubbling cheese overflow—no mess here!
- Parchment paper – Lining your baking sheet ensures easy transfer onto plates later on plus prevents sticking; trust me—you’ll thank yourself later when clean-up time rolls around!
- Pastry brush – Use this handy tool to spread olive oil evenly across dough before baking; doing so guarantees even browning across crusts plus enhances flavors significantly throughout process.
With these ingredients at hand along with essential equipment ready to go—we’re primed for creating something extraordinary together!
Preparing the Dill Pickle Focaccia Bread
Step 1: Activate Your Yeast
Let’s start by creating an environment where magic can happen: activating our yeast! In your mixing bowl, combine that warm water along with active dry yeast and granulated sugar—give it a gentle stir just until everything dissolves nicely together before letting it sit undisturbed for about 5 minutes until frothy bubbles appear on top like little clouds forming over a sunny field! This process is known as proofing—the moment when tiny organisms come alive—and is crucial because without activating those yeasts properly beforehand… well let’s just say we wouldn’t get very far now would we?
Step 2: Mix Up The Dough
Once you see those happy bubbles dancing atop your mixture—that’s when it’s time to add in extra virgin olive oil followed by Italian seasoning along with minced garlic plus kosher salt—all those aromatic scents mingling together will have you dreaming about what’s coming next already! Gently mix everything until combined then gradually introduce all-purpose flour—one cup at a time—to avoid overwhelming yourself or creating lumps within dough texture itself which would affect final outcome drastically if done improperly (trust me!). Once incorporated fully into cohesive ball shape—we’ll knead away!
Step 3: Knead That Dough
Turn out that lovely dough onto lightly floured surface where you’ll knead vigorously using palms pressing outward followed by folding inward repeatedly—that rhythmic action helps develop gluten strands which give structure & elasticity needed during rising phase later down line—you want something smooth & elastic after about 8–10 minutes worth effort here… don’t rush through this step either because kneading builds strength inside each piece ensuring delicious lightness once baked through too!
Step 4: First Rise
Place kneaded dough back inside lightly greased bowl covering tightly using damp cloth or plastic wrap—this resting period allows gluten strands relax allowing maximum expansion during rising phase occurring within next hour ideally located somewhere warm away drafts so they won’t interrupt growth pattern either… keep checking though once thirty minutes pass just peek under cover seeing if doubled size visible yet–if not continue letting rise further until achieved desired volume otherwise proceed onward knowing satisfaction awaits ahead shortly thereafter anyway regardless timing involved really reflects patience shown throughout entire journey overall here folks!
This Dill Pickle Focaccia Bread promises comfort alongside excitement wrapped up into each flavorful bite waiting patiently ahead—now how wonderful does THAT sound? Let’s keep going strong together until finished masterpiece emerges golden brown atop counter soon enough!
Step 5: Kneading the Dough to Perfection
Now that you’ve given your yeast mixture a few moments to come alive—trust me, you’ll know it’s ready when you see those tiny bubbles forming on the surface—it’s time to bring everything together into a harmonious dough. In a large mixing bowl, combine your flour with the kosher salt and Italian seasoning, creating a dry haven for your flavors. The salt is more than just for seasoning; it strengthens the gluten structure as it hydrates, making your focaccia perfectly chewy yet tender.
Once mixed, create a well in the center of your flour blend and pour in the yeast mixture along with the olive oil. Begin mixing with a wooden spoon or spatula, gradually incorporating the flour from the edges into the wet ingredients. As you stir, feel free to let your mind wander; this is where all your anticipation starts to take shape! Once it becomes too difficult to mix with a utensil, lay it out on a lightly floured surface and get your hands involved. Knead the dough for about 8-10 minutes until it becomes smooth and elastic—this step is crucial because kneading develops gluten, which gives bread its fantastic texture. You want to feel that dough spring back when you poke it gently; if it sticks to your hands too much, don’t hesitate to sprinkle just a touch of flour as needed.
Step 6: Letting It Rise—The Magic of Fermentation
After kneading, place your dough in a large greased bowl (I always use olive oil here—it’s not just delicious but also helps prevent sticking). Cover this bowl lovingly with plastic wrap or a damp kitchen towel and set it aside in a warm spot. This is where the magic happens! Allowing the dough to rise for about an hour—or until it has doubled in size—is absolutely paramount. This fermentation process not only helps develop flavor but also creates those lovely air pockets that will make each bite of focaccia airy and light.
As you wait, take this time to reflect on how incredible homemade bread can be! You might notice that depending on room temperature and humidity, rising times may vary slightly; that’s perfectly normal! Just keep an eye on it—look for that glorious puffiness indicating readiness. Patience is key here; rushing this step could lead to denser bread than we want. Remember, great things come to those who wait!
Step 7: Shaping Your Focaccia Dough
Once your dough has risen beautifully, it’s time for some hands-on action again! Gently punch down the dough—the act of deflating releases excess gas bubbles formed during fermentation—and then transfer it onto an oiled baking sheet or pan. With clean hands (and maybe a bit of olive oil), start stretching and pressing the dough gently using your fingertips. Aim for about ½ inch thick; this thickness allows for that delightful golden crust while keeping a fluffy interior.
As you shape the dough, don’t stress too much about perfection; rustic charm is part of focaccia’s allure! Use your fingers to poke dimples across the surface—these little wells will hold onto all those delicious toppings we’re about to add later on. I like to think of these dimples as tiny flavor reservoirs waiting for their moment in the spotlight! This step is not just aesthetic; it’s functional too—it allows olive oil and toppings to seep into those nooks and crannies as they cook.
Step 8: Resting Before Baking—The Second Rise
Now comes another essential moment of patience! Cover your shaped focaccia again with a kitchen towel or plastic wrap and let it rest for another 30 minutes while you preheat your oven—the perfect opportunity for those flavors to deepen even further. While resting, watch how the dough puffs up slightly again; this second rise works wonders in achieving that airy texture we all crave in our bread.
During this time, preheat your oven to 425°F (220°C). It’s critical that your oven reaches full temperature before placing in our masterpiece; otherwise, we risk not getting that gorgeous crust we desire! While you’re waiting, I highly recommend preparing your creamy topping by combining sour cream, mayonnaise, milk, lemon juice, garlic, dill weed, salt, and pepper in a small bowl—this sauce adds an utterly intoxicating layer of flavor that complements our focaccia beautifully!
Conclusion:
As we wrap up our delightful journey through this recipe, I can’t help but feel a surge of excitement that I hope has transferred to you! There’s something truly extraordinary about creating something so flavorful from scratch; it’s like weaving memories into every bite. The way the tangy pickles contrast with the creamy sauce and melt-in-your-mouth mozzarella creates a dance of textures that elevates this dish beyond mere bread. It’s not just about filling our bellies; it’s about crafting an experience that’s rich with flavor and nostalgia.
This Dill Pickle Focaccia Bread is an absolute must-try—not just because it’s delicious, but because making it is an adventure all its own! Whether you’re hosting friends for game night or simply treating yourself on a cozy evening in, pulling that golden-brown loaf from your oven will fill your heart—and home—with warmth and cheer. Picture gathering around the table as everyone takes their first bite; I promise you’ll see smiles light up faces as they enjoy every cheesy morsel!
For serving suggestions that will really make your meal sing, imagine savoring one warm piece alongside a vibrant arugula salad drizzled with zesty lemon vinaigrette; the peppery greens complementing those rich flavors perfectly. Or perhaps enjoy it as an appetizer paired with a chilled glass of sparkling water infused with fresh herbs—it’s such a refreshing pairing! And if you’re feeling indulgent, consider slathering on some herb-infused olive oil for dipping—it truly takes things to another level.
Feeling adventurous? This recipe is wonderfully adaptable! Switch out dill pickles for spicy jalapeños if you’re craving some heat or experiment by adding sun-dried tomatoes for an Italian twist. You could even sprinkle some bacon bits (or their vegetarian alternative) on top before baking for an added layer of flavor—each variation invites new possibilities while keeping that cherished essence intact. So go ahead—try this recipe out today! Share your experience with friends or family and connect over food that’s made with love; I can’t wait to hear how yours turns out!

Dill Pickle Focaccia Bread
- Total Time: 45 minutes
- Yield: Serves 12 1x
Description
Dill Pickle Focaccia Bread is a delightful and unique twist on the classic Italian bread that combines the comforting essence of homemade focaccia with the zesty tang of dill pickles. This easy-to-make bread features a soft, airy texture and crispy edges, topped with gooey mozzarella and infused with a creamy sauce that perfectly balances the flavors. Ideal as an appetizer for gatherings or as a comforting main dish paired with your favorite salad, this focaccia is sure to impress. Imagine pulling a golden loaf from the oven, with bubbling cheese and the irresistible aroma of fresh herbs wafting through your kitchen—it’s not just a recipe; it’s an experience you’ll want to share!
Ingredients
- 1 cup warm water (105°F to 115°F)
- 1 teaspoon active dry yeast
- 2 tablespoons granulated sugar
- ⅓ cup extra virgin olive oil
- 1 teaspoon Italian seasoning
- 2 teaspoons garlic (minced)
- 1 teaspoon kosher salt
- 2 ½ cups all-purpose flour
- ¾ cup sour cream
- ¼ cup mayonnaise
- 2 tablespoons whole milk
- 1 teaspoon lemon juice
- ½ teaspoon dill weed
- 25–30 dill pickle slices
- 2 cups mozzarella cheese (shredded)
- Fresh dill (roughly chopped for garnish)
Instructions
- In a mixing bowl, combine warm water, active dry yeast, and granulated sugar. Let it sit until frothy (about 5 minutes).
- Add olive oil, Italian seasoning, minced garlic, and kosher salt to the yeast mixture; stir to combine.
- Gradually mix in all-purpose flour until a cohesive dough forms. Knead on a floured surface for 8–10 minutes until smooth and elastic.
- Place the dough in an oiled bowl, cover it, and let it rise in a warm spot for about 1 hour or until doubled in size.
- Punch down the dough and transfer it onto an oiled baking sheet. Press and stretch into a ½-inch thick rectangle, creating dimples in the surface.
- Cover again and let rest for another 30 minutes while preheating your oven to 425°F (220°C).
- Drizzle olive oil over the dough, spread creamy sauce made from sour cream, mayonnaise, milk, lemon juice, garlic, dill weed, salt, and pepper on top.
- Top with dill pickle slices and shredded mozzarella cheese.
- Bake for 20–25 minutes until golden brown. Cool slightly before garnishing with fresh dill.
- Prep Time: 20 minutes
- Cook Time: 25 minutes
- Category: Appetizer/Main
- Method: Baking
- Cuisine: Italian
Nutrition
- Serving Size: 1 piece (100g)
- Calories: 210
- Sugar: 2g
- Sodium: 300mg
- Fat: 10g
- Saturated Fat: 2g
- Unsaturated Fat: 7g
- Trans Fat: 0g
- Carbohydrates: 27g
- Fiber: 1g
- Protein: 6g
- Cholesterol: 10mg


Leave a Comment