There’s something utterly magical about the way food can transport us to cherished memories and warm moments shared with loved ones. When I think of the Cheesecake Factory Chicken Costoletta, I’m reminded of cozy dinners where laughter fills the air, and every bite feels like a comforting embrace. This dish isn’t just about satisfying hunger; it’s about creating a beautiful experience that weaves together the flavors of crispy chicken, creamy lemon sauce, and a sprinkle of love. The moment you sink your fork into that perfectly breaded cutlet, you’re met with a symphony of flavors that dance on your palate, inviting you to indulge just a little more. Trust me when I say this recipe will become a cherished favorite in your home, just as it has in mine.
As we embark on this culinary journey together, let me share why the Cheesecake Factory Chicken Costoletta is so beloved. It’s not only an absolute crowd-pleaser but also remarkably versatile; it can stand proudly at any dinner table or be dressed down for a casual weeknight meal. The contrast between the crispy texture of the chicken and the velvety cream sauce creates a delightful balance that evokes joy with each bite. Imagine gathering your friends or family around the table, each eagerly anticipating their portion, because who wouldn’t want to dive into this deliciousness? This dish holds a special place in my heart for its ability to bring people together over good food and great conversation.
Cheesecake Factory Chicken Costoletta: A Crispy Delight with Creamy Lemon Bliss
Welcome to the world of Cheesecake Factory Chicken Costoletta! This recipe is not just about cooking; it’s about crafting an experience filled with flavor and love. Picture yourself in the kitchen, the enticing aroma wafting through your home as you prepare this delightful dish. The moment you serve it up hot from the skillet, topped with that luscious creamy lemon sauce, you’ll be greeted with smiles and compliments that make every effort worthwhile.
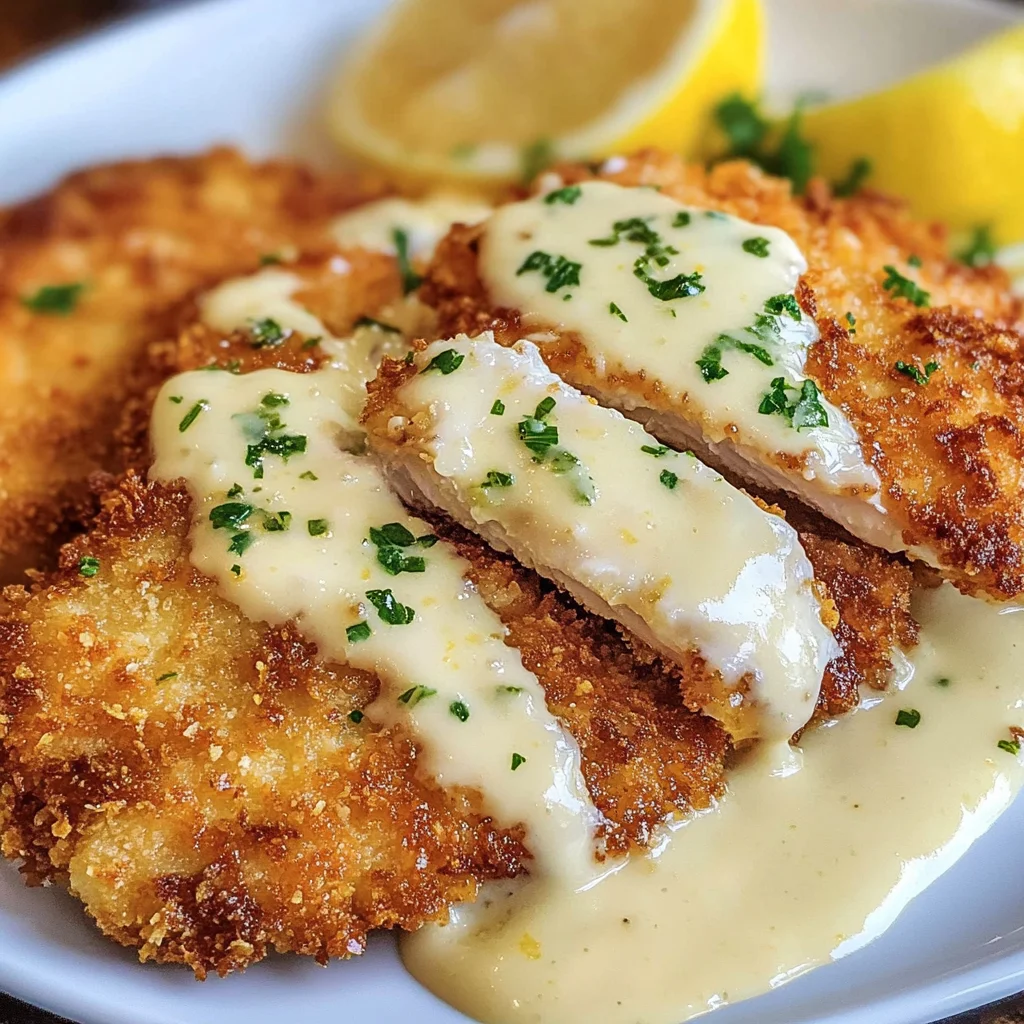
Ingredients:
As we gather our ingredients for this culinary masterpiece, know that each one plays an essential role in creating that perfect balance of textures and flavors. Every component is like an artist’s brushstroke on a canvas—together they create something truly beautiful!
- 1/3 cup all-purpose flour. The foundation of our breading process relies on this simple yet essential ingredient. All-purpose flour helps to create a light coating that will adhere beautifully to our chicken cutlets, ensuring that they have that delightful crunch once fried. When selecting flour, look for brands that feel finely milled; they’ll yield superior results compared to coarser options.
- 1/2 teaspoon garlic powder. Garlic powder adds depth and richness without overpowering the other flavors in our dish. Think of it as a subtle whisper rather than a shout—it enhances without stealing the show! If you’re feeling adventurous, you can also use fresh garlic for an even bolder taste; just remember to adjust your quantities accordingly.
- 1/2 teaspoon onion powder. Much like garlic powder, onion powder contributes another layer of savory goodness while maintaining balance within the dish. It’s particularly useful here since we want all our flavors to meld harmoniously without any single note dominating.
- 1/2 teaspoon salt. Salt is often called nature’s flavor enhancer—it amplifies all other ingredients’ natural aromas and tastes! It’s absolutely paramount in this recipe to ensure our chicken isn’t bland but rather bursting with flavor from every bite.
- 1/4 teaspoon pepper. Freshly ground black pepper introduces warmth and subtle heat into our dish, elevating it further while pairing beautifully with our creamy sauce later on. Using fresh ground pepper makes such a difference; you’ll notice its aromatic oils are far more pronounced compared to pre-ground versions.
- 2 large eggs. Eggs act as our binding agent in this recipe—the glue holding everything together! Not only do they help our breadcrumbs stick during frying (making them nice and crispy), but they also introduce richness into the overall flavor profile.
- Splash of water. Adding just a splash of water when whisking your eggs ensures they blend smoothly without clumping—this step makes all the difference in achieving an even coating on your chicken cutlets.
- 1 cup Italian panko breadcrumbs. Panko breadcrumbs are key players here—they provide an exceptional crunch thanks to their airy texture! Their larger flakes allow for maximum crispiness when fried while soaking up less oil than traditional breadcrumbs might do.
- Zest of 1 lemon. Zesting a lemon releases those fragrant oils packed with citrusy goodness—this ingredient brightens up our dish like nothing else! It works wonders in enhancing both flavor profiles while imparting freshness alongside richness from other elements present here.
- 1/4 cup grated parmesan cheese. Parmesan cheese complements our breadcrumb mixture beautifully by adding nuttiness and umami depth—making sure every bite feels luxurious! Be sure to use freshly grated cheese whenever possible for optimum flavor (and texture!).
- 4 thin cut chicken breasts. Choosing thin-cut chicken breasts ensures quick cooking time while delivering juicy meat throughout each piece—a must-have characteristic! If you can’t find thin cuts at your store, no worries—you can easily slice regular breasts horizontally yourself!
- Oil for frying (I prefer peanut oil). The choice of oil is crucial in achieving that golden-brown crust we desire; peanut oil has a high smoke point which allows frying at higher temperatures without burning—resulting in perfectly cooked chicken every time!
- 2 tablespoons salted butter. Butter brings both richness and flavor into our cream sauce—it’s what makes it indulgent! Choosing salted butter balances out sweetness while providing depth—just remember not to add additional salt until after tasting!
- 2 tablespoons all-purpose flour (for thickening). We’ll need another round of flour here as we create our lush cream sauce; it thickens up beautifully when whisked together with butter creating an irresistible base for everything else!
- 1 clove garlic, minced. Freshly minced garlic provides aromatic punch right before we combine it with cream—a non-negotiable addition if you want robust flavors coming through!
- 1/2 cup heavy cream. Heavy cream introduces unparalleled richness into our sauce making it decadent yet silky smooth—perfectly balancing out tanginess from lemon juice ahead!
- 3/4 cup chicken stock. Using quality chicken stock imparts depth while keeping things moist during cooking—it’s vital for achieving robust flavor throughout!
- 2 tablespoons fresh squeezed lemon juice. Fresh lemon juice cuts through richness providing brightness reminiscent of summer days—it’s simply sublime paired against creamy elements existing here!
- 1 tablespoon Dijon mustard. Dijon mustard adds complexity with its tangy kick enhancing overall savoriness throughout—which means even greater satisfaction when enjoying every morsel!
- 1/4 teaspoon pepper (for sauce) again rounds out flavors harmoniously ensuring nothing falls flat upon tasting later on!
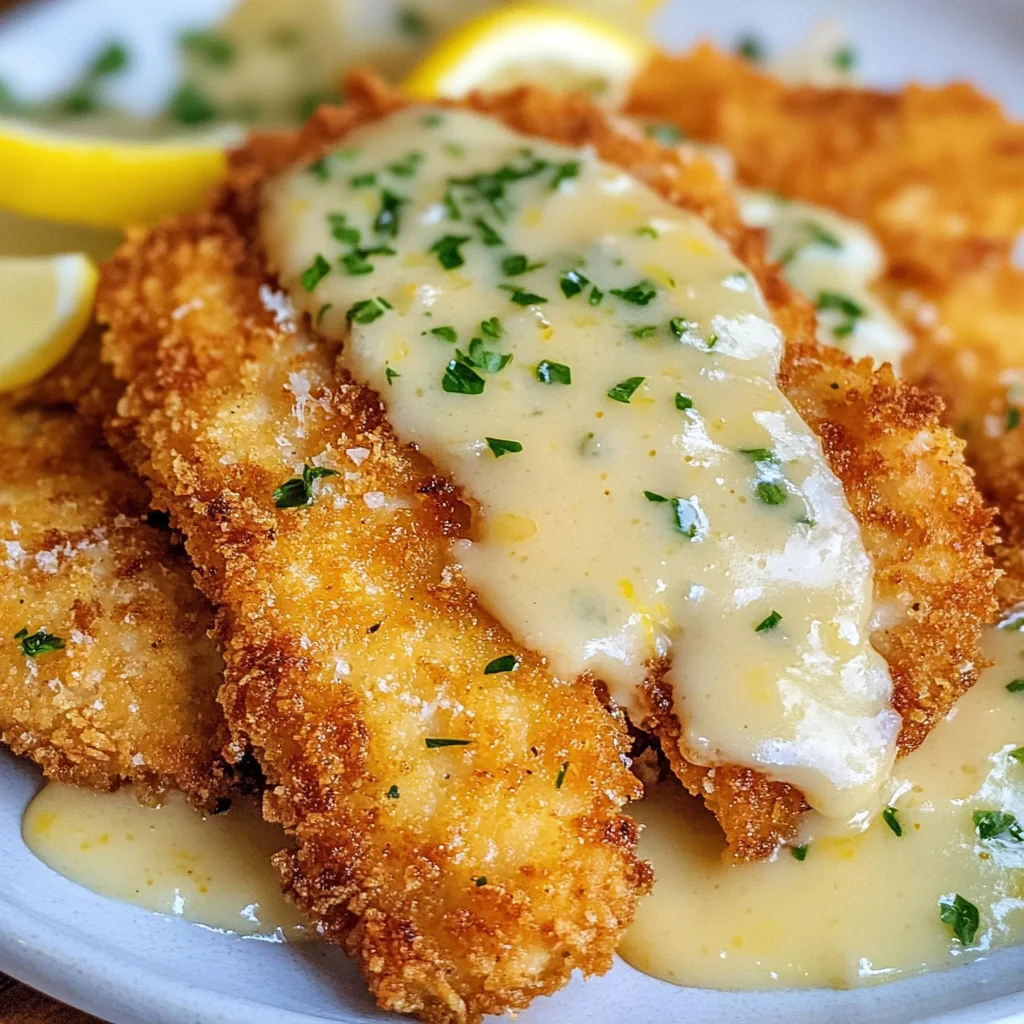
Equipment You’ll Need:
To embark on crafting this stunning Cheesecake Factory Chicken Costoletta, having the right tools at hand will make all the difference between success and frustration in your kitchen adventure! These essentials will help simplify processes so you can focus entirely on channeling your inner chef.
- Medium shallow bowls (3) – These are perfect for setting up your breading station! Having separate bowls ensures minimal mess as well as easy access to each component during assembly—you won’t get overwhelmed by having everything crammed into one space!
- Whisk – A reliable whisk is key when mixing eggs or sauces smoothly—it’ll ensure everything blends evenly without any lumps forming along the way!
- Meat mallet or rolling pin (optional) – If desired, using one helps flatten thicker pieces down into uniform thickness which ensures even cooking throughout all parts during frying—trust me; it makes life much easier!
- Large skillet or frying pan – This serves as your main cooking vessel where magic happens! Opt for non-stick options if possible—they offer ease plus minimal cleanup afterward too!
- Cooking thermometer (instant-read) – Investing in one ensures perfectly cooked chicken every time since reaching proper internal temperature guarantees safety plus tenderness—no more guessing games involved here!
With these ingredients assembled and equipment set ready-to-go—we’re primed for diving straight into preparing this incredible dish together…
Step 1: Preparing Your Breading Station
The first step involves setting up three shallow bowls near each other for an efficient breading assembly line—you’ll appreciate how streamlined it makes things later on trust me! In one bowl combine 1/3 cup all-purpose flour mixed with garlic powder, onion powder, salt, and pepper—this dry mixture acts like armor protecting delicate protein while simultaneously adding depth beneath crispy exterior once fried away later down roads ahead! Ensure everything gets whisked evenly before placing aside momentarily—the goal here is uniformity across pieces once coated adequately during next stages ahead too!
In another bowl take two large eggs along with splash water whisking until well-blended—this creates liquid gold necessary binding agent ensuring breadcrumbs stick beautifully onto surface areas present during final preparations thereafter too! Finally gather panko breadcrumbs then zest one lemon over them mixing thoroughly allowing citrus notes infuse throughout crumbly layers surrounding proteins contributing profoundly satisfying layers upon biting down later on too—all these steps combined serve foundational role leading towards ultimate results achieved later upon serving plates ahead too…
Step 2: Coating Your Chicken Cutlets
Now comes arguably most rewarding part—the actual coating itself where transformation occurs before eyes as plain looking chicken turns divine under careful hands guiding through processes laid forth just moments prior now unfolding beautifully right before own very eyes! Take one thin-cut breast dipping first into seasoned flour coating generously ensuring no crevice left bare then gently shake off excess dust keeping things tidy whilst moving quickly onward towards egg bath next awaiting patiently…
Once covered entirely move forward confidently pressing firmly against breadcrumb mixture allowing crunchy bits cling tightly across surfaces—this step builds texture necessary providing satisfying contrast once cooked fully through thereafter making sure every bite bursts forth deliciousness guaranteed bringing smiles aplenty around dinner tables ahead too… Repeat process until all four pieces get prepped putting aside onto plate ready awaiting sizzling action soon coming their way shortly thereafter too…
Step 3: Making That Irresistible Cream Sauce
Moving along swiftly now onto making rich creamy lemon sauce—a crucial element elevating entire experience beyond what mere fried meat could accomplish alone trust me win hearts everywhere served alongside… Start by melting two tablespoons salted butter over medium heat within medium saucepan waiting patiently until bubbling begins occurring gently stirring continuously until golden foam appears atop surface area indicating readiness occurring rapidly now…
Next add second round tablespoonfuls all-purpose flour whisking vigorously ensuring no lumps form whilst cooking briefly allowing raw taste dissipate away leaving behind smooth velvety base buildling slowly underneath alongside aromatic garlic minced earlier working wonders pulling everyone closer towards tantalizing scents filling air surrounding kitchens everywhere right now indeed…
Step 4: Whisk In Creaminess
Continuing onward slowly pour half cup heavy cream alongside three-fourths cup rich flavorful homemade stock beginning incorporate gradually whilst whisking constantly ensuring nothing sticks beneath bottom surfaces gathering instead becoming cohesive mix gradually merging flavors altogether culminating finally within pot warming up steadily bringing forth simmer soon enough…
Incorporate freshly squeezed lemon juice along with Dijon mustard seasoning further incorporating pepper last minute giving final touches rounding out entire ensemble nicely drawing forth delicious complexity proved remarkable triumph achieved upon completion soon enough shared amongst family friends alike gathered round tables enjoying good company accompanied hearty servings filled love care gratitude shared abundantly wherever travels lead next…
Stay tuned—we’re almost ready to fry those beautiful cutlets golden brown perfection serving immediately alongside warm creamy bliss awaiting everyone eagerly diving deep indulging wholeheartedly savoring moments captured forever lasting memories created gathered round tables sharing laughter stories joyfully celebrating life through cuisine crafted lovingly together forevermore…
Step 5: The Art of Breading – A Crispy Foundation
Now that we have our chicken breasts ready, it’s time to dive into the mesmerizing world of breading. This step is where the magic happens and trust me, it’s crucial for achieving that delightfully crispy texture that we all crave. Start by taking one of those beautifully coated chicken breasts and gently place it in the bowl with the egg wash. You want to ensure every inch of the chicken is lovingly covered in that rich, golden mixture; this act is truly paramount as it acts like a glue, allowing our Panko breadcrumbs to cling on for dear life! Allow any excess egg to drip off before moving on to the breadcrumbs—this helps prevent clumping, ensuring each bite will be perfectly crunchy.
Next, transfer your chicken piece over to that bowl filled with the Panko breadcrumb mixture. Here’s where you can really get into the groove of it! Use your hands to firmly press down on the crumbs, encouraging them to adhere fully. This step isn’t just about coating your chicken; it’s about infusing flavor and texture into every bite. Remember, this isn’t a race—take your time here! You’re building layers of flavor and crunch that will elevate your dish from good to extraordinarily delicious. Once it’s well-coated, set it aside and repeat with the other pieces until they’re all dressed up and ready for their sizzling debut.
Step 6: The Sauce That Steals the Show
Let’s take a moment to prepare what I affectionately call the star of this show—the creamy lemon sauce. It’s not just an accompaniment; it’s an experience in itself! In a medium saucepan over medium heat, add those two tablespoons of salted butter. As it melts into a luscious pool, let its rich aroma waft around your kitchen—it’s like an invitation for everyone nearby! Once melted, whisk in two tablespoons of all-purpose flour until smooth. This is called making a roux, and it’s essential because it thickens our sauce beautifully while adding depth.
Once your roux is ready (you want it just bubbly but not browned), toss in one clove of minced garlic. Let that cook for about a minute—this allows the garlic’s natural oils to release and bloom beautifully into the mix. Now comes my favorite part: slowly pour in half a cup of heavy cream while whisking constantly. Watch as it transforms into this silky concoction; it’s utterly intoxicating! Following that, add three-quarters of a cup of chicken stock—this creates a wonderful depth of flavor that’s both comforting and satisfying. Finally, introduce two tablespoons of freshly squeezed lemon juice and one tablespoon of Dijon mustard along with a pinch more pepper. Whisk until everything is combined and bring it to a gentle simmer; this simmering time—about two minutes—is crucial as it allows the flavors to marry together harmoniously, thickening up into something you’ll want to drizzle over everything!
Step 7: The Sizzle – Frying Your Chicken
Now comes one of my favorite moments: frying! In a large skillet over medium heat, pour in about half an inch of oil for frying—you can use peanut oil if you’re feeling adventurous! Let the oil heat up until it reaches around 350°F; this temperature is key because when you add your chicken, you want that immediate sizzle that tells you you’re on track for golden perfection! To test if your oil is hot enough without any fancy gadgets, drop a few breadcrumbs in there; if they dance and bubble immediately, you’re good to go.
Carefully add each piece of breaded chicken into the hot oil—be mindful not to overcrowd the pan because we want even cooking and maximum crispiness! Allow them to fry for about 3-4 minutes on each side; you’re looking for that glorious golden brown color which indicates they’re cooking perfectly inside as well. An internal temperature check should read at least 165°F when they’re done—a non-negotiable step for safety and quality!
As they finish cooking, use tongs or a slotted spoon to transfer them onto a paper towel-lined plate just long enough to soak up any excess oil before placing them on a wire rack over a sheet tray. This technique keeps them crispy while preventing sogginess—trust me on this one!
Step 8: The Grand Assembly – Plating Like A Pro
At this point, your kitchen must be filled with tantalizing aromas that make your heart skip a beat! Now it’s time for the grand finale—plating your Cheesecake Factory Chicken Costoletta! Start by placing one or two pieces of our perfectly fried chicken onto each plate (or perhaps indulge yourself with three if you’re feeling generous!). Then take that luscious lemon cream sauce we prepared earlier and ladle it generously over each piece—it’s absolutely paramount not only for flavor but also for presentation!
The contrast between the crispy edges of your chicken and that velvety sauce is simply stunning. For an added touch, I love garnishing with fresh parsley or even extra lemon zest if I have some handy—it not only looks beautiful but adds another layer of citrus brightness that makes everything pop! If you’re serving alongside sides like roasted vegetables or mashed potatoes (which I highly recommend), arrange those artfully next to your chicken too—the whole ensemble should feel like an inviting hug on a plate.
Remember, don’t rush through this last step; take pride in how you’ve brought all these elements together. Each bite should be an experience—a symphony of flavors dancing together on your palate while evoking memories of cozy family dinners or special gatherings with friends.
Final Touches: Enjoying Your Creation
And there you have it—the Cheesecake Factory Chicken Costoletta made right at home! As you dig into this dish, don’t forget to relish every single mouthful because you’ve poured love and effort into creating something truly extraordinary. Each crispy bite complemented by that creamy sauce will remind you why this recipe has earned its place among family favorites.
I promise you that sharing these moments around the table transforms simple meals into lasting memories—so invite some loved ones over or treat yourself tonight because you’ve earned it after crafting such culinary magic! Enjoy every moment spent savoring this delightful dish because good food shared among friends or family makes life all the more meaningful. Happy cooking!
Storage and Enjoyment Tips for Your Cheesecake Factory Chicken Costoletta
Now that you’ve crafted this beautifully golden and crispy Cheesecake Factory Chicken Costoletta, it’s time to revel in the deliciousness! But let’s be real, sometimes there are leftovers, and that’s not a bad thing at all. Properly storing your delightful creation ensures that you can enjoy those amazing flavors even days later. So, let’s dive into how to keep this dish fresh and ready for your next craving!
Storing Leftover Cheesecake Factory Chicken Costoletta
To maintain the integrity of your Cheesecake Factory Chicken Costoletta, it’s vital to store it correctly. First, allow any leftover chicken to cool completely before transferring it to an airtight container. This helps prevent moisture buildup, which can lead to soggy breading—a fate we must avoid at all costs! Place the container in the refrigerator where it will keep for up to three days. For optimal quality, consider placing a slice of bread in with the chicken; it helps absorb excess moisture and keeps the breading crispy longer. When you’re ready to enjoy some of those delectable leftovers, you’ll find that they still hold much of their flavor and texture. For reheating, I recommend using an oven or an air fryer instead of a microwave; this way, you will restore that delightful crunch without overcooking the chicken.
Freezing Chicken Costoletta for Later
Freezing is another fantastic option if you want to preserve your Cheesecake Factory Chicken Costoletta for a longer period—up to three months! To freeze properly, first ensure that your chicken has cooled completely. Then wrap each piece tightly in plastic wrap or foil and place them in a freezer-safe bag or container. This double-layer protection is crucial as it prevents freezer burn and maintains the quality of your dish. When you’re ready to enjoy it from frozen, simply take out as many pieces as you’d like and let them thaw overnight in the fridge before reheating them in the oven or air fryer until they’re piping hot and crispy once again. I love this method because it offers convenience for those busy weeknights or when unexpected guests arrive—it’s like having a gourmet meal on standby!
Dinner
Cheesecake Factory Chicken Costoletta
- Total Time: 35 minutes
- Yield: Serves 4
Description
Indulge in the delightful flavors of homemade Cheesecake Factory Chicken Costoletta—a dish that combines crispy breaded chicken with a luscious creamy lemon sauce. This recipe transforms simple ingredients into an extraordinary meal that’s perfect for gatherings or cozy family dinners. The crunchy Panko breadcrumbs provide a satisfying texture, while the bright lemon sauce adds a refreshing zing that elevates every bite. Whether you’re entertaining guests or enjoying a weeknight dinner, this comforting dish is sure to impress.
Ingredients
- 1/3 cup all-purpose flour
- 1/2 teaspoon garlic powder
- 1/2 teaspoon onion powder
- 1/2 teaspoon salt
- 1/4 teaspoon pepper
- 2 large eggs
- Splash of water
- 1 cup Italian panko breadcrumbs
- Zest of 1 lemon
- 1/4 cup grated parmesan cheese
- 4 thin cut chicken breasts
- Oil for frying
- 2 tablespoons salted butter
- 2 tablespoons all-purpose flour (for thickening)
- 1 clove garlic, minced
- 1/2 cup heavy cream
- 3/4 cup chicken stock
- 2 tablespoons fresh squeezed lemon juice
- 1 tablespoon Dijon mustard
- 1/4 teaspoon pepper (for sauce)
Instructions
- Prepare your breading station with three shallow bowls: combine flour, garlic powder, onion powder, salt, and pepper in one; whisk eggs and water in the second; place panko breadcrumbs mixed with lemon zest in the third.
- Dip each chicken breast in seasoned flour, then into the egg wash, and finally coat with panko breadcrumbs. Set aside.
- In a skillet over medium heat, heat oil until hot (about 350°F). Fry each chicken piece for 3-4 minutes on each side until golden brown and cooked through (internal temperature of 165°F).
- For the creamy lemon sauce, melt butter in a saucepan; whisk in flour to create a roux. Add minced garlic, then pour in heavy cream and chicken stock slowly while whisking to combine. Stir in lemon juice and Dijon mustard; simmer until thickened.
- Serve fried chicken drizzled with creamy lemon sauce.
- Prep Time: 20 minutes
- Cook Time: 15 minutes
- Category: Main
- Method: Frying
- Cuisine: American
Nutrition
- Serving Size: 1 piece chicken (150g)
- Calories: 480
- Sugar: 2g
- Sodium: 780mg
- Fat: 28g
- Saturated Fat: 11g
- Unsaturated Fat: 16g
- Trans Fat: 0g
- Carbohydrates: 34g
- Fiber: 2g
- Protein: 28g
- Cholesterol: 150mg
Leave a Comment