There’s something truly magical about the experience of cooking, isn’t there? It’s like stepping into a world where flavors dance together, aromas wrap around you like a warm hug, and every bite tells a story. Today, I’m thrilled to share with you my recipe for Cheesy Garlic Chicken Wraps—a dish that doesn’t just fill your stomach, but warms your heart and nourishes your soul. Picture this: tender chicken enveloped in soft tortillas, basking in a blend of gooey mozzarella and sharp cheddar, all tied together with a hint of garlic that whispers sweet nothings to your taste buds. This isn’t just food; it’s an experience—a comforting reminder of home-cooked meals shared around the table with loved ones.
I remember the first time I made these wraps—it was one of those busy weeknights when I found myself rummaging through my fridge, searching for inspiration. What started as a simple attempt to use up leftover chicken turned into one of my go-to recipes for quick family dinners. As I sautéed the garlic in butter, the aroma filled my kitchen and drew everyone in like moths to a flame. It’s these moments—the laughter, the shared stories over dinner—that make cooking so special. And trust me when I say this: once you take that first bite of these cheesy garlic chicken wraps, you’ll understand why they have become an integral part of our weeknight routine.
Cheesy Garlic Chicken Wraps: A Flavorful Embrace
Let’s dive right into this delightful recipe! These Cheesy Garlic Chicken Wraps are not only easy to whip up but also incredibly versatile, allowing you to customize them based on what you have on hand. Whether it’s a busy Tuesday or a relaxed Saturday night, these wraps promise to deliver comfort and satisfaction with every single bite.
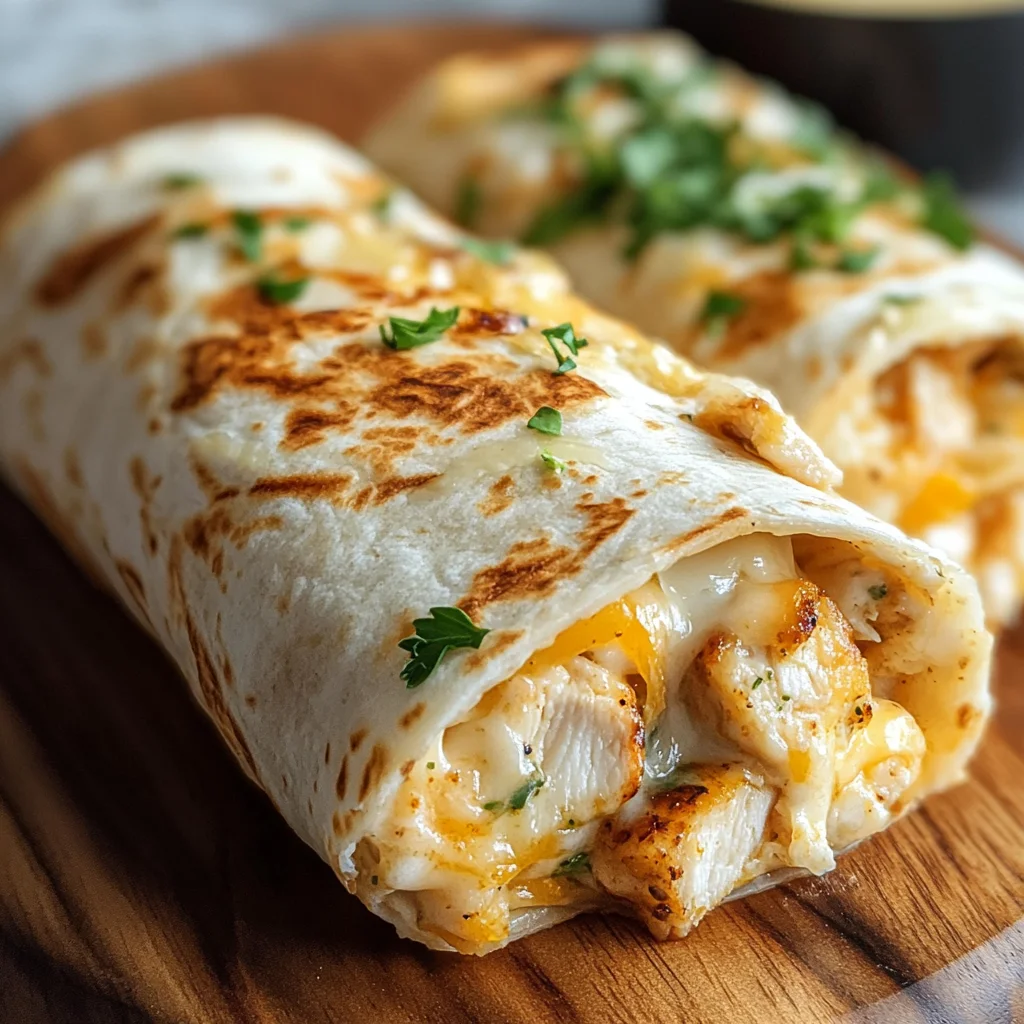
Ingredients:
Getting ready to embark on this culinary adventure is always exciting! Each ingredient plays its role beautifully in creating wraps that are bursting with flavor and texture.
- 2 cups cooked and chopped or shredded chicken. This is where we anchor our wraps! The beauty of using cooked chicken is its convenience—leftover rotisserie chicken works wonders here! It adds protein and ensures that our wraps are both hearty and satisfying. If you’re using raw chicken instead, just ensure it’s cooked thoroughly before adding it to the mix; otherwise, it won’t meld into that delicious symphony of flavors we’re aiming for.
- 4 large flour tortillas. The size really matters! Large tortillas make wrapping much easier without spilling out all the good stuff inside. When selecting your tortillas, look for ones that are soft yet sturdy enough to hold all those delicious fillings without tearing apart. You can even opt for whole wheat or spinach tortillas for an extra nutritional boost—just remember they will slightly alter the flavor profile.
- 1 cup shredded mozzarella cheese. Ahh, mozzarella—the ultimate melt-in-your-mouth cheese! It brings that ooey-gooey texture we crave in cheesy dishes while being mild enough not to overpower other flavors. When shopping for mozzarella, try to choose fresh or part-skim varieties as they melt beautifully without becoming greasy.
- 1 cup shredded cheddar cheese. This cheese adds depth and richness with its sharp flavor profile—an absolute must-have alongside the mozzarella! If you want to elevate the taste even more, consider using aged cheddar; it has a more pronounced flavor that really shines through when melted.
- 2-4 cloves minced garlic (or 1 to 2 teaspoons garlic paste). Garlic is what makes these wraps sing! Its pungent aroma transforms during cooking into something utterly intoxicating and comforting. Freshly minced garlic offers a robust flavor that pre-packaged garlic paste can’t quite match; however, if you’re short on time or ingredients, the paste will still do nicely!
- 1 tablespoon butter or olive oil. This step is crucial—using butter gives a rich flavor while olive oil provides healthy fats and keeps things light. Both options will help cook your garlic perfectly until golden brown and fragrant—a key element in ensuring each wrap has that heavenly garlic essence infused throughout.
- 3-4 tablespoons creamy binder (mayonnaise, Greek yogurt, or sour cream). This ingredient is what binds everything together while adding creaminess that elevates each bite. Use whichever option you prefer—Greek yogurt brings tanginess while mayonnaise adds richness—and don’t be afraid to adjust according to your taste!
- To taste salt, black pepper, paprika, Italian seasoning or oregano. Seasoning is non-negotiable here! A pinch of salt enhances all flavors while black pepper adds warmth; paprika introduces smokiness (perfect if you’re feeling adventurous!), and Italian seasoning or oregano brings herby goodness reminiscent of sunny afternoons spent in Italy.
- To taste fresh herbs (parsley, green onion, or spinach). While optional, fresh herbs add brightness and freshness to these wraps—don’t skip them if you can help it! Parsley provides earthiness while green onions lend subtle oniony notes; spinach adds nutrition without overwhelming the other flavors.
- To taste red pepper flakes or hot sauce (for optional heat). If you’re anything like me and love a bit of spice in your life (who doesn’t?), feel free to sprinkle some red pepper flakes into the mix or drizzle hot sauce inside those wraps before serving—they enhance everything!
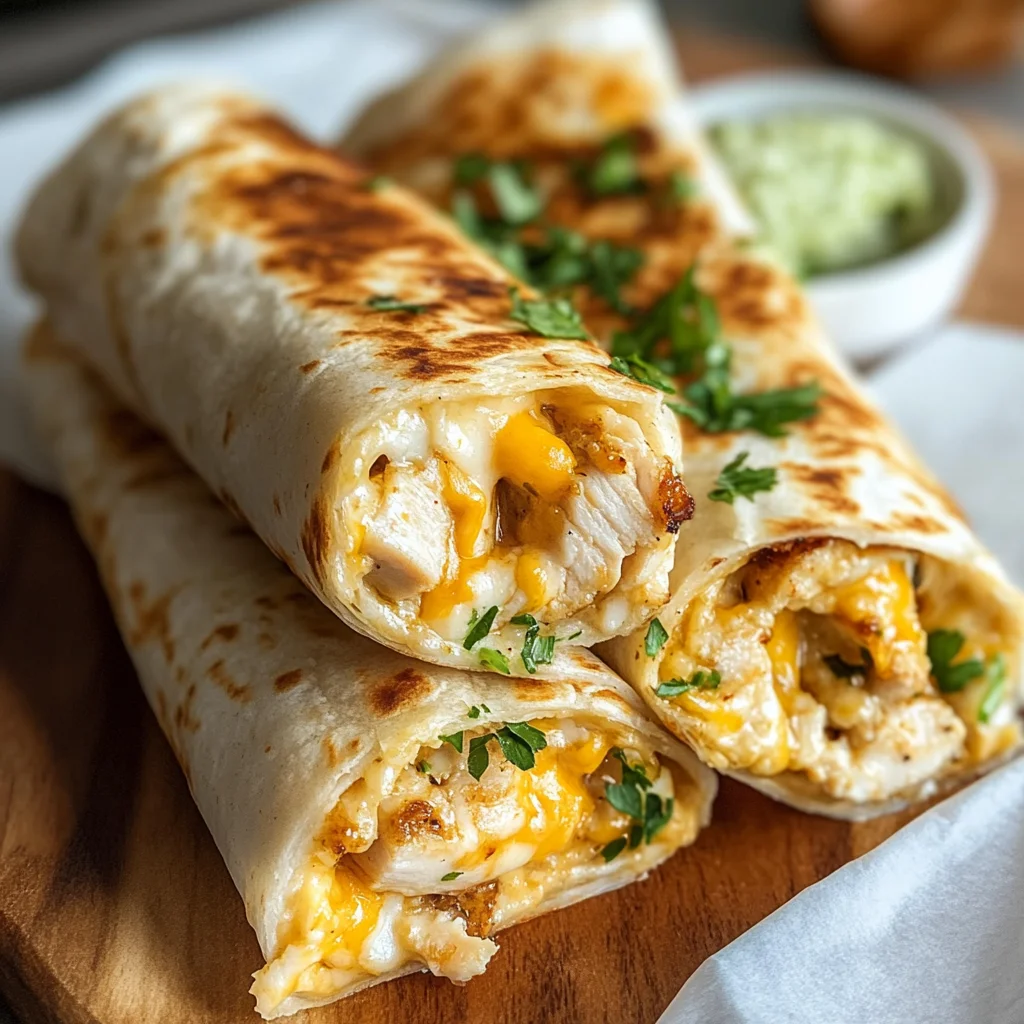
Equipment You’ll Need:
Having the right tools at your disposal makes all the difference in creating these delicious cheesy garlic chicken wraps! While they may not be ingredients, think of them as essential partners in your culinary journey toward wrap perfection.
- Large skillet – A good-quality skillet allows for even cooking while giving you enough room to sauté garlic without overcrowding it—this ensures everything cooks evenly without burning!
- Spatula – A spatula aids in flipping those wraps midway through cooking so they achieve golden perfection on both sides without falling apart; choose one that’s sturdy yet flexible for best results!
- Sharp knife & cutting board – You’ll need these for chopping up your cooked chicken into manageable pieces as well as dicing any fresh herbs you’d like to include—sharp knives make prep work not only easier but also safer.
- Measuring cups & spoons – Accurate measurements ensure that nothing gets overlooked during preparation; plus they help keep our wonderful flavors balanced throughout each bite.
Now let’s move on to preparing those luscious Cheesy Garlic Chicken Wraps!
Step 1: Sautéing That Aromatic Garlic
Start by heating your large skillet over medium heat before adding either butter or olive oil—you want just enough fat coating the bottom so nothing sticks during cooking but not so much that it becomes greasy! Once hot enough (you’ll know when it shimmers), toss in minced garlic carefully; be sure not to rush this step since burnt garlic can become bitter quickly—a situation we definitely want to avoid! Keep stirring gently until fragrant—about 30 seconds should do—and allow those glorious aromas waft through your kitchen like an invitation for family members (and maybe even neighbors!) who’ll soon be delighting in what’s coming next.
Step 2: Combining Chicken & Creamy Goodness
Once you smell that intoxicating scent permeating through every corner of your space (I promise it’ll happen!), it’s time to incorporate our shredded chicken along with those creamy binders we’ve chosen earlier—in go the mayonnaise/Greek yogurt/sour cream combo…whatever suits your fancy at this moment! Stir everything together gently using your spatula until combined well; feel free to season generously with salt/pepper/paprika/Italian seasoning based on personal preference too—it truly enhances overall flavor while ensuring none gets left behind!
Step 3: Melting Cheese Magic
This part feels like pure magic—you’ll want plenty of gooeyness happening here after all! With everything combined nicely now within our skillet from steps prior let’s add both mozzarella AND cheddar cheeses right atop our mixture before reducing heat slightly so it melts down evenly throughout rather than scorching anything away prematurely…trust me when I say watching melted cheese slowly ooze into every crevice feels nothing short than euphoric especially knowing how amazing they’ll turn out once wrapped snugly inside those lovely tortillas we prepared earlier!
Step 4: Wrapping Up Deliciousness
Now comes perhaps my favorite part—the actual wrapping process itself which feels almost meditative once you’ve got everything prepped beforehand… Start by laying out each tortilla flat against clean surfaces then spoon generous amounts filling onto center position leaving room around edges for folding purposes later on—we don’t want any escaping goodness here after all do we? Gently fold sides inward before rolling tightly upward towards top edge until fully sealed shut making sure contents remain secure inside without spilling out—you’ll end up with neat little parcels waiting patiently till their turn comes sizzling away back onto skillet shortly thereafter…
And there you have it—the beginning steps towards crafting perfect Cheesy Garlic Chicken Wraps filled with warmth love flavor absolutely tailor-made just for YOU!! Feel free explore variations add personal touches along way because after all cooking should always reflect individual tastes preferences whatever they may be…stay tuned as we continue unpacking further steps shortly leading us closer delicious finish line ahead!!
Step 5: Sautéing the Aromatics
Now, let’s dive into the heart of our Cheesy Garlic Chicken Wraps. In a medium skillet, melt the tablespoon of butter or pour in the olive oil over medium heat. This step is crucial because we’re not only cooking our garlic; we’re also infusing that beautiful fat with flavor that will permeate every bite of our wraps. Add in those minced garlic cloves—2 to 4 depending on your love for garlic—and watch as they begin to sizzle and release an utterly intoxicating aroma that will have you dreaming of Italian kitchens and sun-drenched Mediterranean coasts. Stir the garlic continuously for about 1 to 2 minutes, until it becomes fragrant but hasn’t turned brown. Trust me on this: burnt garlic is bitter, and we want nothing less than a glorious golden hue here!
This sautéing technique is about more than just cooking; it allows the flavors to meld together beautifully before they meet our chicken and other ingredients. As you stir, keep a close eye on the garlic; it should be softening and turning translucent, but not browning—this transformation is what creates depth in your dish. Once you’ve reached this point, you’re ready to move on to the next exciting step!
Step 6: Mixing It All Together
In a large mixing bowl, combine your cooked and chopped or shredded chicken with the sautéed garlic mixture. This is where all those lovely flavors start to mingle. Add in your creamy binder—whether you’re using mayonnaise, Greek yogurt, or sour cream—and toss everything together until well coated. You want every morsel of chicken to be enveloped in this rich mixture that will keep everything moist and flavorful when we wrap it up later. This binding agent isn’t just for texture; it helps keep your filling from drying out during cooking, which is absolutely paramount for achieving those perfect cheesy bites.
Now comes the fun part! Sprinkle in your shredded mozzarella and cheddar cheeses along with any seasonings you desire—salt, black pepper, paprika, Italian seasoning or oregano can all come into play here. Don’t be shy about adjusting these flavors to fit your palate! The beauty of these wraps lies in their versatility; if you have fresh herbs like parsley or green onion on hand, chop them up and add them now for an extra burst of freshness. Remember to taste as you go; this step is where you can truly make the dish your own.
Step 7: Assembling Your Cheesy Garlic Chicken Wraps
With our flavorful filling ready, it’s time to assemble these delightful wraps! Grab your large flour tortillas—these are essential because their size makes wrapping so much easier. Lay one tortilla flat on a clean surface and spoon a generous amount of the chicken mixture into the center; I usually aim for about one-third of a cup per wrap. Now here’s where technique comes into play: fold in the sides first to secure the filling inside before rolling from the bottom upwards like a burrito. This method not only ensures that nothing spills out during cooking but also creates a compact wrap that crisps up beautifully.
As you roll each wrap, don’t rush this step! Take pride in how neatly they’re wrapped; it’s part of what makes them look so inviting when served. If you find that your wraps are bursting at the seams—a common issue!—consider using smaller amounts of filling or larger tortillas if available. Once wrapped, place them seam-side down on a plate while you continue with the others. This keeps them secure until we’re ready to crisp them up.
Step 8: Crisping Up Your Wraps
Now comes one of my favorite parts: crisping those beautiful Cheesy Garlic Chicken Wraps! Heat up your same skillet over medium heat again (no need to wash it out!), adding a touch more butter or olive oil if needed—just enough to coat the bottom lightly without drowning your wraps. When it’s hot enough that water droplets dance across its surface (a classic test!), it’s time for those wraps to shine.
Carefully place your assembled wraps seam-side down into the skillet, making sure not to overcrowd them; give each wrap some space so they can develop that gorgeous golden crust we all love so much. Cook each side for about 3-4 minutes until they are golden brown and crisped just right—you’ll know they’re perfect when they release easily from the pan without sticking! Keep an eye on them during this process; if they seem to be browning too quickly or unevenly, adjust your heat accordingly—it’s all about achieving that perfect balance between crispy outer layers and gooey melted cheese inside.
Next Major Phase – Serving Your Cheesy Garlic Chicken Wraps
Once you’ve crisped all sides of your wraps and they’ve reached an enviable golden perfection, it’s time for arguably one of the most satisfying moments—the serving!
Step 9: The Final Touches
After removing each wrap from the skillet, let them rest on a cutting board for a minute before slicing them in half diagonally—this not only looks spectacular but also allows any steam inside to escape so they don’t get soggy as they cool slightly. Serve these cheesy delights with an array of dipping sauces if you wish—perhaps some tangy ranch dressing or a zesty salsa verde would complement those rich flavors beautifully!
And there you have it! A dish full of warmth and comfort that’s sure to become a cherished recipe in your household just like mine has with my friends and family over countless gatherings. Each bite transports me back to those cozy evenings filled with laughter and joy around our dinner table—a truly extraordinary experience that I hope you’ll savor just as much as I do! Enjoy every moment as you dig into these Cheesy Garlic Chicken Wraps—they’re more than just food; they’re love wrapped up tight!
Storage and Enjoyment Tips for Your Cheesy Garlic Chicken Wraps
Now that you’ve savored the irresistible deliciousness of your Cheesy Garlic Chicken Wraps, let’s make the most of any leftovers! Whether you’re tucking them away for a busy weeknight or planning to indulge in them again soon, I have all the tips you need to keep that mouthwatering flavor intact. With proper storage, these wraps will remain just as delightful as when they first came off the skillet, ready to bring joy every time you take a bite.
Storing Leftover Cheesy Garlic Chicken Wraps
To ensure your Cheesy Garlic Chicken Wraps stay fresh and flavorful, it’s best to store them in an airtight container. This will shield them from any unwanted moisture or odors that could compromise their deliciousness. Ideally, place them in the refrigerator where they’ll last about 3 to 4 days. A little pro tip I love is to include a slice of bread in the container; this helps absorb excess moisture and keeps your wraps nice and firm instead of soggy! When it comes to reheating, I highly recommend using an oven or air fryer for a few minutes until they’re heated through. This method revives that lovely crispiness on the outside while keeping the cheesy goodness melt-in-your-mouth tender inside. Trust me; those bites will taste just as good as when they were freshly made!
Freezing Cheesy Garlic Chicken Wraps for Later
If you want to prepare ahead or save some of these delightful wraps for another day, freezing is a fantastic option! To freeze them properly, wrap each individual wrap tightly in plastic wrap or aluminum foil, then place them in a freezer-safe bag or container. This method not only prevents freezer burn but also preserves their flavor beautifully. They can be stored like this for up to 2 months—perfect for those days when you crave something comforting yet quick! When you’re ready to enjoy one, simply take it out of the freezer and let it thaw overnight in the fridge before reheating it in your oven or air fryer until warm and crispy again. The convenience factor here is absolutely paramount; knowing that a delicious meal awaits you at any moment is just a wonderful feeling!
Dinner

Cheesy Garlic Chicken Wraps
- Total Time: 25 minutes
- Yield: Serves 4
Description
Cheesy Garlic Chicken Wraps offer a delightful culinary experience that combines tender chicken and gooey cheeses wrapped in soft tortillas. Infused with aromatic garlic and customizable to your taste, these wraps are perfect for busy weeknights or casual gatherings. With just a few simple ingredients, you can create a comforting meal that warms the heart and satisfies the palate.
Ingredients
- 2 cups cooked chicken (chopped or shredded)
- 4 large flour tortillas
- 1 cup shredded mozzarella cheese
- 1 cup shredded cheddar cheese
- 2–4 cloves minced garlic
- 1 tablespoon butter or olive oil
- 3–4 tablespoons creamy binder (mayonnaise, Greek yogurt, or sour cream)
- Salt, black pepper, paprika, Italian seasoning or oregano to taste
Instructions
- Heat butter or olive oil in a skillet over medium heat. Add minced garlic and sauté until fragrant (about 1-2 minutes).
- In a bowl, combine cooked chicken with sautéed garlic and your chosen creamy binder. Season with salt, pepper, paprika, and herbs.
- Stir in mozzarella and cheddar cheeses until well mixed.
- Lay tortillas flat; spoon filling onto the center of each one. Fold sides inward and roll tightly.
- Return to skillet seam-side down; cook for 3-4 minutes on each side until golden brown and crispy.
- Prep Time: 15 minutes
- Cook Time: 10 minutes
- Category: Dinner
- Method: Frying
- Cuisine: American
Nutrition
- Serving Size: 1 wrap (approximately 150g)
- Calories: 400
- Sugar: 2g
- Sodium: 800mg
- Fat: 22g
- Saturated Fat: 10g
- Unsaturated Fat: 8g
- Trans Fat: 0g
- Carbohydrates: 32g
- Fiber: 3g
- Protein: 20g
- Cholesterol: 60mg
Leave a Comment