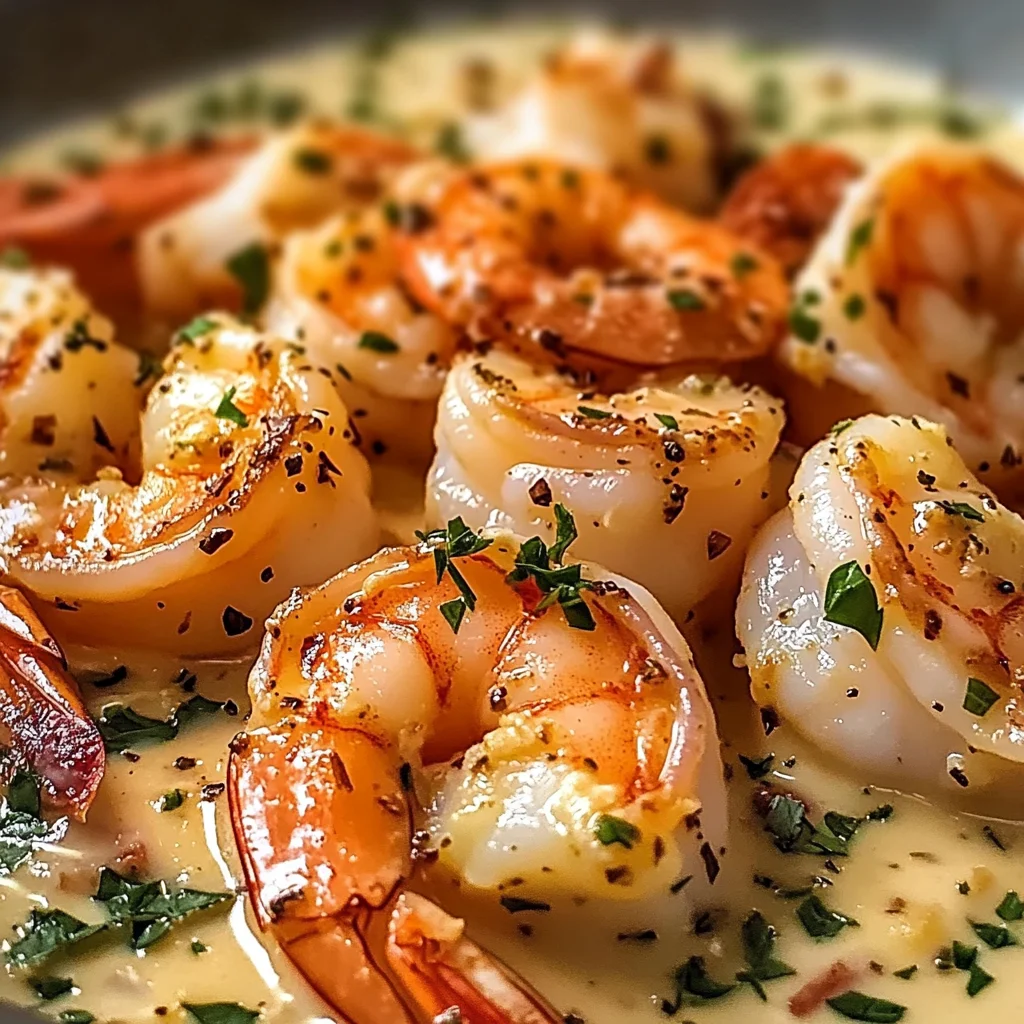
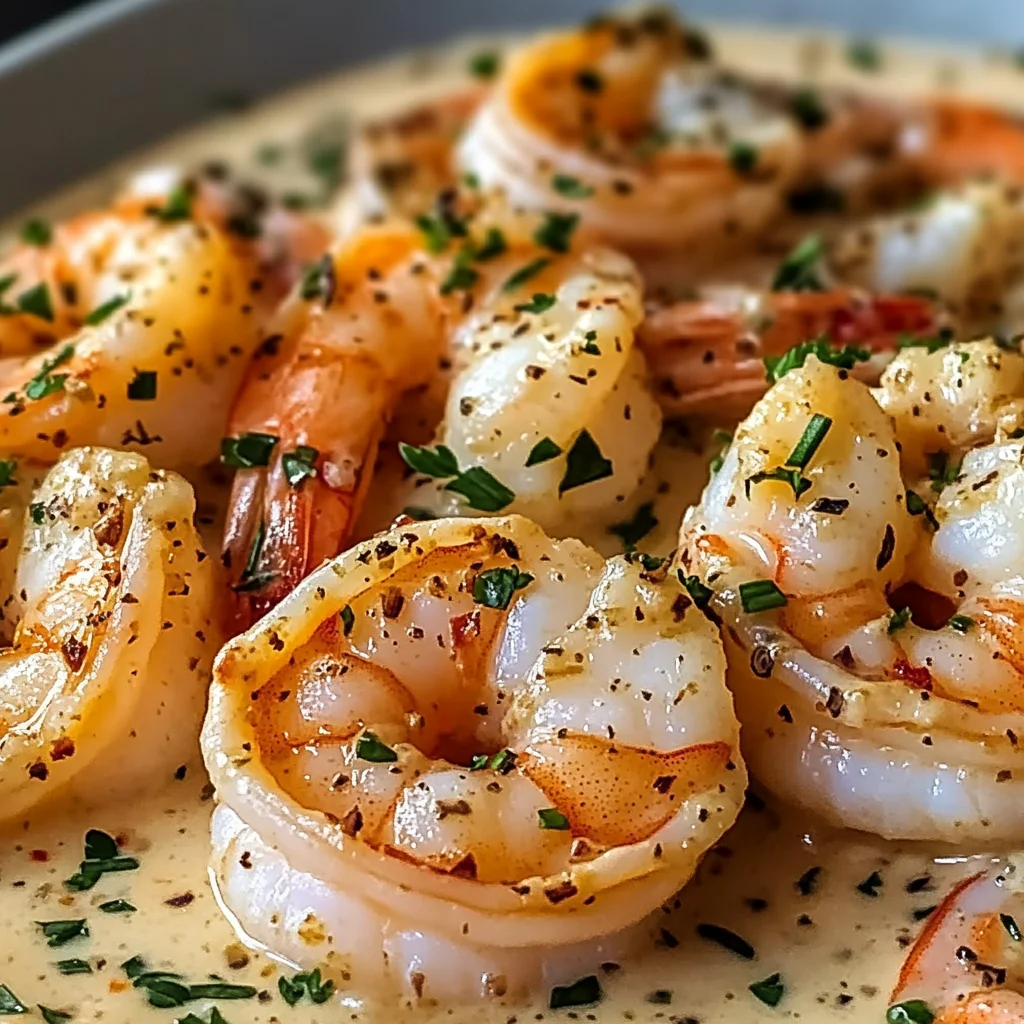
There’s something absolutely enchanting about cooking meals that not only nourish the body but also warm the soul. When I think of my time spent in the kitchen, surrounded by the savory aroma of garlic and the comforting embrace of creamy sauces, I can’t help but feel a rush of nostalgia. It’s these moments that remind me why I adore cooking so much. The Easy Creamy Garlic Shrimp is more than just a dish; it’s a celebration of flavors and textures that come together in perfect harmony. Picture this: tender shrimp bathed in a luscious garlic-infused cream sauce, served over a bed of pasta or rice. As you take your first bite, you’re transported to a cozy Italian trattoria, where every meal feels like an occasion. This recipe is a glorious expression of love and joy, and I can’t wait to share it with you!
Cooking this dish is an experience that invites both creativity and comfort into your kitchen. It’s incredibly versatile, making it perfect for an intimate dinner for two or a fabulous gathering with friends. The flavors are bold yet balanced, creating a symphony that dances on your palate. Trust me when I say that the combination of garlic and cream with succulent shrimp will leave your loved ones begging for seconds—and maybe even thirds! This Easy Creamy Garlic Shrimp recipe has been passed down through generations in my family, evolving with each cook who adds their unique touch. So let’s dive into this culinary adventure together; I promise you’re in for a treat.
Easy Creamy Garlic Shrimp: A Taste of Comfort
Imagine coming home after a long day and whipping up this delightful dish in just 25 minutes. With its creamy texture and robust flavor profile, this Easy Creamy Garlic Shrimp not only satisfies hunger but also nurtures the spirit. Whether you’re new to cooking or have years of experience under your belt, this recipe is designed to be approachable yet impressive. So grab your apron and let’s embark on this delicious journey!
Ingredients:
As we set off on our culinary adventure, let’s gather our ingredients. Each one plays an essential role in crafting the rich tapestry of flavors that makes this Easy Creamy Garlic Shrimp truly special.
- 1 pound shrimp, peeled and deveined. Choosing high-quality shrimp is paramount; they should smell fresh and briny, reminiscent of the ocean rather than fishy or off-putting. The texture will be plump and firm to the touch—this ensures that when cooked, they’ll become tender without being rubbery. If you can get your hands on wild-caught shrimp, go for it! They often have a more pronounced flavor compared to farmed varieties.
- 1 tablespoon olive oil. This liquid gold is not only wonderful for sautéing but also adds depth to our sauce with its fruity notes. When selecting olive oil, look for extra virgin options that boast vibrant green hues—this indicates freshness and quality. Olive oil coats our shrimp as they cook, helping to lock in moisture while imparting its delightful flavor.
- 3 cloves garlic, minced. Ah, garlic—the aromatic superstar! When minced finely, garlic releases its essential oils which contribute complexity to our dish’s flavor profile. Ensure your garlic is fresh; old cloves can lose their potency and sweetness over time. Remember to chop it just before cooking; the moment garlic meets heat is when it begins to work its magic.
- 1 small onion, diced. Onions bring sweetness and depth to our dish as they caramelize gently in the pan. Their natural sugars develop as they cook down into translucence—a critical step for building layers of flavor in our sauce! Always opt for yellow onions here as they have a balanced taste that complements rather than overwhelms.
- 1 cup heavy cream. This ingredient is what transforms our dish into something utterly luxurious! Heavy cream has a higher fat content which gives us that silky smooth texture we’re after; it envelops our shrimp like a soft blanket while contributing richness without being overly heavy on the palate.
- 1/2 cup chicken broth. Here’s where we add depth! Using low-sodium chicken broth allows us to control the saltiness while enhancing overall flavor without drowning out our other ingredients’ nuances. It acts as a bridge between the creaminess and the delicate sweetness of the shrimp.
- 1/2 teaspoon paprika. This spice isn’t just here for color—it brings warmth and subtle smokiness that beautifully contrasts with our creamy base! Whether you choose sweet or smoked paprika will affect the final taste slightly; either way, it’s essential for adding character to our sauce.
- Salt and pepper, to taste. These humble seasonings are truly non-negotiable; they elevate all other flavors present in your dish! Adding them gradually helps achieve balance—always taste as you go so you can adjust according to your preference.
- Fresh parsley, chopped (for garnish). A sprinkle of fresh parsley at the end not only brightens up our dish visually but also adds freshness that cuts through all that richness we’ve created—it’s like saying hello right before serving!
- Cooked pasta or rice (for serving). This serves as the foundation upon which we build our deliciousness! Both pasta and rice pair perfectly with this creamy sauce—opt for whatever suits your mood best today.
Equipment You’ll Need:
Before we dive into cooking, let’s ensure we’ve got all our trusty tools lined up because having the right equipment can make all the difference in how smoothly everything comes together.
- Large skillet or frying pan: This will be your main stage where all the magic happens! Opt for one that’s non-stick or well-seasoned cast iron so your shrimp won’t stick while they’re searing beautifully golden brown.
- Wooden spoon or spatula: An absolute must-have for stirring ingredients gently without scratching your precious cookware! A wooden spoon allows you to scrape up any flavorful bits stuck at the bottom of your skillet during cooking—those little morsels are packed with flavor!
- Cutting board & knife: These are essential partners in crime when prepping ingredients! Your cutting board should provide ample space for chopping onion and mincing garlic—be sure it’s sturdy enough so it doesn’t slip around while working.
- Measuring cups & spoons: Precision can make all the difference between good food and great food! Having these handy ensures you’re using just enough broth or cream without overwhelming each component’s unique character.
Now that we’ve gathered everything we need let’s jump right into preparing this Easy Creamy Garlic Shrimp!
Step 1: Sautéing Aromatics
First things first—let’s get some flavor going by heating up olive oil in your large skillet over medium heat until shimmering but not smoking (about 30 seconds). Once ready, toss in your diced onion and allow it to sauté gently for 2–3 minutes until translucent—this process helps release those sweet natural sugars locked within each layer while adding depth overall as they become aromatic companions for our upcoming ingredients!
Step 2: Adding Garlic
Next up—the magic ingredient: minced garlic! Once your onions are softly glistening away like little jewels in their pan bath, throw in those fragrant cloves and stir continuously for about one minute until fragrant (you’ll know because you’ll start salivating!). Don’t rush this step; letting garlic bloom really enhances its flavor profile; however beware: burnt garlic becomes bitter quickly so keep an eye on it!
Step 3: Cooking Shrimp
Now it’s time for those beautiful shrimp to join us! Add them gracefully into your aromatic mixture while giving everything gentle nudges every now again—this process should take approximately 3–4 minutes total until they turn pinkish-orange (like little ocean treasures!). Make sure not overcrowd them since they’ll steam instead if crammed too tightly together!
Step 4: Building Flavor with Broth
Once those shrimps are cooked through perfectly—you’ll want them opaque—but don’t worry if there’s still some residual liquid from cooking—they’re doing their job wonderfully here helping integrate flavors further down below into each tender morsel surrounding them before we pour half-cup chicken broth directly over top allowing simmering magic commence about two minutes long which allows broth infuse deeply throughout entire mixture harmonizing beautifully along way!
Stay tuned because we’re just getting started on creating something absolutely extraordinary together—and I promise every bite will be profoundly satisfying once complete!
Easy Creamy Garlic Shrimp Recipe
I’m genuinely excited to guide you through this delightful journey of creating Easy Creamy Garlic Shrimp. This dish has a way of transforming even the simplest weeknight into something extraordinary, with its rich flavors and creamy texture wrapping around tender shrimp like a warm embrace. Imagine the aroma of sautéed garlic wafting through your kitchen, enticing everyone to gather around the table. Trust me, this is a recipe you’ll want to keep close to your heart.
Step 5: Let’s Bring in the Flavor – Simmering the Broth
Now that your shrimp have taken on that beautiful pink hue—an unmistakable sign they are nearly cooked through—it’s time to elevate our dish with some depth by adding chicken broth. Pour in half a cup of chicken broth, ensuring you scrape up any lovely bits stuck to the bottom of the skillet as it sizzles and mingles with those wonderful flavors from earlier. This step is crucial because it not only intensifies the flavor profile but also helps deglaze the pan, allowing all those caramelized notes to contribute to our sauce. Let this simmer for about two minutes, watching as it reduces slightly; you want just enough liquid to create a luscious sauce without overwhelming our shrimp. The magic here lies in patience; don’t rush! Allowing the broth to reduce will concentrate those flavors, making each bite truly extraordinary.
Step 6: The Creamy Transformation – Adding Heavy Cream
With our broth simmered and aromatic, it’s time for the pièce de résistance—heavy cream! Pour in one cup of heavy cream and sprinkle in half a teaspoon of paprika to infuse that beautiful color and mild warmth into our dish. As you stir gently, take a moment to appreciate how this transforms our skillet into a canvas of creamy goodness. The heavy cream acts as a binding agent here, creating that velvety sauce that clings lovingly to each shrimp and morsel of pasta or rice we’ll soon serve it over. Cook this mixture for another two to three minutes until it thickens slightly; you’ll know it’s ready when you see small bubbles breaking at the surface, indicating it’s reached that perfect simmer. This is where patience pays off—allowing the cream to thicken not only enhances texture but also ensures our dish is rich enough without being overly heavy.
Step 7: Seasoning – The Final Touches
Now comes an essential part of cooking that truly elevates any dish: seasoning! It may seem simple, but adjusting salt and pepper at this stage can make all the difference in achieving balance in flavor. Start by adding salt and pepper gradually—about half a teaspoon of each should do as a starting point—and taste frequently as you go along. This is where your personal touch shines through; remember, everyone’s palate differs! I promise you, taking the time here will lead to profound satisfaction when your guests rave about how delicious your Easy Creamy Garlic Shrimp turned out! Watch for that glossy sheen on your sauce—that’s what we’re aiming for! If it seems too thick, don’t hesitate to add a splash more chicken broth or even some pasta water if you’re serving it over noodles; this will help reach that ideal consistency.
Step 8: Plating Perfection – Serving Your Dish
Finally, let’s talk about plating because we eat with our eyes first! When you’re ready to serve, ladle generous portions over either al dente pasta or fluffy rice—both options are divine and soak up all that creamy goodness beautifully! Don’t skimp on garnishing; sprinkle freshly chopped parsley over the top for a burst of color and freshness which cuts through the richness of the sauce perfectly. It’s all about balance! The vibrant green not only makes for an Instagram-worthy presentation but also adds subtle herbaceous notes that brighten each bite. I encourage you to take a moment before diving in—savor that intoxicating aroma wafting from your plate and relish in knowing you’ve created something truly special.
Final Touches – A Heartfelt Conclusion
As you gather around the table with friends or family or perhaps enjoy this comforting meal all by yourself (which is absolutely fine!), remember that cooking is an art—a blend of technique, passion, and love for ingredients. Each step we took together in crafting this Easy Creamy Garlic Shrimp was important; from bringing out flavors during sautéing to achieving that perfect creamy consistency. I hope every bite reminds you how rewarding home cooking can be! Enjoy every forkful—you’ve earned it!
Storage and Enjoyment Tips for Your Easy Creamy Garlic Shrimp
Now that you’ve whipped up this delightful dish, I can’t help but feel a rush of excitement for you to dive in and savor every luscious bite. The creamy garlic sauce clings to the perfectly cooked shrimp like a warm hug, and as you twirl it around a fork or scoop it up with a spoon, the aroma alone is enough to make your heart skip a beat. But let’s talk about what happens when there’s some of this deliciousness left over—because I promise you, leftovers are just as good, if not better!
Storing Leftover Easy Creamy Garlic Shrimp
To keep your Easy Creamy Garlic Shrimp fresh and flavorful, store it in an airtight container. This is crucial to lock in the creamy goodness and prevent any unwanted odors from invading your dish! You can pop it in the fridge where it will stay delicious for about 2-3 days. Here’s a little pro tip: if you’re worried about maintaining that silky texture of the sauce, consider placing a slice of bread in the container with your shrimp; it works wonders by absorbing excess moisture without affecting the flavor. When you’re ready to enjoy those leftovers, just know they’ll still be bursting with flavor, although the cream may thicken slightly during storage. To reheat, gently warm it on the stove over low heat, stirring occasionally until it’s heated through—trust me, your taste buds will thank you!
Freezing Easy Creamy Garlic Shrimp for Later
If you find yourself with more than you can eat (or if you simply want to prepare ahead), freezing this delightful dish is an option worth considering! Just transfer your cooled shrimp into freezer-safe containers or heavy-duty freezer bags—make sure to squeeze out as much air as possible before sealing. This way, your Easy Creamy Garlic Shrimp can last in the freezer for up to three months! When you’re ready to indulge again, simply thaw overnight in the refrigerator and then reheat gently on the stovetop or microwave until warmed through. This approach not only saves time but also allows you to enjoy a comforting meal on those busy nights when cooking feels like too much effort. Imagine pulling out your homemade treasure from the freezer on a chilly evening—it’s pure culinary magic!
Dinner

Easy Creamy Garlic Shrimp
- Total Time: 25 minutes
- Yield: Serves 4
Description
Indulge in the delightful flavors of Easy Creamy Garlic Shrimp, a comforting dish that transforms any weeknight dinner into a special occasion. This rich recipe features succulent shrimp enveloped in a velvety garlic-infused cream sauce, served over your choice of pasta or rice.
Ingredients
- 1 pound shrimp, peeled and deveined
- 1 tablespoon olive oil
- 3 cloves garlic, minced
- 1 small onion, diced
- 1 cup heavy cream
- 1/2 cup chicken broth
- 1/2 teaspoon paprika
- Salt and pepper to taste
- Fresh parsley, chopped (for garnish)
- Cooked pasta or rice (for serving)
Instructions
- Heat olive oil in a large skillet over medium heat until shimmering. Add diced onion and sauté for 2–3 minutes until translucent.
- Stir in minced garlic and cook for about one minute until fragrant.
- Add shrimp to the skillet, cooking for 3–4 minutes until they turn pink and opaque.
- Pour in chicken broth, scraping up any flavorful bits from the pan, and simmer for about two minutes.
- Add heavy cream and paprika, stirring gently to combine. Simmer for an additional 2–3 minutes until the sauce thickens slightly.
- Season with salt and pepper to taste.
- Serve over cooked pasta or rice, garnished with fresh parsley.
- Prep Time: 10 minutes
- Cook Time: 15 minutes
- Category: Dinner
- Method: Sautéing
- Cuisine: Italian
Nutrition
- Serving Size: 1 cup (240g)
- Calories: 470
- Sugar: 2g
- Sodium: 600mg
- Fat: 27g
- Saturated Fat: 15g
- Unsaturated Fat: 10g
- Trans Fat: 0g
- Carbohydrates: 18g
- Fiber: 0g
- Protein: 37g
- Cholesterol: 220mg

Leave a Comment