There’s something utterly magical about gathering around a beautifully set table, the aroma of a delicious meal wafting through the air, and the anticipation of sharing an extraordinary dish with someone you love. This is precisely what my Creamy Marry Me Chicken Bowtie Pasta embodies—it’s not just a recipe; it’s an experience that unfolds with each delightful bite. Imagine tender chicken thighs simmered in a luscious, creamy sauce that envelops perfectly cooked bowtie pasta, creating a symphony of flavors that dances on your palate. The richness of the heavy cream mingles seamlessly with the savory notes of Italian seasoning and the nutty undertone of Parmesan cheese, creating a dish that’s both comforting and indulgent. I promise you, this meal has the power to elevate any evening into a romantic celebration.
As I developed this recipe, I wanted it to reflect not only my love for cooking but also the heartfelt connections that food fosters among us. This Creamy Marry Me Chicken Bowtie Pasta has become a go-to for date nights and special occasions in my home—I can’t tell you how many times I’ve seen eyes light up after the first forkful! It reminds me of cozy dinners shared under candlelight, laughter echoing through the room as we savor each moment together. Whether you’re celebrating an anniversary or simply wish to impress someone special, this dish is a perfect choice. It’s easy enough for a weeknight meal yet elegant enough for those moments when you want to make everything feel extraordinary.
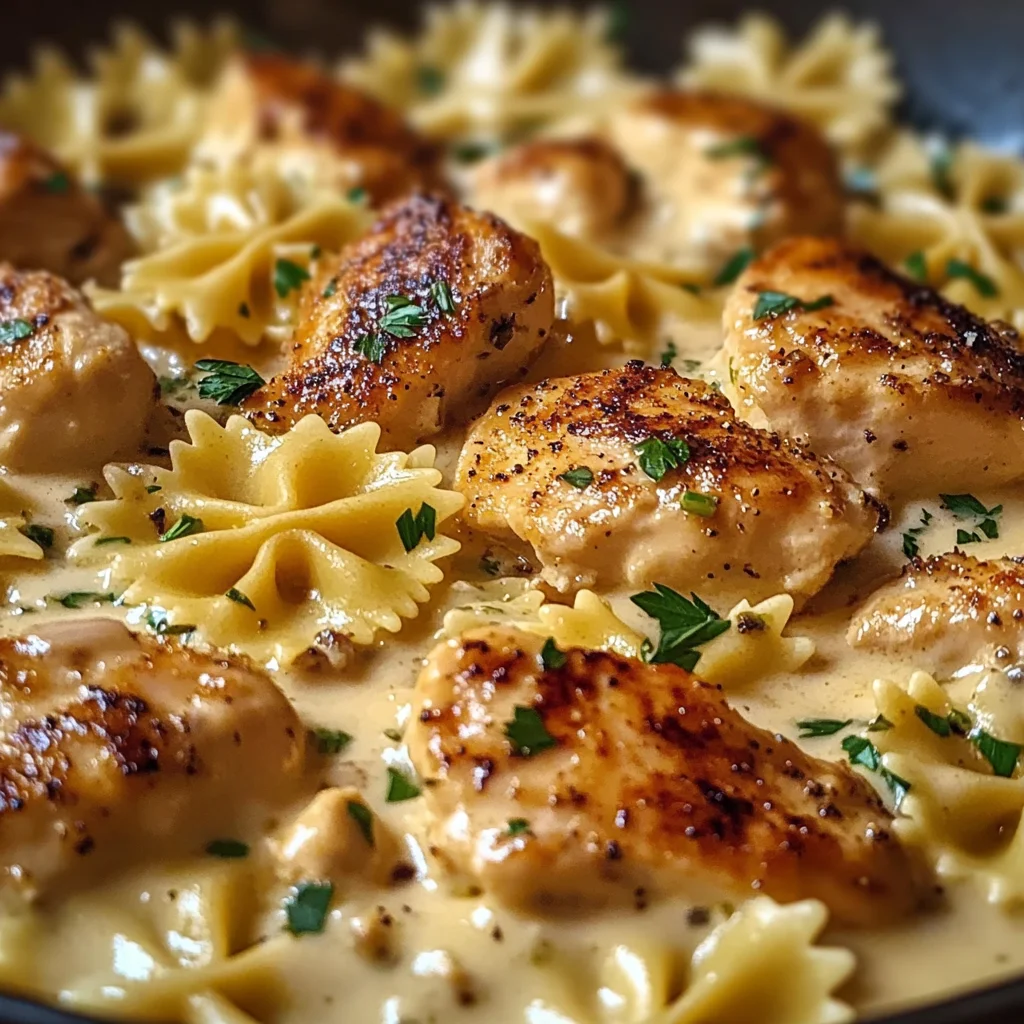
Creamy Marry Me Chicken Bowtie Pasta: A Romantic Dinner Awaits
Welcome to one of the most delightful culinary adventures you’ll ever embark on! This Creamy Marry Me Chicken Bowtie Pasta is your ticket to an unforgettable dining experience at home. Trust me; once you prepare this dish, you’ll understand why it carries such romantic connotations—every bite is like a warm hug that wraps around your heart.
Ingredients:
Let’s gather our ingredients before diving into this culinary journey! Each one plays a crucial role in crafting our dish’s rich flavors and comforting textures.
- 1 lb chicken thighs, boneless and skinless. Chicken thighs are truly wonderful for this recipe because they provide rich flavor and tenderness due to their higher fat content compared to chicken breasts. They absorb flavors beautifully while remaining juicy during cooking—nobody wants dry chicken in their pasta! When purchasing chicken thighs, look for ones that have a nice pinkish hue without any visible bruises; fresh quality matters immensely here.
- 8 oz bowtie pasta. This playful shape isn’t just charming—it holds onto sauce beautifully! Bowties create little pockets of creamy goodness that will leave every bite feeling utterly satisfying. Make sure to cook them until they’re al dente; they should be firm yet tender without being mushy, ensuring they don’t lose their delightful shape in our creamy sauce.
- 2 tablespoons olive oil. A good quality extra virgin olive oil adds depth and richness while helping to achieve that lovely golden-brown sear on our chicken. Not only does it impart amazing flavor, but it also adds healthy fats that make this dish feel luxurious without weighing you down. Look for oils from Spain or Italy—they tend to have more robust flavors which will enhance your meal.
- 1 medium onion, diced. Onions are often referred to as the building blocks of flavor in cooking—and for good reason! They add sweetness and complexity to our sauce as they cook down and caramelize slightly. When chopping onions, I find it helpful to use a sharp knife to minimize tears and ensure clean cuts; trust me, your eyes will thank you!
- 2 cloves garlic, minced. Garlic brings an irresistible aroma and enhances every dish with its distinct flavor profile—it’s aromatic magic! Freshly minced garlic releases essential oils that fill your kitchen with warmth as it cooks with onions; just be careful not to overcook it because burnt garlic can turn bitter quickly.
- 1 cup heavy cream. This ingredient is non-negotiable if you’re aiming for that luxurious creaminess! Heavy cream transforms our sauce into something truly decadent while adding richness that’s simply divine. If you’re looking for alternatives due to dietary preferences, consider using full-fat coconut milk or cashew cream for similar results.
- 1 cup chicken broth. Broth adds depth of flavor while keeping everything moist as it cooks down—think of it as liquid gold! Homemade broth is always best if you have some on hand; otherwise, store-bought works just fine—just ensure it’s low sodium so we can control the saltiness better in our dish.
- 1 teaspoon Italian seasoning. This blend typically includes herbs like oregano, basil, thyme, and rosemary—all things that evoke memories of Italian kitchens filled with love and warmth! Using Italian seasoning elevates our dish by infusing authentic Mediterranean vibes and balancing out all those rich flavors we’re working with.
- 1 cup grated Parmesan cheese. Cheese isn’t just about saltiness—it provides umami that rounds everything out beautifully in our pasta sauce! Opt for freshly grated cheese over pre-packaged varieties whenever possible; it melts smoother and offers superior flavor.
- Salt and pepper to taste. While these seem simple enough as seasonings, they’re absolutely paramount in transforming your dish from ordinary to extraordinary! Always season incrementally; you can always add more but can’t take it away if you’ve overdone it!
- Fresh parsley or basil for garnish. A sprinkle of fresh herbs not only brightens up your plate visually but also adds freshness that cuts through all those creamy flavors beautifully! Choose whatever herb speaks to your palate—you can never go wrong with vibrant greenery!
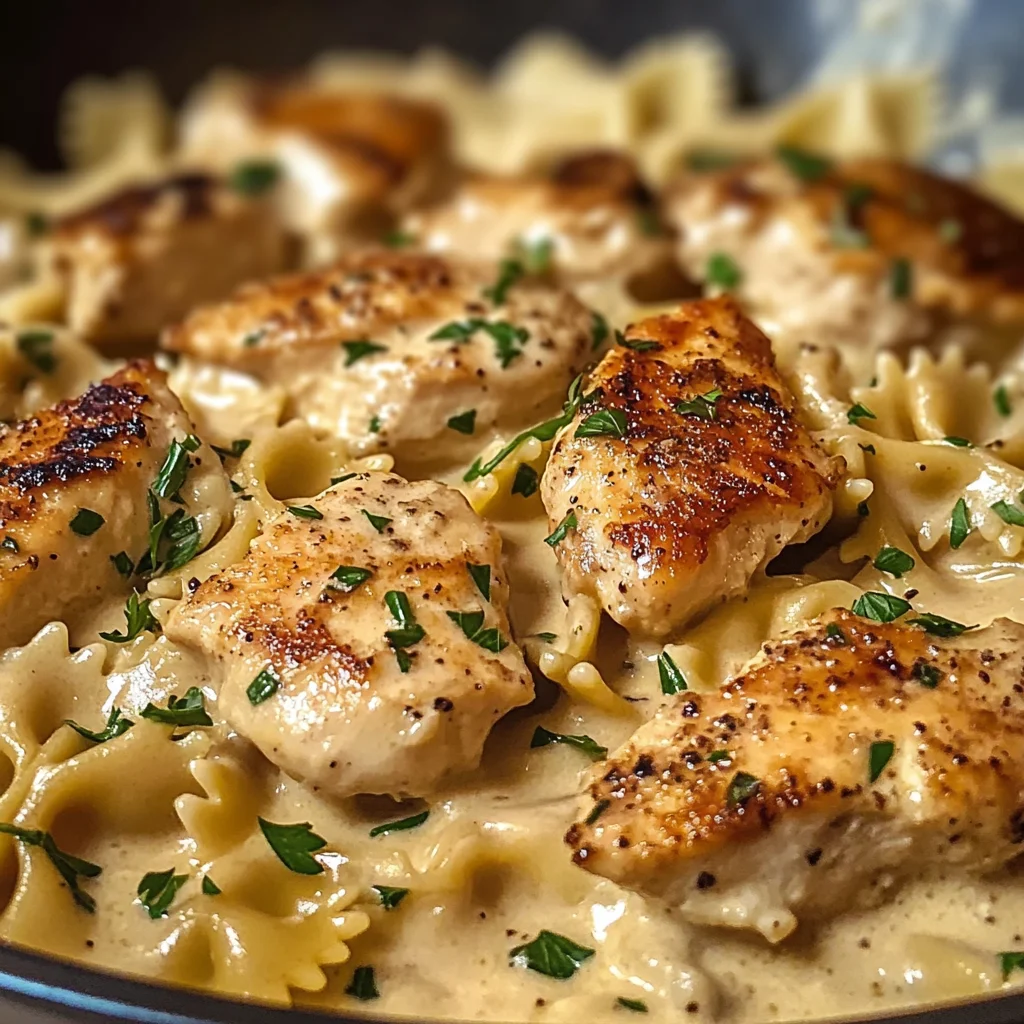
Equipment You’ll Need:
Before we dive deeper into creating this masterpiece, let’s talk about some essential tools you’ll need in your kitchen—I promise having these handy will make things smoother!
- Large pot – This is where you’ll cook your bowtie pasta; it’s important that it’s spacious enough so the pasta has room to move around while cooking evenly without sticking together.
- Skillet – A large skillet or sauté pan is vital here—it allows us enough surface area for browning our chicken nicely while giving us room later to mix in all those delicious ingredients together in one cohesive dish.
- Wooden spoon or spatula – These trusty utensils help stir without scratching non-stick surfaces while allowing us control over mixing ingredients gently as we build layers of flavor throughout the cooking process.
- Meat thermometer (optional) – While not strictly necessary if you’re confident in your cooking skills, using one ensures perfectly cooked chicken every time—especially important since we want tender meat bursting with juiciness without undercooking or overcooking!
Now that we’ve gathered everything we need let’s explore how we bring this creamy delight together step-by-step!
Step 1: Boil That Water!
Start by filling a large pot with salted water—this is crucial because salting helps flavor the pasta from within as it cooks rather than relying solely on the sauce later on! Bring it to a vigorous boil before adding your bowtie pasta—the sound alone when they hit the bubbling water brings joy already! Cook according to package instructions until al dente (about 8-10 minutes). You want them firm yet tender; avoid mushiness at all costs because no one wants soggy pasta ruining their experience!
Once they’re cooked just right (trust me on tasting one!), drain them well but remember—you don’t want them rinsed under cold water since we need every bit of starch left clinging onto them which helps thicken our sauce later too!
Step 2: Sear That Chicken
While waiting on your pasta adventure above—let’s focus on elevating those chicken thighs into succulent morsels everyone will rave about! Heat up two tablespoons of olive oil over medium heat in a large skillet until shimmering like liquid gold—it means it’s ready for action! Season both sides generously with salt & pepper; these simple steps lay down foundational flavor throughout this entire process.
Cook each thigh approximately 5-7 minutes per side until they’ve turned golden brown—a beautiful caramelization enhances taste magnificently—not just aesthetics here folks! Ensure they’re thoroughly cooked inside (165°F/75°C) before transferring them onto a plate where they’ll rest momentarily before joining back into our saucy masterpiece later on!
Step 3: Aromatic Onions & Garlic
In the same skillet still holding onto remnants from our glorious chicken sear—add diced onions next which will work wonders at building complexity within our sauce’s base layer! Let them sauté gently while stirring occasionally until translucent (around 2-3 minutes), then introduce minced garlic close behind stirring further another minute until fragrant fills every corner around you—it’s intoxicating!
This step ensures all those wonderful flavors meld seamlessly together while simultaneously preventing anything from burning—a true testament towards balance during cooking!
Step 4: Create Your Luxurious Sauce
Pour in both heavy cream plus chicken broth now—this combination creates an exceptionally rich lusciousness many dream about achieving consistently at home!! Stir together slowly allowing everything combined beautifully alongside Italian seasoning added next—you’ll notice immediate changes happening right before eyes before bringing mixture up towards gentle simmering point over lower heat settings where patience reigns supreme allowing further thickening actions unfold naturally (about five minutes).
This process allows flavors deepen together perfectly marrying creating utter harmony among all elements present within bowl awaiting completion soon ahead!!
Stay tuned—we’re almost there!!
Step 5: The Creamy Transformation Begins
Now that we’ve cooked the chicken, it’s time to step into the magic of sauce-making! In the same skillet where our chicken was kissed with heat, add one cup of chicken broth—this is not just a liquid; it’s the foundation of flavor for our Creamy Marry Me Chicken Bowtie Pasta. As you pour it in, take a moment to appreciate how those delicious brown bits from the chicken are now being released, creating a symphony of flavors that will enrich your dish. Turn up the heat slightly to bring this gorgeous broth to a gentle simmer.
Once simmering, pour in one cup of heavy cream. This luxurious addition transforms our broth into something truly extraordinary—a creamy base that envelops every ingredient in a velvety embrace. Stir in one teaspoon of Italian seasoning; this blend is essential for infusing your sauce with aromatic herbs that transport you straight to an Italian trattoria. When you see small bubbles forming around the edges of your skillet, this is a cue that your sauce is thickening beautifully—don’t rush this step! Allow it to simmer for about five minutes; you’ll notice how it gradually becomes more luscious and glossy. Trust me on this—patience pays off as the flavors meld together, creating an utterly intoxicating aroma that will have everyone peeking into the kitchen.
Step 6: Marrying Flavors with Pasta and Chicken
Now comes the moment we’ve all been waiting for—the reunion of pasta, chicken, and sauce! Gently add your cooked bowtie pasta back into the skillet along with the beautifully browned chicken thighs. With each toss, watch as those delightful noodles soak up every drop of that creamy goodness. This step is non-negotiable because we want each piece of pasta coated in that luxurious sauce—after all, we’re crafting something memorable here! Use tongs or two forks to carefully mix everything together; you’ll hear that slight sound of pasta moving through liquid gold, which is music to any cook’s ears.
As you combine everything, take a moment to add in one cup of grated Parmesan cheese. This isn’t just for flavor; it’s also going to thicken our sauce further while adding an incredible depth of umami that makes every bite feel like a warm hug. Stir continuously until the cheese melts seamlessly into the sauce, transforming it into something profoundly satisfying and rich. If you find the mixture too thick at any point, don’t hesitate to add just a splash more chicken broth or cream until you reach your desired consistency. Remember, cooking is about adjusting and finding balance—trust yourself!
Step 7: A Beautiful Presentation
After all that stirring and mixing, it’s finally time to plate up this beautiful dish! Grab your favorite serving bowls or plates—think about presentation as if you’re inviting someone special into your home with warmth and elegance. Use tongs or a large serving spoon to scoop out generous portions of our Creamy Marry Me Chicken Bowtie Pasta onto each plate. As you do this, take care to include both pasta and pieces of succulent chicken in each serving; it’s important for everyone at your table to experience the harmony we’ve created.
Now let’s elevate this dish even further: garnish with freshly chopped parsley or basil! These vibrant green herbs not only add a pop of color but also bring freshness that cuts through the richness of the creaminess beautifully. Just imagine those bright flecks against the comforting hues of your pasta—it’s like an artist adding their final brushstrokes on a masterpiece! I promise you that these little touches make all the difference in taking your meal from good to utterly extraordinary.
Step 8: The Moment You’ve Been Waiting For
At last, let’s dive into enjoying what you’ve created! Before you sit down with your loved ones (or maybe just yourself because self-love matters), take one last look at your creation—you deserve to admire it! The creamy sauces glistening under soft light and inviting aromas wafting through your kitchen create an atmosphere that’s simply perfect for sharing memories over dinner.
As you take that first bite, allow yourself to savor every single flavor—the tender chicken perfectly paired with al dente bowtie pasta enveloped in rich creaminess, punctuated by bursts of herbal brightness from those fresh garnishes. Each mouthful will remind you why cooking can be such an intimate act; it’s not just about feeding bodies but nourishing souls. Reflect on how far you’ve come through each step; what may have seemed like mere ingredients have transformed into something wholesome and heartwarming.
Final Thoughts on Your Culinary Creation
Before I let you go enjoy this culinary masterpiece, let me remind you: don’t hesitate to customize it further! Consider adding sautéed mushrooms or sun-dried tomatoes next time for another layer of flavor—after all, cooking is about exploration and making dishes uniquely yours. Your Creamy Marry Me Chicken Bowtie Pasta has not only filled bellies but also hearts tonight! So gather around the table with those who matter most and relish in both food and fellowship—it truly doesn’t get any better than this. Enjoy every moment!
Storage and Enjoyment Tips for Your Creamy Marry Me Chicken Bowtie Pasta
Now that you’ve crafted this absolutely delightful Creamy Marry Me Chicken Bowtie Pasta, it’s time to dig in and relish every creamy, dreamy bite! But what if you find yourself with leftovers after a cozy dinner or an unexpectedly large gathering? Worry not! This dish is just as wonderful the next day, and with the right storage tips, you’ll preserve all the luscious flavors that make it so special.
Storing Leftover Creamy Marry Me Chicken Bowtie Pasta
To keep your delicious creation fresh, transfer any leftover Creamy Marry Me Chicken Bowtie Pasta into an airtight container. Glass containers are fantastic because they don’t absorb odors and help maintain quality. Store it in the refrigerator where it will stay good for about 3 to 4 days. Now, here’s a little pro tip: adding a slice of bread to your pasta container can help absorb moisture, keeping your dish from becoming too sticky or clumpy! When you go to enjoy those leftovers, you might notice that the flavors have melded into something even more delightful; pasta dishes often develop a deeper taste after resting. For reheating, simply warm it gently on the stove over low heat or pop it in the microwave for a few minutes—just be sure to add a splash of chicken broth or cream to revive that creamy texture!
Freezing Creamy Marry Me Chicken Bowtie Pasta for Later
If you’re anything like me, you understand the value of having easy meals on hand for those busy nights when cooking feels daunting. Freezing your Creamy Marry Me Chicken Bowtie Pasta is a fabulous option! To do this properly, allow the dish to cool completely before portioning it out into freezer-safe containers or heavy-duty freezer bags. Be sure to remove as much air as possible before sealing them up tight; this will help prevent freezer burn and ensure quality. It can be frozen for up to 2 months without losing its wonderful flavors. When you’re ready to savor that meal again, simply thaw it overnight in the fridge and reheat on the stove or in the microwave—adding a touch of cream will elevate it back to its original glory. The convenience of having this delectable dish waiting for you makes meal planning feel effortless and oh-so-satisfying!
Dinner
Creamy Marry Me Chicken Bowtie Pasta
- Total Time: 40 minutes
- Yield: Serves 4
Description
Indulge in the delightful Creamy Marry Me Chicken Bowtie Pasta, a dish that promises to elevate any meal into an extraordinary experience. Picture tender chicken thighs simmered in a rich, creamy sauce that lovingly clings to perfectly cooked bowtie pasta. This comforting recipe combines luscious heavy cream with savory Italian seasoning and nutty Parmesan cheese, resulting in a dreamy dish that’s perfect for date nights or cozy family dinners. With each bite, you’ll savor the warmth of togetherness and culinary bliss, making it an unforgettable addition to your dining table.
Ingredients
- 1 lb boneless, skinless chicken thighs
- 8 oz bowtie pasta
- 2 tablespoons olive oil
- 1 medium onion, diced
- 2 cloves garlic, minced
- 1 cup heavy cream
- 1 cup chicken broth
- 1 teaspoon Italian seasoning
- 1 cup grated Parmesan cheese
- Salt and pepper to taste
- Fresh parsley or basil for garnish
Instructions
- Boil salted water in a large pot and cook bowtie pasta according to package instructions until al dente. Drain and set aside.
- In a skillet, heat olive oil over medium heat. Season chicken thighs with salt and pepper, then sear for 5-7 minutes on each side until golden brown and cooked through (165°F). Remove chicken from skillet.
- In the same skillet, sauté diced onions until translucent (2-3 minutes), then add minced garlic and cook for another minute.
- Pour in chicken broth and heavy cream; stir in Italian seasoning. Bring to a gentle simmer for about five minutes to thicken.
- Return cooked chicken to the skillet along with bowtie pasta. Add grated Parmesan cheese and mix until integrated; adjust consistency with more broth if needed.
- Garnish with fresh herbs before serving.
- Prep Time: 15 minutes
- Cook Time: 25 minutes
- Category: Dinner
- Method: Sautéing
- Cuisine: Italian
Nutrition
- Serving Size: 1 plate (approx. 350g)
- Calories: 650
- Sugar: 3g
- Sodium: 800mg
- Fat: 36g
- Saturated Fat: 18g
- Unsaturated Fat: 16g
- Trans Fat: 0g
- Carbohydrates: 52g
- Fiber: 3g
- Protein: 38g
- Cholesterol: 150mg
Leave a Comment