When I think about cozy evenings spent in the kitchen, my heart always drifts back to the Honey Garlic Shrimp Rice Bowls. They are not just a meal; they represent warmth, comfort, and a delightful fusion of flavors that dance together in perfect harmony. Picture this: tender shrimp glistening with a sweet and savory honey garlic sauce, nestled atop fluffy rice, accompanied by vibrant vegetables that add a splash of color and nutrition. It’s an experience that transcends mere sustenance, stirring up memories of shared laughter and stories around the dinner table. The aroma wafting through your kitchen will have you feeling like a culinary artist, even if you’re just winding down from a busy day.
This recipe is special because it encapsulates the essence of what home-cooked meals should be: quick yet utterly satisfying. In just 20 minutes, you can create a dish that not only tantalizes your taste buds but also nourishes your soul. There’s something truly extraordinary about the balance between the sweet notes of honey and the robust umami flavor of soy sauce mingling with garlic’s aromatic embrace. These Honey Garlic Shrimp Rice Bowls are perfect for weeknight dinners or any occasion when you crave something delicious without spending hours in the kitchen. I promise you, once you taste this dish, it’ll become a beloved staple in your home just as it has in mine.
Honey Garlic Shrimp Rice Bowls: A Symphony of Sweet and Savory Flavors
Gather around because I’m about to share with you one of my absolute favorite recipes: Honey Garlic Shrimp Rice Bowls! This dish is like a warm hug on a plate — it’s bright, colorful, and packed full of flavor that will leave your senses singing. Whether you’re cooking for yourself or whipping up dinner for friends and family, these bowls offer not only nourishment but also joy. The best part? They come together so quickly that even on the busiest nights, you can still serve up something fabulous.
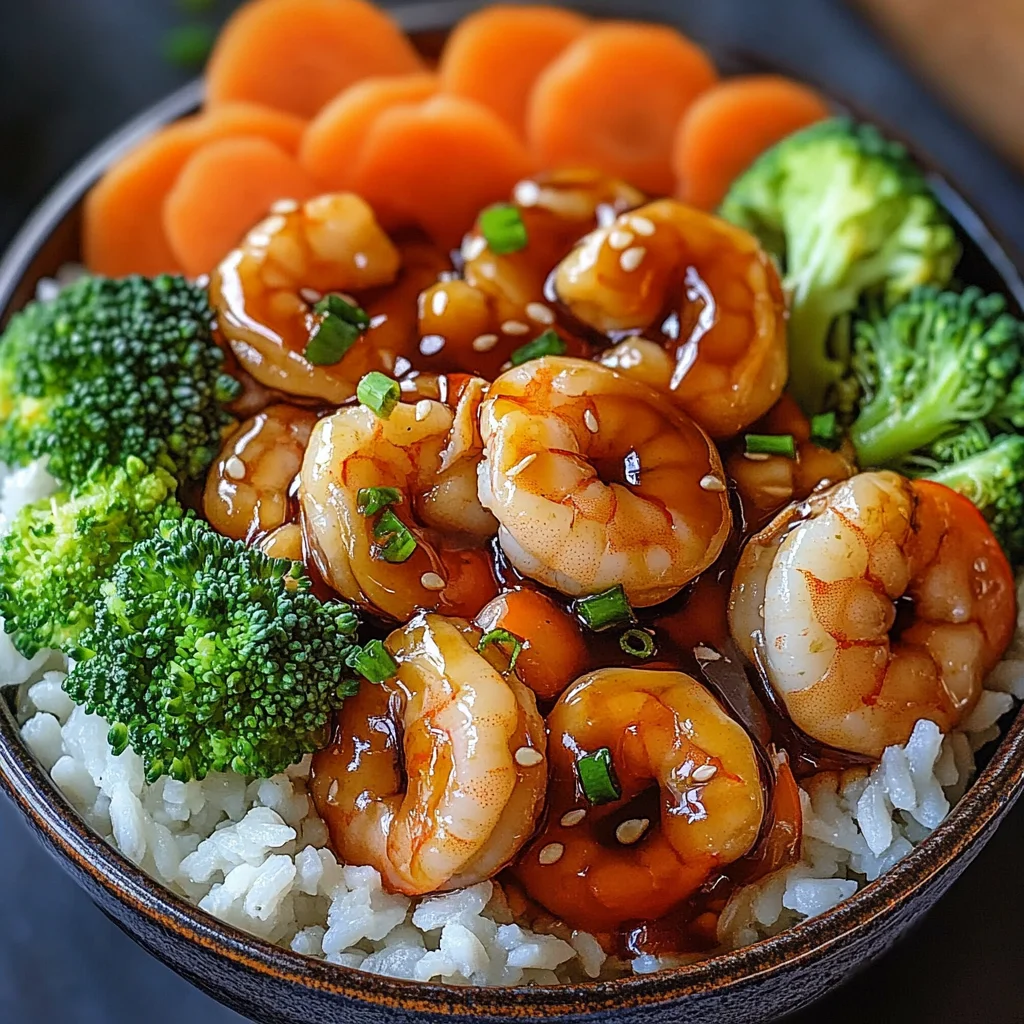
Ingredients:
As we embark on this culinary journey together, let’s take a moment to appreciate each ingredient that contributes to making these Honey Garlic Shrimp Rice Bowls a true standout. Each component plays its role beautifully, ensuring that every bite bursts with flavor.
- 500g shrimp, peeled and deveined. These little gems are the stars of our show! Fresh or frozen shrimp work well here; just make sure they’re peeled and deveined for easy cooking. When selecting shrimp at the market, look for firm ones with a clean ocean scent—this indicates freshness. Not only do shrimp provide that delightful seafood flavor with their natural sweetness, but they also cook quickly, making them ideal for busy weeknights. Trust me; when they turn pink and curl slightly during cooking, that’s when you know they’re perfectly done!
- 2 cups cooked rice. The foundation of our bowl! Whether you prefer white jasmine rice or brown rice for its nutty flavor and extra fiber, having this fluffy base makes all the difference. When preparing your rice, ensure it’s cooked until tender but not mushy; each grain should remain distinct to soak up all that sumptuous sauce we’re about to create. If you’re short on time, feel free to use leftover rice or even microwaveable packets—life is too short not to enjoy delicious food even when rushed!
- 1 cup broccoli florets. Adding vibrant color and crunch! Broccoli not only enhances visual appeal but also brings essential nutrients like vitamins C and K into our meal—what’s not to love? When buying broccoli at your local market or grocery store, look for firm florets without any yellowing; this indicates freshness. Blanching them briefly before adding them to the pan will keep their beautiful green hue while ensuring they’re tender enough without losing all their crispness.
- 1/2 cup carrots, sliced. Sweet and crunchy carrots bring another layer of texture—and let’s not forget their lovely orange hue! Slice them thinly so they cook quickly alongside our shrimp without losing their delightful crunchiness. Carrots are rich in beta-carotene (which becomes vitamin A) and add natural sweetness to balance out our savory elements beautifully.
- 2 tbsp honey. Here comes the liquid gold! Honey is crucial for creating that sticky-sweet glaze that clings lovingly to our shrimp while providing depth to our dish’s flavor profile. Opt for raw honey if possible; it has more complex flavors compared to processed varieties—plus it’s often less refined! This sweetness contrasts beautifully against the saltiness from soy sauce—a pairing made in heaven.
- 3 tbsp soy sauce. This is absolutely paramount in achieving that umami punch we crave! Soy sauce also adds saltiness without overpowering other flavors in our dish. For those avoiding traditional soy due to dietary preferences or allergies, there are fantastic alternatives like tamari or coconut aminos available that maintain similar tastes!
- 3 garlic cloves, minced. Ahh… garlic—the aromatic superstar! Freshly minced garlic elevates every bite with its bold flavor profile while infusing warmth into our dish as it cooks down into a fragrant base alongside ginger (which we’ll get to soon). Always opt for fresh rather than pre-minced versions; trust me—the difference is night and day!
- 1 tbsp sesame oil. Just a drizzle brings an irresistible nuttiness! Sesame oil is rich in healthy fats along with antioxidants—meaning it’s great for both flavor enhancement AND nutrition! Use this sparingly as it’s quite potent; it adds depth without overwhelming other ingredients’ flavors.
- 1 tsp ginger, grated. Ginger lends warmth through its spicy notes while complementing garlic perfectly—a combo found frequently in Asian cuisine! Grating fresh ginger ensures maximum release of those aromatic oils which contribute wonderfully alongside honey and soy sauce.
- 1 tbsp olive oil. A classic choice for sautéing; olive oil helps achieve that perfect sear on our shrimp while providing healthy fats essential for balanced eating habits overall! Feel free to substitute avocado oil if desired—just remember not all oils have equal smoke points!
- Sesame seeds (optional). These tiny powerhouses add decoration AND crunch when sprinkled over finished bowls—a delightful textural contrast against tender shrimp!
- Green onions, chopped: Bright green onions finish off this dish beautifully—they provide freshness while adding color upon serving!
Once we’ve gathered everything necessary into our kitchen space—let’s dive right into preparing these scrumptious bowls!
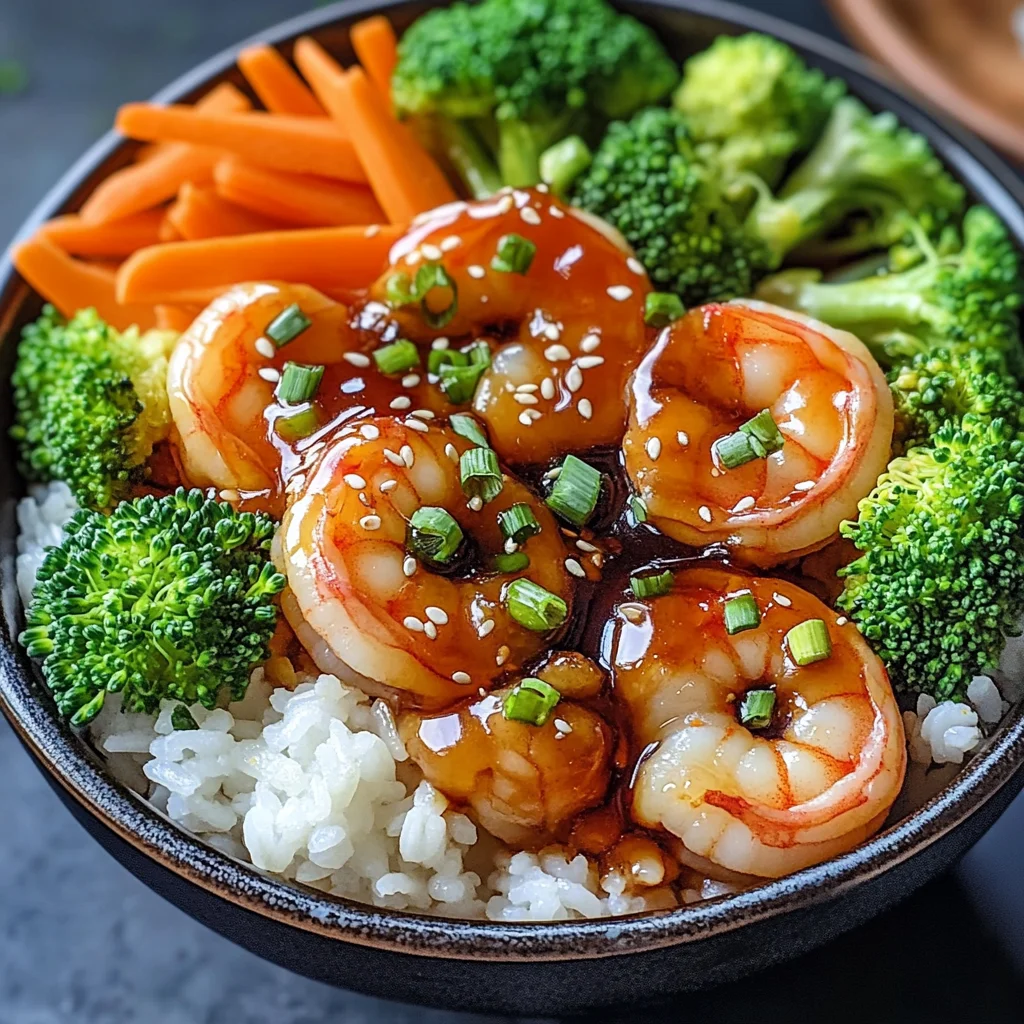
Equipment You’ll Need:
Before we dive headfirst into making these glorious bowls filled with goodness, let’s take stock of what tools you’ll need on hand! Having the right equipment at your disposal not only makes cooking easier but also enhances your overall experience as you create something wonderful.
- Large skillet or frying pan: This versatile piece will be key in sautéing those delicious shrimp along with aromatics like garlic and ginger until golden brown perfection is achieved! A non-stick surface works wonders here but don’t hesitate if cast iron is more your style – just remember seasoning matters!
- Spatula: A sturdy spatula serves dual purposes—it gently turns those delicate shrimp AND helps combine everything harmoniously within our pan during cooking times!
- Measuring cups & spoons: Precision matters when following recipes—and using proper measurements ensures consistent results every time whether you’re whipping up dinner tonight or hosting guests later on!
- Cutting board & knife: Essential tools used throughout preparation stages including slicing carrots finely enough so they cook evenly alongside broccoli florets—as important as measuring ingredients accurately!
With everything prepped ahead of time—let’s get started on preparing these delectable Honey Garlic Shrimp Rice Bowls together!
Step 1: Heat Up Those Oils!
Begin by heating both olive oil and sesame oil over medium heat in your large skillet until shimmering—a sign they’re ready for action! This step is crucial because heating oils beforehand ensures they coat every morsel evenly while preventing sticking during cooking process itself (no one wants sad burnt bits!).
Once hot enough (you can test by dropping a small piece of garlic which should sizzle), add freshly minced garlic along with grated ginger immediately afterward—allow aromas from these two aromatics envelop kitchen air around you instantly creating mouthwatering anticipation among everyone nearby who might catch whiff before meal arrives at table later on…
Step 2: Sauté Until Fragrant
Now comes what I fondly call ‘the magic moment’ where patience pays off big time—we’ll sauté garlic/ginger mixture gently until fragrant (think 30 seconds here). Don’t rush this step! Allow them ample opportunity—to release their flavors fully into heated oils surrounding them resulting ultimately in richer tasting end product once everything marries together beautifully later down line…
Step 3: Add The Star Ingredients
Next up—time for those stunning pink beauties known as shrimp! Gently place them into sizzling pan allowing room between each piece so they don’t steam instead (we want crispy edges!). Cook undisturbed approximately two minutes per side observing closely as color shifts from greyish tones towards vibrant pinks indicating readiness… Trust me—you’ll know when perfectly done based off visual cues alone after flipping halfway through cooking process itself…
Step 4: The Sweet Sauce Transformation
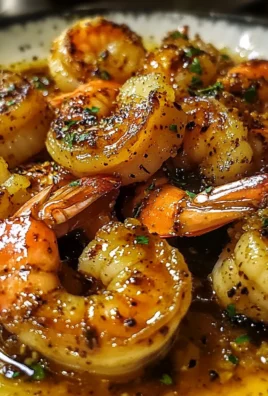
Now let’s elevate things further by bringing honey along with soy sauce directly onto hot skillet filled now with succulent shrimp awaiting transformation—they’ll absorb flavors better while simultaneously thickening slightly creating amazing glaze coating entire batch evenly within seconds flat (it really does happen fast!). Stir thoroughly combining all elements present until visibly sticky consistency forms around each shrimp ensuring every bite holds onto heavenly taste sensation awaiting enjoyment ahead…
With these initial steps laid out clearly—it won’t be long before we enjoy bowls brimming over fulfilling goodness bursting forth onto plates waiting eagerly below… Stay tuned as we continue crafting these delightful creations together next round focusing on veggie integration followed shortly thereafter serving suggestions galore too!
Step 5: Creating a Flavorful Base
Now that your oils are shimmering in the pan, it’s time to elevate the aroma of your kitchen with the vibrant notes of garlic and ginger. Add the minced garlic and grated ginger to your sizzling olive and sesame oil mixture. As soon as they hit the heat, you’ll be greeted by an utterly intoxicating fragrance that fills the air — this is the moment when everything begins to come together! Sauté these aromatic ingredients for about 1-2 minutes, stirring constantly. This step is absolutely paramount because it allows the flavors to bloom and infuse the oil before introducing the shrimp. Trust me on this: if you let them cook too long or at too high a temperature, they can burn quickly and develop a bitter taste that will overshadow your dish.
As you stir, pay attention to the color transformation; you want them to become fragrant and slightly golden but not browned. The reason for this careful approach is simple: garlic and ginger have delicate flavor compounds that can easily be lost if overcooked. When done correctly, this base will serve as a rich canvas for your honey garlic sauce, ensuring every bite of your Honey Garlic Shrimp Rice Bowls bursts with flavor.
Step 6: Perfectly Cooking Your Shrimp
Now it’s time for our star ingredient — those lovely shrimp! Carefully add them to the pan in a single layer, making sure not to overcrowd them; this will help them cook evenly. You’ll want to let them sizzle away in that fragrant mixture for about 2-3 minutes on one side until they turn a beautiful pink color. Then, using tongs or a spatula, flip each shrimp over gently to cook the other side for another 2-3 minutes. The visual cue here is vital; perfectly cooked shrimp will be opaque and firm but still tender — avoid overcooking at all costs!
The science behind perfectly cooked shrimp lies in their proteins; when heated just right, they tighten up without becoming rubbery. This is a crucial moment where patience pays off; if you rush through this step or crank up the heat too high in an attempt to speed things up, you’ll end up with tough shrimp instead of succulent bites that pop in your mouth. So take your time here; you’re crafting something truly extraordinary!
Step 7: Whisking Up Your Honey Garlic Sauce
Once your shrimp are beautifully pink and cooked through, it’s time to introduce that luscious honey garlic sauce we’ve been dreaming about! In a small bowl, whisk together 2 tablespoons of honey and 3 tablespoons of soy sauce until they’re well combined — this mixture is like liquid gold! The sweetness from the honey balances out the savory notes from the soy sauce perfectly, creating a symphony of flavors that will coat each shrimp beautifully.
Pour this mixture into the pan with your sautéed shrimp while keeping everything over medium heat. As you stir it all together, notice how quickly it transforms into a sticky glaze that clings lovingly to each piece of shrimp. This step is essential because you’re not just adding flavor; you’re creating that glossy finish that makes every bite feel indulgent and satisfying. Let it simmer for about 1-2 minutes; watch as the sauce thickens slightly — that’s when you know it’s ready! Keep an eye on it so it doesn’t reduce too much; we want enough sauce to drizzle over your rice later.
Step 8: Incorporating Fresh Vegetables
Now comes one of my favorite parts — adding color and crunch with fresh vegetables! Stir in those vibrant broccoli florets and sliced carrots into the pan with your gorgeous honey garlic shrimp. This is where things get exciting because not only do these veggies add incredible nutrition, but they also provide texture and brighten up your dish visually. Cook everything together for about 3-4 minutes until those vegetables are just slightly tender yet still crisp — we want them to maintain some bite!
Don’t rush this step; allowing the vegetables to mingle with the shrimp gives them an opportunity to absorb some of that divine sauce while retaining their freshness. It’s like each element is having its moment on stage before being elegantly served together! You’ll know they’re ready when they’re vibrant in color but still have a bit of crunch left — overcooked veggies can lose their appeal both in taste and texture. Plus, who doesn’t love that satisfying contrast between tender shrimp and crisp veggies?
Next Major Phase – Plating Your Honey Garlic Shrimp Rice Bowls
At last, we’ve arrived at one of the most delightful moments in cooking: plating our masterpiece! It’s time to serve those divine Honey Garlic Shrimp Rice Bowls.
Step 9: Bringing It All Together
Start by fluffing up those two cups of cooked rice in a large serving bowl or individual dishes — I love using jasmine rice for its fragrant aroma and slight stickiness which pairs beautifully with our sticky sauce! Divide it evenly among bowls so everyone gets their fair share of fluffy goodness as their foundation. Now, this is where personal touches come into play; carefully spoon generous portions of your honey garlic shrimp and vegetables right on top of that warm rice.
To finish off these bowls gloriously, sprinkle some sesame seeds for an added crunch if you fancy — they contribute not just texture but also an aesthetic appeal with their delicate beauty against all those colors! A scattering of chopped green onions adds freshness and brightness while also providing a pop of color against all that golden sweetness below. And there you have it—your Honey Garlic Shrimp Rice Bowls are ready to shine!
Serve immediately while everything is still warm and inviting; I promise you’ll hear compliments left and right as everyone digs into these bowls brimming with flavor! Enjoy every bite knowing you’ve created something truly extraordinary that’s perfect for any busy night or simply whenever you’re craving comfort food done right!
Storage and Enjoyment Tips for Your Honey Garlic Shrimp Rice Bowls
Now that you’ve completed your delicious Honey Garlic Shrimp Rice Bowls, it’s time to revel in the joy of sharing this delightful dish with your loved ones! The vibrant colors, enticing aromas, and mouthwatering flavors are bound to impress everyone at your dinner table. But let’s be honest—sometimes we just can’t finish everything in one sitting, and that’s where the magic of leftovers comes into play. With a few simple tips, you can ensure that those scrumptious shrimp bowls taste just as extraordinary the next day!
Storing Leftover Honey Garlic Shrimp Rice Bowls
To keep your Honey Garlic Shrimp Rice Bowls fresh and flavorful, it’s essential to store them in an airtight container. These containers not only prevent unwanted odors from mingling with your food but also help maintain moisture levels—keeping everything perfectly succulent. When packed away properly, your leftovers can last up to three days in the refrigerator. A little pro tip? If you’re storing rice for later, place a slice of bread in the container; it absorbs excess moisture and keeps that fluffy texture intact! Trust me on this—it makes a world of difference! When you’re ready to enjoy your leftovers again, simply reheat them in a pan over medium heat or pop them in the microwave until warmed through. You’ll find that the flavors meld beautifully overnight, creating an even more intoxicating taste experience.
Freezing Components for Later
If you want to extend the life of this delightful dish even further, consider freezing portions of your Honey Garlic Shrimp Rice Bowls! This is an excellent option if you’re looking to prepare meals in advance or simply want to savor these flavors at a later date without compromising quality. To freeze, let the shrimp and vegetables cool completely before transferring them into freezer-safe bags or containers—this helps prevent freezer burn and maintains their wonderful textures. When stored properly, the components can last up to three months frozen! When you’re ready for a quick meal, simply thaw them overnight in the fridge before reheating; they’ll taste just as fresh as when they were first made. The convenience factor here is absolutely paramount, allowing you to enjoy these sumptuous bowls anytime you desire!
Honey Garlic Shrimp Rice Bowls
- Total Time: 20 minutes
- Yield: Serves 4
Description
Indulge in the comforting delight of Honey Garlic Shrimp Rice Bowls—a quick and satisfying meal that brings a burst of flavor to your dinner table. This dish features succulent shrimp glazed in a sticky honey garlic sauce, served over fluffy rice and complemented by vibrant vegetables like broccoli and carrots. Perfect for busy weeknights or casual gatherings, these bowls are not only delicious but also a feast for the eyes. In just 20 minutes, you can create a wholesome dish that nourishes both the body and soul. Enjoy the delightful fusion of sweet and savory flavors that will have everyone coming back for seconds!
Ingredients
- 500g shrimp, peeled and deveined
- 2 cups cooked rice (jasmine or brown)
- 1 cup broccoli florets
- 1/2 cup carrots, sliced
- 2 tbsp honey
- 3 tbsp soy sauce
- 3 garlic cloves, minced
- 1 tbsp sesame oil
- 1 tsp ginger, grated
- 1 tbsp olive oil
- Optional: sesame seeds and chopped green onions for garnish
Instructions
- Heat olive oil and sesame oil in a large skillet over medium heat.
- Add minced garlic and grated ginger; sauté until fragrant, about 1-2 minutes.
- Add shrimp in a single layer; cook until pink on both sides, approximately 4-6 minutes total.
- Mix honey and soy sauce in a bowl; pour over shrimp in the skillet, stirring to coat.
- Stir in broccoli florets and sliced carrots; cook for an additional 3-4 minutes until veggies are tender yet crisp.
- Serve over cooked rice, garnished with sesame seeds and green onions if desired.
- Prep Time: 10 minutes
- Cook Time: 10 minutes
- Category: Dinner
- Method: Stir-frying
- Cuisine: Asian
Nutrition
- Serving Size: 1 bowl (approximately 350g)
- Calories: 460
- Sugar: 14g
- Sodium: 680mg
- Fat: 15g
- Saturated Fat: 2g
- Unsaturated Fat: 12g
- Trans Fat: 0g
- Carbohydrates: 56g
- Fiber: 4g
- Protein: 30g
- Cholesterol: 180mg
Leave a Comment