There’s something profoundly satisfying about crafting a dessert that not only delights the palate but also warms the heart. I can’t help but get excited when I think about these Lemon Cheesecake Bars—each bite is like a little burst of sunshine on a plate. Imagine creamy, tangy cheesecake perfectly balanced with the zesty brightness of fresh lemons, all nestled atop a buttery graham cracker crust. This isn’t just any dessert; it’s a celebration of flavors and textures that brings back memories of family gatherings, joyful laughter, and moments shared over delicious food. Trust me when I say that these bars are not just about satisfying your sweet tooth; they are an experience, a moment to pause and savor life’s simple pleasures.
As I embark on this culinary journey with you, I want you to know that making these Lemon Cheesecake Bars is like sharing a little piece of my heart. The combination of lightened cream cheese with Greek yogurt creates such a luscious filling that feels indulgent yet light—a perfect treat for any occasion! Whether you’re hosting friends for brunch or simply treating yourself to something special after dinner, these bars are sure to impress. And can we talk about how easy they are to whip up? You’ll be amazed at how quickly you can create something so delectable and satisfying!
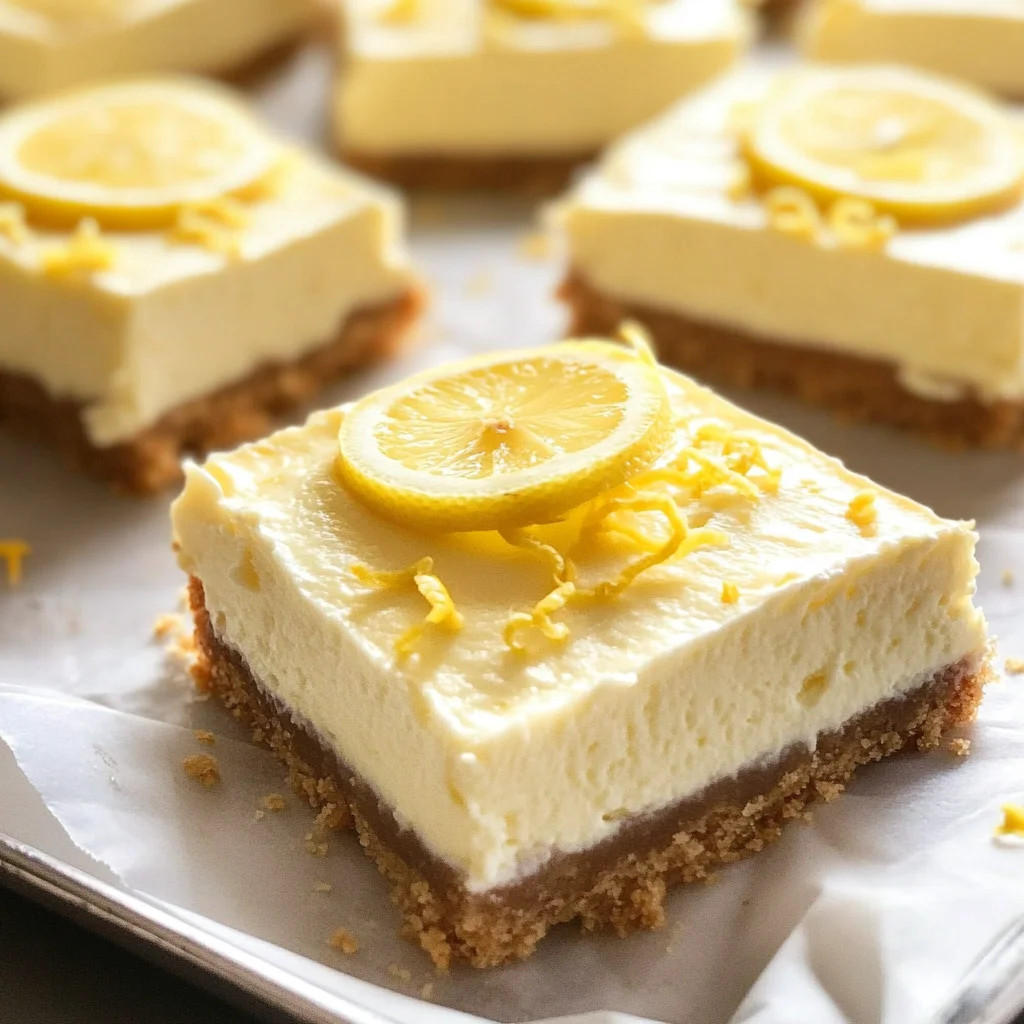
Lemon Cheesecake Bars: A Taste of Sunshine
Welcome to the world of Lemon Cheesecake Bars! This recipe is not only delightful but also incredibly simple to make. With fresh lemon juice and zest infusing every bite with bright flavor, it’s truly going to be love at first taste!
Ingredients:
As we gather our ingredients, let’s take a moment to appreciate each one and its role in creating these heavenly bars. Each ingredient contributes uniquely to the final product, transforming simple components into something extraordinary.
- 6 whole graham crackers. These little squares are the foundation of our dessert—their sweet, slightly nutty flavor pairs beautifully with the creamy filling above. When crushed into fine crumbs, they create the perfect texture for our crust, offering both structure and a delightful crunch. Look for graham crackers that are made with whole grains for added depth in flavor; organic options often have fewer preservatives too!
- 2 tablespoons unsalted butter (melted). Butter is essential here; it binds our graham cracker crumbs together into a cohesive crust while adding richness and flavor. Make sure it’s melted but not hot—if it’s too warm when mixed with the crumbs, you risk making them too greasy rather than achieving that beautiful crumbly texture we’re after.
- 6 ounces 1/3 less fat cream cheese (softened). This is where we start building our luscious filling! Softening the cream cheese ensures it blends smoothly into the mixture without lumps, which is crucial for that velvety texture we’re aiming for in our Lemon Cheesecake Bars. Opting for reduced-fat cream cheese lightens the dish without sacrificing its signature creaminess.
- 6 ounces plain non-fat Greek yogurt. Greek yogurt adds an incredible tanginess while keeping things light—it’s one of my favorite tricks! It contributes moisture and helps balance out the sweetness from sugar while providing that rich creamy consistency we all adore in cheesecake. Plus, it’s packed with protein!
- 1/3 cup granulated sugar. Sweetness is key in this recipe; however, because we’re focusing on bright lemon flavors, we want just enough sugar to enhance without overpowering. Feel free to adjust based on your taste preferences!
- 1 egg + 1 egg white. The egg provides structure to our cheesecake bars—it acts as a binding agent helping everything hold together beautifully while contributing to that creamy texture we love so much. Using an extra egg white helps lighten the overall mixture without compromising richness.
- Pinch of salt. Salt is often overlooked in desserts but it’s absolutely paramount—it enhances all other flavors! Just a small pinch will elevate your cheesecake bars by balancing sweetness and brightness.
- 1 heaping tablespoon lemon zest. This is where the magic happens! Fresh lemon zest infuses intense citrus fragrance and flavor into your filling without adding extra liquid. When shopping for lemons, choose ones that feel heavy for their size—this usually means they’re juicier!
- 1/4 cup fresh lemon juice. Freshly squeezed lemon juice brings vibrant acidity which balances out the richness of the cream cheese and yogurt beautifully—it’s what makes this dessert sing! Bottled lemon juice simply doesn’t compare; trust me on this one!
- 1 1/2 teaspoons vanilla extract. Vanilla is like a warm hug for flavors; it rounds everything out seamlessly while adding depth and warmth to our cheesecake filling.
- 2 tablespoons all-purpose flour. This ingredient acts as a stabilizer—it helps bind everything together solidifying our filling as it bakes without making it dense or heavy.
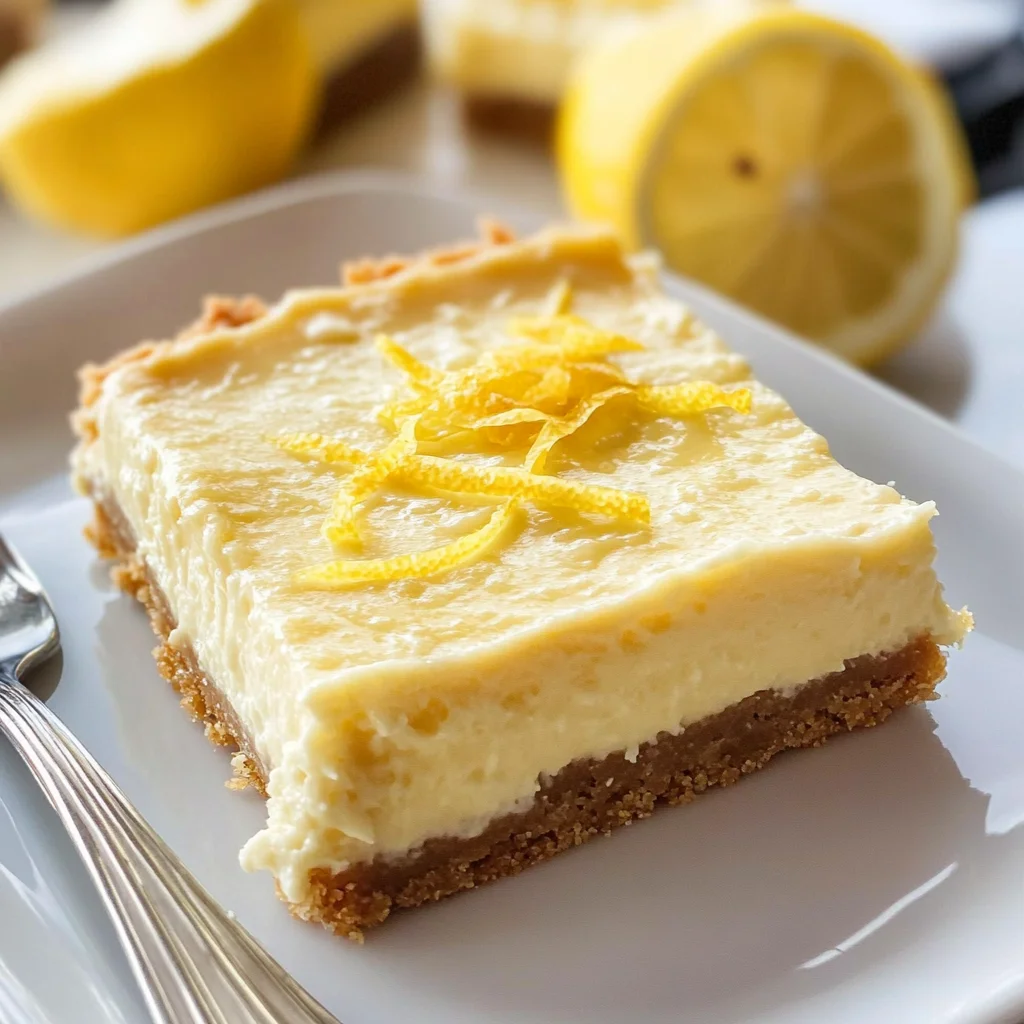
Equipment You’ll Need:
Before diving into preparation mode, let’s gather our trusty kitchen companions—the equipment you’ll need can make all the difference between an effortless baking experience and one filled with frustration! Every tool has its purpose in bringing your Lemon Cheesecake Bars from concept to reality.
- 8×8 baking pan – This size is perfect for creating those thick, luscious cheesecake bars we’re craving! Make sure it’s sturdy enough to withstand oven temperatures; lining it with parchment paper will also help prevent sticking and ensure easy removal later on.
- Food processor – A must-have for turning those graham crackers into fine crumbs effortlessly! If you don’t have one handy, you can place them in a zip-top bag and crush them using a rolling pin—just be cautious not to spill!
- Mixing bowls – Use various sizes for different steps throughout this process—one large bowl will be perfect for mixing your filling ingredients while smaller bowls can hold your melted butter or egg whites separately until you’re ready.
- Electric mixer (handheld or stand) – Whipping up smooth fillings requires some serious power! An electric mixer saves you time and effort compared to mixing by hand—trust me on this one; you’ll want those air bubbles incorporated well!
Step 1: Preheating & Preparing Your Pan
To kick things off right, preheat your oven to 350 degrees Fahrenheit—that initial heat is vital because we want our crust baked just enough before adding any toppings! While that’s happening, grab your trusty 8×8 baking pan—this size is perfect for creating those thick bars we crave—and either spray it with cooking spray or line it with parchment paper for easy removal later on; trust me—it’ll save you from frustration down the line!
Step 2: Crafting Your Graham Cracker Crust
Now comes one of my favorite parts: creating that irresistible graham cracker crust! Place six whole graham crackers into your food processor (or zip-top bag if you’re feeling adventurous) and pulse until they become fine crumbs resembling sand—you want them finely ground so they stick together beautifully once combined with butter! Drizzle in two tablespoons melted unsalted butter while continuing to pulse until those crumbs become moist and hold together when pressed between your fingers; this step ensures that every bite has some delightful crunch from our crust base!
Step 3: Baking the Crust
Once you’ve perfected those crumbs, pour them directly into your prepared pan—using clean hands or even a measuring cup works wonders here—to firmly press them down into an even layer across the bottom (don’t rush this step!). Bake in the preheated oven for about six or seven minutes until golden brown around edges—that slight color change indicates readiness! Afterward, remove from oven carefully (it’ll be hot!) then reduce heat down to 300 degrees Fahrenheit as we move onto making our dreamy filling.
Step 4: Mixing Up That Creamy Filling
With the crust cooling slightly off to one side now’s time focus shifts towards crafting our luscious filling which starts by beating six ounces softened cream cheese using an electric mixer set at medium speed until light fluffy (about two minutes). Don’t forget during this process—you’ll need scrape down sides/bottoms occasionally ensuring everything mixes evenly resulting in smooth consistency free from lumps too! Next up goes in Greek yogurt alongside granulated sugar plus pinch salt—mix again until fully blended together before adding both egg plus egg white beating once more until well combined –you’re doing great already!
I hope you’re feeling inspired because we’re just getting started on these heavenly Lemon Cheesecake Bars—the journey ahead promises delightful results infused with zesty joy along every step taken!
Step 5: Whipping Up the Creamy Filling
Now that we have our delightful graham cracker crust cooling, it’s time to focus on the heart of this recipe—the filling. This is where the magic happens, transforming simple ingredients into a creamy, luscious mixture that will envelop your taste buds in a symphony of flavors. In a large mixing bowl, using an electric mixer or a handheld version if you prefer a bit of a workout (trust me, it’s worth it!), beat the softened cream cheese until it becomes light and fluffy. You want to dedicate about two minutes to this step because incorporating air is absolutely paramount; this will give your bars that ethereal texture we all crave.
Once your cream cheese is beautifully aerated, it’s time to introduce its partners in crime: the Greek yogurt, granulated sugar, and that essential pinch of salt. The Greek yogurt is not only a brilliant substitute for heavy cream but adds a tang that perfectly balances the sweetness of the sugar and richness of the cream cheese. Beat everything together until it’s as smooth as silk—don’t forget to scrape down the sides and bottom of your bowl; you want every morsel mixed in thoroughly! This step ensures uniform flavor throughout the filling, which is crucial for that divine experience with each bite.
Next up, we’re adding our eggs—one whole egg and one egg white—into the mix. Again, mix well until everything is fully combined. This inclusion isn’t just about binding; eggs provide structure and stability to our cheesecake bars as they bake. The lemon zest and juice come next, infusing your filling with vibrant citrus notes that make these bars so refreshing. Don’t skimp here; the zest holds essential oils bursting with flavor! Finally, we add in our all-purpose flour—a touch of this ingredient gives our cheesecake its ideal texture by preventing it from becoming too dense during baking. Blend until everything is seamlessly incorporated; you want to see no lumps or bumps!
Step 6: Pouring Perfection
With your filling ready and waiting, it’s time for one of my favorite moments: pouring it over that golden crust! Gently pour your creamy filling onto the cooled graham cracker crust, ensuring it covers every corner evenly. This is where patience pays off; take a moment to spread it gently if needed using a spatula. Trust me when I say this careful approach makes all the difference in achieving those beautiful layers we’re after—nobody wants a lopsided dessert!
Now comes an important detail: place your pan on the middle rack of your preheated oven set at 300 degrees Fahrenheit (remember we reduced the heat after baking the crust). Baking at this temperature allows for an even cook without causing cracks on top—something we all desire for presentation purposes! Bake your lovely lemon cheesecake bars for about 25 to 30 minutes; keep an eye out for those visual cues! You want them to be set around the edges while still having a slight jiggle in the center when you gently shake the pan. It may feel tempting to leave them in longer for that “perfectly firm” look, but resist! Overbaking will lead to dry bars instead of creamy bliss.
Step 7: The Cooling Ritual
Once you’ve taken those bars out of the oven—oh sweet joy!—it’s crucial to allow them to cool completely before moving on to chilling them in the refrigerator. Set them aside on a wire rack if you have one (if not, any safe surface will do) and let them rest there quietly while they transform from hot delights into something wonderfully chilled and refreshing. Cooling helps stabilize our cheesecake further before refrigeration; without this step, you risk creating cracks during cooling as it shifts too quickly from hot to cold temperatures.
After about an hour or so at room temperature (or whenever they feel pleasantly warm), transfer them into your fridge where they’ll need at least three hours—though I often recommend leaving them overnight if you can bear the wait! Chilling is non-negotiable because it allows all those flavors to meld together beautifully while setting up perfectly firm bars ready for slicing. Can you imagine how utterly intoxicating these will taste after soaking in those lemony flavors?
Step 8: Time for Tasting Perfection
At long last, after what feels like an eternity but really isn’t much at all (I promise!), it’s time for the glorious reveal! When you’re ready to serve these Lemon Cheesecake Bars, make sure they’re chilled through; they should have achieved that perfect creamy consistency with clean edges and smooth tops thanks to our careful handling throughout this process. Use a sharp knife dipped in warm water for slicing—the warmth helps glide through effortlessly without tearing apart those delicate layers.
As you cut into these beauties, notice how they hold their shape but still have just enough softness within—it’s truly extraordinary! If you’re feeling extra fancy (and who wouldn’t?), consider dusting them lightly with powdered sugar or garnishing with fresh berries or mint leaves for that pop of color and flavor contrast against their bright yellow hue. Each bite should be both refreshing yet rich—a beautiful balance encapsulated within each bar!
So there you have it—a truly delightful dessert that’s bound to impress friends and family alike! Whether serving up slices at a summer picnic or enjoying them cozy on your couch after dinner, these Lemon Cheesecake Bars are sure to become an instant favorite. Don’t forget: share some love with those around you by offering bites of these luscious creations—they deserve it just as much as you do! Happy baking!
Storage and Enjoyment Tips for Your Lemon Cheesecake Bars
Now that your delightful Lemon Cheesecake Bars have come together in a symphony of flavors, it’s time to bask in the joy of sharing or savoring them yourself. Trust me when I say that these bars are not just a dessert; they are an experience waiting to happen! You may find yourself daydreaming about that creamy texture and zesty lemon flavor long after they’ve left the oven. But before you dive in, let’s talk about how to keep this treat fresh and ready for your next indulgence.
Storing Leftover Lemon Cheesecake Bars
To ensure your Lemon Cheesecake Bars remain a delightful treat for days to come, storing them correctly is absolutely paramount! First, let them cool completely at room temperature before transferring them to the fridge. For the best results, place them in an airtight container—this helps lock in their creamy goodness while keeping unwanted odors at bay. If you don’t have one handy, a well-wrapped piece of plastic wrap can also do the trick. These bars will stay fresh for up to five days in the refrigerator. Now, here’s a pro tip: if you’re worried about their texture turning too soft, try placing a slice of bread inside the container; it absorbs excess moisture without compromising flavor. After storage, you’ll find that their flavors deepen and meld beautifully, creating an even more satisfying bite. When you’re ready to serve them again, simply cut into squares and enjoy them chilled straight from the fridge or let them sit out for a few minutes to reach room temperature—either way is utterly divine!
Freezing Lemon Cheesecake Bars for Later
If you want to save some of these luscious bars for another day (trust me, they are worth it!), freezing is an excellent option! To freeze properly, first cut the bars into individual servings and wrap each piece tightly in plastic wrap—this prevents freezer burn and keeps those flavors intact. Then place all the wrapped bars in a sturdy freezer-safe bag or container. They can be stored in the freezer for up to three months without losing their delightful essence. When you’re ready to indulge again, simply transfer a bar from the freezer to the refrigerator overnight or leave it on the counter for about 30 minutes until it’s thawed but still chilled. The convenience of having these decadent treats at your fingertips makes your future self so grateful—imagine pulling one out on a sunny afternoon or during unexpected guests; it’ll be like sharing a little piece of sunshine!
Lemon Cheesecake Bars
- Total Time: 50 minutes
- Yield: Approximately 9 servings 1x
Description
Lemon Cheesecake Bars are a delightful dessert that perfectly balances creamy richness with a zesty lemon kick. These bars feature a buttery graham cracker crust topped with a luscious filling made from lightened cream cheese and Greek yogurt, making them both indulgent and refreshing. The bright flavor of fresh lemon juice and zest adds an uplifting touch, transforming these cheesecake squares into a sweet escape that feels like sunshine on your palate. Easy to make and perfect for any occasion, these Lemon Cheesecake Bars are sure to impress friends and family at gatherings or provide a special treat for yourself after dinner.
Ingredients
- 6 whole graham crackers
- 2 tablespoons unsalted butter (melted)
- 6 ounces 1/3 less fat cream cheese (softened)
- 6 ounces plain non-fat Greek yogurt
- 1/3 cup granulated sugar
- 1 egg + 1 egg white
- Pinch of salt
- 1 heaping tablespoon lemon zest
- 1/4 cup fresh lemon juice
- 1 1/2 teaspoons vanilla extract
- 2 tablespoons all-purpose flour
Instructions
- Preheat oven to 350°F (175°C). Prepare an 8×8 baking pan by lining it with parchment paper.
- Crush graham crackers in a food processor until fine. Mix with melted butter until combined. Press into the bottom of the prepared pan and bake for about 7 minutes until golden brown.
- Lower oven temperature to 300°F (150°C). In a mixing bowl, beat softened cream cheese until fluffy. Add Greek yogurt, sugar, salt, egg, egg white, lemon zest, lemon juice, vanilla extract, and flour; mix until smooth.
- Pour filling over the baked crust and bake for 25 to 30 minutes until set around edges but slightly jiggly in the center.
- Allow to cool completely at room temperature, then refrigerate for at least three hours before slicing.
- Prep Time: 15 minutes
- Cook Time: 35 minutes
- Category: Dessert
- Method: Baking
- Cuisine: American
Nutrition
- Serving Size: 1 bar (approx. 60g)
- Calories: 152
- Sugar: 9g
- Sodium: 112mg
- Fat: 7g
- Saturated Fat: 4g
- Unsaturated Fat: 2g
- Trans Fat: 0g
- Carbohydrates: 18g
- Fiber: <1g
- Protein: 4g
- Cholesterol: 25mg
Leave a Comment