There’s something truly magical about cooking that transcends the mere act of preparing food—it’s a heartfelt expression of love, creativity, and tradition. When I think of Miso-Butter Chicken, I don’t just see a recipe; I see an experience that brings people together around the dinner table, filling the air with rich aromas that promise warmth and comfort. Imagine succulent chicken thighs, their skin crisped to perfection, coated in a luscious miso-butter glaze that’s both sweet and savory—a symphony of flavors that dances on your palate. It’s not just a meal; it’s a revelation! This is why I’m so excited to share my beloved Miso-Butter Chicken: Easy Dinner That Will Wow Your Tastebuds with you.
Why does this dish hold such a special place in my heart? For starters, it beautifully marries the umami richness of white miso with the creamy decadence of butter, creating an utterly intoxicating sauce that clings lovingly to the chicken. But it goes beyond flavor; it’s about connection. Whether you’re cooking for family or hosting friends, this dish opens the door to laughter and shared stories over a steaming plate. It’s incredibly versatile too—perfect for a cozy weeknight meal or as the star attraction at your next gathering. Trust me when I say that once you try this Miso-Butter Chicken, you’ll find yourself craving its comforting embrace time and time again.
Miso-Butter Chicken: Easy Dinner That Will Wow Your Tastebuds
Welcome to one of the most delightful culinary journeys you’ll embark upon! This recipe is not just about cooking; it’s about creating something extraordinary that will leave everyone at your table raving about their meal. The beauty of Miso-Butter Chicken lies in its simplicity paired with depth of flavor—a perfect combination for any night of the week.
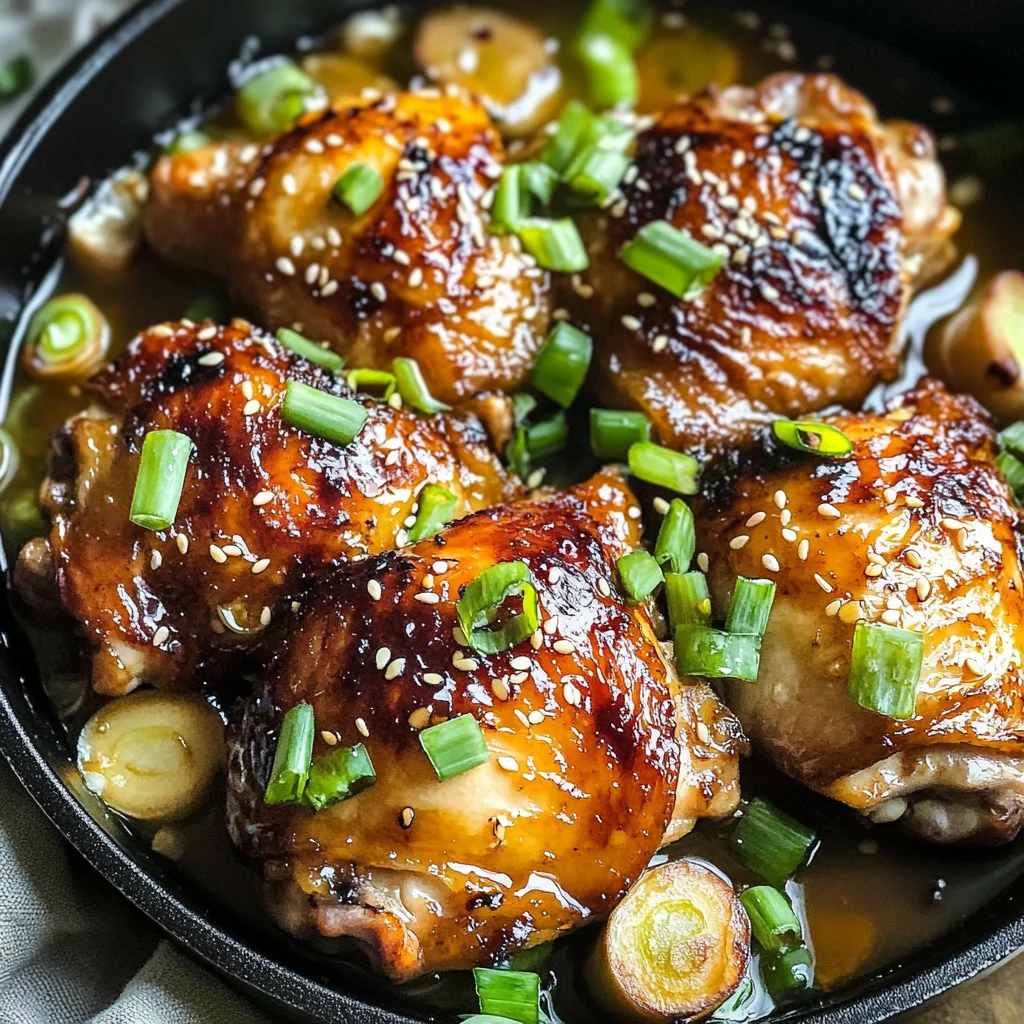
Ingredients:
As we begin this culinary adventure together, let’s gather our ingredients! Each component plays a unique role in crafting our unforgettable Miso-Butter Chicken.
- 8 pieces skin-on, bone-in chicken thighs. These beauties are where all the magic begins! The skin-on feature ensures that as they roast, they’ll develop a crispy exterior while retaining moisture within thanks to their bone-in structure. Don’t shy away from using boneless thighs if you’re in a hurry—they cook faster and still deliver on flavor! Just remember, bone-in thighs give you richer taste and juiciness.
- 4 tablespoons unsalted butter. Ah, butter—the golden elixir of life! It adds richness and depth to our sauce while helping to create that luxurious texture we crave in comfort food. If you’re looking for a lighter touch, olive oil can be an excellent substitute without compromising on flavor too much. Always choose high-quality butter; it truly makes a difference in taste.
- 1/2 cup white miso. This ingredient is absolutely paramount! White miso offers a mild sweetness combined with umami depth that’s simply irreplaceable in this dish. Its creamy texture melds beautifully with our other ingredients, creating that glossy glaze you’ll want to lick off your plate (trust me!). If you can’t find white miso, yellow miso could work too but will have a stronger flavor.
- 3 tablespoons maple syrup. Here’s where we bring in some natural sweetness! Maple syrup not only enhances the overall flavor profile but also balances out the salty notes from the miso wonderfully. If maple syrup isn’t on hand, honey is a fantastic alternative—I promise you won’t be disappointed!
- 1 inch piece ginger (grated). Fresh ginger adds an invigorating zest that brightens up our dish! The warming spice plays harmoniously against the creamy miso and buttery elements. In case you’re out of fresh ginger or need something quick, ground ginger works fine too—though fresh always reigns supreme!
- 8 cloves garlic (unpeeled, lightly smashed). Garlic is life! Using unpeeled garlic cloves is my little secret—it infuses incredible flavor into our dish without becoming overpowering or burnt during cooking. If you’re short on time or prefer convenience, peeled garlic will save you some effort without sacrificing taste.
- 1 tablespoon rice vinegar. This tangy element brings balance to our rich sauce—it’s what lifts everything up and gives it brightness! Apple cider vinegar can step in if rice vinegar isn’t available; it has similar characteristics and will work just as well.
- black pepper (to taste). Freshly cracked black pepper adds an aromatic kick that’s essential for layering flavors throughout our dish—don’t skimp on this! Adjust according to your preferences; I often remind myself that seasoning is key!
- 2 pieces scallions (finely sliced). Bright green scallions add both crunch and freshness as garnish! They’re not just pretty; they contribute herbal notes that cut through the richness beautifully. Chives can replace them if that’s what you’ve got on hand!
- 2 teaspoons toasted sesame seeds. These little gems provide an extra layer of texture and nutty flavor at finishing touches—though feel free to skip them if seeds aren’t your thing!
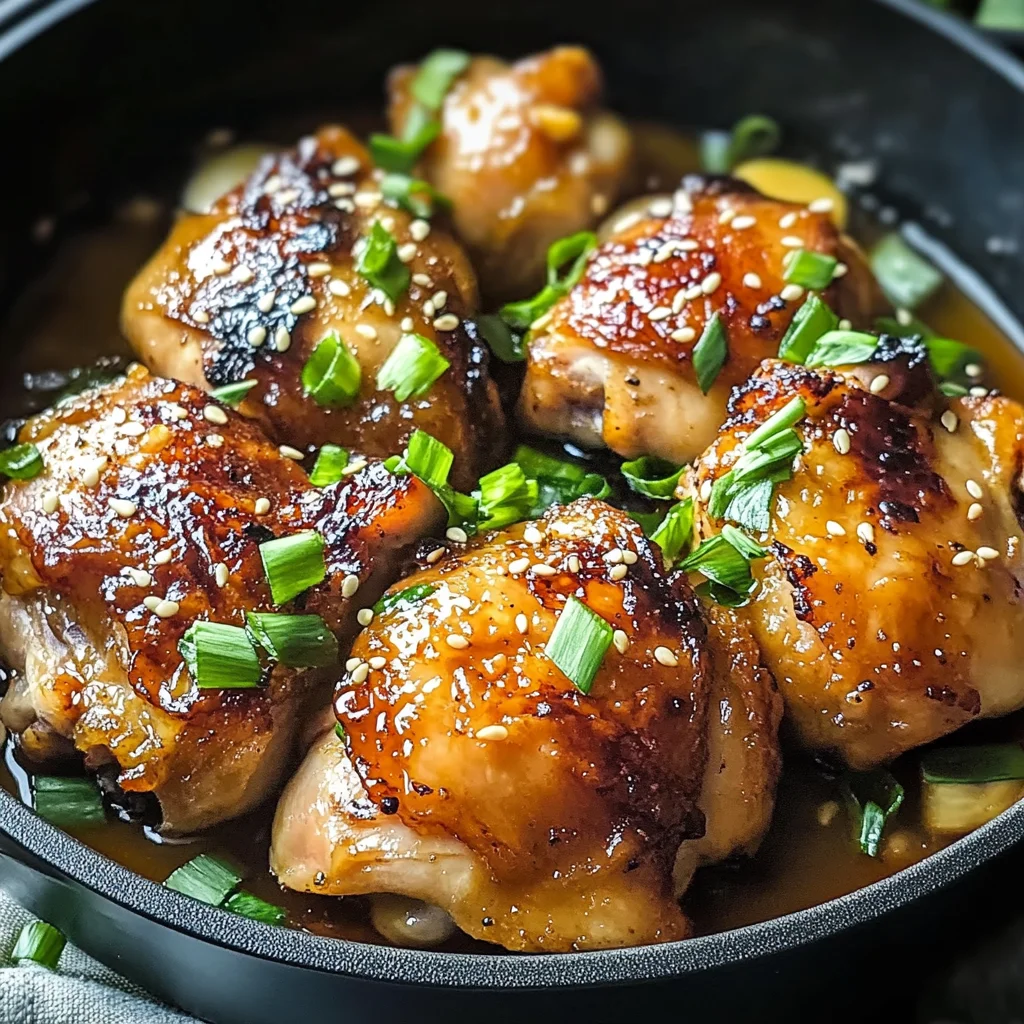
Equipment You’ll Need:
Having the right tools at your fingertips makes all the difference when crafting your culinary masterpiece—and trust me, each piece of equipment we’ll use serves its purpose beautifully!
- Large oven-safe skillet or cast iron pan – A sturdy skillet is essential for achieving that even browning while roasting our chicken thighs perfectly! Cast iron pans are particularly great because they retain heat exceptionally well and help create those delicious crusts we all love.
- Cooking spoon or spatula – A solid wooden spoon or silicone spatula will help us mix those ingredients seamlessly without scratching up our beautiful skillet’s surface! It’s also quite handy when basting the chicken with its glorious sauce.
- Grater/zester – For grating fresh ginger—this tool will make light work out of what could be tedious preparation otherwise!
- Measuring spoons – Accurate measurements are crucial for balancing flavors perfectly—in cooking as in life!
Now that we’ve gathered everything we need let’s dive into preparing this incredible Miso-Butter Chicken: Easy Dinner That Will Wow Your Tastebuds!
Step 1: Preparing Our Flavorful Marinade
First things first—we need to whip up our marinade which will transform these humble chicken thighs into something extraordinary! In a mixing bowl large enough to comfortably hold your ingredients, combine unsalted butter (softened), white miso paste, maple syrup, grated ginger, rice vinegar, and black pepper to taste—all those beautiful flavors mingling together like old friends at a reunion! Mix everything until smooth and creamy—this step is crucial because it ensures every bite bursts with flavor later on!
Step 2: Marinating Our Chicken
Next comes one of my favorite parts—coating those lovely chicken thighs in our luscious marinade! Place your chicken into a large zip-top bag or bowl and pour half of your marinade over them generously (saving the other half for later). Massage gently but thoroughly so every piece gets nestled into those flavorful folds—it’s like giving them a warm hug before they head into their flavorful journey ahead! Let them marinate for at least 30 minutes if possible—the longer it sits (up to overnight), the deeper those flavors penetrate.
Step 3: Searing for Perfection
Preheat your oven while letting those thighs marinate away; aim for around 400°F (200°C). Now grab your trusty skillet and place it over medium-high heat—this step is non-negotiable since searing helps lock in juices while forming that delightful crust we all crave! Once hot enough (test by flicking water droplets onto its surface), carefully lay down each thigh skin-side down onto the skillet—you should hear an immediate sizzle—that’s music to any home cook’s ears! Don’t rush this step; let them sear undisturbed for 5–7 minutes until deep golden brown before flipping them over gently—it’s all about building layers here!
Step 4: Roasting Until Tender
Once both sides are beautifully browned (and trust me they will be!), pour remaining marinade over top ensuring every inch gets coated evenly before transferring directly into preheated oven for approximately 25–30 minutes until cooked through—you’ll know they’re done when juices run clear upon piercing or internal temperature reaches 165°F (75°C). As they roast away sending irresistible scents wafting through your kitchen—you might find yourself dancing along with anticipation!
Stay tuned as we continue exploring more steps together—a delicious feast awaits us!
Step 5: Searing the Chicken for That Irresistible Crust
Now, let’s get to one of the most exciting parts of this recipe: searing the chicken! This step is absolutely paramount because it creates that deeply flavorful, golden crust that will have your taste buds dancing in delight. Start by preheating your oven to 400°F (200°C). While that’s warming up, grab a large oven-safe skillet—cast iron is my favorite because it retains heat beautifully and gives you a fantastic sear. Add the four tablespoons of unsalted butter to the skillet over medium-high heat; watch as it melts into a lovely, bubbly pool of liquid gold. The aroma of melting butter is intoxicating, isn’t it?
Once the butter has melted and is beginning to froth, it’s time to add the chicken thighs skin-side down. This sizzle you hear? That’s music to your ears! Searing should take about 5-7 minutes; resist the urge to move them around too much. You want to let them develop that beautiful crust, which not only adds flavor but also helps keep the juices inside—trust me on this! After about 7 minutes or when they’re golden brown and crispy, carefully flip them over using tongs. This initial searing step locks in moisture and flavor while giving you that irresistible texture contrast when you finally bite into it.
Step 6: Crafting Your Flavorful Miso-Butter Sauce
With your chicken sizzling beautifully in the skillet, it’s time to create that utterly intoxicating miso-butter sauce that will coat our chicken with an explosion of flavors. In a mixing bowl, combine half a cup of white miso paste, three tablespoons of maple syrup, freshly grated ginger, and one tablespoon of rice vinegar. The miso brings a savory umami depth that pairs perfectly with the sweetness of maple syrup; together they harmonize like a well-rehearsed choir! Stir these ingredients until they form a smooth paste—don’t worry if it feels thick at first; it will loosen up as it heats.
Once you’ve got this luscious mixture ready, pour it over the seared chicken thighs in your skillet. This is where magic happens! As the dish bakes in the oven, those flavors meld together beautifully. The heat transforms the miso from its raw state into something profoundly satisfying and caramelized. Make sure every piece of chicken is well-coated; this ensures every bite will be bursting with flavor. Remember to season with fresh cracked black pepper to taste; a little seasoning goes a long way in enhancing those beautiful flavors.
Step 7: Baking to Perfection
Now comes the moment we’ve all been waiting for—baking our masterpiece! Carefully transfer your skillet into the preheated oven and let those thighs bask in all their glory for about 25-30 minutes. During this time, I want you to embrace patience as one of your best friends in cooking. It’s so tempting to peek inside early, but trust me; keep that oven door closed! You’ll know they’re ready when the internal temperature reaches 165°F (75°C), which you can check using an instant-read thermometer—this is non-negotiable for food safety and ensuring perfectly cooked chicken.
As they bake away, your kitchen will fill with an aromatic perfume—a blend of savory miso mingling with buttery goodness—it’s simply heavenly! Take this time to prepare any sides you might want to serve alongside your Miso-Butter Chicken. Think fluffy jasmine rice or steamed green veggies drizzled with sesame oil; each bite should complement the incredible flavors we’ve created here.
Step 8: Finishing Touches for Presentation
When your timer goes off after those delightful 25-30 minutes, carefully remove the skillet from the oven—it’ll be hot enough to make your fingers tingle if you’re not careful! At this point, let’s talk about resting our beautiful creation for about five minutes before serving. You might be tempted to dig right in (I totally get it!), but resting allows those juices inside each thigh to redistribute throughout—the result? Extra juicy bites that are just bursting with flavor!
While it’s resting, I recommend sprinkling finely sliced scallions and toasted sesame seeds on top for that final flourish! Not only does this add vibrant color and texture but also an additional layer of flavor that elevates your dish from great to truly extraordinary. The fresh crunch from scallions juxtaposed against the creamy richness of miso-butter is nothing short of a symphony of flavors dancing on your palate.
Final Thoughts on Your Miso-Butter Chicken: Easy Dinner That Will Wow Your Tastebuds
And there you have it! Your Miso-Butter Chicken is ready to impress everyone at your dinner table—or even just yourself on a quiet weeknight when you deserve something special. Each bite offers an incredible balance between sweet and savory notes while being rich yet light enough not to weigh you down after dinner.
As I always say when sharing recipes like this one: cooking isn’t just about feeding ourselves; it’s about creating memories around food shared with loved ones or simply enjoying a moment alone with something delicious you’ve crafted yourself. I promise you’ll find joy in every single bite—and who knows? This might just become a regular feature on your dinner rotation!
So go ahead—dive into this culinary adventure and savor every moment as much as you will savor every bite! Happy cooking!
Storage and Enjoyment Tips for Your Miso-Butter Chicken: Easy Dinner That Will Wow Your Tastebuds
Now that you’ve created this mouthwatering masterpiece, it’s time to dig in and savor every bite of your Miso-Butter Chicken! The aroma wafting from the pan is simply intoxicating, and as you take that first forkful, you’ll understand why I’m so excited to share this recipe with you. But what if there are leftovers? Fear not! This dish is just as delightful the next day, allowing you to relive that joyful experience all over again.
Storing Leftover Miso-Butter Chicken: Easy Dinner That Will Wow Your Tastebuds
To keep your Miso-Butter Chicken fresh and delicious, store it in an airtight container; glass containers are a fantastic option because they won’t absorb any odors and maintain the chicken’s moisture beautifully. If stored correctly in the refrigerator, your leftovers will last about 3 to 4 days, though I promise you they won’t last that long once they tempt your family’s taste buds! To maintain quality, consider placing a slice of bread inside the container; this little trick absorbs moisture and helps prevent the chicken from drying out. When reheating, I recommend gently warming it on the stovetop over low heat or in the microwave at a medium setting to ensure it remains juicy and flavorful. Trust me—there’s nothing quite like revisiting this profoundly satisfying dish on a busy weeknight!
Freezing Miso-Butter Chicken for Later
If you find yourself with more than you can eat, why not freeze some of that heavenly Miso-Butter Chicken for later? Simply let the chicken cool completely before transferring it to a freezer-safe container or heavy-duty freezer bag—this helps prevent freezer burn. It will keep well frozen for up to three months, ensuring that whenever you’re ready for a quick meal, you’ll have this symphony of flavors waiting for you. The convenience of pulling out a pre-prepared dinner after a long day is truly extraordinary! When you’re ready to enjoy it again, just thaw it overnight in the refrigerator before reheating as mentioned above. You’ll be thrilled to have such an easy dinner option at your fingertips!
Miso-Butter Chicken: Easy Dinner That Will Wow Your Tastebuds
- Total Time: 1 hour
- Yield: Serves 4
Description
Miso-Butter Chicken is a delightful culinary experience that combines the rich umami flavors of white miso with the creamy decadence of butter, creating an irresistible sauce for succulent chicken thighs. This recipe transforms a simple weeknight dinner into a memorable occasion, filling your home with enticing aromas that invite warmth and togetherness. The crispy skin and tender meat are perfectly complemented by a sweet and savory glaze, making it not just a meal but a celebration of flavor that will have everyone at your table asking for seconds. Easy to prepare and versatile enough for any gathering, this dish is guaranteed to wow your taste buds!
Ingredients
- 8 skin-on, bone-in chicken thighs
- 4 tablespoons unsalted butter (or olive oil)
- 1/2 cup white miso paste
- 3 tablespoons maple syrup
- 1 inch piece of grated ginger
- 8 cloves of garlic (unpeeled, lightly smashed)
- 1 tablespoon rice vinegar
- Black pepper (to taste)
- 2 scallions (finely sliced)
- 2 teaspoons toasted sesame seeds
Instructions
- Preheat the oven to 400°F (200°C).
- In a mixing bowl, combine softened butter, white miso paste, maple syrup, grated ginger, rice vinegar, and black pepper until smooth.
- Coat chicken thighs in half the marinade and let them marinate for at least 30 minutes.
- In a large oven-safe skillet over medium-high heat, melt the butter and sear chicken thighs skin-side down for 5–7 minutes until golden brown.
- Flip the chicken, pour remaining marinade over it, and transfer the skillet to the oven.
- Bake for 25–30 minutes or until internal temperature reaches 165°F (75°C). Let rest for 5 minutes before serving.
- Garnish with scallions and sesame seeds.
- Prep Time: 30 minutes
- Cook Time: 30 minutes
- Category: Dinner
- Method: Baking
- Cuisine: Asian
Nutrition
- Serving Size: 1 thigh (150g)
- Calories: 385
- Sugar: 5g
- Sodium: 610mg
- Fat: 22g
- Saturated Fat: 10g
- Unsaturated Fat: 10g
- Trans Fat: 0g
- Carbohydrates: 12g
- Fiber: 0g
- Protein: 32g
- Cholesterol: 145mg



Leave a Comment