There’s something undeniably magical about desserts that evoke a sense of celebration and joy. As we gather around the table, sharing laughter and stories, these moments become woven into our memories. Enter the Patriotic Oreo Balls—a delightful treat that does more than just satisfy your sweet tooth; it brings a burst of color, flavor, and nostalgia to any gathering. Imagine biting into a rich, creamy ball of chocolatey bliss enveloped in vibrant red and blue candy melts, with a sprinkle of white stars dancing atop. This dessert isn’t simply about the taste; it’s an experience that bridges the gap between tradition and creativity. When I make these for my friends or family, it feels like sharing a piece of my heart—and I promise you, they’ll leave you wanting more.
Every bite of these Patriotic Oreo Balls is a celebration in itself—a perfect blend of crunchy cookie crumbs and velvety cream cheese that results in an utterly intoxicating flavor profile. It doesn’t hurt that they look stunning too! Whether you’re celebrating the Fourth of July, Memorial Day, or any occasion where you want to showcase your patriotic spirit, these little delights are sure to be a hit. The balance of sweetness with the creamy filling will have everyone coming back for seconds (and thirds!). So let’s roll up our sleeves and dive into this fun culinary adventure together!
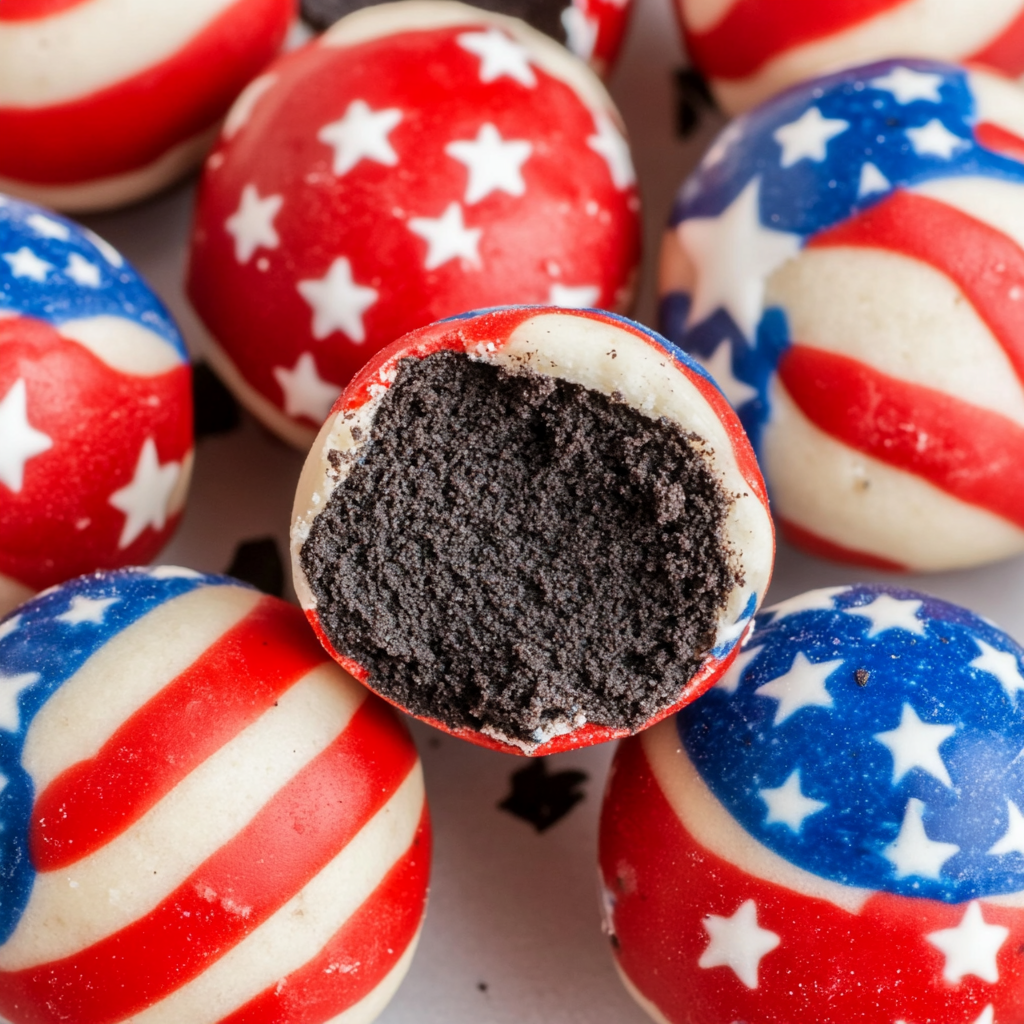 Ingredients:
As we embark on this culinary journey to create our Patriotic Oreo Balls, let’s take a moment to appreciate each ingredient we’ll be using. Each one plays a crucial role in crafting this delicious dessert.
- 1 lb 2.12 oz Family Size package Oreo Cookies. These iconic cookies are at the heart of our recipe, providing that signature chocolatey crunch and rich flavor. The beauty of using Oreos is their versatility; they not only serve as the main structure but also bring an indulgent sweetness that pairs beautifully with the cream cheese. When selecting your Oreos, ensure you’re choosing fresh ones—this will greatly enhance the final texture of your balls. If you’re feeling adventurous or wish to avoid traditional flavors, there are delightful variations available like mint or peanut butter Oreos that can add an unexpected twist!
- 8 ounce block cream cheese (softened to room temperature). This ingredient is absolutely pivotal in making our Oreo balls smooth and creamy. Softening the cream cheese to room temperature is non-negotiable because if it’s too cold, it won’t blend seamlessly with the cookie crumbs—it would be clumpy rather than creamy! I always recommend opting for full-fat cream cheese as it provides richness and depth to the flavor profile while helping bind everything together beautifully.
- 12 ounce bag red candy melts. Ah, candy melts—the magic wand of the dessert world! These vibrant melts transform our Oreo balls into stunning little treats fit for any celebration. They add both color and sweetness with a satisfying snap when bitten into. Be sure to melt them slowly over low heat (I’ll share more on this later), which ensures they stay smooth without burning or seizing up—a crucial step if you want them to coat your balls perfectly!
- 12 ounce bag blue candy melts. Just like their red counterparts, blue candy melts provide not only color but also a delightful sweetness that makes these treats truly pop visually! Combining both colors creates such an eye-catching presentation that’s perfect for patriotic holidays or gatherings where you want to impress your guests. Remember: patience is key when melting candy melts; rushing can lead to undesirable textures!
- ⅓ cup Ghirardelli white melting wafers. These little gems are here for drizzling! White melting wafers provide an elegant contrast against the bold colors of red and blue while adding an extra layer of sweetness that’s just divine. Ghirardelli is my go-to brand because they melt beautifully and maintain their smoothness without becoming grainy—a must for those gorgeous drizzles that complete our masterpiece.
- White star confetti sprinkles for topping. Finally, what’s a patriotic dessert without some festive sprinkles? These adorable white star confetti sprinkles add not only whimsy but also celebrate the theme perfectly! They catch the light just right and give each ball a touch of charm that elevates it from ordinary to extraordinary.
Equipment You’ll Need:
Now that we’ve gathered all our ingredients together, let’s talk about the equipment you’ll need for this sweet endeavor! Having the right tools makes all the difference in creating something wonderful—and trust me; you’ll want everything at your fingertips as we craft these treats together.
- Food processor or high-speed blender – This trusty tool will turn your Oreos into fine crumbs quicker than you can say delicious! A food processor does this job effortlessly while ensuring even textures—crucial for achieving that smooth filling we desire in our Oreo balls. If you don’t have either on hand, no worries! You can place your Oreos in a sturdy zip-top bag and crush them with a rolling pin; just know it might take a bit longer!
- Large mixing bowl – A big bowl allows us ample space for mixing without risking spills or messes—trust me; we want clean counters! Using a large bowl also helps contain all those beautiful Oreo crumbs and cream cheese as we combine them into one glorious mixture.
- Hand mixer – This gadget will help beat our softened cream cheese until it’s perfectly smooth and fluffy—a step that’s essential for creating that luscious filling inside our Oreo balls. Don’t have one? You can definitely use a whisk; just prepare yourself for some serious arm workouts!
- Cookie scoop (1.5 inches) – This handy tool helps us achieve uniformly sized balls every time—important for even coating later on! It takes out all guesswork so each ball looks as delightful as it tastes.
- Parchment paper – We need this lightweight yet sturdy paper to line our baking trays before placing our rolled balls on them; it prevents sticking while making cleanup super easy afterward—a win-win!
Now that we’ve covered what you’ll need let’s roll up our sleeves and get started making these delicious Patriotic Oreo Balls!
Step 1: Prepare Your Workspace
First things first: let’s set ourselves up for success by lining two baking trays with parchment paper. This step is crucial because it prevents any sticking once we start rolling those delightful Oreo balls—no one wants their hard work stuck to the tray! Make sure you’re working on clean surfaces so you can really enjoy this process without unnecessary distractions or messes around you.
Step 2: Crumble Those Oreos
Next up is where all the magic begins! Take your family-sized package of Oreo cookies—yes, we’re going big here—and toss them into your food processor or high-speed blender. Pulse them until they transform into fine crumbs; think sand-like texture rather than chunky pieces—this consistency allows for seamless integration with our cream cheese later on! If you’re using a zip-top bag instead, be sure to crush gently but thoroughly so every bite carries that rich chocolate flavor through.
Step 3: Cream It Up
In your large mixing bowl (which should now feel like home), add in your softened cream cheese—remember how important this step is? Use your hand mixer on high speed now; beat until smooth and fluffy—it should resemble whipped clouds before we mix in those lovely cookie crumbs! This process creates air pockets within the mixture which contributes significantly towards achieving that silky-smooth mouthfeel we’re aiming for when savoring each bite later on.
Step 4: Combine & Roll
Now comes my favorite part: combining those luscious cookie crumbs with whipped cream cheese goodness! Gradually add in those fine Oreo crumbs while continuing at medium speed until well mixed—you’ll know it’s ready when no streaks remain visible! Using your trusty cookie scoop measuring 1.5 inches across (or whatever works best!), start scooping out equal portions onto your parchment-lined trays before rolling them gently between palms until they’re nice and round—the smoother they look now translates directly into how gorgeous they’ll appear after coating too.
As you progress through these steps toward creating your Patriotic Oreo Balls, remember: take joy in every moment spent crafting this treat—it’s about more than just ingredients; it’s about love poured into each sphere filled with happiness waiting patiently beneath colorful coatings adorned by stars calling out for celebration—and trust me when I say: once you’ve tasted one…you won’t be able resist another!
Stay tuned as we dive deeper into melting those vibrant candy coatings next—we’re almost there!
Crafting Your Dreamy Patriotic Oreo Balls
Step 5: Perfectly Shaped Bliss
Now comes the fun part—scooping and rolling those delicious Oreo balls! Using a 1.5-inch cookie scoop, begin to portion out the mixture. Trust me when I say that this step is not just about making them look pretty; it’s crucial for achieving uniformity, which ensures even coating and perfect bites every time. Picture this: you scoop up the rich, dark mixture that smells like a decadent chocolate dream and then roll it in your hands until it’s smooth and inviting. This gentle rolling process helps to create a nice exterior that will hold up beautifully when we dip them later.
As you place each rolled ball on the prepared baking trays, make sure to leave some space between them; they need a little room to breathe. I always find it helpful to take my time here—rushing can lead to uneven sizes or messy shapes, which will affect both presentation and texture. Once you’ve filled your trays with these delightful spheres of goodness, it’s time for the most vital step: chilling! This is an absolute game-changer because it allows the mixture to firm up, making dipping so much easier later on. If you’re feeling impatient (and who wouldn’t be?), you can pop them in the freezer for about 15-20 minutes instead of waiting for two hours in the fridge.
Step 6: Chill Out for Best Results
Ah, the magic of chilling! Why is this step so essential? Well, when those little balls sit in the cold, they firm up beautifully, which means they won’t fall apart when we start dipping them in those vibrant candy melts. Think of it as a mini spa day for your treats! As they chill, the flavors meld together more profoundly, creating a symphony of tastes that will dance on your palate.
Once your two-hour timer dings (or you’ve given them a quick freeze), remove one tray from the refrigerator. You should see that they are now solid enough to handle without any fear of crumbling—this is precisely what we’re aiming for! Don’t rush through this; trust me on this one: giving them adequate chill time is non-negotiable if you want that perfect bite!
Step 7: Melting Magic Begins
Now let’s dive into melting our candy melts — this is where things start to get exciting! Using a double boiler over low heat (or a microwave-safe bowl if you prefer), melt your blue candy melts until they’re completely smooth and velvety. This technique ensures gentle heating; it’s crucial because high temperatures can seize or scorch your candy melts—resulting in a clumpy mess instead of the silky coating we desire. Stirring every 30 seconds not only helps with even melting but also gives you that delightful aroma wafting through your kitchen.
Pay close attention here; once melted, you want that beautiful liquid gold consistency that flows effortlessly off your fork when dipping those Oreo balls. If it feels too thick or chunky at any point, don’t hesitate to add just a tiny splash of vegetable oil or coconut oil; this will help loosen it up without compromising flavor or appearance. Having this smooth coating is paramount—it should feel like you’re drizzling joy itself onto each ball!
Step 8: Dipping Delight
With your blue candy melts perfectly melted and ready for action, it’s time for one of my favorite parts: dipping! Grab one chilled Oreo ball with a fork and gently lower it into the blue goodness. As soon as it’s coated, lift the fork out and give it a gentle tap against the side of the bowl to allow any excess coating to drip away—this helps avoid those pesky puddles around your treat that could ruin its festive look.
As each ball finds its way back onto the parchment-lined tray, sprinkle it immediately with white star confetti sprinkles while the coating is still wet—this ensures they’ll stick beautifully! There’s something utterly intoxicating about seeing those bright colors come together; they evoke memories of fireworks and celebration right before our eyes. After you’ve dipped all your blue-coated delights, return them to the refrigerator to set—about 20 minutes should do nicely!
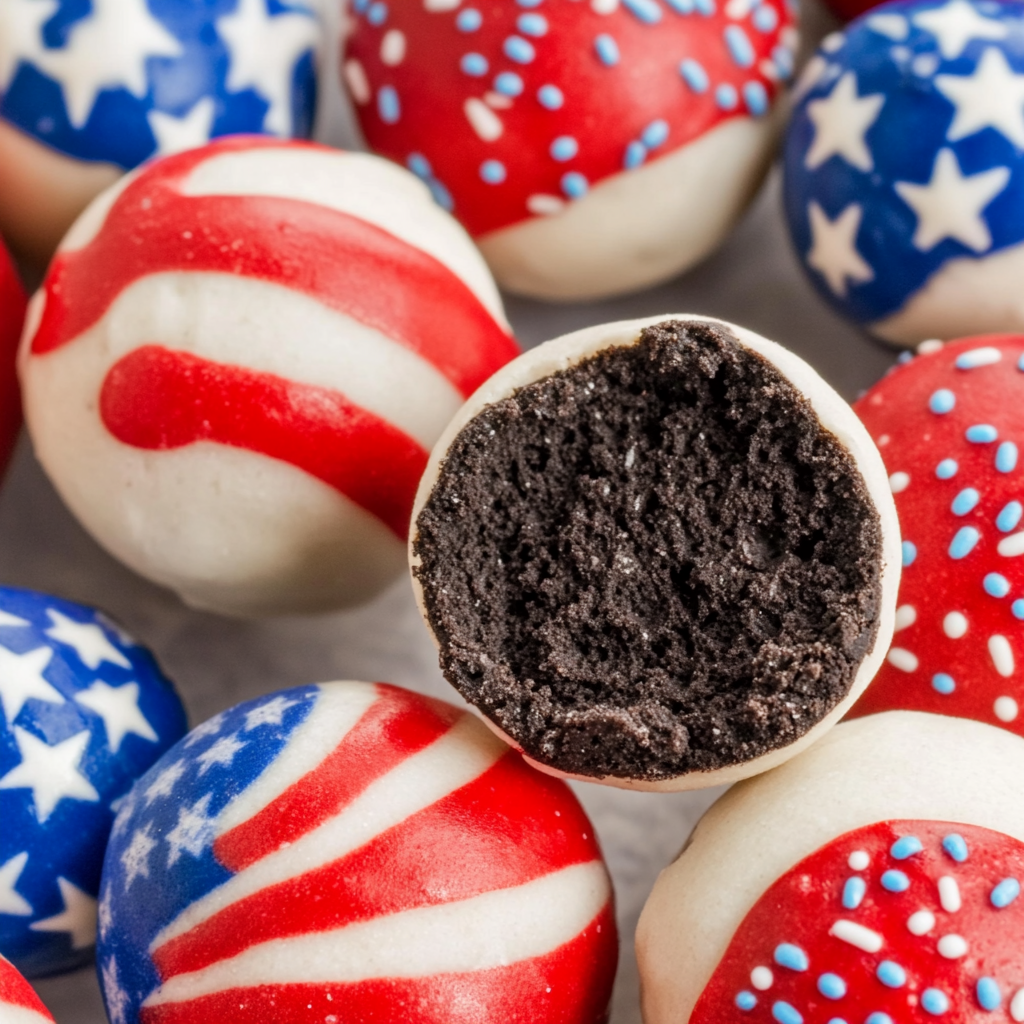 Conclusion:
As we wrap up this delicious journey together through making Patriotic Oreo Balls, I can’t help but feel a surge of excitement at what we’ve created! These treats are not just desserts; they’re tiny celebrations encapsulated in vibrant red, white, and blue that bring people together around any table. Each bite delivers a symphony of flavor—the rich creaminess of cream cheese mingling with crunchy cookie bits creates a texture that is truly extraordinary. And then there’s that gorgeous candy coating that adds sweetness and color; every element works harmoniously together to craft something profoundly satisfying.
This recipe truly deserves a spotlight because it’s so much more than just taste—it’s about joy and creativity in the kitchen. It’s incredibly accessible whether you’re an experienced baker or someone who may be trying their hand at dessert-making for the first time. Imagine gathering friends or family around as you whip up these delightful bites; there’s something magical about sharing food that has been made with love. Picture yourself pulling out those vividly colored balls from the fridge during your next get-together—everyone’s eyes lighting up as they catch sight of these festive beauties!
When it comes to serving suggestions, think about pairing these Patriotic Oreo Balls with a cup of rich coffee or perhaps some creamy vanilla ice cream for an indulgent treat! Or picture savoring one with a sparkling lemonade on a sunny afternoon—it’s such an uplifting combination! For an extra special touch during holiday celebrations like Independence Day or Memorial Day, why not serve them alongside fresh fruit skewers? The bright colors will echo each other beautifully while offering refreshing balance to the sweetness.
Feeling adventurous? This recipe is wonderfully adaptable—you could use different colored melts depending on your occasion or swap in various sprinkles for added flair! How about infusing some flavor by mixing in crushed peppermint candies during Christmas? Or maybe adding orange zest for Halloween-themed treats? The possibilities are endless and so exciting! So gather your ingredients, unleash your creativity, and dive into this delicious venture—I’d love to hear all about your experiences along the way!
Patriotic Oreo Balls
- Total Time: 0 hours
- Yield: Approximately 30 servings 1x
Description
Delight in these festive Patriotic Oreo Balls! Easy-to-make treats perfect for celebrations—join us in crafting these delicious bites today!
Ingredients
- 1 lb 2.12 oz Family Size package Oreo Cookies
- 8 oz block cream cheese (softened)
- 12 oz bag red candy melts
- 12 oz bag blue candy melts
- ⅓ cup Ghirardelli white melting wafers
- White star confetti sprinkles
Instructions
- Line two baking trays with parchment paper.
- Crush Oreo cookies in a food processor until finely crumbed.
- In a large mixing bowl, beat softened cream cheese until smooth.
- Gradually mix in the crushed Oreos until well combined.
- Scoop mixture into uniform balls (about 1.5 inches) and place on a lined tray.
- Chill in the refrigerator for at least 2 hours or freeze for 15-20 minutes.
- Melt blue candy melts using a double boiler or microwave; dip each chilled ball and return to the tray.
- Immediately sprinkle with white star confetti before the coating sets.
- Repeat with red candy melts for another batch of balls; drizzle with melted white wafers for decoration.
- Allow to set in the fridge for about 20 minutes before serving.
- Prep Time: 30 minutes
- Cook Time: None
- Category: Dessert
- Method: No-Bake
- Cuisine: American
Nutrition
- Serving Size: 1 ball (30g)
- Calories: 130
- Sugar: 13g
- Sodium: 70mg
- Fat: 7g
- Saturated Fat: 4g
- Unsaturated Fat: 3g
- Trans Fat: 0g
- Carbohydrates: 16g
- Fiber: <1g
- Protein: 1g
- Cholesterol: <5mg

Leave a Comment