There are moments in life when a dessert transcends mere sweetness to become a heartfelt experience that warms your soul. This Pistachio Tiramisu is one of those revelations—a delightful dance of flavors that takes the traditional Italian classic and infuses it with the nutty richness of pistachios. Imagine layers of creamy mascarpone blended with luscious pistachio cream, lovingly layered between delicate coffee-soaked sponge fingers. It’s not just a dessert; it’s an invitation to savor every bite, to share with friends and family, and to create memories that linger long after the last crumb has disappeared. Trust me when I say, the first bite will sweep you off your feet—it’s utterly intoxicating!
As you embark on this culinary journey, consider how food carries stories, traditions, and love from generation to generation. Tiramisu itself has a rich history, often associated with celebrations and gatherings. By incorporating the flavor of pistachio—a nut revered in many cultures—you’re adding a personal touch that makes this dessert feel even more special. Each layer represents not just ingredients but a fusion of cultures and flavors that come together beautifully. Whether you’re celebrating a special occasion or simply treating yourself after a long day, this Pistachio Tiramisu is here to elevate your spirits and remind you of the joy found in cooking and sharing delicious food.
Pistachio Tiramisu: A Nutty Twist on an Italian Classic
Let me take you through the delightful process of creating this unique Pistachio Tiramisu. It’s quick to prepare yet requires patience as it sets in the fridge—an essential step for achieving that perfect texture we all crave in tiramisu. You’ll find that each ingredient plays a significant role in crafting this symphony of flavors, making every moment spent in your kitchen all the more rewarding.
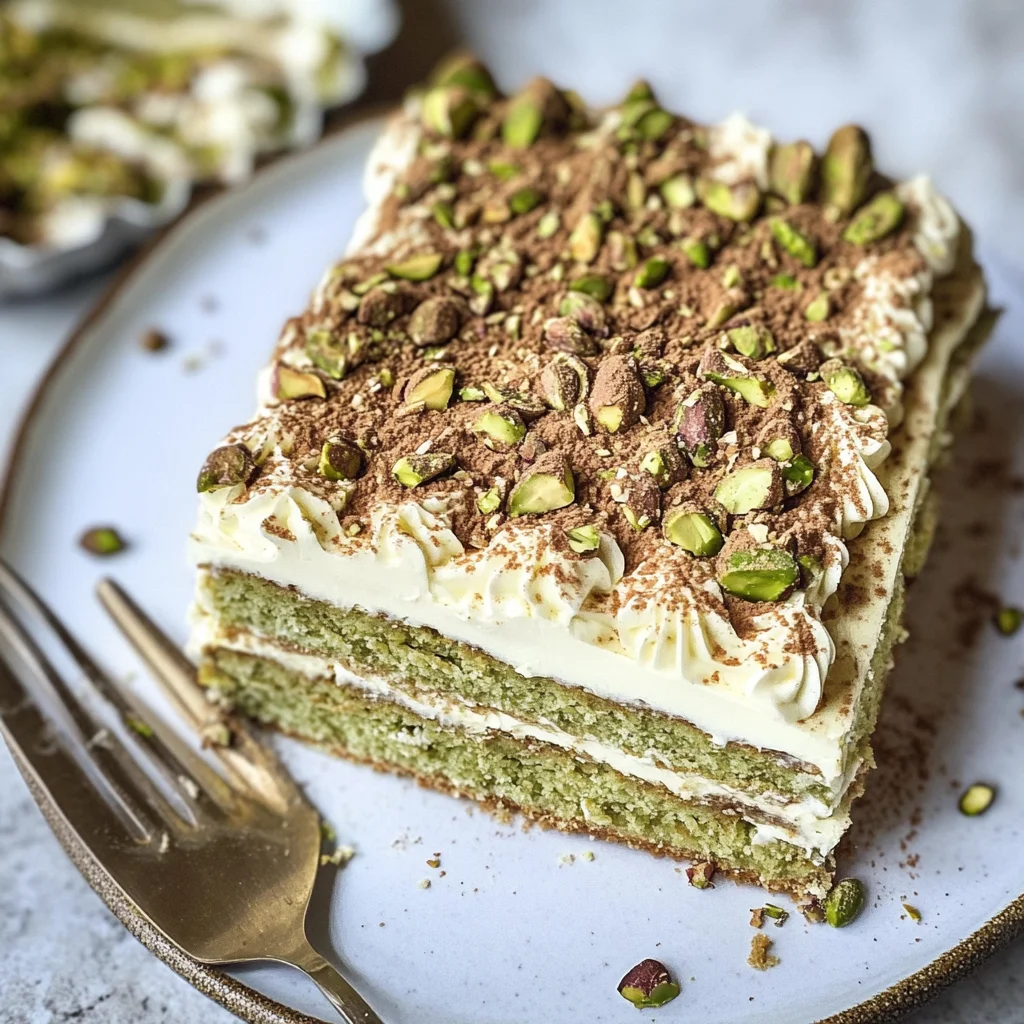
Ingredients:
Now that we’ve set the stage with our emotional backdrop, let’s dive into the ingredients that will bring this Pistachio Tiramisu to life. Each element is essential not only for flavor but also for texture and presentation.
-
100 ml strong coffee. The backbone of any tiramisu lies in its coffee component; it’s what brings depth and boldness to our dessert. Use freshly brewed coffee for the best results—something robust enough to stand up against the creaminess of the mascarpone mixture while still being smooth enough not to overpower your palate. If you’re looking for an alternative, a strong espresso can work wonders too, enriching those decadent flavors even further.
-
200 g savoiardi sponge fingers. These delightful little sponge biscuits are what create those iconic layers we adore in tiramisu! They soak up the coffee beautifully without becoming too soggy—trust me on this one! When selecting savoiardi, look for ones that are crisp yet not overly hard; they should have a light golden color indicating freshness. If you can’t find them at your local store, ladyfingers can serve as an excellent substitute.
-
300 ml double cream. This is where we add richness and decadence! The double cream whips up beautifully into soft peaks, providing a luscious texture that will carry all those wonderful flavors throughout the dish. Using high-quality cream can elevate your dessert significantly; look for one with at least 36% fat content as it whips better and holds its shape longer.
-
75 g icing sugar. This fine sugar dissolves effortlessly into our whipped cream mixture, lending sweetness without any grainy texture—a non-negotiable aspect for achieving smoothness in our tiramisu! You can adjust the amount based on your preference; remember that pistachio cream also adds sweetness.
-
250 g mascarpone. Ahh, mascarpone—the heart of any good tiramisu! Its creamy consistency is truly unparalleled; it blends seamlessly into our whipped cream mixture while contributing a subtle tanginess that balances out all other flavors beautifully. When shopping for mascarpone, opt for brands made with minimal additives; pure ingredients enhance taste tremendously.
-
100 g pistachio cream (plus extra to decorate). Here comes our star ingredient! The pistachio cream infuses our dessert with its stunning green hue and nutty flavor profile—adding an entirely new dimension to traditional tiramisu! If you’re feeling adventurous, homemade pistachio cream can be made by blending roasted unsalted pistachios until smooth; however, store-bought works perfectly well too!
-
Chopped pistachios (to decorate). Finally! The finishing touch! Chopped pistachios not only add visual appeal but also provide delightful crunchiness that contrasts beautifully against the creamy layers below. When chopping them up, aim for uneven pieces—some small bits mixed with larger chunks gives an artisanal look that’s inviting and appealing.
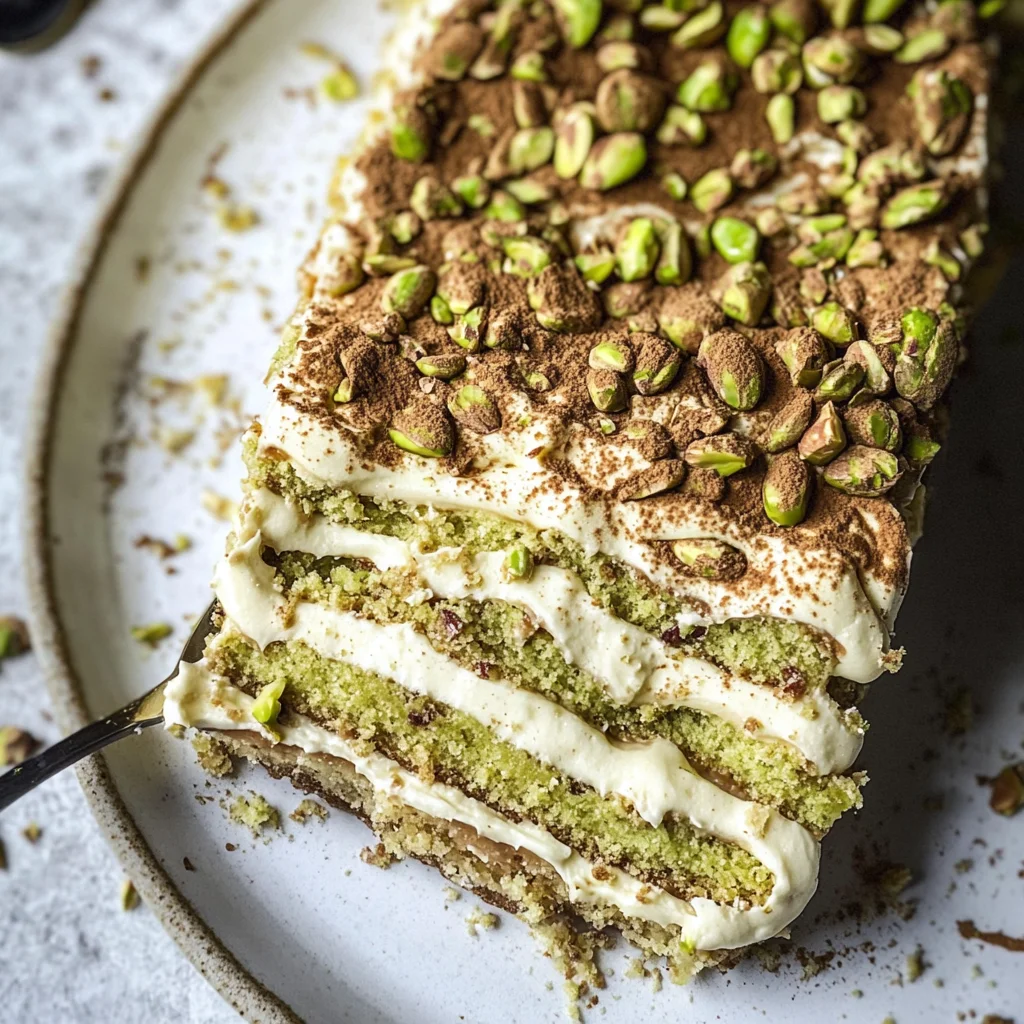
Equipment You’ll Need:
Before we dive into making this delectable dessert, let’s gather our tools together because having the right equipment is just as crucial as having quality ingredients! Each piece plays its part in ensuring success while creating something truly wonderful.
-
Large mixing bowl – This spacious vessel will be where all the magic happens as we whip our cream and blend our ingredients together seamlessly. A glass or metal bowl works best since they hold cold temperatures better when whipping dairy products—a key factor in achieving fluffy peaks!
-
Whisk or electric mixer – Whether you prefer manual labor or are looking to save time with an electric mixer (which I wholeheartedly support!), having something reliable to whip up your cream is essential here! An electric mixer can make light work of whisking heavy cream into peaks without tiring out your arm!
-
Shallow dish – This piece is where you’ll be soaking those lovely savoiardi sponge fingers in coffee before layering them into your tiramisu masterpiece. Choose one wide enough so you can dip several fingers at once; a cake pan works perfectly if you don’t have anything else handy!
-
Piping bag or sandwich bag – These bags will help us achieve that beautiful decorative touch on top of our finished dish when piping lines of pistachio cream! If you don’t have a piping bag at home, fear not—a simple sandwich bag with one corner snipped off does wonders too!
With everything set up nicely around you, it’s time to dive deep into preparing your Pistachio Tiramisu—the kind of activity that’ll fill your kitchen with warmth and anticipation as delightful aromas rise from each layer!
Step 1: Whipping Up Creamy Perfection
In a large mixing bowl—your trusted companion for this adventure—begin by combining 300 ml of double cream with 75 g of icing sugar using either a whisk or an electric mixer set on medium speed. As you whip away, watch as those luscious clouds begin forming soft peaks—this process transforms ordinary ingredients into something extraordinary! Take care not to overwhip here; we want soft peaks rather than stiff ones because they’ll blend beautifully later without losing volume or turning grainy.
Once you’ve achieved that dreamy consistency resembling billowy clouds kissed by sweetness, set aside this heavenly mixture for now because it’s time to embrace our next star player: mascarpone cheese! In another bowl (perhaps smaller than before), gently beat together 250 g of mascarpone along with 100 g of rich pistachio cream until combined thoroughly—it should resemble luxurious silk whispering secrets about how amazing things will taste!
Now comes my favorite part: folding these two mixtures together like old friends reuniting after years apart! Gently fold half of your whipped double cream into your mascarpone mixture until just combined—be careful here so as not to deflate all those beautiful air bubbles created earlier! Repeat by adding remaining whipped cream before stirring just enough until everything melds harmoniously yet remains airy—a non-negotiable step if we want layers filled with lightness rather than density!
Step 2: Soaking Those Savoiardi
Next up is perhaps one of my favorite steps—the ritualistic dipping of savoiardi sponge fingers into freshly brewed strong coffee! Pour out 100 ml carefully brewed strong coffee into a shallow dish—you want something wide enough so each finger gets fully submerged without drowning altogether (we aren’t trying out swim lessons here!). Dip each sponge finger briefly on both sides—just long enough for them to absorb some liquid gold without becoming mushy—that perfect balance will allow them to retain structure while soaking up those delicious flavors!
Arrange dipped savoiardi in an even layer across the bottom surface area of your chosen dish (a medium-sized baking dish measuring roughly 9 x 13 inches works great). Ensure every inch is covered snugly—that way every bite captures both textures harmoniously melding together later down the line!
Step 3: Layering Happiness
Now it’s time for some serious layering action! Carefully spread half of your gorgeous pistachio-cream mixture atop those soaked sponge fingers using either spatula or spoon—it should glide smoothly like butter across warm toast while keeping everything intact below it—don’t rush this step because building flavor profiles takes patience—and trust me: it’ll pay off later when indulging!
Next comes another dose of coffee-soaked savoiardi placed gently on top followed by another luxurious layer featuring more creamy goodness from earlier concoction before repeating until all components are used up—but remember: always finish off last layer being completely covered by remaining pistachio mixture—that final touch makes everything feel complete visually too!
Step 4: Creating Visual Delight
To wrap things up beautifully before placing creations inside refrigerator awaits final embellishments—we need some pizzazz atop this masterpiece begging attention through decoration using remaining pistachio paste squeezed from piping bag mentioned earlier (or handy sandwich variant!). Snip just enough off corner ensuring no large openings appear where messiness reigns supreme instead elegant lines emerge across surface area effortlessly attracting eyes towards centerpiece underneath.
Once adorned sufficiently according personal style preferences (be playful!), cover tightly then chill within refrigerator ideally overnight allowing flavors deepen—as if they’re holding hands under moonlight waiting reveal their true selves come serving time tomorrow afternoon…
As anticipation builds during chilling period ahead don’t forget important tip: unveil treasures twenty minutes prior serving allowing everyone enjoy optimal temperature sensation merging blissfully together bringing out nuances hidden beneath layers waiting patiently emerge upon tasting experience unlike any other encountered thus far…
So there we are—a delightful journey crafting Pistachio Tiramisu filled countless opportunities explore creativity whilst indulging senses throughout entire process—from flavor combinations striking chords harmony-infused notes echoing sweet nostalgia reminiscent celebrations shared amongst loved ones near far alike—all united through sheer joy baking brings forth enhancing everyday moments turning mundane tasks extraordinary adventures worth relishing forevermore… Enjoy every single moment spent both making eating alike—it truly is divine experience await discovery yours today!
The Art of Assembling Your Pistachio Tiramisu
Step 5: Layering the Magic
Now that our luscious pistachio cream is beautifully combined, it’s time to start layering and creating that stunning masterpiece known as Pistachio Tiramisu. This step is where the magic truly begins, as each layer builds upon the last to create a symphony of flavors and textures. Begin by pouring your strong coffee into a shallow dish—this is crucial because it allows for easy dipping of those delicate savoiardi sponge fingers without them becoming too soggy. You’ll want to dip each finger for just a couple of seconds on each side, allowing them to soak up the coffee’s rich aroma without disintegrating. The goal here is to achieve a perfect balance; too long in the coffee bath, and they’ll lose their structure, but too short, and you won’t get that delightful coffee flavor permeating through the layers.
Once you’ve dipped your sponge fingers and they’re perfectly poised with just the right amount of moisture, it’s time to arrange them in your chosen dish—ideally around 9 x 13 inches. Lay them flat in an even layer across the base; this creates a stable foundation for what’s to come. You want this first layer to be sturdy yet soft, providing a beautiful contrast to the creamy layers that will follow. Trust me on this—it’s absolutely paramount to get these layers right because they will determine the texture and overall experience of your tiramisu.
Step 6: Spreading Love
With your sponge fingers snugly nestled in place, it’s now time to generously spread some of that dreamy pistachio-cream mixture over the top. Using a spatula or the back of a spoon, carefully dollop enough of that smooth, vibrant green cream onto your sponge layer until it’s evenly covered—think of it as spreading warm butter on toast; you want every inch to be enveloped! This rich layer adds not only flavor but also helps bind everything together beautifully as it sets in the fridge. The reason we fold instead of whisking this mixture is key—the aim here is to keep that lovely lightness from the whipped cream intact while incorporating all those fabulous pistachio flavors. It’s like hugging all those flavors together until they become one delicious entity.
After spreading out your first layer of pistachio cream, you’re going to repeat this process: lay down more coffee-soaked savoiardi, followed by another layer of cream. Each repetition builds depth and height in your dessert while ensuring every bite is an explosion of flavor and texture—think about how satisfying it will be when you cut into it later! Don’t rush this step; take your time ensuring each layer is evenly distributed. So go ahead and repeat until you’ve used up all those delightful sponge fingers and finish with one last glorious layer of pistachio cream on top—this final touch will serve as a canvas for our decorative flair later on.
Step 7: Decorate with Passion
Now comes one of my favorite parts—decorating our Pistachio Tiramisu! This is where you can let your creativity shine while adding an extra element of visual delight. Grab that piping bag filled with extra pistachio paste we saved earlier (if you don’t have a piping bag handy, a simple sandwich bag with a small corner snipped off works wonders too). As you gently pipe lines across the surface of your tiramisu, consider how this simple act transforms plain cream into something extraordinary! Those little lines not only look stunning but also introduce another subtle dimension of flavor. Remember, this isn’t just about aesthetics; it’s about enhancing every element of this dessert.
Once you’ve piped beautiful lines across the top, take a toothpick or skewer and gently drag it through these lines in alternating directions—you’ll be creating an elegant feathered pattern that elevates your dessert from delightful to truly extraordinary! This small step might seem trivial at first glance, but trust me—the visual appeal adds excitement before anyone even takes their first bite! After you’ve adorned your tiramisu with its pretty patterns, cover it loosely with plastic wrap or foil (avoid pressing down) and pop it into the fridge for chilling.
Step 8: Patience Makes Perfect
Now comes perhaps the hardest part—waiting for our creation to set! I know it can be tempting to dive right in after such hard work, but patience here is non-negotiable if you want that profound satisfaction when served. Allowing your Pistachio Tiramisu to chill for at least four hours is essential because this resting period enables all those wonderful flavors to meld beautifully together while firming up its structure so that each slice holds its shape perfectly when served.
For optimal results—and I promise you they are worth it—I highly recommend letting it sit overnight in the refrigerator if time allows. During this extended chill time, you’ll find that not only do flavors deepen and harmonize beautifully but also that luscious cream thickens ever so slightly into a velvety dreaminess—it becomes utterly intoxicating! When you’re ready to serve after its well-deserved rest, remember to remove it from the fridge about 20 minutes beforehand; allowing it some time at room temperature will enhance those flavors even further!
Final Flourishes Before Serving
Step 9: The Grand Finale
Finally, it’s showtime! Just before serving your beautiful Pistachio Tiramisu, sprinkle chopped pistachios over the top like confetti—a celebration indeed! These crunchy bits add not only texture but also a burst of color against that soft green background. They’re like little jewels adorning crown jewels! Carefully slice into squares, revealing those gorgeous layers within; I promise you will feel an overwhelming sense of pride as you present such an exquisite dessert crafted by your own hands.
As you serve each piece onto plates (perhaps with a side of fresh berries or a drizzle more pistachio cream if you’re feeling particularly indulgent), take a moment to breathe in those beautiful aromas wafting through the air—the nutty scent combined with coffee notes mingling together creates an ambiance that’s simply magical. Your friends or family will be utterly captivated by both presentation and taste alike; watching their faces light up is worth every moment spent making this treat.
So there you have it—a luxurious Pistachio Tiramisu that’s quick enough for weeknight enjoyment yet impressive enough for special occasions! Each bite offers layers upon layers of creamy goodness intertwined with hints of nutty sweetness and aromatic coffee—all coming together in perfect harmony. Enjoy every mouthful knowing you’ve created something truly special—one worth sharing among loved ones over laughter-filled conversations around your table!
Storage and Enjoyment Tips for Your Pistachio Tiramisu
Ah, at last! Your gorgeous Pistachio Tiramisu is ready to be enjoyed, and the anticipation is almost too much to bear. The layers of creamy pistachio goodness, perfectly soaked sponge fingers, and that delightful sprinkle of chopped pistachios make this dessert a feast for both the eyes and the palate. But before you dive in, let’s chat about how to preserve this masterpiece so you can savor every luscious bite over the next few days.
Storing Leftover Pistachio Tiramisu
To keep your Pistachio Tiramisu fresh and delightful, it’s crucial to store it properly. An airtight container is absolutely paramount here; not only does it protect the delicate layers from absorbing unwanted odors from your fridge, but it also keeps that beautiful creaminess intact. If stored correctly in the refrigerator, your tiramisu will remain delicious for up to 3 days. Now, here’s a pro tip: placing a slice of bread inside the container can help maintain moisture levels! This little trick ensures that your tiramisu stays wonderfully creamy rather than becoming dry or rubbery over time. After a day or two in the fridge, you might even find that the flavors have deepened—creating an utterly intoxicating experience as each layer melds together beautifully. Just remember to remove it from the fridge about 20 minutes before serving; this allows those rich flavors to awaken fully!
Freezing for Later
If you want to prepare ahead of time or simply extend your enjoyment of this divine treat, freezing is a fantastic option! To freeze your Pistachio Tiramisu properly, cut it into individual portions and wrap each piece tightly in plastic wrap before placing them in an airtight container or freezer bag. This way, each slice remains protected from freezer burn while preserving its luscious texture. When stored properly, it can last for up to 2 months in the freezer—how amazing is that? When you’re ready to indulge again, just remove a portion from the freezer and let it thaw overnight in the refrigerator. What’s so great about freezing tiramisu is that you can have an elegant dessert waiting for you whenever a craving strikes! Trust me on this: having a stash of homemade Pistachio Tiramisu tucked away brings such joy and convenience when unexpected guests arrive or when you need a bit of sweet comfort after a long day.
Dessert

Pistachio Tiramisu
- Total Time: 0 hours
- Yield: Serves approximately 10 people 1x
Description
Indulge in a delightful twist on a classic Italian dessert with our Pistachio Tiramisu. This enchanting creation layers creamy mascarpone and rich pistachio cream between coffee-soaked savoiardi sponge fingers, creating an irresistible fusion of flavors and textures. Each bite offers a heavenly balance of nutty richness and aromatic coffee that is sure to impress your friends and family. Perfect for special occasions or as a treat any day, this Pistachio Tiramisu will elevate your dessert game and create unforgettable memories.
Ingredients
- 100 ml strong coffee
- 200 g savoiardi sponge fingers
- 300 ml double cream
- 75 g icing sugar
- 250 g mascarpone cheese
- 100 g pistachio cream (plus extra for decoration)
- Chopped pistachios (for garnish)
Instructions
- In a large mixing bowl, whip the double cream with icing sugar until soft peaks form.
- In another bowl, gently beat the mascarpone and pistachio cream together until smooth.
- Fold the whipped cream into the mascarpone mixture carefully until fully combined.
- Dip the savoiardi into the strong coffee briefly, then arrange them in a dish.
- Spread half of the pistachio cream mixture over the soaked sponge fingers.
- Repeat with another layer of coffee-dipped savoiardi followed by the remaining pistachio mixture.
- Decorate with piped lines of pistachio cream and chopped pistachios on top.
- Chill in the refrigerator for at least four hours before serving.
- Prep Time: 30 minutes
- Cook Time: None
- Category: Dessert
- Method: No cooking required
- Cuisine: Italian
Nutrition
- Serving Size: 1 slice (100g)
- Calories: 320
- Sugar: 24g
- Sodium: 50mg
- Fat: 23g
- Saturated Fat: 13g
- Unsaturated Fat: 9g
- Trans Fat: 0g
- Carbohydrates: 28g
- Fiber: 1g
- Protein: 5g
- Cholesterol: 80mg


Leave a Comment