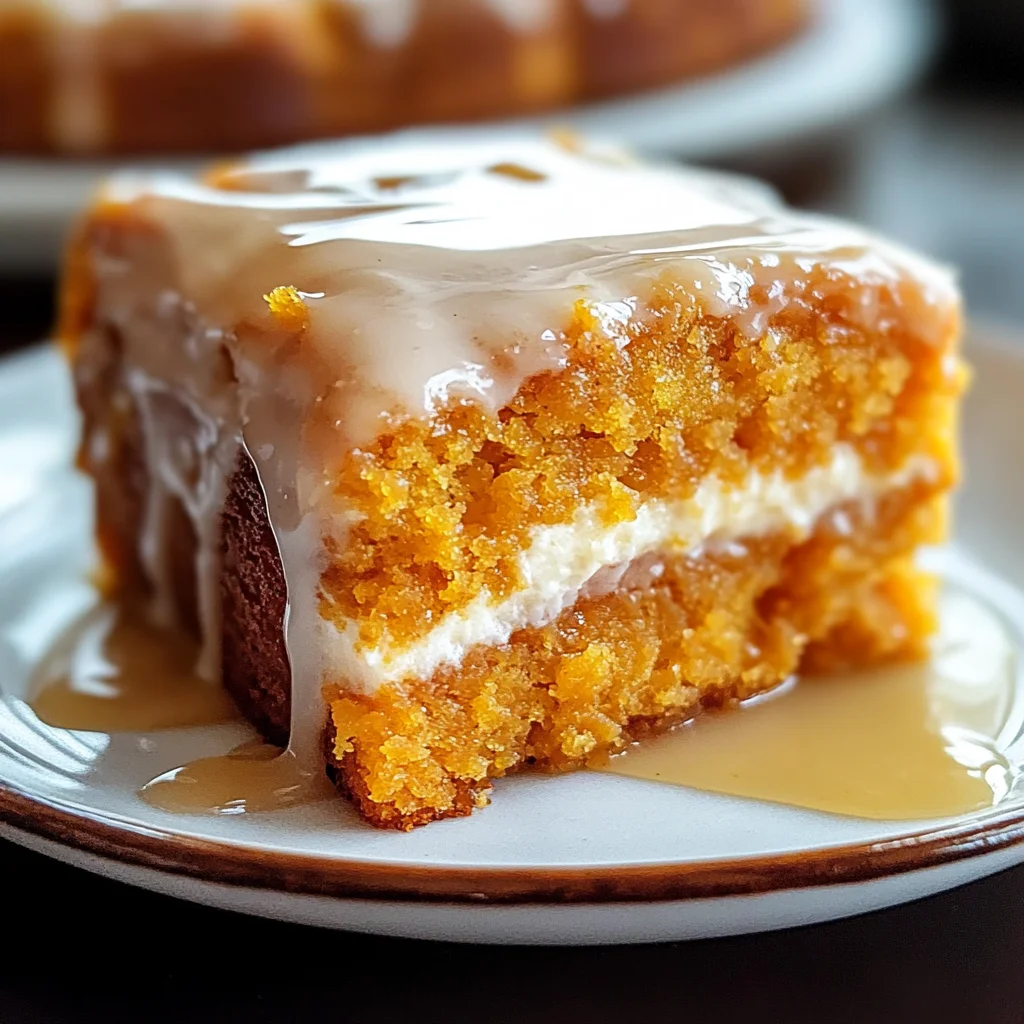
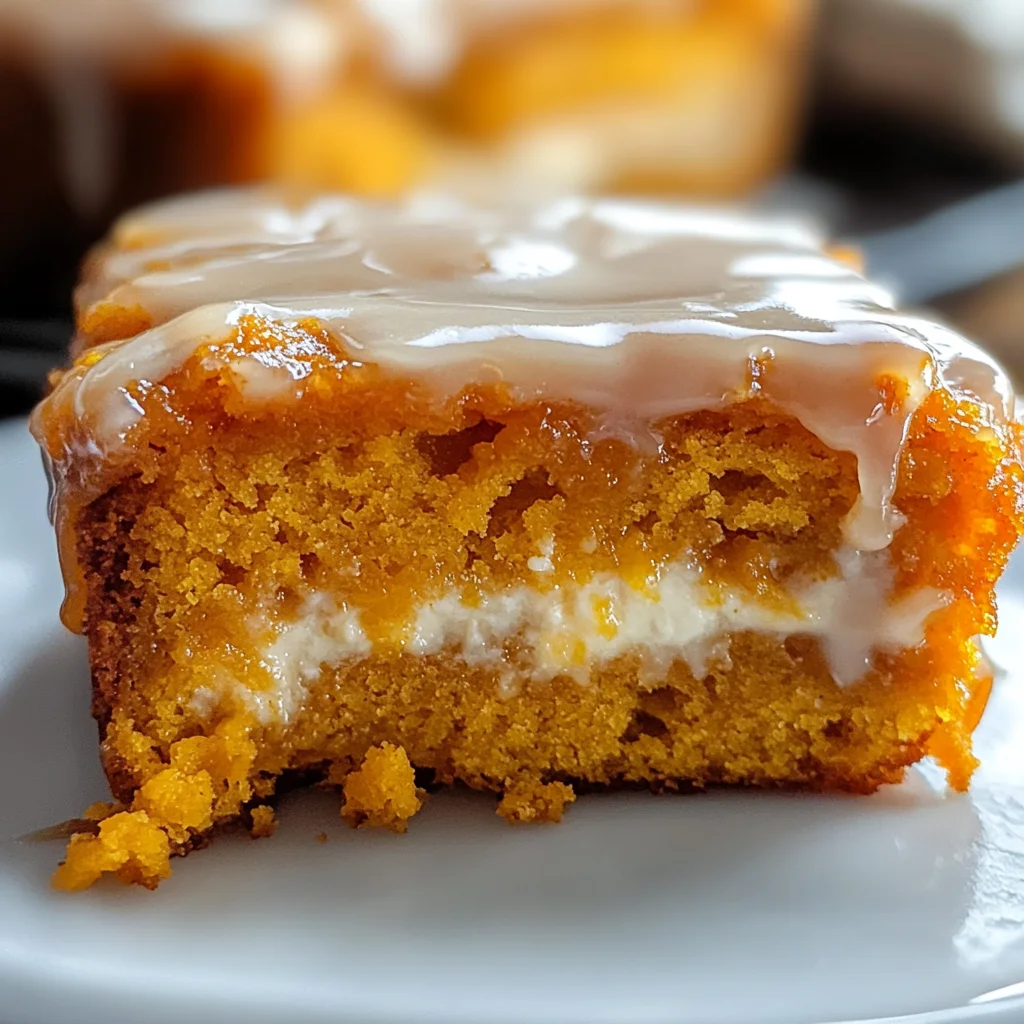
When I think about the moments in life that feel truly special, they often revolve around food. There’s something profoundly satisfying about sharing a meal that transcends mere sustenance; it becomes an experience, a tapestry of memories woven together by flavors, warmth, and laughter. That’s precisely what the Quick Sweet Potato Honey Bun Cake embodies for me. This delightful creation is not just a recipe; it’s a bridge between the comforting traditions of home baking and the innovative spirit of modern cuisine. Picture this: a soft, moist cake infused with the earthy sweetness of sweet potatoes, complemented by a luscious cream cheese swirl and topped with a drizzle that brings everything together in perfect harmony. The aroma wafting through your kitchen as it bakes will make your heart sing, and trust me, your friends will wonder how you conjured such magic.
Every bite of this cake tells a story—it’s not only delicious but also holds the promise of nostalgia and warmth. It’s versatile enough to be enjoyed as an indulgent breakfast or a charming dessert following dinner. This Quick Sweet Potato Honey Bun Cake is like wrapping yourself in your favorite sweater on a chilly day; it’s comforting, familiar, and utterly inviting. Whether you’re hosting friends for brunch or simply treating yourself on a cozy Sunday morning, this cake is sure to be a hit. I promise you will find joy in every morsel!
Quick Sweet Potato Honey Bun Cake: A Delightful Morning Treat
Let’s dive right into this wonderful recipe! The Quick Sweet Potato Honey Bun Cake is easy to prepare and features ingredients that are likely already in your pantry. It combines simple elements to create something extraordinary that feels both homey and elevated.
Ingredients:
As we embark on this culinary journey together, let’s take a moment to appreciate each ingredient that plays its part in crafting this lovely cake. Each component contributes to the overall symphony of flavors and textures that makes this dish so irresistible.
- 1 1/2 cups well-mashed sweet potato (can use canned or baked for convenience). Sweet potatoes are the star here, bringing both moisture and natural sweetness to our cake while adding nutritional benefits like fiber and vitamins A and C. If using canned sweet potatoes for ease—make sure they are plain without added sugar or spices as we want to control the flavor ourselves. Alternatively, roasting fresh sweet potatoes enhances their sweetness; just bake until tender before mashing them to achieve that smooth texture we desire.
- 1 box yellow cake mix (15.25 oz). This is our shortcut ingredient that provides a reliable base for our cake without sacrificing flavor or texture—it’s all about balance! The yellow cake mix offers a lightness that’s essential for achieving that fluffy crumb while harmonizing beautifully with the sweet potato’s richness. I love using brands with minimal additives since we’re looking for quality here; don’t hesitate to experiment with different types if you’re feeling adventurous!
- 4 ounces softened cream cheese. Ah, cream cheese—the magical ingredient that adds smoothness and tangy flavor to our batter! Make sure it’s softened to room temperature so it incorporates easily into the mixture without clumping. This creamy goodness creates that signature swirl effect when combined with brown sugar and spices later on, giving you pockets of decadence throughout the cake.
- 3/4 cup vegetable oil. This might seem simple but trust me—using oil instead of butter here keeps our cake incredibly moist and tender while allowing it to rise beautifully without being too dense. It’s vital for achieving that melt-in-your-mouth texture we crave! Feel free to substitute with canola or even avocado oil if you prefer something lighter.
- 4 large eggs at room temperature. Eggs are crucial in baking—they act as binders while providing structure and stability to our cake as it rises in the oven. Room temperature eggs incorporate better into batters than cold ones; they help create an even consistency which is absolutely paramount for avoiding any lumps in your final product.
- 1 tablespoon vanilla essence. Vanilla extract adds depth to our flavor profile—it’s like adding a warm hug! Opt for pure vanilla extract rather than imitation; it truly makes all the difference in elevating the overall taste experience of your cake.
- 1/2 cup packed light brown sugar. Brown sugar brings not only sweetness but also moisture due to its molasses content—which contributes wonderfully to our cake’s tenderness! When measuring brown sugar, pack it tightly into your measuring cup so you get those rich caramel notes throughout.
- 3/4 teaspoon cinnamon powder. Cinnamon introduces warmth and spice that pairs perfectly with sweet potatoes—it helps evoke feelings of comfort reminiscent of cozy family gatherings around the table during autumn.
- 1 teaspoon ginger powder. Ginger adds another layer of complexity; it’s slightly spicy yet refreshing at the same time! Together with cinnamon, they create an aromatic harmony that’s simply delightful; plus, ginger has wonderful health benefits!
- 1/4 teaspoon nutmeg powder. Nutmeg is one of those spices that can elevate any dish from ordinary to extraordinary! Just a pinch goes a long way in creating depth—its warm notes work beautifully alongside cinnamon without overwhelming other flavors.
- 1 1/4 cups powdered sugar. For our frosting drizzle later on—powdered sugar dissolves seamlessly into creams creating smooth frostings—this will give us that perfect finishing touch over our baked beauty!
- 3 tablespoons milk. Milk helps adjust the consistency of our frosting drizzle while adding richness making each bite even more satisfying!
- 1 tablespoon authentic maple syrup. Maple syrup doesn’t just add sweetness—it infuses our frosting with an earthy undertone that’s utterly intoxicating! Authentic maple syrup has distinct flavor notes compared to artificial varieties which makes it non-negotiable for this recipe!
Equipment You’ll Need:
Having the right tools at your disposal makes any baking experience smoother—and trust me when I say there’s nothing worse than scrambling around looking for something mid-recipe! Let’s ensure you’re fully prepared so we can focus solely on creating magic together.
- Mixing bowls – A set of various sizes will be essential here; you’ll need larger ones for mixing batters and smaller ones for preparing frostings or other components like cream cheese mixtures! Look for sturdy bowls made from glass or stainless steel since they offer durability while also making cleanup easier afterward.
- Electric mixer – Whether you’re using hand-held or standing models, having an electric mixer will save time and effort when creaming together those vital ingredients like butter (or cream cheese) alongside sugars until lightened up properly—a key step ensuring fluffy results!
- Rubber spatula – A trusty rubber spatula is invaluable when scraping down sides of bowls during mixing processes—ensuring nothing gets left behind while transferring batter into pans too!
- Baking pan – An 8-inch round pan works great here since it allows even baking throughout—just remember to grease it well beforehand so nothing sticks later on!
Preparing the Quick Sweet Potato Honey Bun Cake
Step 1: Prepping Your Ingredients
Before diving into mixing anything together, take some time upfront getting everything ready! Start by measuring out all ingredients accurately—you wouldn’t want surprises halfway through right? Make sure those eggs are at room temperature too; it really helps bind everything nicely once mixed together later on! And if you’re using fresh sweet potatoes instead of canned ones? Bake them first until soft—let cool slightly before mashing them up nicely…trust me when I say doing prep work ahead saves headaches down line!
Step 2: Creaming Together
Now let’s talk about creaming together those key ingredients—the softened cream cheese along with brown sugar until smooth & fluffy! This process isn’t just about blending things together—it creates tiny air bubbles within mixture which ultimately leads us towards achieving desired light texture later after baking occurs…so don’t rush this step my friend! Once mixed thoroughly add vegetable oil next into bowl followed by eggs one at time incorporating well before introducing vanilla essence last but not least!
Step 3: Incorporating Dry Ingredients
With wet ingredients fully combined let’s fold in dry ones next starting off gently mixing yellow cake mix alongside spices & mashed sweet potato until incorporated evenly throughout batter—you want consistency resembling thick pancake mixture once done here…watch closely because overmixing can lead towards tough end result which nobody wants now do they?!
Step 4: Swirling It All Together
Now comes my favorite part—the swirling process! Pour half batter into prepared pan first then dollop generous spoonfuls cream cheese mixture over top followed by remaining batter covering completely afterward…this creates those beautiful marbled effects once baked giving gorgeous visual appeal alongside delightful taste sensations once served fresh out oven garnished lightly drizzle icing made from powdered sugar milk maple syrup combined perfectly altogether just prior serving warm slices atop plates garnished fresh fruits perhaps?
I can’t wait for you all share how yours turns out—I promise it’ll become beloved staple within kitchens everywhere soon enough…happy baking dear friends!!
Step 5: Mixing the Batter to Creamy Perfection
Now that we have all our beautiful ingredients ready, it’s time to dive into the heart of this Quick Sweet Potato Honey Bun Cake. Start by grabbing a large mixing bowl and adding your softened cream cheese. Trust me when I say that using softened cream cheese is absolutely paramount here; it ensures that we create a smooth, luscious base for our cake batter. Next, pour in the vegetable oil—this will add moisture and richness to our cake, making each bite feel like a warm hug. Using an electric mixer, beat these two together on medium speed until they become a harmonious blend of creamy goodness. You’re looking for a fluffy texture with no lumps; this will set the stage for a beautifully uniform cake.
Once you achieve that silky consistency, it’s time to add in your room temperature eggs one at a time. This step is crucial because room temperature eggs mix into the batter more thoroughly than cold eggs, leading to a better rise and texture in your cake. After incorporating the eggs, drizzle in the vanilla essence and continue mixing until everything is well-combined—your kitchen should already start smelling delightful! After this, gently fold in the well-mashed sweet potato. If you’re using canned sweet potato for convenience (which is perfectly fine), make sure it’s free of any added sugars or spices. The sweet potato will not only infuse our cake with natural sweetness but also provide moisture and an irresistible tender crumb. When you’re done mixing, take a moment to appreciate that vibrant orange color; it promises so much flavor!
Step 6: Creating the Sweet Spice Mixture
Now let’s turn our attention to some delightful spices that will elevate our Quick Sweet Potato Honey Bun Cake to extraordinary levels. In a separate bowl, combine your light brown sugar with cinnamon powder, ginger powder, and nutmeg powder. The sweetness of the brown sugar paired with these warm spices creates an intoxicating aroma that will make your taste buds dance in anticipation! As you mix them together with a fork or whisk, take note of how these ingredients interact—the brown sugar clumps up at first but breaks apart easily as you stir; this is exactly what we want! These spices are non-negotiable elements of this recipe; they not only enhance the flavor profile but also evoke those cozy feelings associated with autumn baking.
Once you’ve created this fragrant spice mixture, slowly incorporate it into your batter while continuing to mix on low speed just until combined. This gentle folding technique prevents overmixing and keeps air bubbles intact—air bubbles are your friends when it comes to achieving that light and airy texture we crave in cakes. Overmixing can lead to a dense outcome, which we want to avoid at all costs! You’ll know you’re done when no streaks of flour remain visible in the batter; however, don’t worry if there are some small specks from the spices—that’s where the magic lies! Trust me on this; it’s going to be absolutely divine.
Step 7: The Joyful Layering Process
With our rich batter prepared and spiced up beautifully, it’s time for one of my favorite parts—the layering process! Grab your prepared baking dish (I recommend using a 9×13-inch pan) and grease it lightly with cooking spray or vegetable oil to ensure nothing sticks during baking. Now comes the fun part: take half of your glorious batter and pour it into the bottom of the pan. Use a spatula to spread it evenly across the surface; this creates an even foundation for our cake while also ensuring every slice has that perfect balance of flavors.
Next up is where we sprinkle some joy! Take about half of your sweet spice mixture—remember that magical blend we created earlier—and sprinkle it generously over the first layer of batter. This is truly what makes this cake special; as it bakes, those spices meld beautifully into the cake creating little pockets of flavor that make each bite utterly intoxicating! After you’ve sprinkled on your spice mixture, gently top it off with the remaining batter by dolloping spoonfuls around before spreading out evenly again. Don’t fret if some of those heavenly spices poke through; it adds character and charm!
Step 8: Baking Your Perfect Quick Sweet Potato Honey Bun Cake
Preheat your oven to 350°F (175°C)—this step could not be more important as getting that oven nice and hot allows our cake to rise beautifully from the get-go! Once preheated, carefully place your layered masterpiece into the center rack of your oven and set your timer for about 27 minutes. Now comes one of those moments where patience truly pays off; while it’s tempting to peek inside early on (and I totally understand!), resist that urge for at least 20 minutes!
As your cake bakes, watch how it transforms from a luscious batter into a golden delight—this visual cue is something truly magical! When you reach around 25 minutes mark, do yourself a favor and perform the toothpick test: insert a toothpick into the center of your cake; if it comes out clean or with just a few moist crumbs attached (not wet batter), then voila—you’ve reached perfection! Keep in mind that every oven can behave differently due to variations in temperature calibration or hot spots, so keep an eye on those last few minutes like they’re precious jewels.
Once baked perfectly and golden-brown on top—trust me when I say this will smell amazing—it’s essential to allow your cake to cool slightly in its pan for about 10-15 minutes before transferring it onto a wire rack. Cooling helps set everything nicely while ensuring it doesn’t become too moist underneath—a crucial step for maintaining texture!
Next Major Phase – Adding That Irresistible Glaze
As we float toward the final touches on our Quick Sweet Potato Honey Bun Cake, let’s talk about that decadent glaze which truly brings all these flavors together harmoniously! Prepare yourself for another wave of deliciousness because glazing is where you’ll add depth and shine that’ll make everyone swoon with delight.
Step 9: Crafting Your Irresistible Glaze
In yet another small bowl (I promise not too many bowls!), combine powdered sugar with milk and authentic maple syrup until smooth—a whisk works wonders here! This glaze should be pourable yet thick enough not to run away too quickly off your cake once applied—it should drape over like liquid gold rather than flood everywhere. If you find it’s too thick after mixing—don’t panic! Just add tiny amounts of milk until you achieve that desired consistency.
Once you’ve achieved glaze perfection (and oh my goodness does taste-testing count as “cooking”?) drizzle generously over the slightly cooled cake still sitting proudly in its pan or upon serving slices individually later on—each bite deserves this finishing touch! The maple syrup adds such depth compared to regular sugar glazes—it becomes profoundly satisfying without overpowering any other flavors present within that beautiful sweet potato honey bun composition.
I promise you—the moment this beauty hits your table will be extraordinary as everyone gathers around eagerly anticipating their slice! And when they finally take their first bites? Just wait for those happy smiles radiating pure bliss—they’ll understand why this Quick Sweet Potato Honey Bun Cake holds such special place in my heart—and hopefully yours too now!
So there you have it—a comprehensive journey through creating one deliciously memorable cake experience filled with flavor harmony & love every step along way! Enjoy every moment spent savoring each bite…happy baking my friends!
Storage and Enjoyment Tips for Your Quick Sweet Potato Honey Bun Cake
Oh, my friends, the moment has finally arrived! The tantalizing aroma wafting through your kitchen is a sure sign that your Quick Sweet Potato Honey Bun Cake is ready to be savored. But wait—before you dive in, let’s chat about how to store this delightful treat so you can enjoy it long after the last slice has been devoured. While I know the temptation to polish off the whole cake in one sitting can be strong—trust me, I’ve been there—you’ll want to preserve its flavors and textures for those moments when you crave a little sweetness.
Storing Leftover Quick Sweet Potato Honey Bun Cake
To keep your Quick Sweet Potato Honey Bun Cake fresh and utterly delicious, I recommend using an airtight container. This is crucial because it protects the cake from drying out and ensures every bite remains as moist and tender as the first. If you don’t have a container handy, wrapping it tightly in plastic wrap will do the trick just fine. Stored properly at room temperature, this scrumptious cake will stay delightful for about 3 to 4 days. However, if you want to maintain its incredible taste even longer, consider refrigerating it for up to a week. A little pro tip? Placing a slice of bread in the container with your cake can work wonders to keep it moist—it’s like giving your dessert a cozy blanket! When you’re ready for a slice of happiness, just pop it into the microwave for about 10-15 seconds; you’ll be amazed at how quickly it comes back to life, warm and inviting.
Freezing Quick Sweet Potato Honey Bun Cake for Later
If you find yourself with some leftover cake (or if you simply want to prepare in advance), freezing your Quick Sweet Potato Honey Bun Cake is an absolutely fantastic option! To freeze it properly, make sure to let your cake cool completely before wrapping it tightly in plastic wrap or aluminum foil. This non-negotiable step prevents freezer burn and keeps all those delicious flavors intact. You can store it frozen for up to three months without losing any of its charm. When you’re ready to enjoy a slice again, simply transfer it from the freezer to the fridge overnight or let it sit at room temperature for about an hour before indulging. The convenience factor here is extraordinary—imagine having this delightful treat ready at a moment’s notice whenever sweet cravings strike!

Quick Sweet Potato Honey Bun Cake
- Total Time: 42 minutes
- Yield: Approximately 12 servings 1x
Description
Indulge in the delightful flavors of our Quick Sweet Potato Honey Bun Cake, a perfect fusion of homey comfort and modern elegance. This moist cake, enriched with well-mashed sweet potatoes and warm spices, is swirled with creamy goodness and finished with a luscious maple glaze. Whether enjoyed as a delightful breakfast treat or a charming dessert, this cake promises to create memorable moments around your table. Its inviting aroma fills the kitchen while baking, making it an instant favorite among friends and family. So grab your apron and prepare to embark on a delicious culinary journey!
Ingredients
- 1 1/2 cups well-mashed sweet potato
- 1 box yellow cake mix (15.25 oz)
- 4 ounces softened cream cheese
- 3/4 cup vegetable oil
- 4 large eggs at room temperature
- 1 tablespoon vanilla essence
- 1/2 cup packed light brown sugar
- 3/4 teaspoon cinnamon powder
- 1 teaspoon ginger powder
- 1/4 teaspoon nutmeg powder
- 1 1/4 cups powdered sugar
- 3 tablespoons milk
- 1 tablespoon authentic maple syrup
Instructions
- Preheat your oven to 350°F (175°C) and grease an 8-inch round baking pan.
- In a mixing bowl, combine softened cream cheese and vegetable oil using an electric mixer until smooth.
- Add room temperature eggs one at a time, followed by vanilla essence, mixing until well combined.
- Gently fold in mashed sweet potato until fully incorporated.
- In another bowl, mix together yellow cake mix, brown sugar, cinnamon, ginger, and nutmeg.
- Gradually add dry ingredients to the wet mixture until just combined; do not overmix.
- Pour half of the batter into the prepared pan, layer with half of the spice mixture, then top with remaining batter.
- Bake for approximately 27 minutes or until a toothpick inserted comes out clean.
- Allow to cool slightly before transferring to a wire rack.
- Prep Time: 15 minutes
- Cook Time: 27 minutes
- Category: Dessert
- Method: Baking
- Cuisine: American
Nutrition
- Serving Size: 1 slice (90g)
- Calories: 285
- Sugar: 20g
- Sodium: 220mg
- Fat: 14g
- Saturated Fat: 2g
- Unsaturated Fat: 10g
- Trans Fat: 0g
- Carbohydrates: 38g
- Fiber: 2g
- Protein: 3g
- Cholesterol: 40mg

Leave a Comment