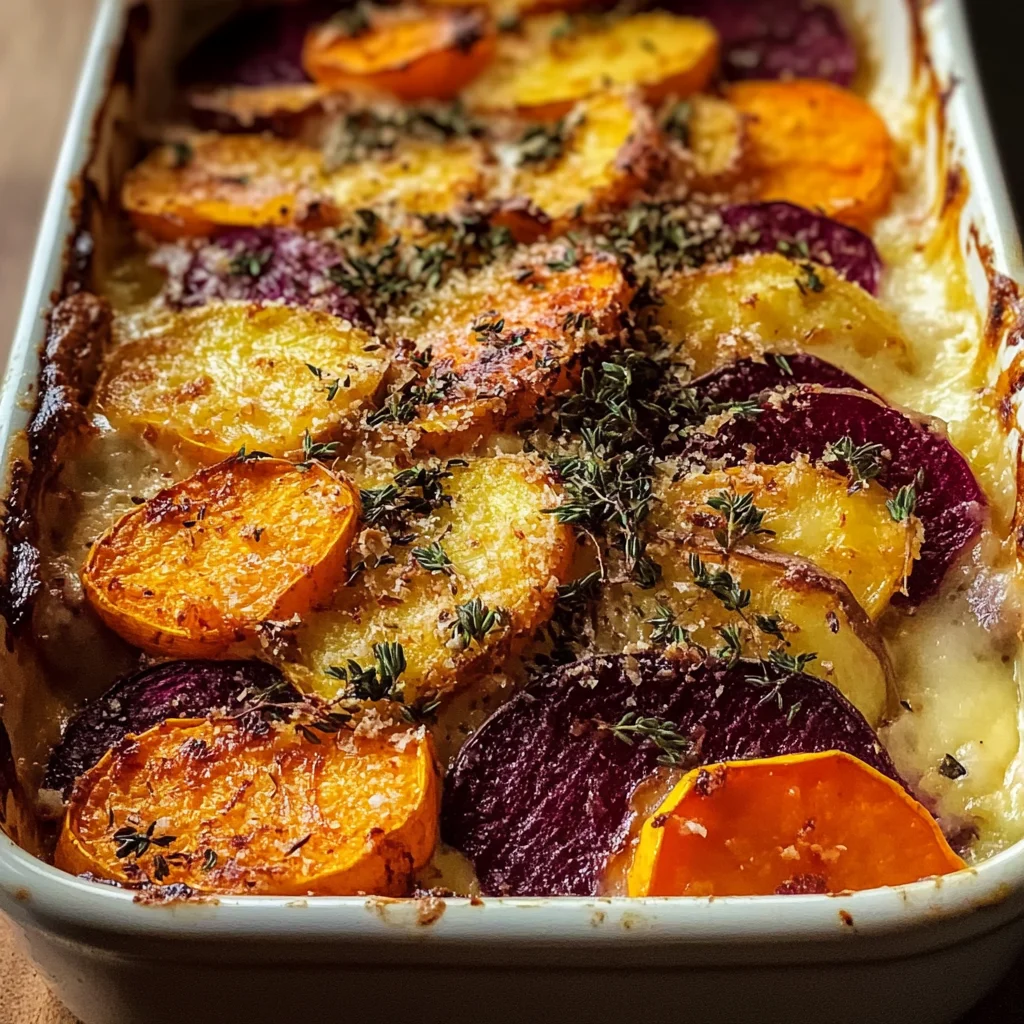
There’s something profoundly magical about the way food can weave its way into the fabric of our lives, isn’t there? When I think of a dish that embodies warmth, nostalgia, and pure comfort, my mind immediately drifts to a Root Vegetable Gratin with Sweet Potatoes, Parsnips, and Beets. This isn’t just a recipe; it’s an experience that brings people together around the table, filling the air with an intoxicating aroma that beckons everyone to gather. Imagine layers of vibrant sweet potatoes, earthy parsnips, and jewel-toned beets harmonizing in creamy perfection, each bite revealing a symphony of flavors that dance on your palate. The golden crust is like a warm hug from the oven—inviting and utterly irresistible.
What truly captivates me about this gratin is how it balances tradition with a fresh twist. Root vegetables have been cherished for generations, but by layering them with rich cheeses and fragrant thyme, we elevate this humble dish into something extraordinary. It’s perfect for cozy family dinners or special occasions when you want to impress guests without losing that homey charm. Plus, it allows us to savor the bounty of nature’s harvest while celebrating those moments that matter most—gathering around the table with laughter, stories, and love.
Root Vegetable Gratin with Sweet Potatoes, Parsnips, and Beets: A Cozy Comfort Food Delight
Let’s dive into this delightful recipe together! Making this Root Vegetable Gratin is not just about following a set of instructions; it’s about creating something beautiful and delicious from simple ingredients. Trust me when I say that once you’ve tasted this dish—with its creamy texture and cheesy goodness—you’ll find yourself reaching for seconds (and thirds!). So roll up your sleeves; let’s embark on this culinary adventure!
Ingredients:
As we prepare to create our Root Vegetable Gratin with Sweet Potatoes, Parsnips, and Beets, let’s take a moment to appreciate each ingredient we’ll be using—each one plays a vital role in crafting the magic of this dish.
- 2 medium sweet potatoes, peeled and thinly sliced. Sweet potatoes are not just visually stunning; their natural sweetness balances beautifully with the earthiness of parsnips and beets. When selecting sweet potatoes, look for those that are firm without any soft spots or blemishes—this ensures they’ll hold up well during baking. Their creamy texture when cooked adds a delightful contrast to the other root veggies in this gratin.
- 2 medium parsnips, peeled and thinly sliced. Parsnips bring an aromatic sweetness that’s more nuanced than carrots but equally captivating. Their unique flavor profile shines through in the gratin’s layers. When choosing parsnips, opt for smaller ones—they tend to be sweeter and more tender than larger varieties. Plus, peeling them reveals their pristine white flesh that adds visual appeal.
- 2 medium beets, peeled and thinly sliced. Beets are like nature’s candy—earthy yet sweet—and they introduce such vibrant color to our dish! Not only do they taste fantastic roasted or baked, but their natural sugars caramelize beautifully in the oven. Choose beets that feel heavy for their size with smooth skin; these will yield tender results when baked.
- 1 onion, thinly sliced. The onion contributes depth and complexity to our gratin as it caramelizes in the pan. This step is key; sautéing onions until they’re soft transforms their sharpness into sweetness that enhances every bite of our dish. Look for onions that are firm without any wrinkled skin or dark spots.
- 2 cloves garlic, minced. Garlic is truly the soul behind so many savory dishes! Its pungent aroma becomes pleasantly mellow when cooked—a flavor enhancement you won’t want to skip out on here. Fresh garlic cloves are best; simply peel away their papery skins before mincing them finely to release all those lovely essential oils.
- 2 cups heavy cream. Ahh—the cream! This ingredient is what makes our gratin so luscious and indulgent; it’s akin to liquid gold! Heavy cream has a high fat content that enriches our dish while allowing all those flavors meld beautifully together during baking. Always choose high-quality cream; it can make all the difference in achieving that velvety texture we crave.
- 1 cup grated Gruyère cheese. Gruyère is one of my absolute favorites! With its nutty flavor profile and superb melting qualities, it creates that perfect cheesy topping we desire on our gratin. When grating cheese at home (which I highly recommend), you’ll find it melts more evenly than pre-packaged shredded varieties due to less added starch.
- 1 cup grated Parmesan cheese. Parmesan adds an extra depth of flavor through its salty richness—it’s absolutely paramount for achieving balance in this dish! Opt for freshly grated instead of pre-grated versions because they typically lack depth in flavor plus contain anti-caking agents which can affect melting quality.
- 2 tablespoons fresh thyme leaves. Fresh herbs are non-negotiable here! Thyme offers an herbaceous note that complements our root vegetables perfectly while imparting aromatic qualities throughout the gratin as it bakes away in your oven’s warm embrace.
- Salt and pepper to taste. Seasoning is everything! A good sprinkle of salt will enhance all those natural flavors we’ve layered into this dish while freshly cracked black pepper brings out warmth without overpowering anything else going on within each bite.
- 2 tablespoons olive oil. Olive oil serves two purposes here: first as a cooking fat for sautéing onions (ensuring they don’t stick) but also contributing richness overall while providing healthy fats!
- 1/2 cup breadcrumbs (optional for topping). Breadcrumbs add an incredible textural contrast if you choose to top your gratin with them before baking—it creates a satisfying crunch against all those creamy layers beneath! Use homemade breadcrumbs if possible; they’re fresher than store-bought options plus offer endless possibilities regarding seasoning!

Equipment You’ll Need:
Before we begin layering these delectable ingredients into our baking dish, let’s ensure we have all the necessary tools at hand—having the right equipment not only streamlines our cooking process but also enhances enjoyment while creating something wonderful!
- 9×13 inch baking dish: This size is optimal for layering your gratin evenly while allowing ample space for bubbling edges as it bakes away! If you don’t own one specifically labeled gratin, any similar-sized casserole dish will work just fine too—just ensure it’s oven-safe!
- Large skillet: A sturdy skillet makes sautéing easy breezy by providing enough surface area where heat circulates evenly throughout vegetables as they soften perfectly before adding them into layers below!
- Cutting board & sharp knife: An essential duo needed for slicing all those beautiful root veggies effortlessly—you’ll want them cut uniformly thin (about 1/8 inch thick) so everything cooks uniformly during baking time!
- Mixing bowls: Having separate bowls handy lets us combine ingredients neatly without cross-contamination while prepping sauces or mixtures beforehand saves time later when assembling everything together!
- Whisk: Perfectly whisking together heavy cream along with cheeses ensures no lumps remain meaningably smoother results await us once baked (and who wouldn’t love even melting cheese over delicious root veggies)!
With these tools at your side ready-to-go let’s start preparing our Root Vegetable Gratin with Sweet Potatoes, Parsnips & Beets!
Preparing the Root Vegetable Gratin with Sweet Potatoes, Parsnips, and Beets
Step 1: Preheat Your Oven
Start by preheating your oven to 375°F (190°C). This step might seem simple enough but trust me—it’s absolutely crucial for ensuring your gratin bakes evenly from start to finish! By preheating now while you prepare your ingredients allows time for those comforting aromas wafting through every corner of your kitchen soon after placing it inside—that anticipation only adds another layer of excitement as dinner draws near!
Step 2: Sauté Onions & Garlic
In a large skillet over medium heat, pour in 2 tablespoons of olive oil then add your thinly sliced onion along with minced garlic cloves into hot oil when shimmering begins appearing across surface area—a sure sign we’re ready! Sauté these aromatic ingredients until softened—this usually takes around five minutes—but don’t rush this step too quickly since developing flavorful depth here sets up wonderful base notes later down line within layers themselves so keep stirring gently until they turn translucent just past golden brown stage where fragrances fill entire room inviting everyone nearby closer toward cooking adventure ahead!
Step 3: Combine Vegetables
In a spacious mixing bowl combine your prepared sweet potatoes along with parsnips and beets then toss them gently alongside sautéed onions followed by fresh thyme leaves sprinkled generously atop mixture seasoned liberally using pinch salt plus cracked pepper too—all elements working harmoniously together enhancing each other’s individual characteristics ensuring balanced notes shine forth throughout finished product later down road ahead… what an enticing sight indeed!
Step 4: Whisk Together Cream & Cheese
Now let’s transition over toward creating luscious creamy mixture that’ll blanket every layer lovingly during baking process itself—we want those flavors melding perfectly! Grab another bowl whisk together two cups heavy cream along side half portions Gruyère plus Parmesan cheeses until smoothly combined then set aside awaiting next steps because once poured atop layered veggies magic begins unfolding inside oven transforming simple roots into glorious symphony awaiting eager taste buds upon arrival dinner table shortly thereafter…
And there you have it! We’ve made great strides already towards creating this beautiful Root Vegetable Gratin with Sweet Potatoes, Parsnips & Beets—and I promise you won’t regret one minute spent diving deeper into preparation stages leading up toward final assembly completed soon enough… Stay tuned as we continue unfolding every last detail next round ahead!
Step 5: Layering for Flavor and Texture
Now that you’ve got your vibrant root vegetable mixture ready, it’s time to bring everything together in a glorious symphony of textures and flavors. Grab a greased 9×13 inch baking dish—this size is absolutely perfect for allowing the layers to blend beautifully without overcrowding. Start by gently pouring half of the root vegetable mixture into the dish, spreading it out evenly with a spatula or the back of a spoon. This initial layer is crucial because it establishes the base of your gratin, creating a delightful foundation that will soak up all those creamy flavors as it bakes.
Next, take that luscious cream mixture you whisked together earlier—this is where the magic truly begins! Drizzle half of it over the first layer of vegetables, ensuring every slice gets its fair share of that rich, velvety goodness. You might notice how the cream seeps into the nooks and crannies of your sweet potatoes, parsnips, and beets, promising a moist and flavorful experience once baked. Don’t rush this step; take a moment to admire how beautifully colorful this dish is becoming. The vibrant orange from the sweet potatoes contrasts with the earthy tones of the beets and parsnips, creating an inviting visual feast that’s just as important as the taste!
Step 6: Building Layers for Ultimate Creaminess
With your first layer complete, it’s time to repeat this process with the remaining root vegetable medley. Layer on those gorgeous slices with care; remember, each piece should feel loved as you nestle it into place. The goal here is to create an even distribution so that no bite goes without flavor or creaminess. Once you’ve laid down all those beautiful vegetables again, pour over the remaining cream mixture with confidence. This second application is essential because it ensures that every single layer is enveloped in that dreamy sauce—a non-negotiable step if you want every bite to be profoundly satisfying.
As you pour, watch how the cream cascades over everything like liquid gold, pooling in between those colorful layers. It’s at this point where patience pays off; don’t be tempted to skimp on layering! The harmony created by these layers will lead to an exquisite balance of flavor when baked—a contrast between soft, tender root vegetables and that delightful cheesy crust we’re building towards. Trust me on this; if you rush through layering or skip any part of this process, you might miss out on creating something utterly extraordinary!
Step 7: Topping Off with Cheesy Goodness
Now comes one of my favorite parts: adding that irresistible cheesy topping! Sprinkle the remaining Gruyère and Parmesan cheeses generously over the top of your beautifully layered gratin. This step isn’t just about taste; it’s about texture too! As your dish bakes in the oven, these cheeses will melt into a bubbling delight while developing that coveted golden crust we all crave. Take a moment to really appreciate how those cheesy shavings look against the vibrant backdrop of your vegetables—it’s like an edible work of art!
If you’re feeling adventurous—or if you’re simply looking for extra crunch—this is also where you can sprinkle on some breadcrumbs before popping it into the oven. Breadcrumbs add an additional layer of texture that complements the creamy interior beautifully; imagine digging in with your fork only to hit a crispy topping—it’s absolutely divine! Remember, though; whether you choose to add breadcrumbs or not, what matters most is ensuring an even distribution across the surface so every bite delivers that satisfying crunch combined with creamy goodness.
Step 8: Baking Your Perfect Root Vegetable Gratin
With everything layered and topped off just right, it’s time to cover your dish tightly with foil and slide it into your preheated oven at 375°F (190°C). Baking it covered for about 40 minutes allows all those flavors to meld together beautifully while keeping moisture locked inside—this step is crucial for achieving tender vegetables without drying them out! You’ll know it’s working when you start to smell those heavenly aromas wafting through your kitchen; trust me when I say this will be one of those moments when everyone starts wandering toward your kitchen in anticipation.
After 40 minutes have passed, carefully remove the foil (watch out for steam!) and let your gratin bake uncovered for an additional 20 minutes. This is where transformation takes place—the exposed surface will begin to brown and bubble gloriously under that heat. Keep an eye on it during this stage because every oven behaves differently; you want that top layer to turn a beautiful golden brown without burning—look for deep golden hues rather than pale yellows. When it’s achieved that perfect color and bubbles are joyfully dancing atop your gratin, then you’ll know it’s time to pull it from the oven! Allowing it to rest for about ten minutes is another essential step before diving in; during this period, everything settles nicely so each serving holds its shape beautifully.
Final Touches: Serving Your Root Vegetable Gratin
As you allow your Root Vegetable Gratin with Sweet Potatoes, Parsnips, and Beets to cool slightly after baking—a mere ten minutes feels like a lifetime when you’re craving comfort food—you’ll find yourself filled with excitement about sharing this masterpiece with friends or family around your dinner table. That little bit of resting time allows those incredible flavors to marry even more deeply while giving each bite structure so they don’t fall apart upon serving.
When you’re finally ready to scoop out portions onto plates or into bowls—with its creamy interior now set against a crunchy top layer—you may find yourself savoring every moment as you present this dish that’s not only visually stunning but also utterly intoxicating in aroma and flavor! Each forkful delivers layers upon layers of sweetness from both sweet potatoes and parsnips mingling perfectly against earthy beet notes—all blanketed under melted cheese bliss that brings comfort like nothing else can.
I promise you—the moment someone digs their fork into this gratin will feel magical! They’ll be greeted by colorful visuals alongside rich flavors bursting forth—it’s simply profound how much joy one dish can bring! So gather everyone around because this Root Vegetable Gratin isn’t just food; it’s an experience worth sharing—and savoring—together!
Storage and Enjoyment Tips for Your Root Vegetable Gratin with Sweet Potatoes, Parsnips, and Beets
Oh, my friends, once your Root Vegetable Gratin with Sweet Potatoes, Parsnips, and Beets emerges from the oven, bubbling and golden, you’ll feel an overwhelming sense of accomplishment! This dish is not just a recipe; it’s a labor of love that warms the heart and fills the belly. As you prepare to serve this masterpiece, let’s talk about how to preserve that delightful flavor for future indulgences—because trust me, you’ll want seconds (and thirds!).
Storing Leftover Root Vegetable Gratin with Sweet Potatoes, Parsnips, and Beets
To keep your gratin fresh and delectable for later enjoyment, transfer any leftovers into an airtight container. I always recommend glass containers because they allow you to easily see the vibrant layers of root vegetables while also ensuring no lingering odors from your fridge seep in. In general, your beautifully crafted gratin will last about 3-5 days in the refrigerator. But here’s a little pro tip: place a slice of bread in the container alongside your gratin. This magical trick helps absorb excess moisture and keeps everything tasting just as heavenly as it was on day one! After storage, you might find that some flavors have melded together even more profoundly, giving each bite an extra layer of taste that is truly extraordinary. When you’re ready to enjoy your leftovers again, simply reheat them in the oven at 350°F (175°C) for about 15-20 minutes until warmed through—this will help revive that glorious crispy top!
Freezing Root Vegetable Gratin with Sweet Potatoes, Parsnips, and Beets for Later
If you’re thinking ahead or simply want to save some of this luscious dish for another day (and believe me, you will), freezing is a fantastic option! To freeze your gratin properly, ensure it has cooled completely before wrapping it tightly in plastic wrap or aluminum foil. Then pop it into a freezer-safe container or bag—this will protect it from freezer burn. It can be stored in the freezer for up to three months without losing its delightful charm! When you’re ready to enjoy it again, there’s no need to thaw; just bake straight from frozen at 375°F (190°C) for about 50-60 minutes until heated through and bubbly. This convenience factor is absolutely paramount for busy weeknights or impromptu gatherings when you want something delicious without all the fuss. Trust me; having this scrumptious gratin on hand makes meal planning feel like a breeze!

Root Vegetable Gratin with Sweet Potatoes, Parsnips, and Beets
- Total Time: 1 hour 20 minutes
- Yield: Serves approximately 6
Description
Discover the comforting warmth of Root Vegetable Gratin with Sweet Potatoes, Parsnips, and Beets—a delightful dish that brings together vibrant layers of sweet potatoes, earthy parsnips, and jewel-toned beets, all enveloped in a creamy cheese sauce. This savory vegetable bake is perfect for family dinners or special occasions. With its golden crust and rich flavors, it’s not just a meal; it’s an experience that invites everyone to gather at the table.
Ingredients
- 2 medium sweet potatoes
- 2 medium parsnips
- 2 medium beets
- 1 onion
- 2 cloves garlic
- 2 cups heavy cream
- 1 cup grated Gruyère cheese
- 1 cup grated Parmesan cheese
- 2 tablespoons fresh thyme leaves
- Salt and pepper to taste
- 2 tablespoons olive oil
Instructions
- Preheat your oven to 375°F (190°C).
- In a large skillet, heat olive oil over medium heat. Sauté sliced onion and minced garlic until soft.
- In a mixing bowl, combine sweet potatoes, parsnips, beets, sautéed onions, thyme, salt, and pepper.
- In another bowl, whisk together heavy cream with half of the Gruyère and Parmesan cheeses.
- Layer half of the vegetable mixture in a greased baking dish. Drizzle half of the cream mixture on top. Repeat with remaining vegetables and cream.
- Top with remaining cheeses and breadcrumbs if desired. Cover with foil and bake for 40 minutes; then uncover and bake for an additional 20 minutes until golden brown.
- Prep Time: 20 minutes
- Cook Time: 60 minutes
- Category: Side Dish
- Method: Baking
- Cuisine: American
Nutrition
- Serving Size: 1 cup (200g)
- Calories: 320
- Sugar: 8g
- Sodium: 450mg
- Fat: 21g
- Saturated Fat: 12g
- Unsaturated Fat: 7g
- Trans Fat: 0g
- Carbohydrates: 27g
- Fiber: 4g
- Protein: 8g
- Cholesterol: 55mg



Leave a Comment