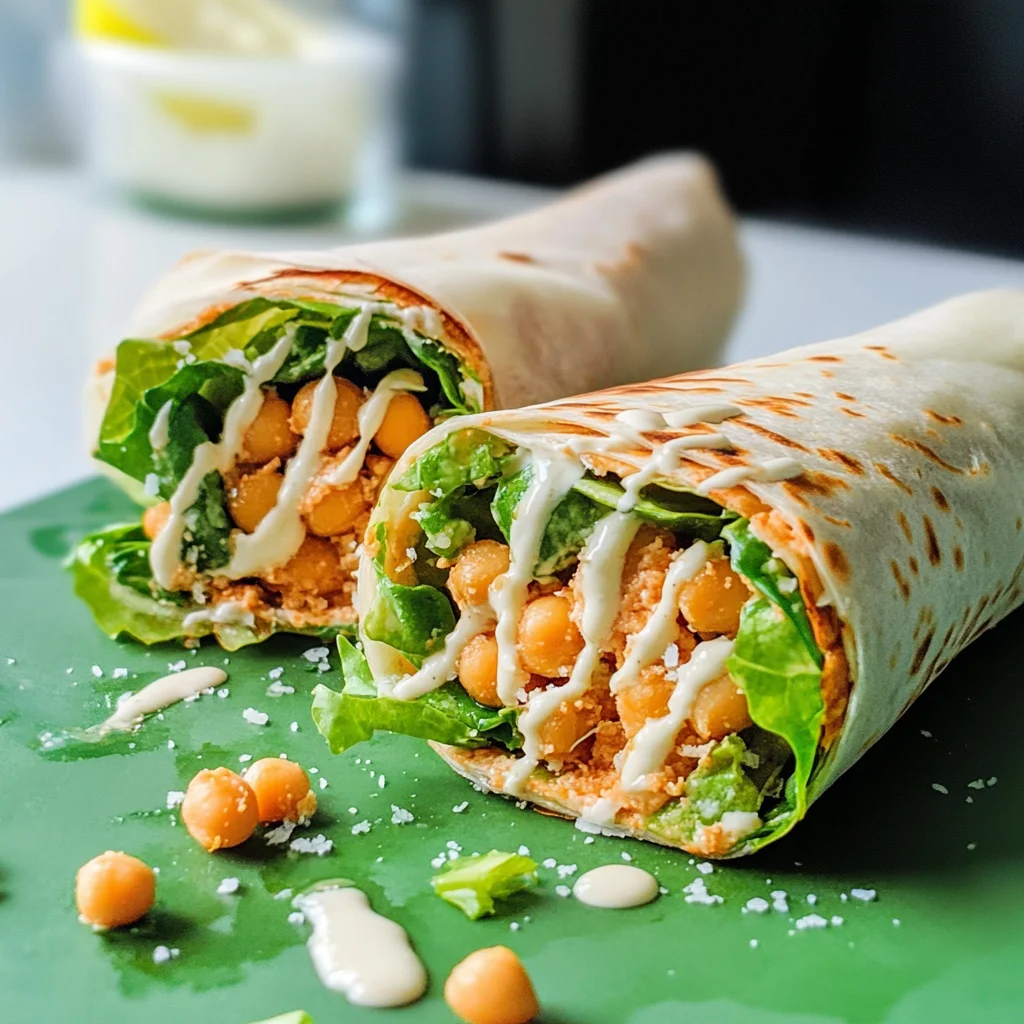
As I sat down to write about my beloved Smashed Chickpea Caesar Wraps, I couldn’t help but be filled with nostalgia. This recipe isn’t just a delightful meal; it’s a joyful experience that bridges tradition and innovation. Imagine biting into a wrap where the creamy, tangy essence of classic Caesar salad collides with the hearty texture of smashed chickpeas. Each mouthful is an explosion of flavors—a symphony of crunch from fresh romaine and the rich depth of spices that sing together in harmony. It’s this beautiful blend that makes these wraps not just food, but a celebration of creativity in the kitchen. I promise you, once you try them, you’ll understand why they’ve nestled themselves into my heart as a go-to dish for both a quick lunch and an impressive dinner party offering.
What truly astonishes me about these Smashed Chickpea Caesar Wraps is how easily they come together. With just a handful of ingredients and 15 minutes of effort, you can whip up something that feels utterly gourmet yet retains that comforting simplicity we all crave. The beauty lies in the fusion of textures—smashed chickpeas create a delightful base, while a crisp layer of romaine adds that refreshing crunch we adore in salads. Plus, every time I make these wraps, I think about how they embody everything I love about cooking: accessibility, flavor, and the ability to bring people together around the table. These wraps are perfect for busy weekdays or leisurely weekends when you want to indulge without spending hours in the kitchen.
Smashed Chickpea Caesar Wraps: A Flavorful Twist on Tradition
These Smashed Chickpea Caesar Wraps are not just another meal; they are an invitation to explore new culinary horizons while savoring familiar flavors. The genius behind this recipe is its ability to take something beloved—the classic Caesar salad—and transform it into a portable delight that’s perfect for any occasion. Whether you’re packing lunch for work or hosting friends for brunch, these wraps will impress everyone at the table!
Ingredients:
Embarking on this culinary journey means gathering some vibrant ingredients that work harmoniously to create our delicious wraps. Each element plays an essential role in building flavor and texture.
- 1 15-oz can chickpeas (drained and patted dry with paper towels, 425 g): Chickpeas are the star of our show! Not only do they pack a protein punch—making these wraps satisfying—but their creamy texture when mashed provides the perfect base for our filling. When purchasing canned chickpeas, look for those labeled as low-sodium or no salt added if you’re watching your sodium intake. If you’re feeling adventurous, you could even cook dried chickpeas yourself! Just remember to soak them overnight first; it’s worth it for that fresh taste!
- ¼ medium white onion: Onions add depth and sweetness to our mixture while enhancing the overall flavor profile without overpowering it. When using onions in recipes like this one, aim for freshness—this ensures your dish has maximum flavor impact. The mildness of white onions complements the earthiness of chickpeas beautifully; however, if you prefer something with more punch, feel free to substitute with red onion or shallots.
- 1 Tbsp flour: This small addition serves as our binding agent—it’s crucial for helping hold everything together without compromising texture! You can use all-purpose flour here or opt for alternatives like almond flour or gluten-free flour if you’re looking for options that cater to dietary preferences. Flour works its magic by absorbing moisture from the chickpeas and onion mixture, creating a dough-like consistency that’s easy to spread on your wraps.
- ½ tsp each garlic powder, salt, and smoked paprika: These spices are what bring our dish to life! Garlic powder adds an aromatic warmth that infuses every bite with savory goodness while salt enhances all other flavors—it’s simply non-negotiable! Smoked paprika introduces a subtle smokiness reminiscent of outdoor grilling; it’s absolutely phenomenal in elevating our wrap’s flavor profile. Don’t skimp on these seasonings—they’re key players!
- 2 Tbsp olive oil (30 mL): Olive oil acts as liquid gold here! It not only prevents sticking during cooking but also adds richness to our chickpea mixture. The fruity notes from good quality extra virgin olive oil can truly elevate this dish; look for oils labeled “cold-pressed” or “first cold extraction” for maximum flavor benefits.
- 2 tortilla wraps: While any tortilla will do—flour or corn depending on your preference—I recommend using large ones so we have plenty of room to pack in all those delectable fillings without tearing! Tortillas serve as the canvas upon which we create our masterpiece; they’re what allow us to enjoy this meal on-the-go without sacrificing taste!
- 2 handfuls chopped romaine: Fresh romaine lettuce lends a satisfying crunch and freshness that balances out the hearty chickpea filling beautifully. When selecting your romaine at the store, look for vibrant green leaves without wilting or browning edges—you want crispness here!
- 2 to 4 Tbsp Caesar dressing: This is where we get indulgent! A good quality Caesar dressing captures all those classic flavors we adore—tangy, creamy goodness that ties everything together perfectly! If you’re feeling adventurous (or health-conscious), consider making your own dressing using tahini or vegan mayonnaise as bases.
- 2 Tbsp parmesan cheese: For those who enjoy dairy (or nut-based alternatives), Parmesan cheese brings salty richness that enhances every bite of your wrap. If you’re avoiding dairy altogether but still want that umami kick, feel free to swap with nutritional yeast—a fantastic plant-based alternative!
Equipment You’ll Need:
Having the right tools at hand can make all the difference in your cooking experience—instead of feeling overwhelmed by tasks, you’ll glide through them with ease! Trust me when I say having these essentials ready will set you up for success.
- Food processor: This magical machine is essential for blending our chickpeas into a smooth yet chunky mixture—think thick dough rather than hummus consistency! A food processor saves time compared to manual mashing; plus, it ensures even mixing which helps distribute flavors beautifully throughout.
- Large pan: A sturdy pan is paramount when cooking our wraps; it allows us to achieve that golden-brown crust while ensuring even heat distribution during cooking. Non-stick pans work wonders here since they prevent sticking—however cast iron skillets can provide an extra depth of flavor thanks to their seasoned surfaces!
- Spatula: A flexible spatula is valuable when flipping our wraps without breaking them apart—trust me on this one! Look for one made from silicone or wood so you don’t scratch up non-stick surfaces while serving up those gorgeous creations.
Now let’s dive into preparing these Smashed Chickpea Caesar Wraps—a process bursting with joy and excitement as we move through each step together!
Step 1: Blend Until Smooth
Begin by gathering your food processor and tossing in those well-drained chickpeas along with your quartered onion. We want everything blended until it reaches a thick dough-like consistency—this process transforms simple ingredients into something magical! Add in one tablespoon of flour along with half a teaspoon each of garlic powder, salt, and smoked paprika before blitzing again until incorporated nicely. Don’t rush this step; ensuring everything is well-blended creates uniformity throughout each wrap which translates into consistent flavor across every bite!
Step 2: Scoop & Spread
Once you’ve achieved that lovely thick consistency reminiscent of cookie dough (but don’t eat it raw!), it’s time to scoop portions onto your tortilla wraps—with equal amounts spread evenly over two tortillas being ideal here! Leave about half an inch border around edges so there’s room when rolling them up later on—it makes all difference between tight rolls versus messy spills! Use either back side of spoon or spatula for spreading gently across surface; trust me when I say patience will pay off tenfold—an even layer will guarantee maximum enjoyment at lunchtime!
Step 3: Cook It Right
Now comes my favorite part—the cooking process transforms raw ingredients into golden perfection! Heat two tablespoons olive oil in large pan over medium heat until shimmering—a clear sign it’s ready for action! Carefully transfer each prepared wrap directly into heated skillet with chickpea-side facing downwards—you should hear that satisfying sizzle immediately as flavors begin melding together beautifully on contact heat creates crispy exterior layer within minutes (about eight-to-ten). Keep an eye out during cooking because we want them golden brown—not burnt—which means flipping occasionally helps monitor progress efficiently!
Step 4: Assemble Your Creation
Once they’ve reached desirable shade (golden brown), it’s time for assembly magic—the moment where all components come together harmoniously before diving into devouring blissfully afterward! Gently flip out each cooked wrap onto plate carefully (pro tip: use cutting board/plate combination method if worried about breakage!). Now arrange mounds filled generously with chopped romaine lettuce alongside drizzles luscious Caesar dressing followed by sprinkling grated parmesan cheese atop piles enticingly awaiting next step awaits eagerly ahead…
Stay tuned as we continue wrapping up this culinary adventure by rolling everything snugly inside those beautiful tortillas next!
Step 5: Cooking Your Chickpea Wraps to Perfection
Now comes the exciting part—cooking your wraps! Heat 2 tablespoons of olive oil in a large skillet over medium heat. This step is crucial because the olive oil acts as a lubricant, allowing the wraps to become beautifully golden and crispy without sticking to the pan. I always recommend using a wide pan so that you can cook both wraps at once if you’re feeling adventurous, but if your pan is smaller, don’t worry—batch cooking works too! Carefully transfer one of your prepared wraps chickpea-side down into the hot oil, and listen for that satisfying sizzle—it’s music to my ears! The key here is to let this wrap cook undisturbed for about 8 to 10 minutes. What you’re looking for is a deep golden brown color on the chickpea layer; this not only enhances the flavor through caramelization but also adds a lovely textural contrast when you bite into it.
As you watch it cook, keep an eye on the edges; they should start to pull away from the pan slightly as they crisp up. Trust me on this: patience is everything during this phase. If you try to flip it too soon, you risk tearing that delicate chickpea crust, and nobody wants a beautiful wrap turned into a sad pile of ingredients! Once it’s perfectly golden and firm, gently slide a spatula underneath and flip it over with confidence; if it’s sticking, give it another minute. When both sides are done, carefully lift the wrap out of the pan and set it aside on a plate while you repeat with the second one. Your kitchen will smell utterly intoxicating by now, and I promise you’ll be tempted to devour them right away!
Step 6: Assemble Your Flavorful Fillings
With your deliciously crispy chickpea wraps ready, it’s time to bring everything together in an explosion of flavor. Grab your freshly chopped romaine lettuce—a vibrant green that adds both crunch and freshness—and mound them generously onto each wrap. Remember, we want each bite to be an adventure in texture, so don’t skimp! Next up is that creamy Caesar dressing; aim for about 2 to 4 tablespoons per wrap depending on how saucy you like things. This dressing is what ties everything together and transforms your ingredients into a cohesive delight. The richness of the dressing complements the nuttiness of the chickpeas beautifully while adding moisture that balances out all those textures.
Now sprinkle your wraps with 2 tablespoons of parmesan cheese (or a plant-based alternative if you prefer). The cheese adds an umami punch that elevates the dish from good to truly extraordinary! As you layer these components, take a moment to appreciate how visually appealing your wrap looks—the contrasting colors make it feel festive and inviting. This assembly phase isn’t just about throwing ingredients together; it’s about creating harmony between flavors and textures so that every bite will leave you craving more.
Step 7: The Art of Wrapping Up
Now comes the fun part—wrapping up all those delicious fillings into a neat parcel! Start by folding in both sides of your tortilla towards the center; think of it as giving your filling a cozy little hug. Then grasping firmly but gently, tuck the edge closest to you over those flavorful mounds before rolling away from yourself toward the open end of the tortilla. It’s essential here to apply even pressure as you roll; this helps compress everything tightly so that when you slice into it later, nothing escapes!
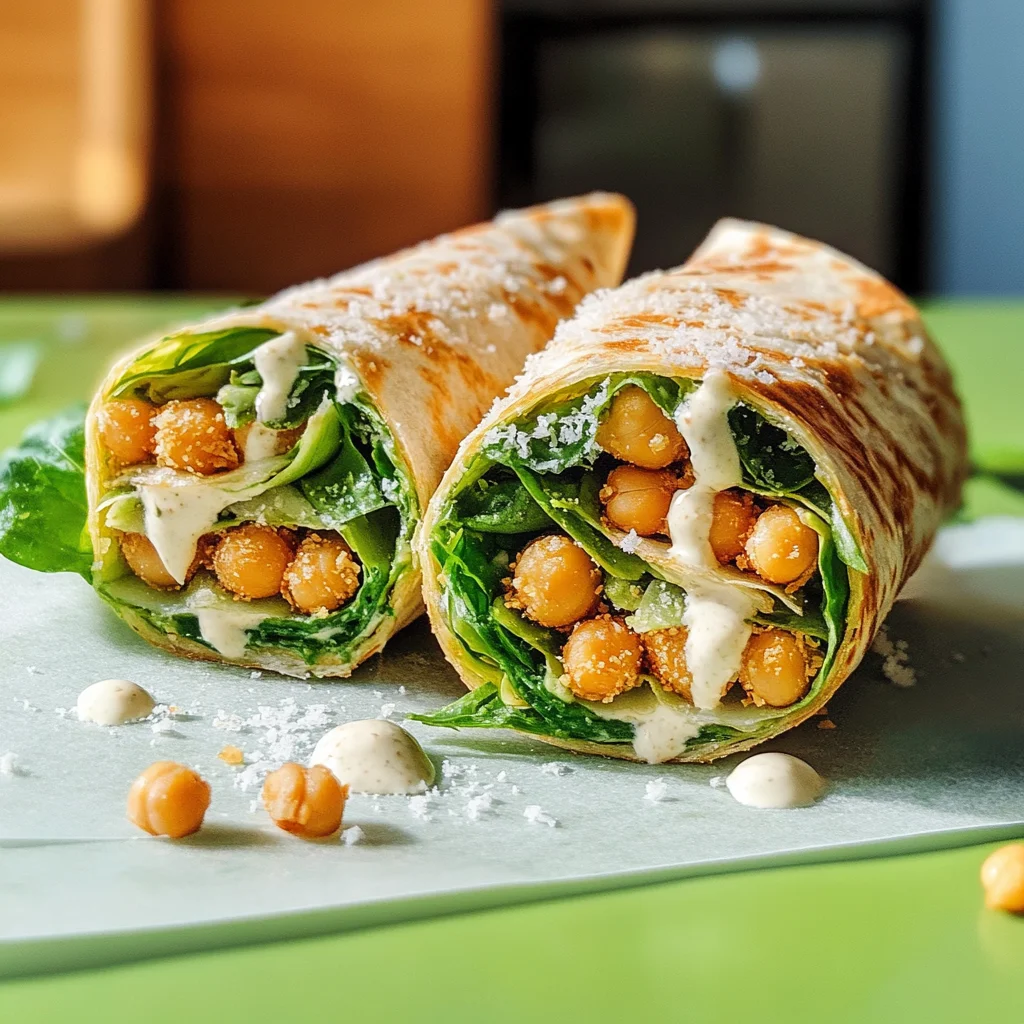
Don’t rush this step; taking your time ensures that each ingredient stays nestled securely within its warm embrace. A good wrap should be compact yet not overly tight—if it’s too tight, you’ll risk squeezing out all those wonderful fillings or tearing the tortilla apart when biting into it. Once wrapped, hold it firmly for a moment or two before slicing in half diagonally with a sharp knife for presentation’s sake (and let’s be honest—who doesn’t love an Instagram-worthy food shot?). You’ll find that slicing reveals all those beautiful layers inside—a true feast for both eyes and mouth!
Step 8: Serving Your Smashed Chickpea Caesar Wraps
Finally, let’s talk about serving these beauties! You can enjoy them immediately while they’re still warm and crispy or pack them up for lunch later—either way, I guarantee they’ll be met with delighted faces! If you’re serving them right away, consider presenting with extra Caesar dressing on the side for dipping; there’s something wonderfully indulgent about dunking your crispy wrap into creamy dressing—it elevates each bite even further!
If you’re making these ahead of time, simply store them in an airtight container in the fridge without cutting them until you’re ready to eat; this keeps them fresh and prevents sogginess from setting in too quickly. But I must warn you: these Smashed Chickpea Caesar Wraps are best enjoyed fresh off the skillet or within a day or two at most—trust me on this one! So gather your friends around because these wraps are not just food; they’re little bundles of joy meant to be shared and savored together!
With every bite infused with flavors inspired by classic Caesar salad yet uniquely transformed into something new and exciting, I can assure you: once you’ve made these Smashed Chickpea Caesar Wraps once—you’ll find yourself returning again and again for more magic in every mouthful! Enjoy every moment spent preparing—and devouring—this delightful recipe!
Storage and Enjoyment Tips for Your Smashed Chickpea Caesar Wraps
Ah, the moment you’ve been waiting for has finally arrived! Your Smashed Chickpea Caesar Wraps are ready to be devoured, bursting with flavor and texture that will surely make your taste buds dance. However, if you find yourself with leftovers (though I can’t imagine how!), there are some wonderful storage tips to ensure you enjoy these delectable wraps at their best later on.
Storing Leftover Smashed Chickpea Caesar Wraps
To keep those precious Smashed Chickpea Caesar Wraps fresh, I recommend using an airtight container. This is crucial as it helps to lock in moisture and flavor while preventing unwanted air from altering the wrap’s delightful crunch. Store them in the refrigerator, where they’ll happily sit for up to three days. Now, if you’re worried about your wraps becoming too soggy, a nifty little trick is to place a slice of bread inside the container; this will absorb excess moisture and keep everything tasting fabulous! Trust me on this one—it really works wonders! After a day or two in the fridge, you may find the texture slightly different but still utterly delicious. When you’re ready to enjoy them again, simply pop them in a skillet over medium heat for a few minutes on each side or microwave them for about 30 seconds—just enough to warm them through without losing their charm.
Freezing Components for Later
If you want to prepare ahead of time or simply have some wraps ready for those busy days when cooking feels like a chore, freezing is an excellent option! To freeze your Smashed Chickpea Caesar Wraps properly, I suggest wrapping each one tightly in plastic wrap or aluminum foil before placing them in a freezer-safe bag. This double layer is non-negotiable when it comes to preventing freezer burn! They’ll keep well frozen for up to three months, maintaining their vibrant flavors and textures if stored correctly. When you’re ready to indulge in these delightful wraps again, just take them out of the freezer and let them thaw in the refrigerator overnight. You can then reheat them on a skillet as mentioned earlier or even bake them at 350°F (175°C) until heated through. The convenience of having these tasty wraps ready at your fingertips makes meal prep an absolute joy!
Smashed Chickpea Caesar Wraps
- Total Time: 15 minutes
- Yield: Serves 2 wraps 1x
Description
Discover quick and easy Smashed Chickpea Caesar Wraps bursting with flavor! Try this recipe today for a delicious meal that will impress everyone.
Ingredients
- 1 (15-oz) can chickpeas (drained and patted dry)
- ¼ medium white onion
- 1 Tbsp flour (or alternative)
- ½ tsp each garlic powder, salt, and smoked paprika
- 2 Tbsp olive oil
- 2 large tortilla wraps
- 2 handfuls chopped romaine lettuce
- 2 to 4 Tbsp Caesar dressing
- 2 Tbsp Parmesan cheese (or plant-based alternative)
Instructions
- Blend the chickpeas and onion in a food processor until thick and dough-like. Add flour, garlic powder, salt, and smoked paprika; pulse until well mixed.
- Scoop the mixture onto tortillas, leaving a border around the edges. Spread evenly.
- Heat olive oil in a skillet over medium heat. Cook each wrap chickpea-side down for 8 to 10 minutes until golden brown. Flip carefully to crisp both sides.
- Assemble by adding chopped romaine and Caesar dressing atop each wrap; sprinkle with Parmesan cheese.
- Roll tightly and slice in half before serving.
- Prep Time: 10 minutes
- Cook Time: 5 minutes
- Category: Main
- Method: Frying
- Cuisine: American
Nutrition
- Serving Size: 1 wrap (200g)
- Calories: 410
- Sugar: 3g
- Sodium: 600mg
- Fat: 18g
- Saturated Fat: 3g
- Unsaturated Fat: 12g
- Trans Fat: 0g
- Carbohydrates: 54g
- Fiber: 10g
- Protein: 14g
- Cholesterol: 10mg
Leave a Comment