Toasted Ravioli in Air Fryer or Oven are more than just a delightful appetizer; they are an embrace of nostalgia, a journey back to those cherished moments spent around the dinner table, laughing and sharing stories. Imagine biting into the golden, crispy exterior that gives way to a warm, creamy filling of cheese—it’s like a hug for your taste buds! The aroma wafting through your kitchen as these little treasures cook is utterly intoxicating, making it hard to resist sneaking a few before they’re even served. I promise you, this recipe will quickly become one of your go-to crowd-pleasers, whether you’re hosting a game night or enjoying a cozy family dinner.
What makes these toasted ravioli so special is not just their delightful crunch but also the versatility they bring to any occasion. They are perfect for dipping into marinara sauce or even a tangy pesto—each bite is an invitation to explore flavors that dance harmoniously together. Plus, making them in an air fryer or oven means you can create this mouthwatering dish without the guilt that often accompanies fried foods. It’s a beautiful marriage of tradition and innovation that allows you to enjoy the classic Italian dish while keeping it light and crispy. So, grab your apron and let’s dive into this culinary adventure together!
Toasted Ravioli in Air Fryer or Oven: A Crispy Delight Awaits
I can’t wait to share how easy and rewarding it is to make Toasted Ravioli in Air Fryer or Oven. This recipe is not only straightforward but also incredibly forgiving—perfect for those who may feel intimidated in the kitchen. With just a handful of ingredients and some simple techniques, you’ll be on your way to serving up something extraordinary that will have everyone coming back for seconds. Let’s embrace the joy of cooking together!
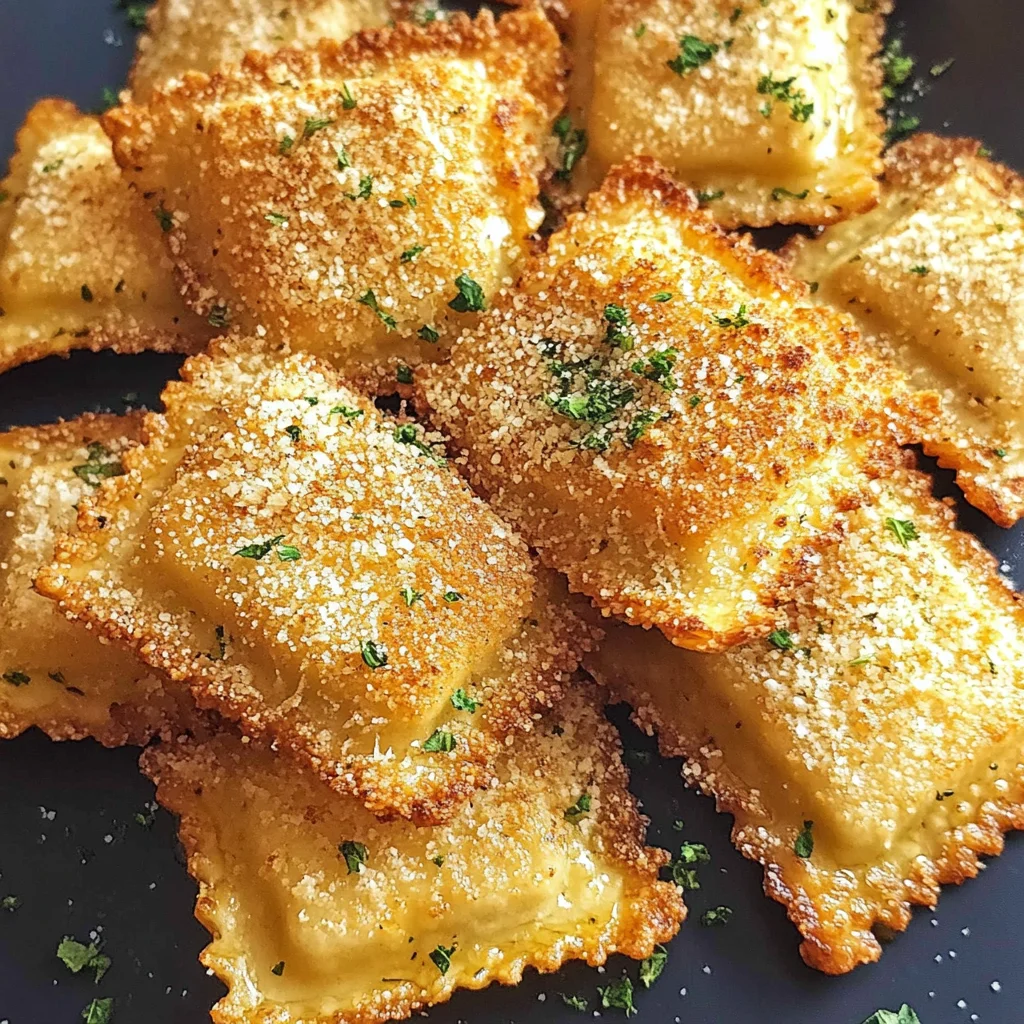
Ingredients:
Embarking on this culinary journey begins with gathering our star players—the ingredients! Each component plays a vital role in creating the warm, crispy perfection of our toasted ravioli.
-
1 bag frozen cheese ravioli: Using frozen cheese ravioli simplifies our process while still delivering on flavor. The cheese blend inside provides a rich and creamy texture that melts beautifully when cooked. Look for high-quality brands that use real cheese; you’ll thank yourself later when every bite bursts with flavor.
-
2 eggs: These eggs serve as our binding agent, helping the breadcrumbs stick to the ravioli during cooking. When beaten lightly and applied properly, they create an irresistible crust once baked or air-fried, adding both moisture and richness to each bite. Trust me on this—skipping them would leave you with soggy ravioli rather than the delightful crunch we’re aiming for!
-
2 cups bread crumbs (Panko style): Panko breadcrumbs are non-negotiable when it comes to achieving that airy crunch we all crave. Their larger flakes provide more surface area for crisping up perfectly in either an air fryer or oven. If you can’t find Panko, regular breadcrumbs will work too—but nothing beats that delicate texture from Japanese-style Panko!
-
1 teaspoon Italian Seasoning: This blend of herbs brings warmth and depth to our dish, invoking memories of sun-drenched Italian kitchens filled with aromatic herbs and spices. It’s essential for infusing each bite with flavor; feel free to adjust based on your preference—fresh herbs like oregano or thyme can be lovely substitutes if you have them handy.
-
1/2 teaspoon salt and black pepper: These humble seasonings elevate our toasted ravioli by enhancing all other flavors present in the dish. Salt acts as a flavor enhancer while black pepper adds just enough heat without overpowering the other ingredients—a dash here goes a long way!
-
1 Tablespoon oil or oil spray: A touch of oil is crucial for promoting crispiness during cooking; it helps achieve that golden brown crust we’re after. You could use olive oil for its rich flavor or even avocado oil if you’re looking for something lighter and neutral.
-
1/4 cup Parmesan cheese (grated): Parmesan adds nutty flavors while enriching our breadcrumb coating with savory goodness. Freshly grated cheese melts beautifully into the crust and forms an enticing layer that complements our cheesy filling perfectly.
-
1 Tablespoon dry or fresh herbs like parsley or basil: Finally, finishing off with fresh herbs not only brightens up our dish visually but also adds freshness contrasting beautifully against the richness of the cheese filling. Whether dried or fresh from your garden, these herbs bring another layer of excitement!
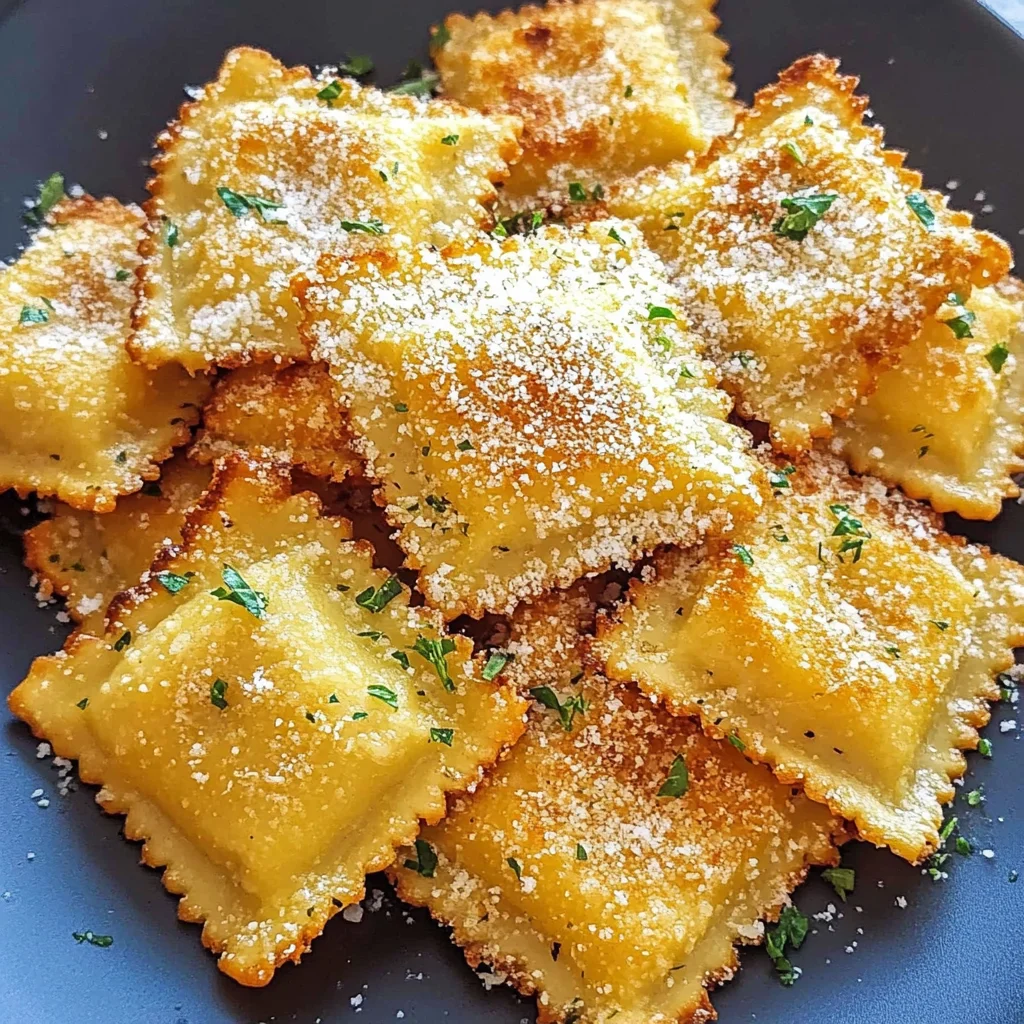
Equipment You’ll Need:
Having the right tools at your disposal makes all the difference when creating something delightful in your kitchen! While they may not be ingredients, these essential partners will help ensure your Toasted Ravioli in Air Fryer or Oven turn out perfectly every time.
-
Air fryer: This fantastic appliance circulates hot air around food, creating that coveted crispy texture without excessive oil. It’s perfect for achieving evenly cooked ravioli with minimal fuss! If you don’t have one yet, consider investing; they’re truly game-changers.
-
Mixing bowls: A couple of good-sized mixing bowls will come in handy as we prepare our egg wash and combine our breadcrumbs with seasonings—having enough room allows everything to mix thoroughly without mess.
-
Baking sheet: If you’re opting for oven baking instead of air frying, you’ll need a sturdy baking sheet lined with parchment paper to prevent sticking and ensure even cooking.
-
Whisk: A simple whisk is essential for beating those eggs until frothy—it creates a lovely mixture ready to coat our frozen ravioli evenly.
With these tools gathered together lovingly on your countertop, we’re one step closer to creating something truly extraordinary.
Preparing the Toasted Ravioli in Air Fryer or Oven
Step 1: Prepare Your Workstation
Before diving into cooking magic, setting up an organized workstation is key! Gather all your ingredients and equipment close at hand—you want everything within reach so you can move smoothly through each step without distraction. Start by preheating your air fryer according to its instructions (usually around 375°F) because getting it nice and hot ensures crispiness from start to finish! If you’re using an oven instead, preheat it at 400°F—trust me; this step sets us up for success right away.
Step 2: Create Your Egg Wash
Now let’s make that egg wash! In one mixing bowl, crack open two eggs—watch how their golden yolks swirl together—and whisk them until blended well; think frothy clouds dancing together! This mixture serves not only as glue but also enriches each ravioli with moisture during cooking. Don’t rush this step; take time ensuring it’s nicely combined since uneven coverage can lead to mismatched textures later on.
Step 3: Combine Your Breadcrumb Mixture
In another bowl (yes, we need two!), combine your Panko breadcrumbs along with Italian seasoning, salt & pepper—imagine each herb joining forces like old friends coming together again after years apart! Add grated Parmesan here too; as it hugs onto those breadcrumbs intimately—oh my goodness! You’re already smelling something delicious forming! Mix thoroughly until every crumb is coated evenly with spices—this ensures every bite bursts with flavor!
Step 4: Coat Those Ravioli
Now comes the fun part—coating those frozen cheese raviolis! One by one (or maybe two at once if you’re feeling speedy), dip each ravioli first into your egg wash allowing excess liquid to drip off before transferring them delicately into the breadcrumb mixture. Gently press down so they get fully covered—this touch is crucial; I promise you want every nook enveloped in crunchy bliss! Once coated perfectly (and yes—it might get messy!), arrange them neatly onto either an air fryer basket lined with parchment paper or directly onto your baking sheet if using an oven.
As we dive deeper into preparing these tasty morsels next time around… stay tuned because every step gets us closer toward crispy perfection!
Step 5: The Art of Breading Your Ravioli
Now that we have our ravioli ready to transform into something extraordinary, it’s time to dive into the art of breading. This part is crucial because it creates that delightful, crispy exterior that contrasts beautifully with the creamy cheese filling inside. Begin by cracking the two eggs into a shallow bowl and whisk them until they’re a uniform golden hue. This egg wash is absolutely paramount; it acts as the glue that holds the breadcrumbs to our ravioli, ensuring each piece gets a perfect coating. In another bowl, combine your Panko breadcrumbs with the Italian seasoning, salt, black pepper, and grated Parmesan cheese. Panko breadcrumbs are a game-changer here—they’re light and airy, so they fry up perfectly crispy while adding an incredible texture.
Now comes the fun part! Take each frozen ravioli and dip it into the egg wash first, making sure it’s fully coated—don’t rush this step; you want every nook and cranny covered. Then, gently transfer it to the breadcrumb mixture, pressing lightly but firmly to ensure that the breadcrumbs adhere well to the surface. Visualize each ravioli as a tiny treasure waiting to be discovered. You’ll want to repeat this for all your ravioli until they’re all beautifully coated in their crunchy armor. Trust me on this: this step not only enhances flavor but also provides you with that gorgeous golden color once cooked.
Step 6: Prepping Your Air Fryer or Oven
While you’re deep in the fun of breading your ravioli, let’s get our air fryer or oven prepped for action! If you’re using an air fryer—which I highly recommend for its ability to deliver that crispy finish without excessive oil—you’ll want to preheat it to 375 degrees Fahrenheit (190 degrees Celsius). Preheating is essential because it ensures that your ravioli start cooking immediately upon entering; this helps achieve that coveted crunch while keeping the insides deliciously tender. If you’re opting for an oven instead, let it heat up in a similar fashion.
As you wait for your appliance to reach temperature, consider lightly greasing your air fryer basket with either oil or a good spray of cooking oil. This little step can make all the difference in preventing any sticking and promotes even browning—nobody wants their beautifully breaded treasures stuck to the bottom! If you’re using an oven, line a baking sheet with parchment paper for easy cleanup and a bit of extra crispiness on the bottom side of your toasted ravioli. This preparation sets you up for success and keeps everything neat when it’s time to bake.
Step 7: Cooking Your Toasted Ravioli
Once everything is prepped and ready, it’s showtime! Place your breaded ravioli in a single layer in your air fryer basket or on the prepared baking sheet if you’re going with the oven method. Make sure not to overcrowd them because giving each piece room allows hot air to circulate around them; this is what will create that stunning crunch we’re all after! If you’re using an air fryer, set your timer for about 10 minutes—this is where magic happens as those little parcels transform from simple pasta into something utterly intoxicating.
About halfway through cooking—at around five minutes—give them a gentle shake or flip them over if you’re using an oven. This ensures even cooking on both sides and helps achieve that beautiful golden color we crave so much. Keep an eye out during these final moments; you’ll know they are done when they’re golden brown and fragrant—a telltale sign that they’re ready to be devoured! A little patience goes a long way here; rushing could lead you to undercooked or overly soft results instead of achieving that divine crunch.
Step 8: The Grand Finale – Serving Your Toasted Ravioli
Once your toasted ravioli are out of the air fryer or oven, allow them a moment to cool just enough so they won’t scorch anyone’s eager taste buds upon first bite! The aroma wafting from them at this point will be nothing short of mesmerizing—a warm embrace of cheesy goodness mixed with seasoned breadcrumbs is simply irresistible. Arrange them beautifully on a serving platter while contemplating how they can elevate any gathering—trust me, these little delights will be gone before you know it!
Don’t forget about dipping sauces! A homemade marinara sauce or even a tangy pesto makes for an incredible accompaniment—these flavors dance together like old friends at a reunion! Just think about how satisfying it is to dip each crispy bite into luscious sauce; it’s like adding another layer of joy to every mouthful. As you serve these toasted ravioli in air fryer or oven creations at gatherings or cozy nights in with friends, watch as everyone lights up at their first taste—it’s profoundly satisfying knowing you’ve created something truly extraordinary from such humble ingredients.
Final Touch: Enjoying Every Crunch
As you gather around with family or friends, take a moment before diving in and appreciate all the love that went into making these toasted ravioli in air fryer or oven masterpieces. Every crunch carries not just flavor but also warmth—a shared experience brought together by food made with passion and heart. And remember: there’s no wrong way to enjoy these bites! Whether you savor them alone while binging your favorite show or serve them during festive occasions laden with laughter and chatter, each moment spent indulging in these delectable treats will be one worth cherishing.
So there you have it—your guide on creating perfectly toasted ravioli! With their enticing crispiness enveloping gooey cheese goodness inside, I promise you these will become a staple recipe you’ll return to again and again. Happy cooking!
Storage and Enjoyment Tips for Your Toasted Ravioli in Air Fryer or Oven
Now that you’ve created these delightful toasted ravioli, it’s time to savor every crispy bite! But let’s face it; sometimes we can’t eat them all in one sitting—especially when they are as delicious as these! That’s why I like to have a plan for any leftovers. If you find yourself with some extra toasted ravioli, don’t worry; I’ve got you covered with some tips on preserving their irresistible charm without losing that magical texture and flavor you worked so hard to achieve.
Storing Leftover Toasted Ravioli in Air Fryer or Oven
To keep your leftover toasted ravioli fresh and tasty, I recommend using an airtight container. This will help seal in the flavors while preventing any moisture from sneaking in and making them soggy—nobody wants that! Store your container in the refrigerator where they can hold up beautifully for about 3-4 days. When it comes to maintaining quality, here’s a fun little trick: toss a slice of bread into the container with your ravioli. The bread will absorb excess moisture, ensuring those little pockets of cheesy goodness stay crispy longer. When you’re ready to enjoy them again, just pop them back into the air fryer or oven for a quick reheat—trust me, they’ll taste almost as good as fresh out of the fryer!
Freezing Toasted Ravioli for Later
If you want to enjoy toasted ravioli long after they’ve been made, consider freezing them! Start by laying the cooked ravioli on a baking tray lined with parchment paper, making sure they don’t touch each other—this prevents them from sticking together. Once frozen solid (usually about an hour), transfer them to a freezer-safe bag or container. They’ll keep well for about 2-3 months this way. When you’re craving that crunchy goodness again, there’s no need to thaw; simply toss them straight into the air fryer or oven! This is such a fantastic option because it gives you the freedom to indulge in your favorite snack anytime. Plus, nothing beats the convenience of having delectable appetizers waiting in your freezer for those impromptu gatherings or cozy movie nights.
CATEGORY_NAME
Toasted Ravioli in Air Fryer or Oven
- Total Time: 25 minutes
- Yield: Approximately 20 pieces (5 servings) 1x
Description
Toasted Ravioli in Air Fryer or Oven are the perfect combination of crispy delight and cheesy goodness, making them an irresistible appetizer for any occasion. These golden-brown bites are easy to prepare and can be enjoyed with your favorite dipping sauces like marinara or pesto. Whether you’re hosting a game night or enjoying a cozy dinner with family, this recipe promises to be a crowd-pleaser.
Ingredients
- 1 bag frozen cheese ravioli
- 2 eggs
- 2 cups Panko breadcrumbs
- 1 teaspoon Italian seasoning
- 1/2 teaspoon salt and black pepper
- 1 tablespoon oil or oil spray
- 1/4 cup grated Parmesan cheese
- 1 tablespoon fresh or dried herbs (like parsley or basil)
Instructions
- Preheat your air fryer to 375°F or oven to 400°F.
- In a bowl, whisk together the eggs to create an egg wash.
- In another bowl, mix Panko breadcrumbs with Italian seasoning, salt, pepper, and grated Parmesan.
- Dip each frozen ravioli into the egg wash, then coat with the breadcrumb mixture.
- Arrange the coated ravioli in a single layer in the air fryer basket or on a baking sheet lined with parchment paper.
- Cook for about 10 minutes until golden brown, flipping halfway through for even crispiness.
- Let cool slightly before serving with your favorite dipping sauce.
- Prep Time: 15 minutes
- Cook Time: 10 minutes
- Category: Appetizer
- Method: Frying
- Cuisine: Italian
Nutrition
- Serving Size: 4 pieces (100g)
- Calories: 250
- Sugar: 2g
- Sodium: 520mg
- Fat: 11g
- Saturated Fat: 4g
- Unsaturated Fat: 5g
- Trans Fat: 0g
- Carbohydrates: 30g
- Fiber: 2g
- Protein: 10g
- Cholesterol: 100mg
Leave a Comment