There’s something truly magical about gathering around a table filled with warm, inviting dishes that not only nourish the body but also feed the soul. The Ultimate Glazed Chicken Leg Quarters with Fries & Fresh Salad is more than just a meal; it’s an experience that combines comfort and joy in every bite. As the aroma of roasted chicken wafts through your kitchen, you can practically feel the anticipation bubbling up, ready to be shared with loved ones. Each component of this dish tells a story: glossy, caramelized chicken leg quarters that glisten in the light, golden fries that promise crispiness, and a fresh salad bursting with color and flavor. It’s like a symphony of flavors coming together in perfect harmony, creating a feast that feels like home.
This recipe holds a special place in my heart because it embodies the essence of cooking—bringing people together. There’s nothing quite like sitting down to enjoy a plate filled with these Ultimate Glazed Chicken Leg Quarters alongside crispy fries and vibrant salad. It’s perfect for family gatherings or a cozy weeknight dinner when you want to impress without feeling overwhelmed. Trust me; once you take your first bite of that tender chicken enveloped in its sweet glaze, you’ll understand why this dish has become a beloved staple in my home.
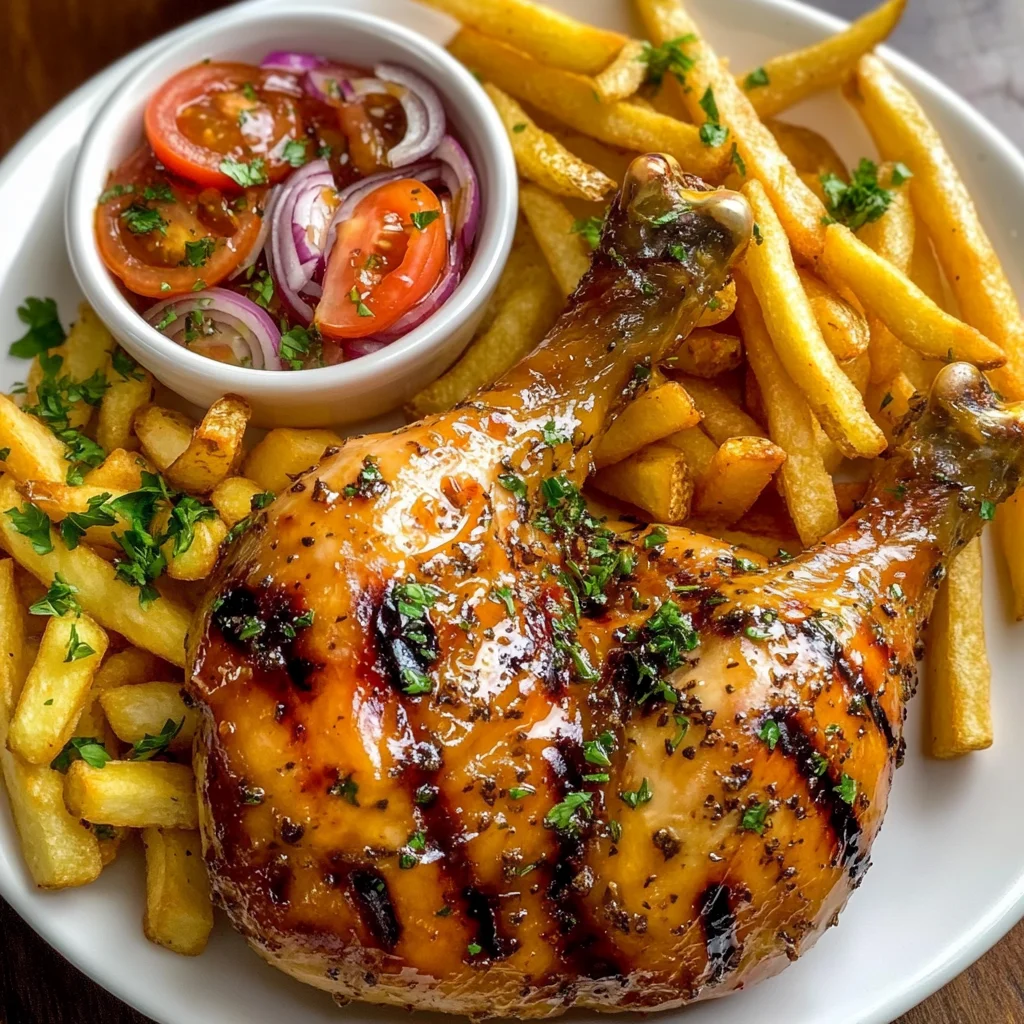
Ultimate Glazed Chicken Leg Quarters with Fries & Fresh Salad: A Hearty Delight
I’m thrilled to share this recipe with you! The combination of savory, sweet, and tangy flavors truly elevates the humble chicken leg quarter into an extraordinary meal. And let’s not forget about those fries—golden and crisp, they are the perfect accompaniment to soak up any leftover glaze on your plate. Paired with a fresh salad, this dish is not just wholesome; it’s happiness on a plate.
Ingredients:
Embarking on this culinary journey starts with gathering your ingredients. Each element plays an important role in crafting those ultimate glazed chicken leg quarters that we all crave.
-
4 chicken leg quarters, skin-on and bone-in. These pieces are juicy and flavorful thanks to their skin and bones. The skin crisps beautifully during roasting while keeping the meat moist underneath—it’s essential for achieving that delicious texture contrast! When choosing your chicken, look for pieces that are plump and have no discoloration. If possible, opt for organic or free-range options for even more flavor and quality.
-
2 tbsp olive oil. This liquid gold is crucial for ensuring our chicken gets that golden-brown crust while roasting. Olive oil also helps meld the spices into the skin beautifully. When purchasing olive oil, go for extra virgin if you can—its rich flavor adds depth to our glaze too!
-
1 tsp salt. Salt enhances every ingredient’s natural flavors; it’s absolutely paramount to bringing out the best in our chicken leg quarters. Kosher salt is ideal here because its larger grains allow for even seasoning without over-salting.
-
1 tsp black pepper. This simple spice adds warmth and subtle heat to our dish. Freshly cracked pepper is preferred as it offers brighter flavor notes compared to pre-ground varieties.
-
1 tsp paprika. Besides adding vibrant color to our dish, paprika introduces a mild sweetness along with smoky undertones—perfectly complementing our honey glaze! You can experiment between sweet or smoked paprika depending on your taste preference.
-
3 garlic cloves, finely minced. Garlic elevates this dish beyond measure; its aromatic qualities will infuse throughout as it roasts with the chicken creating enticing notes in every bite! Make sure to mince finely so it integrates well into our rub.
-
2 tbsp honey. This sweet nectar is what makes our glaze shine! Honey caramelizes beautifully under heat—turning into that sticky goodness we all love on roasted meats. Look for raw honey if you want deeper flavor profiles.
-
2 tbsp soy sauce. To add umami depth and balance out sweetness from the honey, soy sauce steps in perfectly here! Choose low-sodium soy sauce if you’re watching salt intake; it still packs plenty of flavor without overwhelming the dish.
-
1 tbsp lemon juice. Brightening everything up with acidity is vital—it cuts through richness while enhancing flavors harmoniously! Freshly squeezed lemon juice will always yield better results than bottled varieties.
-
2 tbsp melted butter. Butter brings richness into our glaze while helping it cling to those glorious chicken leg quarters—trust me when I say this step is non-negotiable!
-
2 tbsp chopped fresh parsley (for garnish). Not only does parsley add freshness visually but also contributes light herbal notes that elevate each bite’s palate experience!
For the fries:
-
1 lb frozen fries or fresh-cut potatoes. Whether you choose frozen or make them from scratch (I highly recommend going fresh if time allows), these crispy delights are essential companions to soak up all those luscious juices from the chicken!
-
Salt, to taste. Just like before—the right amount of salt helps enhance natural flavors here too!
For the salad and sauce:
-
2 tomatoes, sliced. A pop of freshness on your plate—their juiciness pairs wonderfully against savory elements while providing much-needed acidity!
-
1 small red onion, sliced into rings. Adds both crunch and sharpness which balances well against creamy dips later on!
-
½ cup creamy garlic sauce, mayo dip, or honey mustard (your choice). Having some form of creamy dressing nearby invites everyone to dip their fries or drizzle over salads—transforming ordinary components into extraordinary bites!
-
Extra parsley (for garnish). A little sprinkle at the end goes a long way in brightening up presentation visually!
Equipment You’ll Need:
As we dive deeper into preparing this delightful dish together, having the right tools makes all the difference! While they may not be ingredients themselves, these kitchen essentials are essential partners in crafting something truly wonderful.
-
Baking tray lined with parchment paper or foil – This will help ensure easy cleanup while preventing sticking as our chicken roasts away deliciously! The parchment creates an even surface allowing heat distribution evenly across all pieces ensuring perfect doneness throughout!
-
Meat thermometer – An invaluable tool when cooking poultry! It guarantees safety by measuring internal temperature accurately so there’s no guessing game involved—it should reach 165°F (74°C) at its thickest part without touching bone before serving up this glorious feast!
-
Basting brush – Perfect for applying that luscious honey-soy glaze generously onto each piece mid-roasting—you’ll want even coverage here!
Now that we have everything ready to go let’s get started creating these Ultimate Glazed Chicken Leg Quarters with Fries & Fresh Salad together!
Step 1: Preheat Your Oven
Start by preheating your oven to 400°F (200°C). This step may seem simple but it sets everything else into motion beautifully; by heating beforehand ensures even cooking throughout which yields better texture overall—a crucial point when aiming for crispy-skinned perfection! Line your baking tray with parchment paper or foil—it not only prevents sticking but also aids tremendously during cleanup later on (thank me later!).
Step 2: Seasoning Your Chicken
Pat those lovely chicken leg quarters dry using paper towels—not rushing this step matters immensely because moisture hinders browning processes crucial for achieving great textures! Next comes rubbing them generously with olive oil followed by sprinkling salt, pepper paprika along minced garlic evenly over surfaces letting flavors meld beautifully together as they roast away! Place each piece skin-side up maintaining space between them allowing hot air circulation needed for crispiness without steaming instead—it’s vital they’re not overcrowded!
Step 3: Roasting Begins!
Slide your seasoned tray into preheated oven where magic starts happening—let them roast undisturbed for about 30 minutes until skins turn gorgeously brown while juices run clear beneath surface layers signaling readiness ahead despite waiting patiently might feel tough initially—the aroma wafting through kitchen will keep spirits high while anticipation builds further delightfully too!
Step 4: Crafting Your Sweet Glaze
While waiting patiently keeps us occupied gracefully stir together honey along soy sauce mixed nicely lemon juice melted butter until smooth consistency reached; brush generously over roasted legs after initial roasting period finished letting flavors mingle divine seconds before returning back into oven once again gives desired glossy appearance everyone craves while sealing moisture inside locking tenderness brilliantly within layers present already—incredibly satisfying combination awaits ahead just trust me here!
Let’s continue crafting those delectable components step by step until we create perfection upon plates served proudly alongside friends family gathered ’round sharing joy laughter heartfelt conversations lasting memories created forevermore through simple act cooking happens effortlessly—all culminating beautiful experience indeed worthy celebrating wholeheartedly lush glorious feast now beckons us eagerly enjoy blissful moments spent savoring every single delicious mouthful savored completely uniting hearts souls around table shared lovingly warm embrace food brings us together ultimately reminding us how precious life truly is…
Step 5: Glazing the Chicken to Perfection
Now that your chicken is beautifully roasted and that luscious skin has started to take on a golden hue, it’s time for the pièce de résistance: the glaze. In a small bowl, whisk together the honey, soy sauce, lemon juice, and melted butter until it’s a harmonious blend. This mixture is more than just a topping; it’s the magic elixir that transforms our chicken from delightful to utterly extraordinary. The honey brings in sweetness that balances the savory notes of the soy sauce, while the acidity from the lemon juice cuts through the richness of the butter. Trust me on this—this glaze is absolutely paramount to achieving that glossy finish we all crave.
Now, with a brush or spoon, generously apply this glaze over each chicken leg quarter. Don’t be shy! I promise you; every nook and cranny should be coated in this liquid gold. This step is crucial because as the chicken continues to roast, that glaze will caramelize beautifully, resulting in an irresistibly sticky and flavorful outer layer. Be sure to return the chicken to the oven for another 10-15 minutes after glazing—this allows time for those flavors to meld together while enhancing that gorgeous sheen. Keep an eye on it; you want it deeply glossy but not burnt. It’s all about balance here!
Step 6: Achieving Roasted Chicken Bliss
As your chicken finishes roasting, let’s talk about what happens during these final moments in the oven. The heat works its magic by concentrating flavors and creating a delightful texture contrast between crispy skin and juicy meat beneath. Depending on your oven’s personality (yes, each oven has its quirks!), you might want to rotate your baking tray halfway through just to ensure even cooking – nobody likes a situation where one side is a bit too crispy while the other remains pale!
Once you’ve reached about 165°F (74°C) in the thickest part of each thigh without touching bone, you can remove them from the oven. This temperature is non-negotiable for safe eating and ensures your chicken remains juicy and tender rather than dry or rubbery. Letting it rest for a few moments before serving will allow those delicious juices to redistribute throughout the meat, creating an experience that’s profoundly satisfying in every bite.
Step 7: Perfecting Your Fries
While your chicken is basking in its roasted glory, let’s turn our attention to those fries—our delightful companions on this plate! If you’re using frozen fries (which are absolutely convenient), simply follow the package instructions for baking them perfectly crisp and golden. Typically, this means cranking up your oven to around 425°F (220°C) and spreading them out evenly on a separate baking sheet lined with parchment paper or foil.
Should you be feeling adventurous and opt for fresh-cut potatoes instead, slice them into even sticks—about half an inch thick works wonders—and toss them with olive oil and salt before laying them out on their own tray. The key here is ensuring they have enough space; overcrowding will lead to steaming rather than crisping! Keep an eye on them during cooking; they usually need about 20-25 minutes until they turn beautifully golden brown. Don’t forget to salt them immediately after they come out of the oven while they’re still hot—that little bit of seasoning makes all the difference!
Step 8: Assembling Your Plate
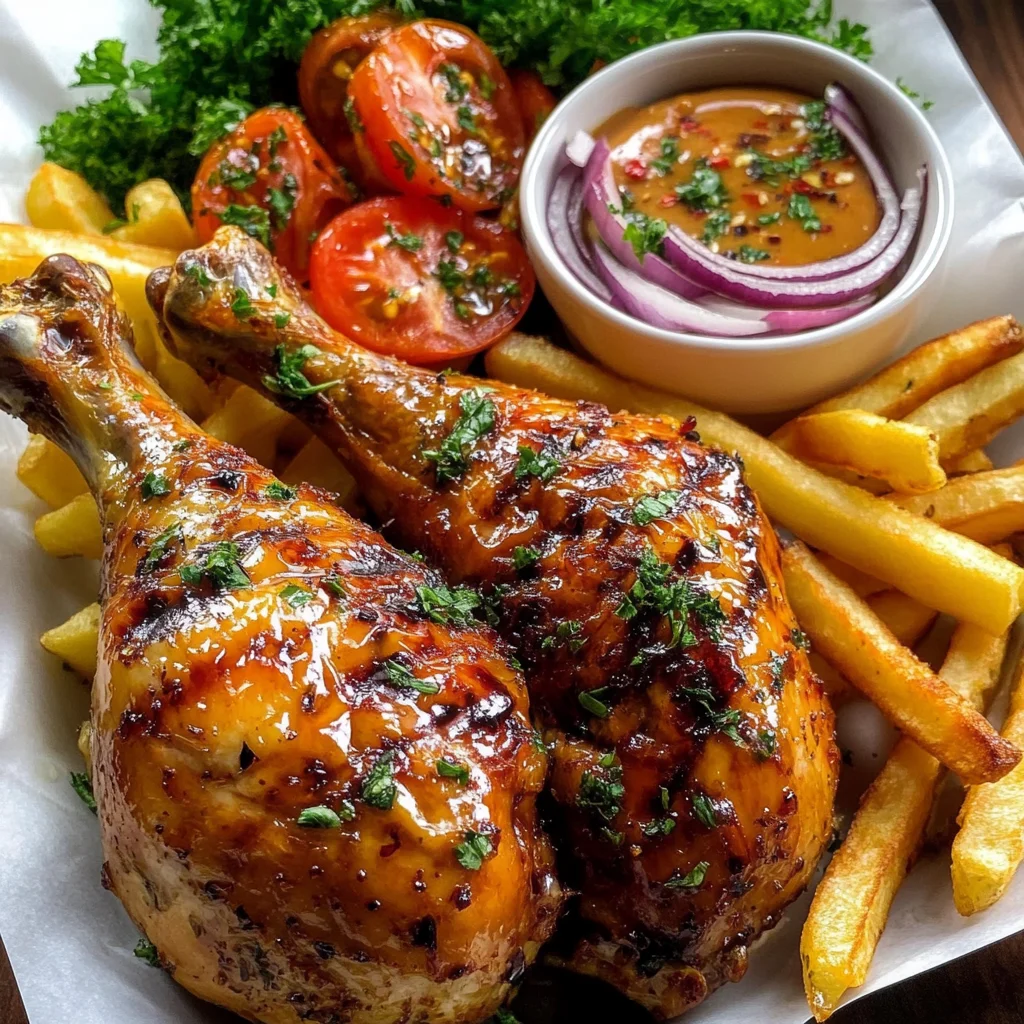
Now comes my favorite part—the assembly! It’s where all your hard work culminates into a beautiful feast ready for sharing (or indulging solo!). Start by piling those crunchy fries onto a large serving platter; there’s something so inviting about seeing that golden mass waiting patiently beside our glazed chicken leg quarters. Arrange those legs with care—they deserve their moment in the spotlight!
Next up are your fresh ingredients—the sliced tomatoes and red onion rings add color and freshness that not only beautify but also create an engaging textural contrast against our rich chicken and crispy fries. Don’t forget about that creamy garlic sauce or mayo dip you prepared earlier; place it in a small bowl right in the center of your creation—it’s going to be everyone’s favorite companion at this feast! Finally, sprinkle some extra parsley over everything for that lovely hint of green freshness—a perfect finishing touch!
Conclusion:
As we wrap up our delicious journey through creating these Ultimate Glazed Chicken Leg Quarters with Fries & Fresh Salad, I hope you feel as inspired as I am! This recipe isn’t just a meal; it’s an experience filled with layers of flavor that come together beautifully. The sweet notes of honey mingling with salty soy sauce create an utterly intoxicating glaze that coats each tender bite of chicken, while the crispy fries add that satisfying crunch we all crave. The fresh salad brings brightness and color, making every mouthful feel like a celebration.
This dish truly deserves a place at your table because it’s not just about filling stomachs—it’s about creating moments and memories around food. Imagine gathering friends or family around your dining table, serving this glorious plate straight from the oven, and hearing their oohs and ahhs as they take their first bites. It’s perfect for casual weeknight dinners or special occasions alike—the kind of recipe that makes everyone feel at home.
When it comes to serving suggestions, think outside the box! Imagine savoring one of those glazed chicken legs alongside a chilled glass of lemonade on a sunny afternoon or pairing it with a refreshing cucumber salad for an invigorating twist. For an extra decadent experience, consider adding roasted vegetables tossed lightly in garlic oil or even some homemade coleslaw on the side to balance out those rich flavors.
Feeling adventurous? This recipe is wonderfully adaptable! You could swap out honey for maple syrup for an entirely different sweet profile or try using different herbs like thyme or rosemary instead of parsley for another layer of flavor complexity. I encourage you to experiment and make it your own; after all, cooking is about sharing joy and creativity! I would love to hear how your version turned out—so please share your experience! Now go forth and create delicious memories with this beautiful dish!
Ultimate Glazed Chicken Leg Quarters with Fries & Fresh Salad
- Total Time: 1 hour
- Yield: Serves 4
Description
Savor the flavor-packed Ultimate Glazed Chicken Leg Quarters with Fries & Fresh Salad—easy to make and utterly delicious! Try it today!
Ingredients
- 4 chicken leg quarters (skin-on, bone-in)
- 2 tbsp olive oil
- 1 tsp salt
- 1 tsp black pepper
- 1 tsp paprika
- 3 garlic cloves (minced)
- 2 tbsp honey
- 2 tbsp soy sauce (low-sodium)
- 1 tbsp lemon juice
- 2 tbsp melted butter
- 1 lb frozen fries or fresh-cut potatoes
- 2 tomatoes (sliced)
- 1 small red onion (sliced)
- ½ cup creamy garlic sauce, mayo dip, or honey mustard (your choice)
- Extra parsley (for garnish)
Instructions
- Preheat the oven to 400°F (200°C) and line a baking tray with parchment paper.
- Pat chicken leg quarters dry and rub them with olive oil, salt, pepper, paprika, and minced garlic.
- Place chicken skin-side up on the tray and roast for about 30 minutes until browned.
- In a bowl, mix honey, soy sauce, lemon juice, and melted butter. Brush over chicken after initial roasting.
- Return chicken to the oven for an additional 10-15 minutes until glazed and cooked through (internal temperature should reach 165°F).
- Meanwhile, prepare fries according to package instructions or bake fresh-cut potatoes until golden brown.
- Assemble your plate with glazed chicken, fries, and a fresh salad topped with your chosen creamy sauce.
- Prep Time: 15 minutes
- Cook Time: 45 minutes
- Category: Main
- Method: Baking
- Cuisine: American
Nutrition
- Serving Size: 1 chicken leg quarter (150g) with fries (100g) and salad
- Calories: 505
- Sugar: 8g
- Sodium: 780mg
- Fat: 25g
- Saturated Fat: 7g
- Unsaturated Fat: 16g
- Trans Fat: 0g
- Carbohydrates: 43g
- Fiber: 4g
- Protein: 28g
- Cholesterol: 90mg
Leave a Comment