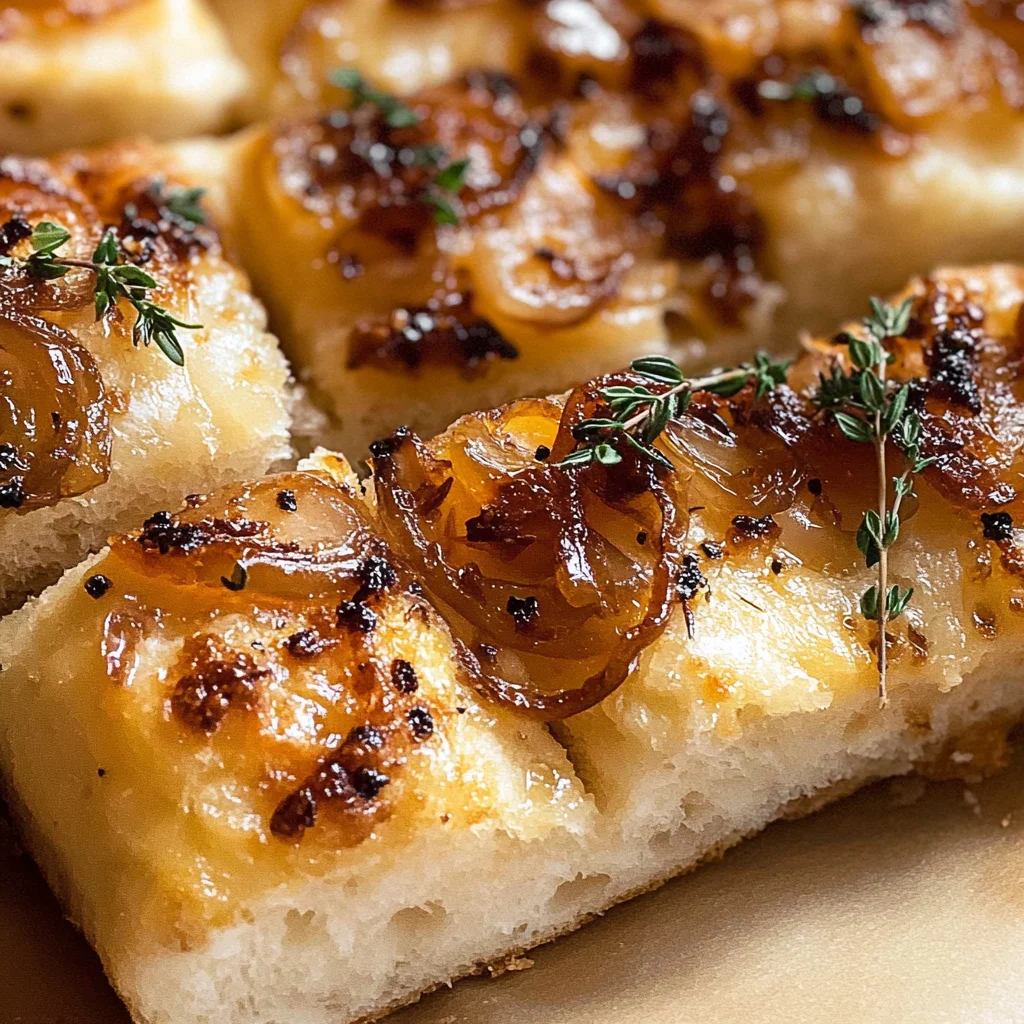
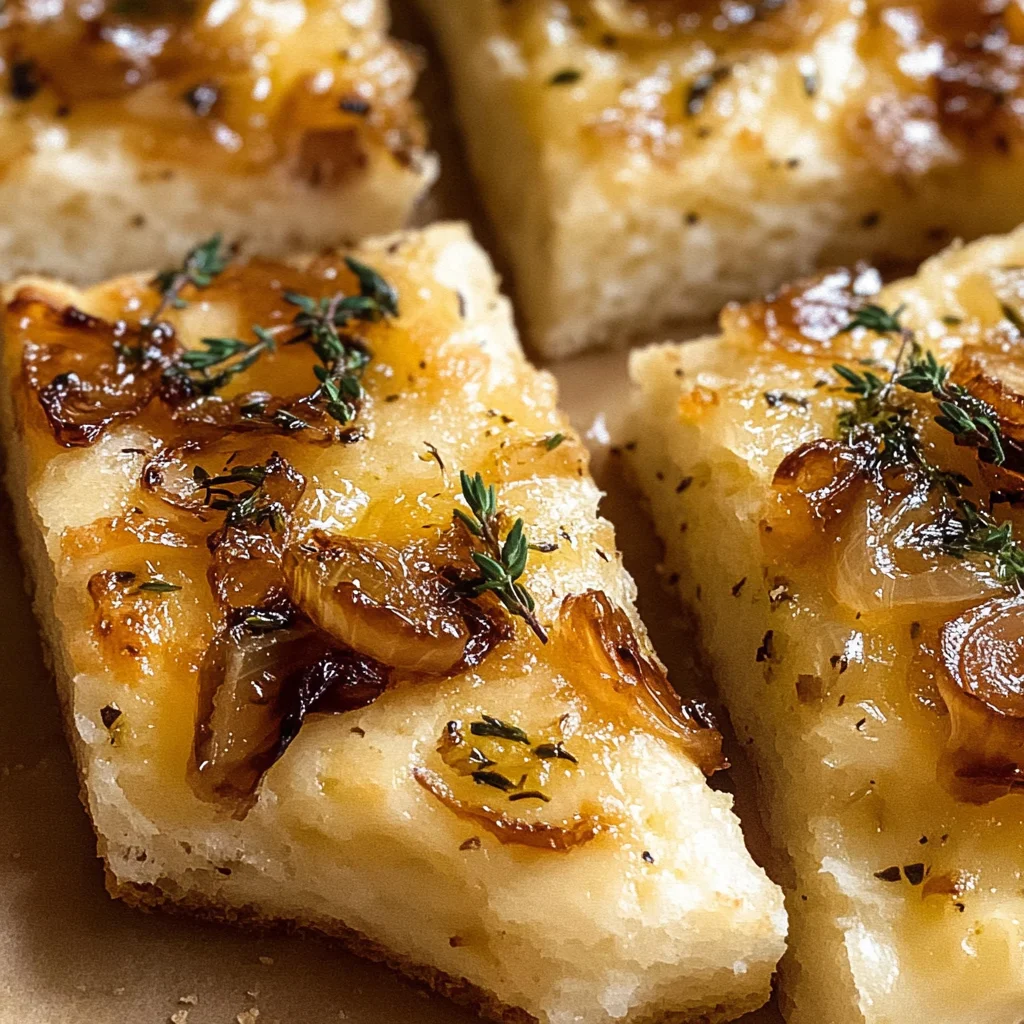
What a joy it is to share one of my absolute favorite recipes with you! Caramelized Onion Focaccia isn’t just bread; it’s an experience that wraps you in warmth and comfort from the first whiff of its heavenly aroma wafting through your kitchen. The moment you pull this golden masterpiece from the oven, you’re met with a symphony of flavors that dance on your palate. Fluffy, airy dough topped with sweet caramelized onions, fragrant garlic, and fresh thyme creates a beautiful harmony that’s both tantalizing and profound. I can promise you that every bite will evoke memories of family gatherings, lazy Sunday brunches, or cozy evenings spent with loved ones.
This recipe is incredibly special not only for its deliciousness but also for its simplicity. You see, it captures the essence of Italian cooking—using quality ingredients and letting them shine through time-honored techniques. The method we’ll use here is a no-knead approach, which means even if you’re new to baking bread, you’ll feel like a pro by the end of this journey! Imagine sitting down with friends and family, sharing slices of this fluffy focaccia while reminiscing about cherished moments—trust me when I say that it truly brings people together. So let’s roll up our sleeves and dive into making this culinary delight!
Caramelized Onion Focaccia: A Heavenly Harmony of Flavors
This Caramelized Onion Focaccia is not just any bread; it’s a warm embrace in culinary form. The process begins with the slow caramelization of onions—a transformative technique that brings out their natural sweetness and depth of flavor. With each step, you will find yourself enveloped in an intoxicating aroma that fills your kitchen and makes your heart flutter with anticipation. So, grab your apron and get ready to embark on this delightful adventure!
Ingredients:
As we prepare to create our Caramelized Onion Focaccia, gathering the right ingredients is essential to set the stage for success. Each component plays a vital role in building flavor and texture, so let’s take a moment to appreciate what we’ll be working with.
- 2 tbsp olive oil – This liquid gold isn’t just for greasing pans; it’s a cornerstone flavor in Mediterranean cooking! High-quality extra virgin olive oil adds richness and depth while helping to create that beautifully crisp crust on our focaccia. When choosing olive oil, opt for one that’s labeled as first cold-pressed for maximum flavor impact.
- 1 tbsp salted butter – Butter lends a luxurious creaminess that enriches our dough while also enhancing the sweetness of the caramelized onions. It helps achieve that perfect balance between crispy edges and soft centers in our focaccia. Always choose good-quality salted butter; it elevates flavors beautifully without overpowering.
- 4 cups diced yellow onions – Onions are truly the star here! Their natural sugars become beautifully caramelized during cooking, transforming them into sweet morsels bursting with flavor. Aim for fresh yellow onions—they have a wonderful balance of sweetness and mildness that’s perfect for this dish.
- 1/4 cup water – Adding water during the onion caramelization process helps create steam which softens the onions faster, allowing them to break down beautifully without burning. It’s all about patience and allowing those sugars to develop fully!
- 2 tbsp fresh thyme (chopped) – Thyme brings an earthy brightness to our focaccia that’s simply irresistible! Its aromatic qualities perfectly complement the sweetness of the caramelized onions while adding an herbaceous note that ties everything together beautifully.
- 2 1/2 cups all-purpose flour – The backbone of any great bread recipe! When measuring flour, remember that too much can lead to dense results—spoon it into your measuring cup instead of scooping directly from the bag for more accurate results. This flour gives our focaccia its fluffy texture!
- 1 1/4 cups lukewarm water – Water is crucial in activating our yeast while maintaining moisture in the dough. Make sure it’s at a comfortable temperature—too hot can kill yeast action, while too cold will inhibit rising.
- 1/4 cup parmesan cheese (finely shredded) – A sprinkle of parmesan adds depth and umami richness that enhances every bite. Look for freshly grated parmesan if possible; it melts better than pre-packaged options.
- 2 tbsp olive oil – This additional olive oil will infuse both flavor into our dough and help create that signature golden crust we all crave when breaking into freshly baked bread.
- 1 tbsp granulated sugar – Sugar serves as food for yeast during fermentation while also helping develop a lovely golden color on top as it bakes—it’s like giving your focaccia a sweet little kiss!
- 2 tsp instant yeast – Instant yeast is my go-to because it’s quick to activate and doesn’t require proofing like active dry yeast does; this means less waiting time before we can enjoy our delicious creation!
- 3/4 tsp salt – Salt isn’t just there for seasoning—it strengthens gluten structure in our dough while enhancing overall flavor. Just be cautious not to overdo it; we want harmonious flavors working together!
- 1-2 tbsp fresh thyme (additional) – A final sprinkle over top before baking adds freshness and visual appeal—a finishing touch that makes all the difference!
- 1/4 cup olive oil (for topping) – This last drizzle adds richness as well as helps create those gorgeous dimples when we press into the dough before baking—a technique that truly sets focaccia apart!
- 3 whole garlic cloves (crushed) – Garlic brings an irresistible fragrance to this dish! When combined with olive oil, it creates an aromatic topping that’s simply divine—the perfect complement to sweet onions.
Equipment You’ll Need:
Before diving into making this delectable Caramelized Onion Focaccia, let’s talk about some essential tools you’ll need along the way. Having these handy will make your baking experience smoother and more enjoyable—after all, creating something wonderful is best done with great partners at your side!
- Large skillet – A sturdy skillet is essential for caramelizing those onions evenly without burning them. Choose one with high sides; it’ll allow room for stirring without spills while ensuring even heat distribution throughout cooking.
- Mixing bowls – You’ll need multiple mixing bowls: one for combining dough ingredients initially and another for letting your dough rise later on! Opting for glass or stainless steel allows you easily monitor rising progress by observing size changes.
- Plastic wrap or kitchen towel – Covering your rising dough helps retain moisture during fermentation so it doesn’t dry out! This simple step ensures optimal conditions are maintained—trust me; you’ll thank yourself later when pulling out pillowy bread from the oven!
- Baking pan (9×9 inches) – An unlined metal baking pan works wonders when creating crispy edges around your focaccia! If you don’t have one handy, feel free to use another similarly sized pan—you just might need adjustments on cook times based on material differences.
- Wooden spoon or spatula – Perfect tools for mixing together ingredients without damaging surfaces! Wooden spoons are gentle yet effective at folding in flour without overworking gluten—a key element in achieving light-as-air texture.
Now that we’ve gathered everything we need let’s get started on preparing our glorious Caramelized Onion Focaccia!
Step 1: The Sweet Symphony Begins
The first step in our journey is creating those glorious caramelized onions that’ll crown our focaccia later on! Heat up your large skillet over medium heat before adding both butter and olive oil—the combination allows us to achieve rich flavor while preventing burning during cooking. Stir in your diced yellow onions along with ¼ cup water then cover tightly; this initial steaming phase softens them beautifully within five minutes so they can start releasing their natural sugars quicker! Once softened enough (you’ll know by their translucency), lower heat down further toward medium-low as we embark upon this hour-long process known as caramelization—the magic where patience pays off immensely!
Keep stirring occasionally throughout so they don’t burn—this part requires love as much as technique—but witnessing those vibrant colors deepening alongside aromas filling kitchen air will make time fly by effortlessly! As they transform from mere vegetables into golden treasures bursting with sweetness… oh my goodness—it’s truly an unforgettable experience I promise you won’t want to miss out on!
Step 2: Mixing Up Our Dough
With those aromatic onions set aside now—and trust me they’ll be worth every minute spent—we move forward towards creating our fluffy dough worthy enough to cradle them atop its surface later on! In another large bowl combine all-purpose flour along with lukewarm water (make sure it feels comfortable against skin), finely shredded parmesan cheese adding depth plus umami notes needed here too alongside remaining olive oil (this coats dry ingredients helping prevent clumping). Sprinkle granulated sugar evenly across mixture next followed by instant yeast plus salt ensuring even distribution throughout—all vital players working together seamlessly towards achieving something extraordinary ahead!
Grab hold of wooden spoon now blending until uniform consistency forms—don’t rush this step either; take care integrating until no visible patches remain behind because well-mixed batter lays foundation beneath wondrous fluffiness ahead once risen properly—but also ensures nothing sticks together awkwardly later down line when handling itself too much post-rising phase comes around eventually later too…
Step 3: Letting It Rise
Once thoroughly mixed up now comes magical time where patience reigns supreme once again—we lighty coat hands first before gently shaping formed ball-like mass placing inside separate oiled bowl covering tightly using plastic wrap afterwards setting aside somewhere warm preferably around room temperature area nearby preferably devoid any drafts present nearby at least full hour pass by until doubled size occurs—that’s right…we’re embarking upon transformation stages now bringing airiness forth through fermentation process aided greatly thanks tiny microorganisms doing work diligently behind scenes here quietly whilst savoring fragrant notes drifting through air meanwhile waiting patiently ourselves ahead…
Step 4: Crafting Garlic Oil
During downtime waiting patiently whilst rising occurs let’s whip up garlic-infused oil which becomes essential finishing touch drizzled upon top shortly afterwards right after popping whole thing inside oven eventually soon enough later… Begin heating remaining extra virgin olive oil within small skillet over moderate flame carefully stirring crushed cloves meanwhile allowing fragrant blissful aromas emanate forth filling entire space surrounding us resulting intoxicating effect indeed within few minutes time frame hitting golden hues developing ever so slightly tenderly browning sides seen visibly too almost instantly revealing delightful fragrance wafting enticingly nearby inviting everyone close proximity wanting glimpse peek firsthand witnessing culinary marvel unfolding impending soon enough direct attention coming forth straight away…
And there we have it—the foundation laid beautifully thus far towards crafting magnificent masterpiece ahead awaits patiently final touches complete ultimately leading towards mouthwatering rewards beckoning everyone home soon enough wrapping everything altogether nicely shortly ahead…
Step 5: Crafting the Garlic Infusion
Now, let’s dive into creating that utterly intoxicating garlic oil that will elevate your Caramelized Onion Focaccia to truly extraordinary heights. Start by heating a generous amount of olive oil in a skillet over medium heat; I recommend using about 1/4 cup, as this will ensure that the garlic flavors are beautifully infused into the oil. Once the oil is shimmering but not smoking—trust me, you don’t want to burn it—gently stir in your crushed garlic cloves. This step is pivotal because it transforms the raw garlic into something fragrant and delicious, allowing its natural sweetness to emerge. Cook for about five minutes, or until the garlic becomes golden brown and aromatic, stirring occasionally to prevent any pieces from burning. Remember, burnt garlic can turn bitter and ruin your lovely focaccia; so keep a watchful eye. Once you’ve achieved that lovely golden hue, remove the skillet from heat and discard the garlic cloves. Set the infused oil aside to cool slightly before we use it later on our dough.
Step 6: Preparing for the Second Rise
With your dough rising beautifully in its bowl, let’s not forget that patience is your best friend here! After that initial hour of rising—when it should have doubled in size and become all fluffy and airy—it’s time to give it a little more love. Lightly oil your hands; this will help keep the dough from sticking as we shape it. Gently grab one side of the dough and stretch it upwards before folding it toward the center—a technique known as stretch and fold. You’ll repeat this with each side of the dough until you’ve folded all four sides into the center. Why do we do this? It helps develop strength in your dough without kneading, creating those lovely air pockets that make focaccia so light and airy! Now, flip your dough seam-side down into an oiled metal baking pan (the kind you don’t line), which is crucial for achieving that perfect crust. Once nestled in its new home, cover the pan with plastic wrap and let it rise again in a warm place. This second rise can take about another hour; during this time, you’ll see it puff up magnificently—this is when those gluten strands continue to develop, ensuring a chewy yet tender texture.
Step 7: The Dimple Dance
After patiently waiting for that glorious second rise, which should leave your focaccia jiggly with large air bubbles on top (yes, that’s exactly what you’re looking for!), it’s time for one of my favorite steps—the dimple dance! Preheat your oven to 425°F (220°C) while you prepare to pour half of that fragrant garlic-infused oil over your risen dough—this is where things get exciting! Using clean fingers (or even knuckles if you’re feeling adventurous), press straight down into the dough to create deep dimples across its surface. These little indents are not merely decorative; they hold onto all that flavorful olive oil, ensuring every bite is rich with flavor. As you do this, sprinkle fresh thyme over top; its earthy notes harmonize beautifully with the caramelized onions we’ll add later. How could anyone resist such a tempting sight? At this point, you’re building layers of flavor that will make every bite feel like an embrace from Italy itself.
Step 8: Baking Your Focaccia Masterpiece
Now comes perhaps the most thrilling moment—you’re ready to bake! Slide your pan into that preheated oven and set a timer for about 12-18 minutes. But don’t just walk away; keep an eye on it! The aroma wafting through your kitchen will be nothing short of divine—a symphony of savory notes mingling together as they dance inside your oven. You’ll know when it’s done when you see a beautiful golden-brown crust emerging on top; trust me on this visual cue! Additionally, if you have an instant-read thermometer handy (and I highly recommend having one for baking), check that internal temperature aiming for at least 190°F (88°C). This ensures it’s cooked through perfectly—no one wants soggy focaccia! If you find yourself with uneven results due to different oven temperatures or baking pans (some are thicker than others), don’t hesitate to adjust baking times accordingly. When it’s finally baked to perfection, pull it out and let it cool in its pan on a wire rack—it’s crucial not only for texture but also to prevent sogginess on the bottom.
Conclusion:
As we wrap up our journey through making this Caramelized Onion Focaccia, I can’t help but feel excited about sharing such a heartfelt recipe with you. From the enchanting process of caramelizing those onions—resulting in their sweet, meltingly tender glory—to watching the dough rise and transform into an airy masterpiece, every step offers its own kind of joy and satisfaction. This isn’t just any bread; it’s an extraordinary union of flavors and textures—the richness of the caramelized onions combined with the herbaceous notes of fresh thyme creates an experience that transcends ordinary baking.
This recipe is truly a must-try not just because of how delicious it is but also due to the sheer pleasure derived from making it. Whether you’re preparing dinner for friends or simply indulging yourself during an afternoon snack, this focaccia shines on any occasion. Just imagine pulling that steaming hot tray out of the oven, the enticing aroma filling your kitchen and beckoning everyone closer—it’s practically impossible not to smile as you dig in!
Serving suggestions abound with this versatile delight! Picture yourself savoring a warm piece alongside a vibrant salad drizzled with zesty vinaigrette or perhaps enjoying it dipped into rich olive oil infused with herbs as an appetizer at gatherings. For an afternoon pick-me-up, pair it with creamy soup that warms your soul or serve slices alongside roasted vegetables for a comforting dinner spread that’s sure to impress.
Feeling adventurous? This recipe is wonderfully adaptable! Try adding rosemary instead of thyme for an aromatic twist or incorporate different toppings like cherry tomatoes or olives for an added burst of flavor. You could even experiment by turning this focaccia into mini sandwiches filled with your favorite veggies—how fun would that be? I encourage you to try these variations and share your experience because cooking is always better when we connect over food!
So gather those ingredients and dive into this heavenly world of Caramelized Onion Focaccia! I promise you will fall in love just as I did—let’s create some delicious memories together!
Caramelized Onion Focaccia
- Total Time: 50 minutes
- Yield: Serves approximately 8 people 1x
Description
Caramelized Onion Focaccia is a delightful bread that combines the sweetness of caramelized onions with the savory aroma of fresh herbs. This no-knead focaccia is perfect for both novice and experienced bakers, allowing anyone to create a fluffy, golden loaf that fills the kitchen with an irresistible scent. Topped with fragrant garlic oil and sprinkled with fresh thyme, every bite of this focaccia is a warm hug for your taste buds. Perfect for sharing at gatherings or enjoying as a comforting snack, this easy recipe captures the essence of Italian comfort food in your own home.
Ingredients
- 2 tbsp olive oil (for dough)
- 1 tbsp salted butter
- 4 cups diced yellow onions
- 2 1/2 cups all-purpose flour
- 1 1/4 cups lukewarm water
- 1/4 cup parmesan cheese (finely shredded)
- 2 tbsp olive oil (for topping)
- 1 tbsp granulated sugar
- 2 tsp instant yeast
- 3/4 tsp salt
- 1–2 tbsp fresh thyme (additional)
- 3 whole garlic cloves (crushed)
Instructions
- In a large skillet, heat olive oil and butter over medium heat. Add onions and water; cover tightly. Cook for about 5 minutes until softened, then reduce heat and caramelize for about an hour, stirring occasionally.
- In a separate bowl, combine flour, lukewarm water, parmesan cheese, remaining olive oil, sugar, yeast, and salt. Mix until uniform.
- Shape dough into a ball and place it in an oiled bowl. Cover with plastic wrap and let rise for about one hour or until doubled in size.
- Gently stretch the dough into an oiled baking pan. Let it rise again for another hour.
- Preheat oven to 425°F (220°C). Pour half of the garlic-infused oil over the risen dough and use fingers to create dimples across the surface.
- Bake for 12-18 minutes until golden brown. Once baked, top with caramelized onions and additional thyme.
- Prep Time: 20 minutes
- Cook Time: 30 minutes
- Category: Dinner
- Method: Baking
- Cuisine: Italian
Nutrition
- Serving Size: 1 piece (100g)
- Calories: 250
- Sugar: 1g
- Sodium: 300mg
- Fat: 10g
- Saturated Fat: 3g
- Unsaturated Fat: 7g
- Trans Fat: 0g
- Carbohydrates: 34g
- Fiber: 2g
- Protein: 6g
- Cholesterol: 10mg



Leave a Comment